
The size of our pupils can say a lot about how we're feeling. Some methods of marketing research relate the size of the pupils to the attractiveness of TV commercials, for example.
Greater sizes can indicate that the person is attracted, happy, or just likes what it is seeing. Smaller usually denote the opposite, and that kind of control can be very useful in close up shots to help indicate how your character is feeling.
- Open the file called
003-Pupils.blendfrom the book's support files. You'll see a rig to control the eyes and eyelids, with shapes applied to the bones. That's our starting point, as you can see in the next screenshot: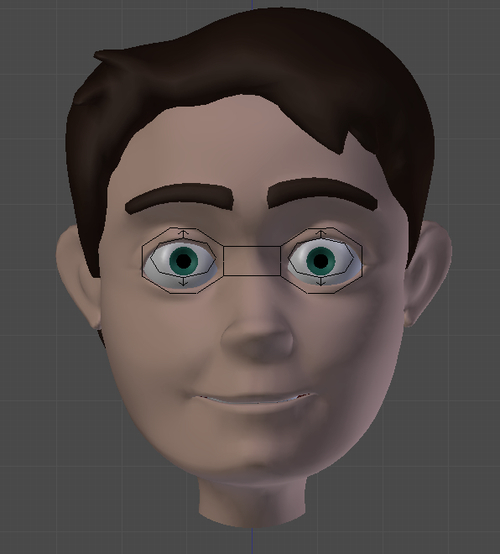
- First we need to create two Shape Keys for each eye. Select the
Eye.Lobject, navigate to the Properties Window, in the Object Data tab, and locate the Shape Keys panel. Press the plus button to create the Basis shape. Click two more times to create our shapes. Select each on the panel and name them Pupil_Small and Pupil_Big, as seen in the following screenshot: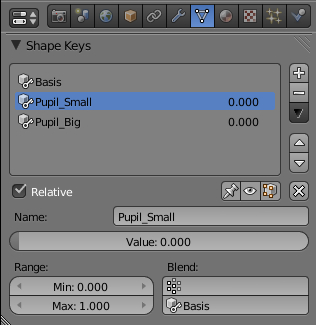
- Select the Pupils_Small shape, go to the 3D View, and enter the eye mesh Edit Mode (Tab). Select the loop of vertices that define the pupil by holding Alt, right-clicking on one edge of this loop and scaling (S) it down, as seen in the following screenshot:
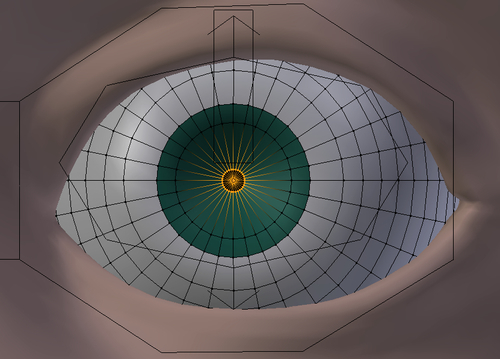
- Go back to the Shape Keys panel, click on the Pupils_Big shape name to activate it. You'll see that the loop of vertices remain selected. Scale (S) them up so you get a dilated pupil.
We could just repeat the last three steps now to create similar shapes as the right eye, but we'll see a nice Blender feature to make our lives easier.
- In Object Mode (Tab), select the left eye, hold Shift, and select the
Eye.Robject. Go to the Shape Keys panel in the Properties Window, click on the button with a down arrow below the minus button and pick Transfer Shape Key, as seen in the following screenshot:
This will transfer the active Shape Key (currently Pupil_Big) from the left eye object to the right eye, since they have the same topology.
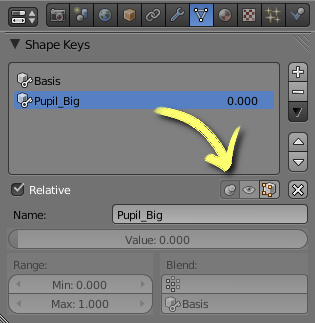
- Disable the Pin button for the transferred shape to the left of the "eye" button, just above the Shape Key name, as shown in the following screenshot:
- Select the
Eye.Lobject again, activate thePupil_Smallshape, and repeat steps 5 and 6 to transfer this Shape Key to theEye.Rmesh.Now that we have the necessary Shape Keys for each eye, it's just a matter of creating a driver controller for them.
- Select the
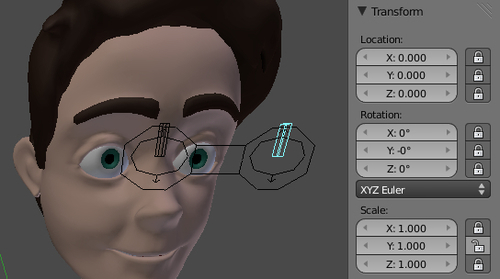
Armatureobject, enter in its Edit Mode (Tab). Make sure the X-Axis Mirror property is turned on in the Tool Shelf (T) panel. - Select the base of the
Eyelids.Lbone, extrude (E) it to roughly half the height of the eyelids controller. This will create a smaller bone in the same position of theEyelids.Lbone. You'll notice that another bone will be created at the base of the right eyelids controller, since we're in X-Axis Mirror mode, as you can see in the following screenshot: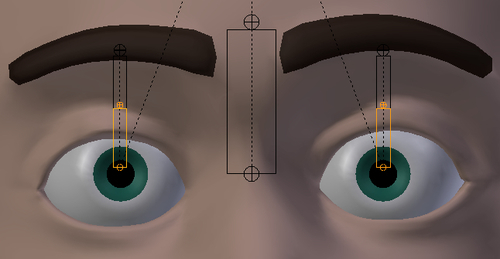
- Select the bone you've just created, hold Shift, select the
Eyelids.Lbone and press Ctrl + P (Keep Offset) to make it child of the eyelids controller. Name the created bones asPupil.LandPupil.R. - Enter in Pose Mode and lock all the Transform channels of these bones, except the Scale in the Y axis. You should end up with a setup that looks similar to the next screenshot. It's a good idea to add a circle shape for the pupils controllers.
Now you should add a Driver for each Shape Key
- Select the left eye mesh, go to the Shape Keys panel in the Properties Window, click on the Pupil_Big shape, right-click on its Value slider and choose Add Driver. The slider will get a pinkish hue.
- Open a Graph Editor window, choose the Drivers mode on the window header, click on the Value (Pupil_Big) name in the left-hand side panel and change the following settings in the Properties (N) panel: in the Drivers section, change the Expr field to
varon the box below the Add Variable button, change its type to Transform Channel; select theOtto_Armatureobject and thePupil.Lbone in the Ob/Bone fields; choose the Y Scale type and enable the Local Space field. The driver setup values are shown in the next screenshot, and the left eye pupil should dilate when you scale (S) up thePupil.Lbone:
Note
The
var-1value on the Expr field is because the default scaling value of objects and bones in Blender is equal to 1, in contrast to location and rotation which get default values of 0. This value allows us to get the desired result when scaling up the bone driver. - For the
Pupil_Smallshape you should repeat steps 12 and 13, with the only difference being that the Expr value should be set to1-var. The next screenshot shows the driver setup values, and the contracted pupil achieved by scaling down thePupil.Lbone: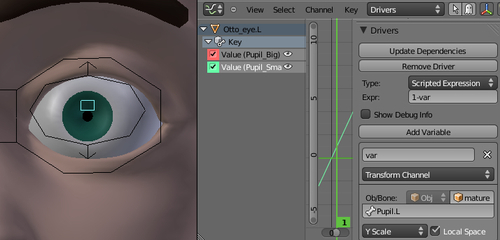
- To apply the drivers on the right eye, you can copy the ones that you've set for the left eye. Select the left eye mesh, go to the Shape Keys panel in the Properties Window, select the desired shape, right-click on its pinkish Value slider and select Copy Driver, as seen in the next screenshot:
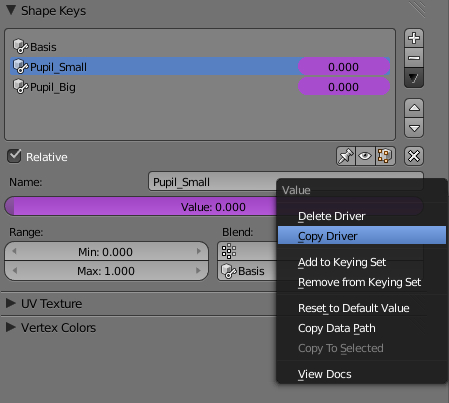
- Then you should select the right eye and its equivalent shape in the same panel, right click on its Value slider and choose Paste Driver. The only thing that you need to do next is to change the target bone from
Pupil.LtoPupil.Rin the driver properties on the Graph Editor window. Repeat it for the other shape and you're done with the pupil controllers!
The file 003-Pupils-complete.blend has this finished recipe for your reference.
By creating shape keys for the pupil sizes and assigning bone drivers to their values, you can control the amount of their dilation. To use the same controller for both contraction and dilation shapes, you must use inverted expression values for evaluation in the Graph Editor window.
Besides the fact that the human iris doesn't contract nor expand, you can apply the same techniques shown here to control their size. If used very carefully, this kind of control can help you express your character's emotional state. This is most applicable to cartoon characters, though.
Chapter 1: Using corrective shape keys
Chapter 1: Making a IK-FK switcher
Chapter 3: How to control where your characters looks at
Chapter 3: The eyelids controllers