
When working in a production environment, in a studio with other professionals or even as a freelance artist, it's important to work with linked assets. Having separate Blender files for characters, environments and props is crucial for an organized and sane workflow, avoiding redundancy and making the update process easier.
Imagine if, at a later stage of your animation, you have to make changes in the shape or materials of your main character. If, in order to do that, you have to reopen and alter all your already finished shots, your workflow is far from optimized. If using linked libraries, all you have to do is change the main source file and automatically all scenes making reference to it will be updated.
The use of linked libraries also allows different professionals to work on different aspects of a production at the same time. While the animator is posing the character, another professional can work on refining its mesh or materials, for example.
- Open the file
006-Libraries.blend. It has an empty scene with only a camera and some lamps. Lets add our character to this scene. On the top header, in the Info window, go to the File menu and choose the Link option, as seen in the next screenshot: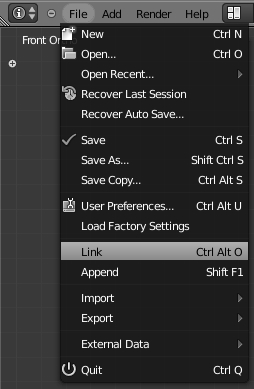
- The Blender window will open a file browser, through which you should find and click on the file
006-Libraries-Otto.blend. When you click on it the file browser interprets it as a regular folder, which has sub-folders to represent the various kinds of data in a Blender file, as you can see in the next screenshot: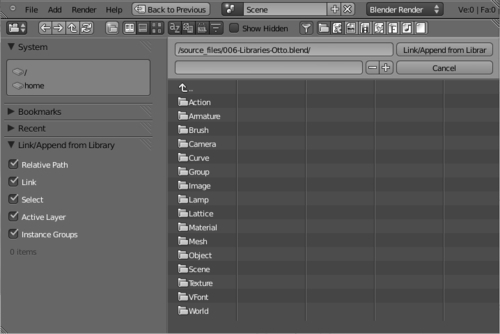
- Make sure all options under the Link/Append from Library panel are enabled, navigate to the
Groupfolder, select theOttogroup, and click on the Link/Append from Library button to bring it to our scene.Note
It's important to have an established file hierarchy on your system. If you keep renaming or moving the library file to another location, all scenes with links to it will be broken!
You'll see our character positioned at the center of our scene, already selected. Since we've linked our character as a linked group, you cannot select individual items such as the mesh or armature. You also cannot enter in Edit Mode, because all structural changes must be made in the original library file.
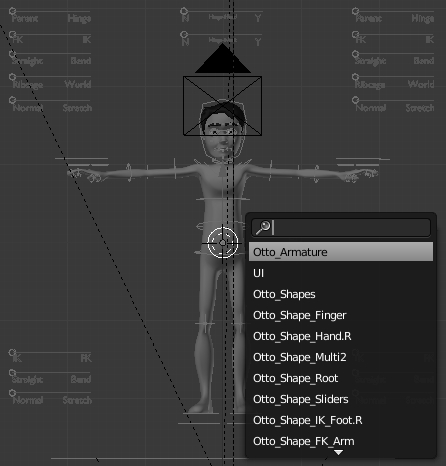
- To be able to pose and animate the character, we need to create a proxy instance of the armature. A proxy acts like a linked and limited copy that enables you to work on to add keyframes. With the group already selected on the 3D view, press Ctrl + Alt + P and select Otto_Armature from the list, as seen in the next screenshot:
This would create a proxy instance of our armature, making it the selected object in the 3D View. Now you can press Ctrl + Tab to enter in Pose Mode and animate our character. If you try to enter in the armature's Edit Mode with Tab, nothing happens because of the limited nature of the proxy object.
- Save this file and open the original library file,
006-Libraries-Otto.blend. Try changing something on its mesh or materials and reopen the scene file. Everything you changed will be automatically updated on the linked instance.This method of linking a group is very useful for its simplicity: when linking an external library, only the group should be selected. On the other hand, you should be very careful when creating the group. You must make sure that every object needed for the rig is on the group.
- Open the library file,
006-Libraries-Otto.blend, again. In an Outliner window, select the Groups display mode. You'll see the only group on that file, Otto, as the root of a hierarchy of several objects, including the character meshes, armature, and helper objects, such as empties, shapes for bones and lattices. Notice that even hidden objects are included. The next screenshot shows the group with all included objects: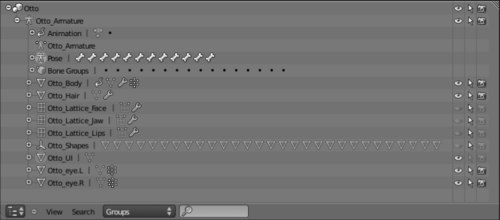
It's far easier to pick only a group of objects instead of linking each one separately. This linked group, for instance, has 41 different objects. Another advantage is that you can add or remove objects from the group on the library and all linked instances are updated.
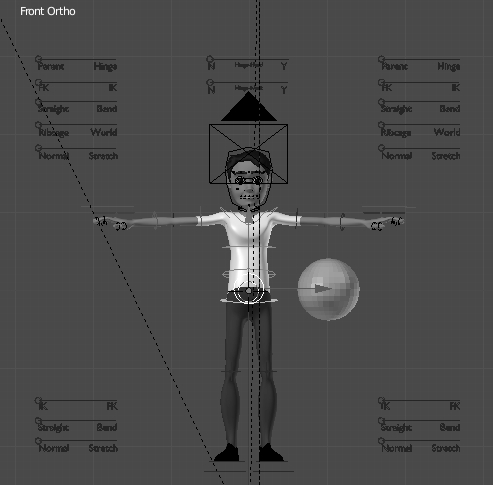
- Let's add another object to this Otto group. Add a sphere in the 3D View through Shift + A | Mesh | UV Sphere. Move (G) and rotate (R) it as you wish, then go to the Object tab on the Properties window, under the Groups section. Click on the Add to Group button and select Otto. Save the file and open the file
006-Libraries.blendagain. You'll see the new object automatically added on the scene, as you can see in the following screenshot:
The file 006-Libraries-complete.blend has this completed example, with the only difference that it has a linked group from the file 006-Libraries-Otto-final.blend.
Working with linked assets makes your workflow organized, easier to manage and without unnecessary redundancies. For characters, it's a good idea to create a group with all necessary objects, including shapes used for the rig. Linking a group is a good practice, since you can add or remove objects to a rig without breaking existent scenes.
Appendix: Naming conventions