
Another common animation exercise to understand body mechanics involves your character kicking a soccer ball. It includes anticipating the action, the actual kick, and the follow-through movements.
As with all other animation shots, you should look for video references on the Internet or even record yourself performing the action. Then you should make quick sketches on the best ideas for poses prior to moving controllers around.
- Open the file
008-BallKick.blend. It has our character Otto properly dressed as a soccer player with a ball in front of him. It also has a camera set for this action, from which we see the objects in 3D view as default, as pictured in the following screenshot: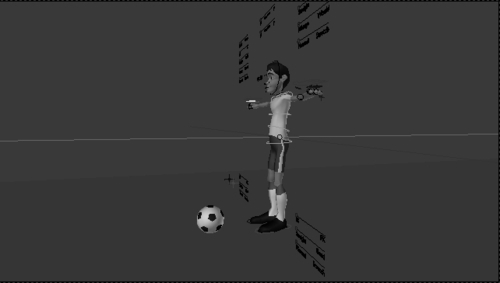
During the research and planning phase, you should notice some peculiarities to this action. Let's assume that the character kicks the ball with his right leg:
- The soccer player runs towards the ball looking firmly towards it.
- His torso remains a bit curved to the front, reinforcing his attention towards the ball.
- Just before the kick, he takes a bigger step to position the left foot on the ground next to the ball while moving the right foot up and behind his body in order to make a strong hit.
- Just after the kick, his body gets twisted in the follow-through: the right leg is up and pointing towards the left, the torso gets more curved towards the front and twisted to the right, and the left arm follows it and points towards the right, while the right arm points to his back.
- During the whole action, his arms swing in opposite directions to his legs, to balance his body.
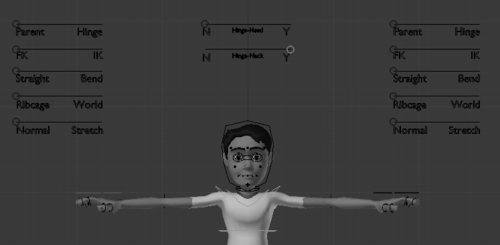
- Keeping these points in mind, it's time to make sure that our rig is properly set up before we start making the Extreme poses. Since the hands will not hold anything, we're going to leave the arms in the default FK mode. Our first observation tells us that the character looks firmly towards the ball while running at it, so it's a good idea to enable the Hinge property for the Neck, as seen in the next front view screenshot. The neck and head will rotate independently of the ribcage, and it would be easier to make the character look at a fixed point.
- Now you should start with the Extreme poses, using the sketches, annotations, and references you've made so far. Use the Quad View Toggle (Ctrl + Alt + Q) to see the poses from more angles to help you create the Extremes.
At this stage you shouldn't worry about timing yet. Just make sure you have a good set of Extreme poses defined on the DopeSheet to adjust them later. When creating the Extremes, it would be good to think of the overlapping action on the hands: creating this sense of "drag" on the Extreme poses will save you a good time, since you don't need to make lots of changes on your Extremes later.
- Once you have all Extreme poses set, it's a good idea to have them marked as such in the DopeSheet window to tell them apart from the Breakdowns and other keyframes. With all Extreme poses selected on the DopeSheet window (A), press (R) and choose Extreme to give the diamonds a pinkish hue.
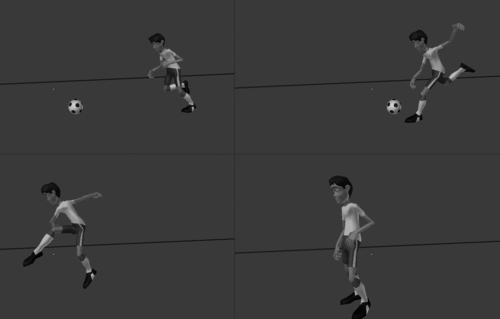
The following screenshot shows four Extreme poses for this action as reference:
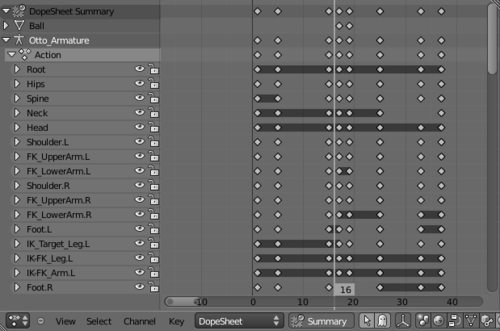
- After you're happy with your Extreme poses, move on to the timing adjustment. Make sure the DopeSheet Summary option is enabled on the DopeSheet window and move (G) the Extreme poses on the timeline. You may find your poses need a bit of adjustment when you navigate through the timeline, and it's now the perfect time to do that. The following screenshot shows the Extreme positions with the timing adjustment on the DopeSheet window:
- After the timing adjustment, start adding the Breakdown positions and additional keyframes. Make sure you get good arcs described by the character's limbs. This is also good to ensure the overlapping action, especially in the arms and hands, looks good.
Note
You can tweak your pose by using some built in tools in Blender. With the armature in Pose Mode, the Toolshelf panel (T) shows three buttons: Push, used to exaggerate a pose; Relax, which does the opposite, making it look closer to the surrounding ones; and Breakdowner, which tries to figure out how the Breakdown position should be. Be wary to use them only as helpers, not the main pose builders.
- When you're happy with the new poses and—eventually—further adjustments on the timing, start focusing on the details such as fingers, facial expressions, and moving holds for when the character goes to a resting pose. You can even add a little squash and stretch to enhance the feeling of the strength involved in the kick, although it's not required.
- As a final touch, animate a slight rotation of the camera from right to left, following our character performing the kick for the glory of the team. The file
009-BallKick-complete.blendhas this finished example for your reference, along with a background to make this shot more interesting, as you can see in the next screenshot:
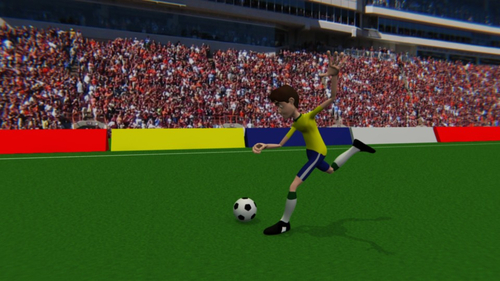
With both planning and study of video references, you can make a convincing action of a ball kick. By setting up a hinged neck, the character keeps the head still and looking at his target while running. The workflow of creating Extreme poses, adjusting the Timing, adding the remaining Breakdown and regular keyframes and refinement keeps your timeline organized, easy to understand and to adjust.
Appendix: Extremes, Breakdowns, Inbetweens, ones and twos
Chapter 6: Animating in layers
Chapter 7: Easy to Say, Hard to Do: Mastering the Basics