Chapter 8
Writing with Word Processing
IN THIS CHAPTER
![]() Creating new Google Docs documents
Creating new Google Docs documents
![]() Formatting and manipulating text
Formatting and manipulating text
![]() Saving, exporting, and sharing documents
Saving, exporting, and sharing documents
The Chromebook is not just for fun and games. It is a powerful tool for students and business users alike — even published authors! However, what makes the Chromebook powerful is not the hardware; it’s the unrestricted access to — and complete integration with — the Google platform.
One key component of the Google platform is its web-based office tools. The name often used to describe the entire suite of these tools, however informally, is Google Docs. However, this name can be confusing: Docs is also the official name of Google’s web-based word processing tool within that suite. For the purposes of this book, then, when I refer to Google Docs, I’m referring to Google’s word processor.
Docs is a powerful word processor that offers an extensive amount of functionality. The goal of this chapter is not to dive into every nook and cranny of the Docs application – which would fill an entire book. Instead, I just cover the basics. By the end of this chapter, you should be able to open and create documents; write, format, and otherwise manipulate text; and save, export, and share your documents with anyone across the web for collaboration. This chapter describes the steps used to create documents such as resumes, recipes, and flyers. If this capability is interesting to you, read on!
Navigating Google Docs
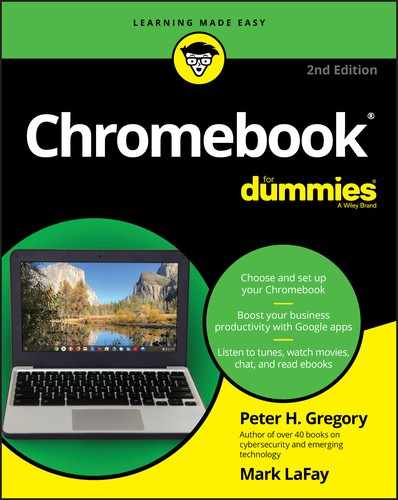
![]() Docs is Google’s answer to Microsoft Word. If you’ve had any experience working with Word on a Mac or PC, you will find the interface quite similar. If you’re using a word processor for the first time, don’t worry: Docs is extremely intuitive. To get started, launch Google Docs by clicking the Docs icon in the Launcher. The Docs application opens in a Chrome browser window and creates a new, untitled document. Have a look at Figure 8-1.
Docs is Google’s answer to Microsoft Word. If you’ve had any experience working with Word on a Mac or PC, you will find the interface quite similar. If you’re using a word processor for the first time, don’t worry: Docs is extremely intuitive. To get started, launch Google Docs by clicking the Docs icon in the Launcher. The Docs application opens in a Chrome browser window and creates a new, untitled document. Have a look at Figure 8-1.
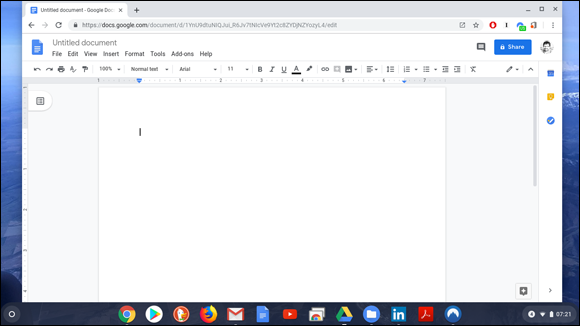
FIGURE 8-1: Google Docs.
 If you really want to (or must) use Microsoft Word, you can, by using Office 365, which works on your Chromebook. If this is you, skip over to Chapter 11, which talks about using Office 365 on a Chromebook.
 Instead of displaying a new, empty document, Docs might instead show you a list of documents you have worked on before. When this is the case, and you want to start on a new document, press the + (plus sign) button near the lower-right corner of the Docs window.
Surveying the Docs workspace
The Docs workspace is broken into two main areas: The menu area and the main document area. The menu area, by default, is composed of the Applications menu and the Edit toolbar, as shown in Figure 8-2.
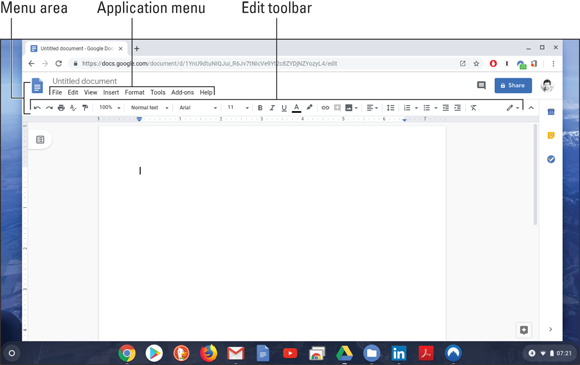
FIGURE 8-2: The Docs Applications menu and Edit toolbars.
The Applications menu contains a standard set of application-specific control options, including
- File: File-specific options and controls for creating, saving, exporting, printing, setting up your page, and otherwise managing your documents at the file level.
- Edit: Copy, paste, delete, and otherwise move and manipulate text. Also used to find specific text in your document.
- View: Modify your Docs view by adding and removing toolbars, or change the layout of the main document area.
- Insert: Add files, images, symbols, charts, headers, footers, links, and more.
- Format: Manipulate the appearance of your text, including font, size, and features like underline, bold, and strikethrough, as well as the format of paragraphs (indent, spacing, and so on).
- Tools: Spell check, translate text, determine word count, or define specific text.
- Add-Ons: Add software plug-ins to change your Docs experience.
- Help: Get help with Docs, search for menu options, and more.
The Edit toolbar serves as a shortcut bar to several of the common Edit, File, and Format features contained within the Applications menu. With the Edit toolbar, you can quickly
- Undo and redo recent changes you’ve made in your document
- Print your document
- Spell check
- Apply the format of text or a paragraph to another part of your document
- Zoom in or out of your document
- Change the font face of your text
- Change font size
- Bold, italicize, and underline your text
- Add hyperlinks
- Insert images into your document
- Align text
- Change line spacing
- Add and edit bullets and numbering
- Set indentations
- Adjust paragraph styles
- Change basic edit modes (edit, suggesting changes, or read only)
Changing your view
Before you begin to type your document, you might find changing your view in Google Docs helpful. One way you can change your view is to hide the Applications menu. Just click the little up arrow at the far right side of the toolbar. (When you hover over that arrow, it reads “Hide the menus”.) When you click the up arrow, the Applications menu disappears from sight, as shown in Figure 8-3.
To restore the Applications menu, click the icon that looks like a V, located on the far right side of the Edit toolbar.
You can also use the keyboard shortcut Shift+Ctrl+F to hide and reveal the Applications menu.
FIGURE 8-3: Hide the Applications menu to make more room for your content.
If you’re the type of person who likes to remove clutter from sight before you begin working, you might like to hide the ruler, and maybe even put Docs into Full-Screen mode. Full-Screen mode hides everything but the main document area. You can turn on Full-Screen mode by following these steps:
- Click View in the Applications menu.
In the View menu that appears, click Show Ruler.
The check mark next to Show Ruler disappears, and the View menu closes.
- Again, click View to open the View menu.
Choose Full Screen.
Docs goes into Full-Screen mode. A message appears to remind you that pressing the Esc key leaves Full-Screen mode.
- Exit Full-Screen mode by pressing Esc.
If you want to eliminate all distractions, put your browser into Full-Screen mode by pressing the Full-Screen shortcut key located four keys to the right of Esc. (See Figure 8-4.) This key also maximizes the size of the Docs window if it wasn’t already maximized.
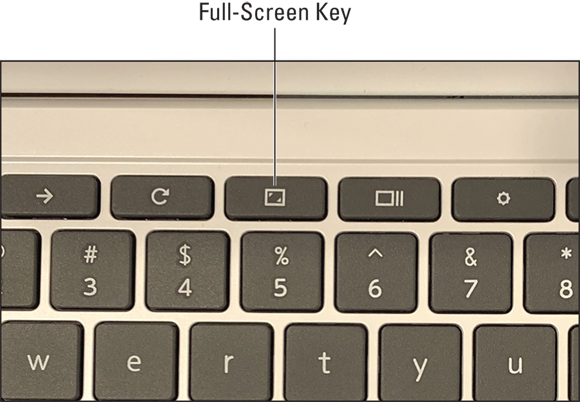
FIGURE 8-4: The Full-Screen shortcut key on your keyboard.
Working with Text
By default, when you open Docs, your cursor is placed in the main document area. This placement is helpful if you want to begin typing text immediately because you don’t have to click in the workspace to begin. The blinking cursor (the small vertical line flashing off and on) indicates that you are ready to type. If you do not have a blinking cursor in the main document area, move your pointer anywhere over the main document area and click.
Begin typing a couple sentences or a paragraph of text. As you type, the cursor moves to the right, leaving characters to the left of the cursor. Google Docs is by default left-justified, meaning that all text is aligned to the left. As you approach the end of a line, the cursor automatically moves to the next line. If you are typing a word that does not fit on the line, Docs automatically moves the word to the next line.
When you are finished typing a paragraph, press Enter to start a new paragraph. If you are following any sort of paragraph style, you may need to hit Enter twice to space out your paragraphs.
Moving around your document
As you write your document, you may find that you want to make edits to your text. You can move around your document in a number of different ways. To start, take a look at the arrow keys on your keyboard. (See Figure 8-5.)
You can move your cursor by using the arrow keys to navigate to different places in your document. Press and hold the left arrow key to move the cursor leftward until it reaches the left end (left margin) of your line. After you’ve hit the beginning of the line on the left side, keep pressing the left arrow key, and you will notice your cursor go to the right side of the line above. Conversely, pressing the right arrow key moves the cursor rightward along the line. As you approach the right margin of the line, keep pressing the arrow key to go to the left margin of the next line down. You can also move around the document by using the up and down arrow keys to quickly move to lines above or below the current line, respectively.
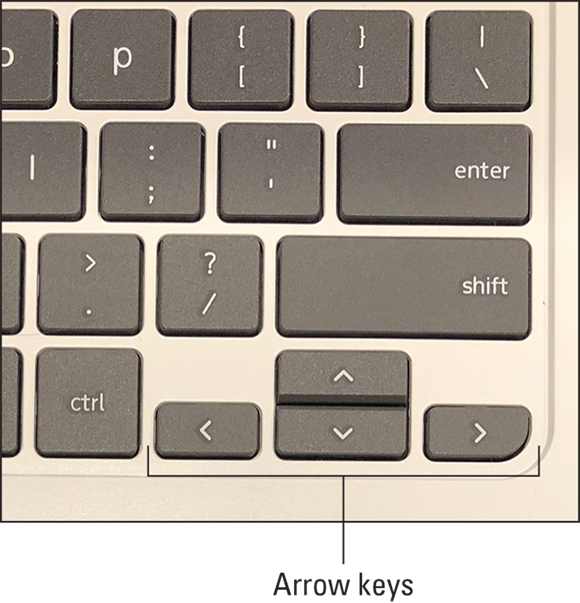
FIGURE 8-5: The Arrow keys on your keyboard.
You can also navigate your document by using your touchpad or mouse to move the cursor directly to the desired location. Click once to move the cursor and then begin editing using your keyboard. In the event that you have several pages of text, you can quickly navigate to various pages by following these steps:
Place two fingers on your touchpad and swipe up or down.
If your touchpad is configured to traditionally scroll, swiping up scrolls the document up so that you can see previous pages. Swiping down scrolls you down in the document to later pages.
If your touchpad is configured to Australian scroll, swiping up scrolls your document down to later pages. Conversely, swiping down scrolls your document up to earlier pages.
Using your touchpad with a two-finger swipe scrolls you to the page that contains the text you would like to edit.
- Using one finger on your touchpad, relocate the pointer to the location of the word or words you would like to edit.
Click your touchpad.
Your cursor appears at the location of your pointer.
If you have a touchscreen Chromebook, move around by following these steps:
- Place your finger on the screen on the middle of the page and then scroll up and down by holding your finger on the screen and moving it up and down.
Tap your finger any place in the text in your document.
Tapping moves the cursor to this location. If you begin typing, your text will appear here.
Hold two fingers on the screen on the document and slowly spread your fingers apart.
Spreading your fingers apart “zooms in,” magnifying the text on the screen. Try it and see how far you can zoom in.
- To zoom back out, hold two fingers on the screen on the document and slowly bring them together.
You can alternatively use the touchscreen and the arrow keys to move around in the document.
To delete text, move your cursor to the right of the text so that you can easily remove it by pressing the Backspace key. To insert text, position your cursor where you want the inserted text and begin typing.
You can also use a feature called Find and Replace to find a specific piece of text within your document. To find text using the Find and Replace feature, follow these steps:
- Click Edit in the Applications menu.
In the Edit menu that appears, choose Find and Replace.
The Find and replace window appears, containing multiple inputs:
- Find: Enter the text you want to find.
- Replace: If you want to replace the text for which you are searching, simply enter the replacement text in this text box.
- Match Case: Select this check box to search for text that has the same capitalization as you typed in the Find box.
Enter the text you want to locate in the Find text box.
As you type text in the Find text box, Docs highlights words in your document that match your search entry.
You can also quickly find text in your document by typing Ctrl+F. Doing so opens the search bar, where you can search for text in your document. Google Docs treats blank spaces as characters. If you’re looking for a particular word that’s not immediately followed by punctuation, place a space after your search term to reduce the number of unneeded results. For example, if you want to find the word pass and your search shows you other words like password, type pass followed by a space.Sort through search results by clicking the Next or Previous buttons located in the bottom right of the Find and Replace window.
As you navigate to the matched words in your document, Docs changes the color of the highlighted word to indicate where you are in the document.
When you successfully locate the word or words in your document, close the Find and Replace window by clicking the X in the top-right corner (not the main browser window!).
The Find and Replace window disappears, leaving your desired word highlighted and ready to be deleted or otherwise edited.
Copying and pasting text
As you create documents, you can avoid typing repetitive text by using the Copy and Paste functions. You can do copying and pasting in several ways — on the keyboard, with the touchpad, and with menu commands.
Larger documents that contain several thousand words over numerous pages may be too large to effectively navigate with just your keyboard. Your touchpad will come in handy with these documents because you can quickly locate, select, copy, and paste text.
To copy and paste text, follow these steps:
Using your touchpad, move your cursor to the text you want to copy.
You may need to scroll to a different page. To do so, you can
- Place two fingers on your touchpad and swipe up or down to scroll to a different page within your document.
- Place one finger on the scroll bar and move your pointer to the vertical scroll bar located on the right side of the screen. Click anywhere on the bar to quickly scroll to a different page. Or, on the bar itself, click and drag your cursor up or down to scroll to different pages.
Click and drag your cursor over the section of text you want to copy. When all the desired text is selected, release the click.
A highlighter follows your pointer as you drag it across the text.
You can select text using the keyboard by using the arrow keys while holding the Shift key. Go character by character by using the left or right arrow keys. Select entire lines by using the up and right arrow keys at the same time.In the Docs menu, click Edit and then click Copy.
Alternatively, press and hold the Alt key and click the highlighted text. A menu appears in which you can choose Copy, as shown in Figure 8-6.
The selected text is copied to your Clipboard.
The Clipboard is a temporary place where text you copy resides. When you copy or cut, that text resides in the clipboard. When you paste, text in the Clipboard is inserted into your document. The Clipboard works across all applications: You can copy text on a web page you are viewing with the Chrome browser, and paste it into a document.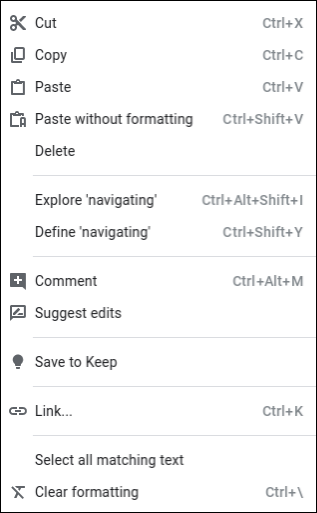
FIGURE 8-6: Open an editing menu by Alt-clicking selected text.
- Using your touchpad, scroll to the location where you want to place your text and click to place your cursor there.
Open the Edit menu again and select Paste.
The copied text is pasted into the document at the location of your cursor.
You can paste the contents of your Clipboard as many times as you like. If you need to place the text in numerous locations, simply move to each location and paste the text by following Steps 4 and 5 in the preceding list.
You can also use handy keyboard shortcuts to copy and paste text. After you select the desired text, pressing Ctrl+C copies the text to your Clipboard. After you move the cursor to the place in your document where you want the text to appear, press Ctrl+V to copy the text from your Clipboard into the document.
You can paste text over and over; pasting text from the Clipboard does not empty the Clipboard; instead, the Clipboard will contain your selected text until you perform the next copy. At that point, you replace the prior contents of the Clipboard with the new content.
Moving text by cutting and pasting
When you want to replicate text, copying and pasting is the mode of operation you should use. When you want to move text but not replicate it, however, instead of using Copy, you would use Cut. To move text in your document using the cut-and-paste method, follow these steps:
Using your touchpad, click and drag your pointer across the text you want to copy; then release your click.
The selected text is highlighted.
Alt+click the highlighted text.
A menu appears, revealing several options.
Select Cut from the menu.
The selected text disappears from the screen. Don’t worry; it’s sitting in your Clipboard waiting to be pasted.
 When you cut text from your document, the text vanishes, perhaps giving you the impression that you have deleted it. You haven’t deleted the text, though — it has just been moved to your Clipboard. However, that text will be deleted if you cut or copy additional text prior to pasting the already-cut text. The Clipboard always and only holds one copied item.
- Using the touchpad, navigate to the location where you want to paste your text.
Alt-click in the location where you want to paste your text. In the menu, select Paste.
The copied text is pasted in the location of your cursor.
 You can paste text as many times as you like. However, when you copy or cut a new selection of text, the previously cut text is replaced with the newly cut text.
Instead of using Alt+Click menus for cutting and pasting, you can instead press Ctrl+X to cut text (copy to the Clipboard), and Ctrl+V to paste text.
Formatting Text
Before you can start formatting text, you need to become familiar with a few terms that describe the different characteristics of your text:
- Font: Also known in some circles as font face, the font is the style of typeface. By default, the name of the font used in Docs is Arial.
- Font size: The size of your text is often used to indicate hierarchical structure or writing format or style. By default, the size of your text is 11 points. This size is about the normal size of text on an ordinary printed page.
- Font weight: Weight refers to the thickness or boldness of the letters in a font. A heavy font weight means the text is bold, or very thick and dark.
- Font slope: Slope indicates how much your text leans, and in what direction. For example, italicizing letters means adding a left-to-right slope.
Here are some examples:
- This is Times New Roman font in 10 points.
- This is 16 points.
- This is bold.
- This is italics.
The formatting of your text is important not only for style but also to adequately communicate your message. Font weight, slope, and size are all used to communicate meaning, emphasis, and more. Font face can also be useful for establishing a personality, tone, and brand. Google Docs gives you the ability to modify all these characteristics of your text so that your documents look great and say what you want them to say.
Changing fonts
With Docs, you can change the font of any text contained in your document. Creatively speaking, having many different fonts from different font families in a single document isn’t recommended, but Docs does make it possible to change every letter in your document to a different font. Google Docs comes preloaded with eight fonts:
- Arial
- Comic Sans MS
- Courier New
- Georgia
- Impact
- Times New Roman
- Trebuchet MS
- Verdana
To change your font, follow these steps:
Using your touchpad, click and drag your cursor across the text you want to select.
Docs highlights the selected text.
Using the Edit toolbar, click to open the Font menu.
The Font menu is located directly to the left of the Font Size menu. The Font menu shows the name of the font currently in use. (See Figure 8-7.)
In the Edit toolbar, the Font menu appears with the name of the font for the selected body of text. By default, all text uses the Arial font.
FIGURE 8-7: Selecting a font in Google Docs.
Select one of the fonts listed.
Your highlighted text is changed to the selected font.
If no text was highlighted when you changed the font, the new font will apply only to new text. Any text typed from the current location of the cursor will appear with the font face of the selected font.
Adding new fonts
The Google Docs default list of fonts is a brief list of eight. Other word processors, such as Microsoft Word, Adobe Acrobat, or Apple Pages, have extensive lists of fonts by default. Google provides users with an initial list of the most globally popular fonts to keep things simple at first. You can, however, add fonts to your Docs. Follow these steps:
- Click the Font menu in the Edit toolbar.
Select More Fonts to add fonts.
The Font selection window, shown in Figure 8-8, gives you a robust list of new fonts from which to choose. Scroll down through the list to reveal more fonts.
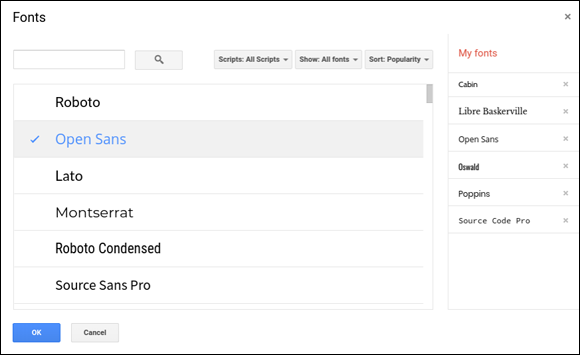
FIGURE 8-8: Adding new fonts to Google Docs.
Select the desired fonts by clicking each.
Each selected font is highlighted in blue and given a check mark.
Click OK to finish adding the fonts to your Font menu and exit.
When you are ready to change the font of your text, you can choose from a list containing your original fonts, plus your newly selected fonts from the Font menu.
Removing fonts from the Font menu
The more fonts you add, the more fonts you will have to rifle through when trying to make a decision on changing the font of your text. The time may come when you want to remove fonts that you added to your list. Think of it as decluttering or spring cleaning. To remove fonts from Docs, take these steps:
- Open the Font menu in the Edit toolbar.
Select More Fonts.
The Font window appears. On the left of the window, a list of new fonts appears; on the right, a list of fonts currently in use by your Docs account.
Scroll through the list of fonts on the right side of the window under My Fonts and locate the font or fonts you want to remove. Then, to remove a font, click the X located to the right of that font’s name.
The font vanishes from the list of available fonts.
- Click OK.
Removing a font from your list of fonts doesn’t affect your documents, even if they contain a font you removed from the menu. Further, after you use a font in your document, you can change more text to use that font even if you removed it from your Font menu. (However, a removed font won’t be available in any new documents, or existing documents that don’t contain the font.)
Adding fonts to Google Docs makes these fonts available for Google Sheets and Google Slides as well. They aren’t, however, available in other Chromebook apps, such as Text.
Styling fonts
You can easily confuse the style of your font with the face of your font. Font face is simply the font itself. Think of a font as a designer pair of jeans. A fashion designer made the jeans to look a particular way. However, no matter how the jeans were made, you can still style the jeans by cuffing the bottoms, cutting the jeans off at the knees, and so on.
You can accentuate a font by applying various styles to the font itself. Those styles include
- Size: Makes your text bigger or smaller, depending on where it fits in a hierarchy.
- Bold: When you make text bold, the text becomes visibly thicker. This is why a bold font is said to have a heavy font weight.
- Italics: A slanted font is often referred to as italic.
- Underline: Places a line under your text (for example, to indicate importance).
- Strikethrough: Places a line through the middle of your text. Useful in communicating a change in your text or simply to
makeillustrate a point. - Superscript: Lifts the text above the line and reduces its size. You may remember this from high school algebra, like the 2 in X2.
- Subscript: Moves the text slightly lower and reduces its size. This is like the 2 in the chemical formula for water, H2O.
- Color: Track changes, distinguish individual users in collaboration, or simply add style to your text by changing the color of the text itself or by adding a permanent color highlight.
Text size
You can change the size of your text by following these steps:
Using your touchpad, click and drag your cursor across the text you want to change; then, when you've selected the desired text, release your click.
The selected text is highlighted.
Open the Font Size menu in the Edit toolbar.
It’s the number found between the Font menu and the Bold button. (See Figure 8-9.)
The size of a font is called the point size. The point is the smallest whole unit of measure in typography. In the industrial era, typesetting was the process of manually setting letters into a printing press to print whole sheets of text. The original point varied in actual size between 0.18mm and 0.4mm. In the modern era, the point (abbreviated pt.) size doesn’t necessarily correspond directly to an actual size on the printed page. Today, a desktop publishing point is defined as 1/72 of an international inch, or about 0.353mm.Select the desired font size.
Your selected text becomes the chosen size.
You can quickly make selected text bold by clicking the Bold button (which displays a capital B) located in the middle of the Edit toolbar. You can also bold your selected text by pressing Ctrl+B.
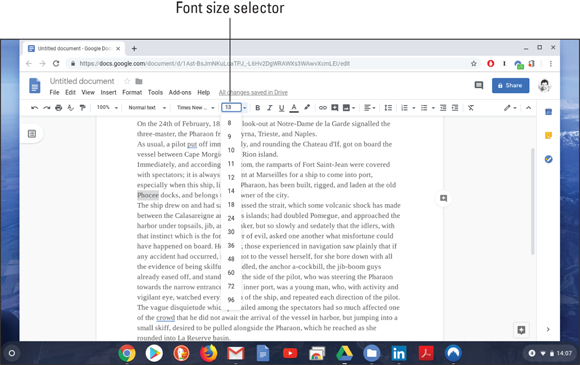
FIGURE 8-9: Selecting different text sizes in Google Docs.
Applying bold, italics, underline, or strikethrough
To style a specific selection of text with bold, italics, underline, or strikethrough, follow these steps:
Using your touchpad, click and drag your cursor across the text you want to change; then, when you’ve selected the desired text, release your click.
The selected text is highlighted.
- Open the Format menu in the edit toolbar.
Select Bold, Italic, Underline, or Strikethrough.
Your selected text changes accordingly.
As a quick alternative, you can style selected text just by clicking the appropriate button in the middle of the Edit toolbar. Click the B button for bold, the I button for italic, or the U button for underline. (No button exists for strikethrough on the standard Edit toolbar.) Similarly, you can apply styles by pressing Ctrl+B (bold), Ctrl+I (italic), Ctrl+U (underline), or Alt+Shift+5 (strikethrough). Pressing again undoes the same style.
Coloring your text
Google Docs gives you the ability to change the color of your text or the color of the background behind your text. Change the color of your text by using these steps:
Using your touchpad, click and drag your cursor across the text you want to change; then, when you’ve selected the desired text, release your click.
The selected text is highlighted.
Click the Text Color menu in the Edit toolbar.
It’s the heavily underlined A found to the right of the Underline button.
Select your desired color.
Your selected text now appears in the selected color.
To apply a highlight to your text, you can do so by following these steps:
Using your touchpad, click and drag your cursor across the text you want to change; then, when you’ve selected everything, release your click.
The selected text is highlighted.
Open the Highlight Color menu in the Edit toolbar.
It’s to the right of the Text Color button and looks like a tiny, slanted highlighter.
Select your desired color.
Your selected text now appears highlighted in the selected color.
Aligning your text
The alignment of your text determines the orientation of the edges of lines, paragraphs, or pages in your document. Google Docs gives you several options for changing the alignment, including:
- Left alignment: This is the default alignment for new documents in Docs. The text is flush with the left margin of your document.
- Right alignment: The text is flush with the right margin of your document.
- Center: The middle of your document is the half-way point between the left and the right margins. With centered alignment, all text is centered on this midway point, regardless of the relation between document margins and document dimensions.
- Justified: Justifying your text aligns the text evenly along both the left and right margins. To ensure that the left and right side of your text are flush with the left and right margins, Docs introduces additional spaces between each word. This paragraph is published in Justified alignment; see how the left and right edges line up neatly?
You can change the alignment of text in your document by the line, paragraph, or page by following these steps:
Using your touchpad, select the text you want to realign.
The selected text is highlighted.
Click the align button in the Edit toolbar.
The alignment buttons appear.
Click the desired alignment button.
The selected text is realigned. Alignment buttons are shown in Figure 8-10.
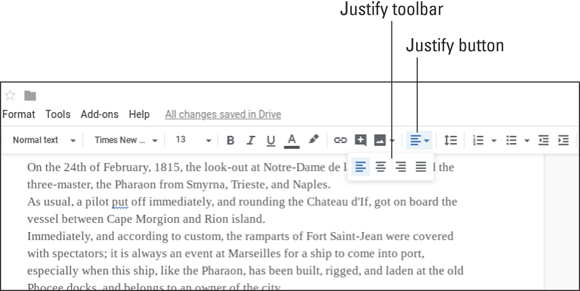
FIGURE 8-10: Left, Right, Center, and Justified alignment buttons in Google Docs.
You don’t have to select the entire paragraph to change its alignment. You need only to place the cursor anyplace in the paragraph before changing its alignment.
Clearing formatting
Sometimes you need to start with a blank slate. You might be given a document that requires editing, or maybe you got a little too enthusiastic with the formatting tools that Google Docs provides you. Regardless of the reason, Docs makes it incredibly easy to wipe out all formatting in a section of text or a complete document. To clear your formatting, follow these steps:
Select the formatted text.
The selected text is highlighted.
To clear the formatting of an entire document, press Ctrl+A instead of selecting a section of text. Pressing Ctrl+A selects the entire document.- Open the Format menu in the Applications menu.
Select Clear Formatting.
The selected text is reset to defaults: left-aligned text with all style elements — including color, underline, strikethrough, italics, bold, and so on — removed. Font sizes are not affected by Clear Formatting.
Saving Documents
One of the many reasons to use Google Docs is the symbiosis between Docs and Google Drive. Google Drive is Google’s cloud-based storage solution that allows you to safely store your files and access them from any device with an Internet connection. Every document you create with Docs is saved to your Drive folder so that you can access it at home, on the road, at work, or anywhere else you might need it, using any device with a browser.
When you create a new document with Docs, Docs automatically saves the document to your Drive. As you edit your document, Docs continuously saves each change to Drive so that you have almost no risk of losing your information. Docs has no manual Save feature for this very reason: You may forget to save your document, but Docs won’t.
Rest assured, your work is safe with Google.
Naming your document
When you open a new document with Docs, the default name for the document is Untitled Document. However, you won’t want to leave your document named this way. Drive doesn’t have a problem with storing multiple files with the same name, but such naming may easily confuse you. It’s best, then, to immediately give your document a more intuitive name. To name your document, follow these steps:
Open a new document.
The easiest way to do this is simply to launch Docs from the Launcher.
A Chrome web browser opens and loads Docs.
- If Docs shows you a list of documents that you have previously edited, click the colorful + (plus sign) button in the lower-left corner of the Google Docs page to start a new document.
- Click File from the menu at the top of the Google Docs window.
Click Rename.
The cursor moves to the document name at the top of the Google Docs window, as shown in Figure 8-11.
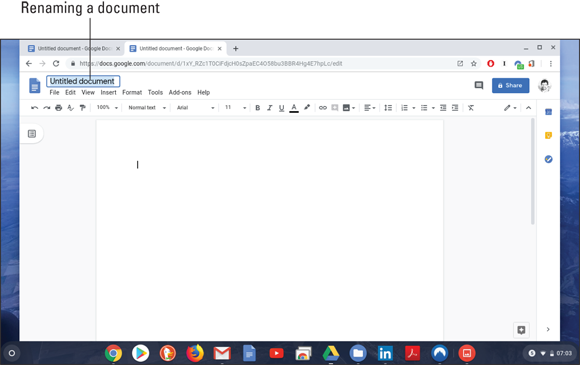
FIGURE 8-11: Changing the name of a Google Docs document.
Type the new name for your document in the Name field and press Enter.
The name Untitled Document in the top-left corner has been replaced with the new name you entered.
Your document now appears in Google Drive with the new name. As you continue to make edits to the document, those changes will be updated and saved in real time.
Exporting documents
Unfortunately for you, the entire world does not use the Google platform exclusively. Therefore, you may need to export your documents to formats that others may be comfortable with. Docs presently allows you to export documents to a few standard formats, including
- Microsoft Word (
.docx) - OpenDocument (
.odt) - Rich Text (
.rtf) - PDF (
.pdf) - Plain Text (
.txt) - Web Page (
.html, Zipped)
Exporting documents to different file types may change or remove the formatting within your document. The Plain Text format, for instance, is as the name says: plain text. No formatting is carried through when you export your document to Plain Text. Before sending your exported documents, review them to ensure that everything is as it should be.
You can export your documents by following these steps:
- Open the File menu in the Docs Applications menu.
In the File menu, hover your cursor over Download As.
A submenu appears, revealing the document types available for export. (See Figure 8-12.)
Select the desired file type.
Your Docs file is exported in the desired file type and is automatically downloaded to your Chromebook’s Downloads folder.
To view the downloaded file on your computer, click the arrow next to the filename in the bottom of your browser window.
A menu revealing several options appears.
Select Show in Folder.
The Files app launches, showing you the file in your folder.
If you want your newly exported document to be saved in Google Drive, you can move the document from the Downloads folder on your Chromebook to your Google Drive. To do so, open the Files app, find your Downloads folder and the new exported document, and copy it to Google Drive. I cover this procedure in Chapter 7.
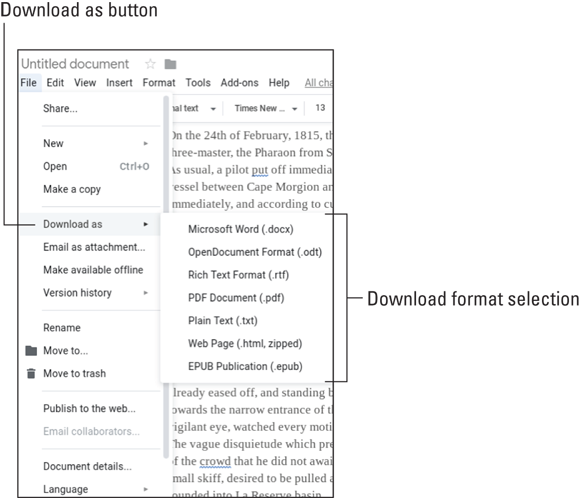
FIGURE 8-12: Exporting your document to a new format with the Download As submenu.
Your original document is unaffected when you export your document to a new format. Your original document is still there, and you can continue making changes to it.
Collaborating in Docs
By default, Docs and Drive make your files inaccessible to anyone other than yourself. You can, however, change the visibility settings on your files and invite specific people, or even the entire world, to comment, view, or edit your documents. To share a document with specific people, follow these steps:
- Open your document with Docs.
Click the blue Share button in the top-right corner of your Docs window.
A window appears, giving you several options for sharing your document. (See Figure 8-13.)
In the Invite People text box in the pop-up window, enter the email address of each person with whom you want to share your file.
Be sure to separate multiple email addresses with commas.If the email address is in your address book, Docs will try to auto-fill their information.
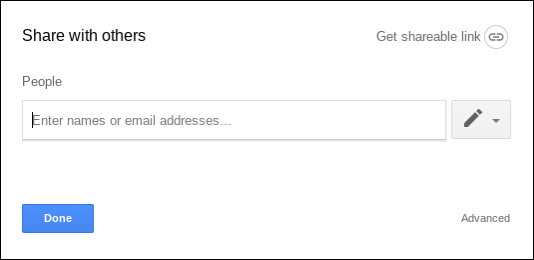
FIGURE 8-13: The Share window lets you share documents with others.
If you want to set the permissions of the collaborators, click the Advanced button in the lower right of the Share window.
A second window appears.
To change the permissions for each user, click the link directly to the right of the name of the invitee.
A drop-down menu with three options appears:
- Can View: Allows users only to view the document.
- Can Comment: Allows users to view the document and comment on the document but not to change any content or security settings.
- Can Edit: Allows users to view, comment, and edit the document and change permissions.
This is shown in Figure 8-14.
- Select from the menu the permission setting you want to apply to this collaborator.
- Select the Notify People via Email box directly above the Send button to notify the specified collaborators, by email, that you have shared a document with them.
Click Send.
Your document is made available to the collaborators immediately.
The collaborators who are invited to view, edit, or comment on your document will have to log into Google Docs using the email address with which you shared the document. If a collaborator doesn’t have a Google Account under the email address that you used, you have to invite her by using her Google Account address. She also has the option to create a Google Account using the email address to which you sent the invitation.
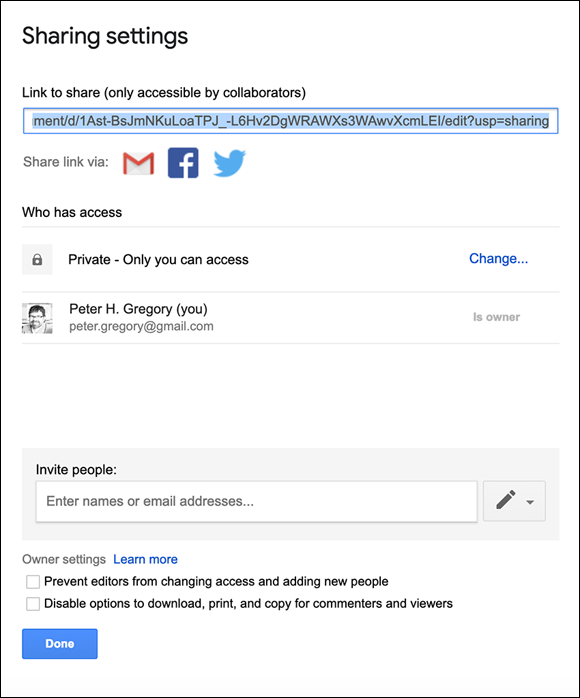
FIGURE 8-14: Advanced Share settings let you specify editing rights for each person.
Tracking Document Revisions
Keeping track of revisions is very important when creating and working with documents, especially when multiple collaborators are working with them. Luckily, Google Docs handles version control masterfully. As you and your collaborators make changes to your documents, Docs will time-and-date stamp those changes so that you can view previous versions of your document and even revert to an earlier version if you need to.
Revision tracking is a default feature of Docs. To view your revision history, follow these steps:
- Open a document with Docs.
- Open the File menu in the Docs Applications menu.
Select Version History and then See Version History.
A Version History box appears in the right portion of your screen. (See Figure 8-15.) The box contains the various versions of your document, in order from most recent to oldest.
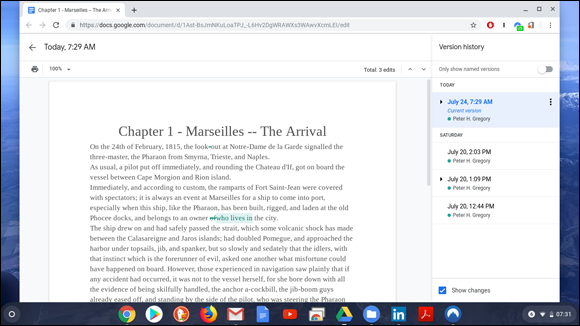
FIGURE 8-15: The Version History box.
Click a revision date in the Version History box.
A preview of the revision you chose appears in the main document area. Changes that occurred between versions appear in green. When you hover over each change, the name of the person who made the change is shown.
To make a copy of a previous version of the document, click the menu button to the right of the revision and then click Make a Copy.
You now have a new document with the original name that includes the date that version was saved. Your current document remains unchanged.
To restore your document to an older version, click the Restore This Version button at the top of the Google Docs window.
The restored version becomes the current version.
Using Docs Offline
Google Docs is a web-based word processor, which means that you must have an Internet connection to access all its features. However, an offline version of Docs is available in the event that you find yourself without a connection to the Internet.
To use Google Docs offline, follow these steps:
To use Google Docs offline, you must first enable Google Drive for offline use. To ensure that Google Drive is properly enabled, open the Launcher and click the Google Drive icon.
A Chrome web browser appears and takes you to your Drive.
On the right side of the screen, click the Settings icon (it looks like a little gear).
A menu appears, revealing several options.
Click Settings.
A window appears, giving several general settings options.
- Locate the Offline check box and select it.
Click Done.
The window disappears, indicating that the changes have been made. Your Docs files will now be synced and available for offline editing.
To test whether you have properly enabled offline access, turn off your Wi-Fi by opening the Settings panel in the bottom-right of your screen and clicking the blue Wi-Fi button.
This turns off Wi-Fi off, and the button changes from blue to gray. You are now offline.
With your Wi-Fi turned off, switch back to Google Drive, locate your synced documents, and click to open one.
If your document opens and you are able to edit it, you know that you have successfully engaged offline use and synced your documents. As you edit your document, a little message appears to the right of the menu that reads, “All changes saved offline.”
While offline, you won’t be able to access some of the features available to Docs users that are connected to the Internet. You will, however, be able to create documents and save them. Later, when you connect to the Internet, Drive uploads the saved documents and enables all Internet-only features.