
In this recipe, we will show how you can use techniques you were introduced to in the previous recipes to make particles align to the edge detected in the image.
In this recipe, we are going to use the particles' implementation from the Creating a particle system in 2D recipe; the image processing example from the Detecting edges recipe in Chapter 3, Using Image Processing Techniques; as well as simulating repulsion covered in the Applying repulsion and attraction forces recipe.
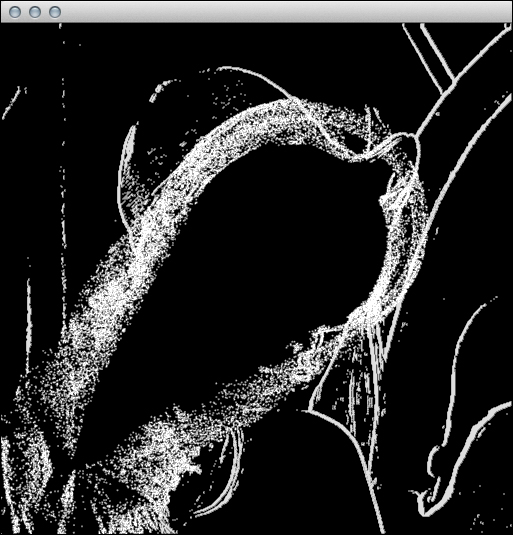
We will create particles aligning to the detected edges in the image. Perform the following steps to do so:
- Add an
anchorproperty to theParticleclass in theParticle.hfile.ci::Vec2f anchor;
- Set the
anchorvalue at the end of theParticleclass constructor in theParticle.cppsource file.anchor = position;
- Add a new property to your application's main class.
float maxAlignSpeed;
- At the end of the
setupmethod, after image processing, add new particles, as follows:mMouseDown = false; repulsionFactor = -1.f; maxAlignSpeed = 10.f; mImage = loadImage( loadAsset("image.png") ); mImageOutput = Surface8u(mImage.getWidth(), mImage.getHeight(), false); ip::grayscale(mImage, &mImage); ip::edgeDetectSobel(mImage, &mImageOutput); Surface8u::Iter pixelIter = mImageOutput.getIter(Area(1,1,mImageOutput.getWidth()-1,mImageOutput.getHeight()-1)); while( pixelIter.line() ) { while( pixelIter.pixel() ) { if(pixelIter.getPos().x < mImageOutput.getWidth() && pixelIter.getPos().y < mImageOutput.getHeight() && pixelIter.r() > 99) { float radius = 1.5f; float mass = Rand::randFloat(10.f, 20.f); float drag = 0.9f; Particle *particle = new Particle( pixelIter.getPos(), radius, mass, drag ); mParticleSystem.addParticle( particle ); } } } - Implement the
updatemethod for your main class, as follows:void MainApp::update() { for( std::vector<Particle*>::iterator it = mParticleSystem.particles.begin(); it != mParticleSystem.particles.end(); ++it ) { if(mMouseDown) { Vec2f repulsionForce = (*it)->position - getMousePos(); repulsionForce = repulsionForce.normalized() * math<float>::max(0.f, 100.f - repulsionForce.length()); (*it)->forces += repulsionForce; } Vec2f alignForce = (*it)->anchor - (*it)->position; alignForce.limit(maxAlignSpeed); (*it)->forces += alignForce; } mParticleSystem.update(); } - Change the
drawmethod forParticleinside theParticle.cppsource file to read as followsvoid Particle::draw(){ glBegin(GL_POINTS); glVertex2f(position); glEnd(); }
The first major step was to allocate particles at some characteristic points of the image. To do so, we detected the edges, which was covered in the Detecting edges recipe in Chapter 3, Using Image Processing Techniques. In step 4 you can see that we iterated through each pixel of each processed image and placed particles only at detected features.
You can find another important calculation in step 5, where we tried to move back the particles to their original positions stored in the anchor property. To disorder particles, we used the same repulsion code that we used in the Applying repulsion and attraction forces recipe.
- To learn more about fast Fourier transform, please visit http://en.wikipedia.org/wiki/Fast_Fourier_transform