
In this recipe we are going to learn how to connect particles with splines in 3D.
In this recipe we are going to use the particle's code base from the recipe Creating a particle system, from Chapter 5, Building Particle Systems. We are going to use the 3D version.
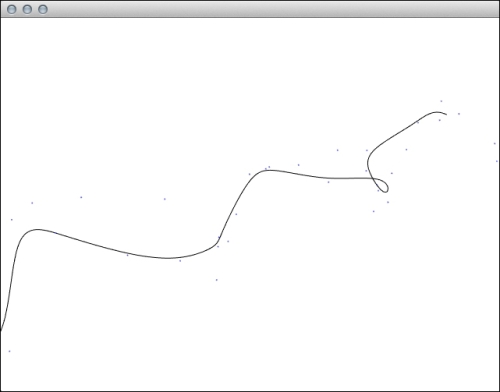
We will create splines connecting particles.
- Include the necessary header file inside
ParticleSystem.h:#include "cinder/BSpline.h"
- Add a new property to the
ParticleSystemclass:ci::BSpline3f spline;
- Implement the
computeBSplinemethod for theParticleSystemclass:void ParticleSystem::computeBspline(){ std::vector<ci::Vec3f> splinePoints; std::vector<Particle*>::iterator it; for(it = particles.begin(); it != particles.end(); ++it ){ ++it; splinePoints.push_back( ci::Vec3f( (*it)->position ) ); } spline = ci::BSpline3f( splinePoints, 3, false, false ); } - At the end of the
ParticleSystemupdate method, invoke the following code:computeBSpline();
- Replace the
drawmethod ofParticleSystemwith the following:void ParticleSystem::draw(){ ci::gl::color(ci::Color::black()); if(spline.isUniform()) { glBegin(GL_LINES); float step = 0.001f; for( float t = step; t <1.0f; t += step ) { ci::gl::vertex( spline.getPosition( t-step ) ); ci::gl::vertex( spline.getPosition( t ) ); } glEnd(); } ci::gl::color(ci::Color(0.0f,0.0f,1.0f)); std::vector<Particle*>::iterator it; for(it = particles.begin(); it != particles.end(); ++it ){ (*it)->draw(); } } - Add headers to your main Cinder application class files:
#include "cinder/app/AppBasic.h"
#include "cinder/gl/Texture.h"
#include "cinder/Rand.h"
#include "cinder/Surface.h"
#include "cinder/MayaCamUI.h"
#include "cinder/BSpline.h"

#include "ParticleSystem.h"
- Add members for your
mainclass:ParticleSystem mParticleSystem; float repulsionFactor; float maxAlignSpeed; CameraPersp mCam; MayaCamUI mMayaCam; Vec3f mRepPosition; BSpline3f spline;
- Implement the
setupmethod as follows:void MainApp::setup() { repulsionFactor = -1.0f; maxAlignSpeed = 10.f; mRepPosition = Vec3f::zero(); mCam.setPerspective(45.0f, getWindowAspectRatio(), 0.1, 10000); mCam.setEyePoint(Vec3f(7.f,7.f,7.f)); mCam.setCenterOfInterestPoint(Vec3f::zero()); mMayaCam.setCurrentCam(mCam); vector<Vec3f> splinePoints; float step = 0.5f; float width = 20.f; for (float t = 0.f; t < width; t += step) { float mass = Rand::randFloat(20.f, 25.f); float drag = 0.95f; splinePoints.push_back( Vec3f(math<float>::cos(t), math<float>::sin(t), t - width*0.5f) ); Particle *particle; particle = new Particle( Vec3f( math<float>::cos(t)+Rand::randFloat(-0.8f,0.8f), math<float>::sin(t)+Rand::randFloat(-0.8f,0.8f), t - width*0.5f), 1.f, mass, drag ); mParticleSystem.addParticle( particle ); } spline = BSpline3f( splinePoints, 3, false, false ); } - Add members for camera navigation:
void MainApp::resize( ResizeEvent event ){ mCam = mMayaCam.getCamera(); mCam.setAspectRatio(getWindowAspectRatio()); mMayaCam.setCurrentCam(mCam); } void MainApp::mouseDown(MouseEvent event){ mMayaCam.mouseDown( event.getPos() ); } void MainApp::mouseDrag( MouseEvent event ){ mMayaCam.mouseDrag( event.getPos(), event.isLeftDown(), event.isMiddleDown(), event.isRightDown() ); } - Implement the
updatemethod as follows:void MainApp::update() { float pos=math<float>::abs(sin(getElapsedSeconds()*0.5f)); mRepPosition = spline.getPosition( pos ); std::vector<Particle*>::iterator it; it = mParticleSystem.particles.begin(); for(; it != mParticleSystem.particles.end(); ++it ) { Vec3f repulsionForce = (*it)->position - mRepPosition; repulsionForce = repulsionForce.normalized() * math<float>::max(0.f, 3.f-repulsionForce.length()); (*it)->forces += repulsionForce; Vec3f alignForce = (*it)->anchor - (*it)->position; alignForce.limit(maxAlignSpeed); (*it)->forces += alignForce; } mParticleSystem.update(); } - Implement the
drawmethod as follows:void MainApp::draw() { gl::enableDepthRead(); gl::enableDepthWrite(); gl::clear( Color::white() ); gl::setViewport(getWindowBounds()); gl::setMatrices(mMayaCam.getCamera()); gl::color(Color(1.f,0.f,0.f)); gl::drawSphere(mRepPosition, 0.25f); mParticleSystem.draw(); }
B-spline lets us draw a very smooth curved line through some given points, in our case, particle positions. We can still apply some attraction and repulsion forces so that the line behaves quite like a spring. In Cinder, you can use B-splines in 2D and 3D space and calculate them with the BSpline class.
More details about B-spline are available at http://en.wikipedia.org/wiki/B-spline.
..................Content has been hidden....................
You can't read the all page of ebook, please click here login for view all page.