Receiving Email
The two steps for configuring Force.com to process inbound emails are as follows:
1. Write an Apex class that implements a specific interface (Messaging.InboundEmailHandler) and method (handleInboundEmail). This provides your code access to the envelope (Messaging.InboundEnvelope) and content (Messaging.InboundEmail) of inbound emails, including mail headers and attachments. It is otherwise standard Apex code with no special restrictions. The return value of this method is a Messaging.InboundEmailResult. To indicate processing failure, set the success field of this object to false. Any explanatory message set in the message field is returned to the sender as an email response.
2. Create an Email Service using the native user interface. An Email Service is associated with one or more Force.com-issued email addresses that serve as the gateways to your Apex class. When email arrives at the email address, your Apex class is invoked to process it.
If your Apex code fails with an uncaught exception while processing an incoming email, Force.com treats the email as undeliverable. This is much like a mail gateway behaves when presented with an unknown recipient email address. An email is returned to the sender with diagnostic information about the problem, including the error message from your Apex code.
To personalize email processing based on the identity of the sender, use one of these strategies:
![]() Have all users share a single inbound email address. Your Apex code reads the sender’s “from” address and customizes behavior based on that, perhaps by querying Contact or Lead for more information about them.
Have all users share a single inbound email address. Your Apex code reads the sender’s “from” address and customizes behavior based on that, perhaps by querying Contact or Lead for more information about them.
![]() Issue each user or group of users a unique email address. Your Apex code can adjust its behavior based on the “to” address of the incoming message.
Issue each user or group of users a unique email address. Your Apex code can adjust its behavior based on the “to” address of the incoming message.
Caution
There are governor limits on inbound email. The maximum size of each inbound message, attachments included, is 10MB. The maximum size of each message body, text and HTML combined, is 100KB. The maximum size of each binary attachment is 5MB and 100KB for text attachments. The maximum heap size for Apex email handlers is 18MB. If any of these limits are reached, your Apex code will not be invoked, and the offending message will be returned to its sender.
Getting Started with Inbound Email Processing
Follow these next steps to create a new Apex class to process inbound email in the Force.com IDE. This is a simple example that sends a reply to the inbound message with the original message quoted in the body.
1. Make sure your Force.com project is selected and click New, Apex Class in the File menu.
2. Enter MyEmailService for the name and select the Inbound Email Service template.
3. Click the Finish button. Enter the code given in Listing 5.27, skipping the class, method, and result declarations because they are provided by the template. Save your changes.
global class MyEmailService implements
Messaging.InboundEmailHandler {
global Messaging.InboundEmailResult
handleInboundEmail(Messaging.InboundEmail email,
Messaging.InboundEnvelope envelope) {
Messaging.InboundEmailResult result = new
Messaging.InboundEmailresult();
Messaging.SingleEmailMessage outbound = new
Messaging.SingleEmailMessage();
outbound.toAddresses = new String[] { email.replyTo };
outbound.setSubject('Re: ' + email.subject);
outbound.setHtmlBody('<p>This reply was generated by Apex.'
+ 'You wrote:</p><i>' + email.plainTextBody + '</i>'),
Messaging.sendEmail(new Messaging.SingleEmailMessage[]
{ outbound });
return result;
}
}
4. In the native user interface, go to the App Setup area and click Develop, Email Services.
5. Click the New Email Service button.
6. Enter a service name. Enter MyEmailService as the Apex class. Leave the other options set to their defaults and click the Save button.
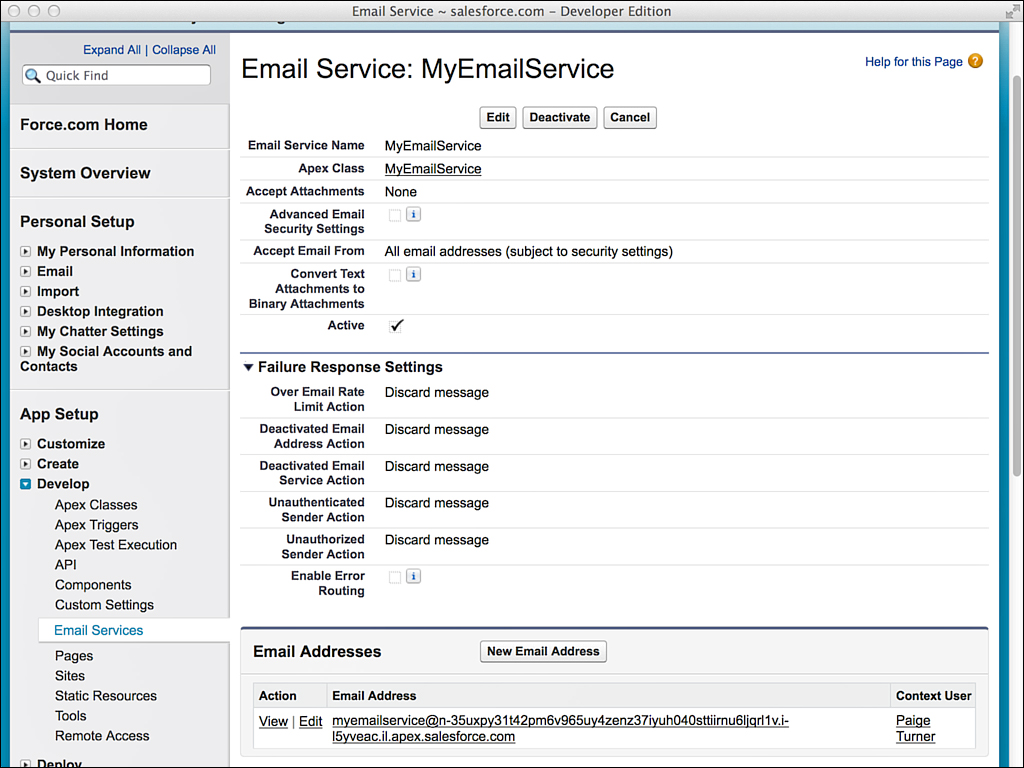
7. Click the Activate button. Then click the New Email Address button to create a Force.com-generated email address.
8. This screen allows you to whitelist email addresses and domains that are allowed to use this email service. By default, it’s configured to allow emails only from the current user’s email address. Accept this setting by clicking the Save button.
9. You should now see an email address listed at the bottom of the page, as shown in Figure 5.13. Copy the address to your Clipboard, open your favorite email application, and send a test message to this address. Within a minute, you should receive an email in response, generated by your Apex class.