
Importing Data
In this section, you will import sample project and resource data into the Force.com database using the Data Loader tool. This process is divided into three stages: preparing the data, importing it, and then verifying it visually using the native user interface. This is certainly not the only way to import data into Force.com, and probably not the easiest. But it employs a free, widely used, fully supported tool from Salesforce that can scale up to support large numbers of records and complex objects.
Data Preparation
Data Loader operates on CSV files. The first line of the file contains a header listing the columns present in the data. The following lines are the body of the data, with each line a record, values separated by commas. You should have access to Microsoft Excel or an equivalent tool for working with CSV files.
To begin, export CSV files for the Project and Contact objects. Because there is no data yet in the database, these files will be empty except for the header line. This serves as a template for the import file, providing an example of the data layout expected by the Data Loader.
To export, perform the following steps:
1. Launch Data Loader. Click the Export button.
2. Enter your username and password and click the Log In button. Make sure your password includes a Security Token appended to it. If you have not yet obtained a Security Token, log in to Force.com using your Web browser; navigate to Setup, My Personal Information, Reset My Security Token; click the Reset Security Token button; and get the Security Token from the email sent to you by Force.com. Click the Next button when your login is completed.
3. Select the Project object to export. Click the Browse button to name the export file and specify its directory. Name the file the same as the object name, and save it where you’ll readily find it, such as the desktop. Then click the Next button.
4. Click the Select All Fields button. Then remove the system fields, which are Id, OwnerId, IsDeleted, CreatedDate, CreatedById, LastModifiedDate, LastModifiedById, and SystemModstamp. Click the Finish button.
5. Answer Yes to the confirmation dialog. The export is performed, and a summary dialog is shown. Click the OK button to dismiss it. You now have a CSV file on your desktop containing a single line with the names of the exported fields.
Repeat this process for the Contact object, but this time remove all the standard fields in step 4 except for Id.
You should have two files on your desktop. Create a new worksheet and import contact.csv into it. Repeat this for project.csv.
Listing 2.10 is a sample import file containing five Contact records. In the first column, use the actual Id values from your contact.csv instead of the values shown here. Listing 2.11 contains five sample Project records. Make sure you save the Project and Contact Excel worksheets as two separate CSV files when you’re done. (Note: Only a certain number of code characters will fit on one line on the page. The arrow symbol indicates where code that should be entered as one line is wrapped to the next line.)
Listing 2.10 CSV Import File for Contact
ID,ACTIVE__C,EDUCATION__C,HIGHEST_EDUCATION_LEVEL__C, HOURLY_COST_RATE__C,HOME_OFFICE__C,REGION__C,START_DATE__C, INDUSTRY_START_DATE__C,YEARS_OF_EXPERIENCE__C
003i0000008TTBqAAO,TRUE, University of Chicago,MS,100,Chicago,Central,2/3/2003,6/1/1983, 003i0000008TTBrAAO,TRUE,St. Edwards University,BS,50,Austin,Central,5/15/2006,5/15/2006,
003i0000008TTBsAAO,TRUE,Cascade College,BS,40,Portland,West, 7/1/2008,1/1/2005, 003i0000008TTBtAAO,TRUE,University of Arizona,PhD,120,Tucson,West,10/15/2004,3/1/1992, 003i0000008TTBuAAO,TRUE,Fordham University,MS,125,New York,East,6/28/2007,5/1/1979,
Listing 2.11 CSV Import File for Project
NAME,TYPE__C,START_DATE__C,END_DATE__C,BILLABLE_HOURS__C, CONSULTING_BUDGET__C,EXPENSE_BUDGET__C,INVOICED__C,LOCATION__C, PROJECT_ID__C,NOTES__C,STAGE__C,STATUS__C,STATUS_NOTES__C
GenePoint,Billable,1/12/2015,,800, 200000,20000,FALSE,"Mountain View, CA", ,Phase 2,In Progress,Green,
Grand Hotels & Resorts Ltd,Billable,2/16/2015,,100, 30000,0,FALSE,"Chicago, IL", ,,In Progress,Green,
United Oil & Gas Corp.,Billable,2/9/2015,,500, 75000,10000,FALSE,"New York, NY", ,,In Progress,Green,
Burlington Textiles Corp of America,Billable,2/2/2015,,200, 40000,5000,FALSE,"Burlington, NC", ,,In Progress,Green,
Express Logistics and Transport,Non-Billable,3/1/2015,,0, 0,0,FALSE,"Portland, OR", ,Presales,In Progress,Green,
Data Import
Now that the data is prepared, you’re ready to import it. Launch Data Loader again, log in, and then follow these steps:
1. From the File menu, select Update.
2. Select Contact from the list of Salesforce objects.
3. Click the Browse button and locate your contact.csv file, and then click the Next button.
4. The file structure is verified, and a small dialog is displayed showing the number of records contained in the file. Check to make sure that this matches the number of records you expected. Click the OK button to continue.
5. The mapping dialog takes columns from your file and matches them with fields in the Force.com object. Click the Create or Edit a Map button.
6. The easiest way to create the mapping is to click the Auto-Match Fields to Columns button. Because the import files were actually once export files, the columns should match perfectly. Figure 2.12 shows the result of this mapping. All the available Force.com fields except for OwnerId were mapped to columns of the CSV file. The YEARS_OF_EXPERIENCE__C column has no mapping because it is a Formula field and cannot be modified. Click the OK button to continue.
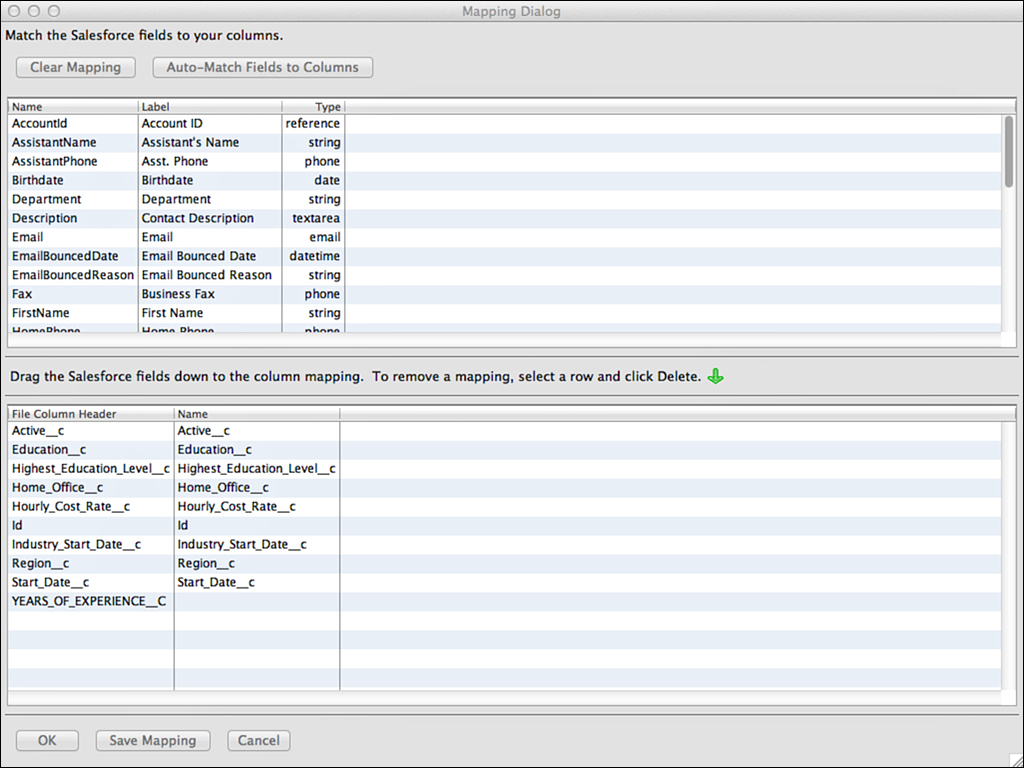
7. The new mapping is copied to the current mapping screen. Click the Next button.
8. Click the Browse button to locate a directory to save the results of the import. Data Loader creates two files, one containing errors and another containing success messages. Click the Finish button to begin the import and click Yes to confirm.
9. A dialog is shown with the results of the import. If you received errors, click the View Errors button to examine them, fix your import file accordingly, and try the import again.
Repeat this process for project.csv.
Data Verification
Data Loader outputs a CSV file containing the records successfully imported. But a more friendly way to look at the successfully imported data is to log in to Force.com and browse the records using the native user interface.
After you log in, select the Services Manager application from the application drop-down list in the upper-right corner of the screen. It contains six tabs, one for each of the custom objects defined in this chapter plus the standard Accounts and Contacts tabs. Click the Contacts tab and then click the Go button to display the view named All Contacts, which contains all the records of the Contact object.
You should see a list of the contact records you just imported. By default, only the names are shown. You can modify this view to show more fields by clicking the Edit link to the left of the Create New View link and then adding fields in the Select Fields to Display section. Figure 2.13 shows a modified All Contacts View.
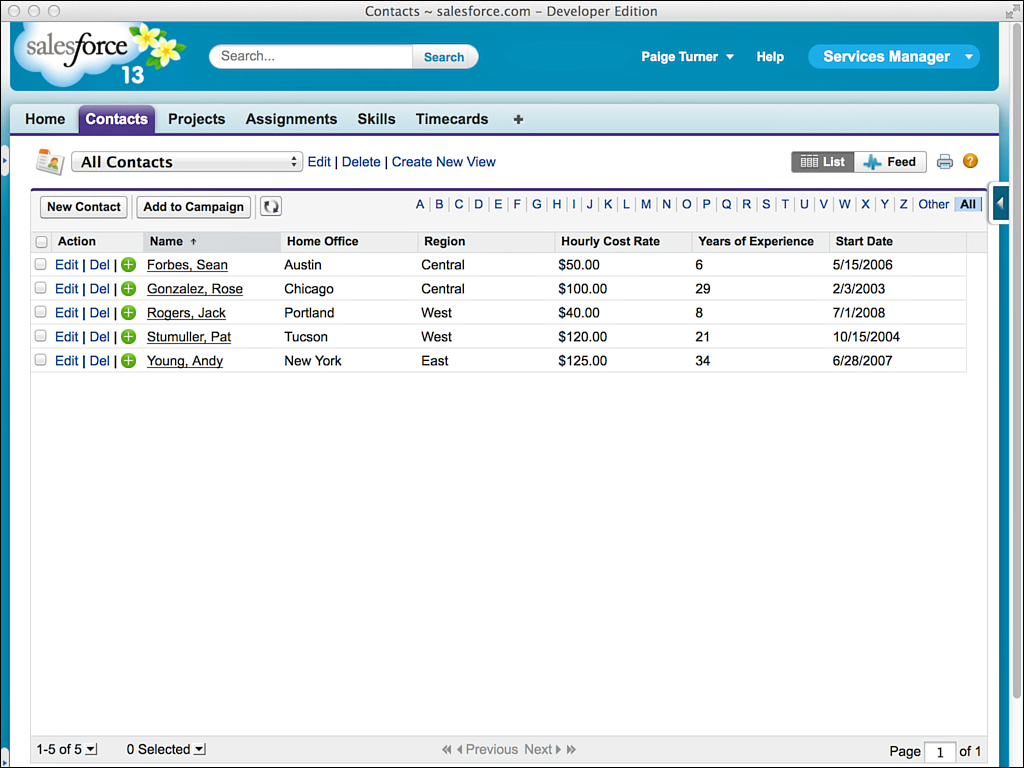
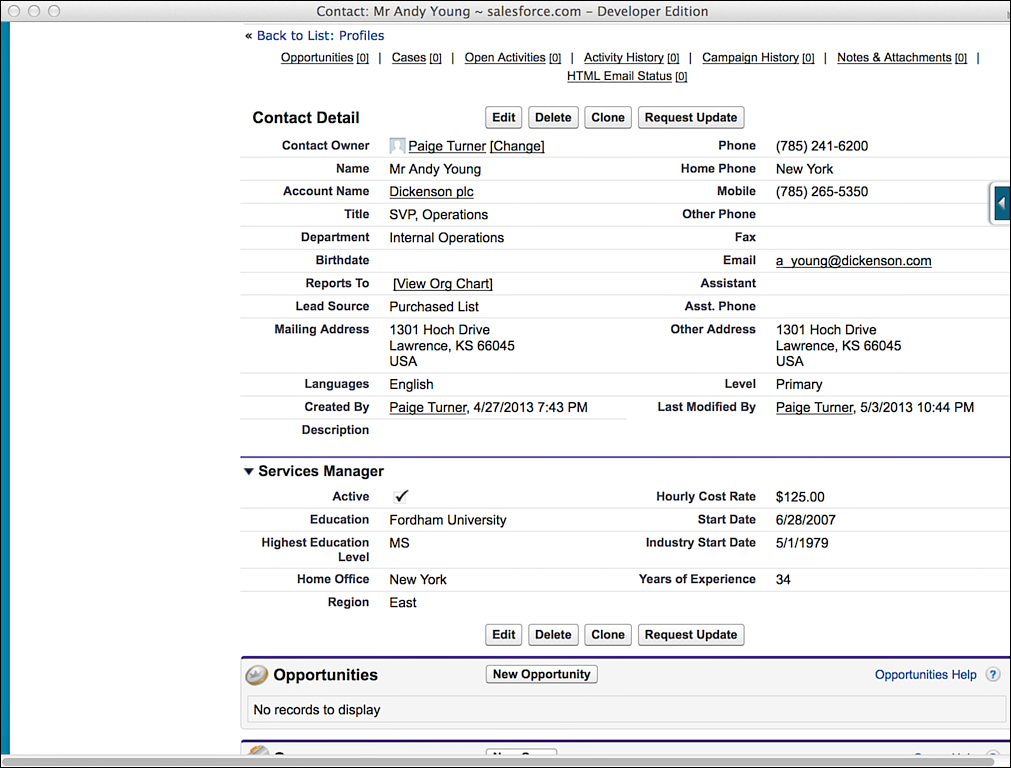
Figure 2.14 shows the detail of an individual Contact record. Verify that the currency and dates imported correctly. Notice that the number of years of experience was calculated from the Industry Start Date field.
To complete your rounds, browse to the Projects tab. Manually associate each Project with a parent Account of your choice, and verify that all the field types were imported correctly.