
Testing the Security Model
Although Services Manager is a sample application, it’s a good idea to get into the habit of testing the security of all Force.com applications before you go into production with them. If you do not take the time to test methodically, a user or group of users could be unable to perform their jobs or become exposed to confidential data intended for other users.
Security testing requires the same level of patience and attention to detail as the actual configuration. If you’ve kept a spreadsheet or another document with the details of your configuration, you can use it to construct a test plan. Where feasible, make sure you test from the perspective of every group of uniquely privileged users. The native user interface is a great tool for security testing because it exposes the underlying security model accurately, without the distortion of potentially buggy custom code found in custom user interfaces.
Test object and field visibility by visiting tabs. Test access levels by looking for buttons that modify the state of the record on the pages in these tabs. Test sharing rules by creating records with different owners and checking their visibility to other users.
In the following subsections, you will create three additional users for testing, prepare some test data, verify object and field visibility for three profiles, and test manual sharing between two roles.
Create Additional Users
Force.com Developer Edition provides you with up to seven free users for your testing. Two of the users are licensed to use the full Salesforce functionality, which includes all the standard objects. Three of the users are Salesforce Platform Users, meaning they have access to a subset of the standard objects. Two of the users are Force.com - App Subscription users, which are roughly equivalent to Salesforce Platform Users. Services Manager can be tested using Salesforce Platform Users.
Although you could use one user and cycle him through the various roles and profiles, creating as many users as you can makes testing more efficient and intuitive. Start with a Staffing Coordinator in the West, a Consultant in the West, and a Vice President in the Executive team.
Follow these steps to create each new Salesforce Platform user:
1. Click Setup. In the Administration Setup area, click Manage Users, Users.
2. Click the New User button.
3. Enter First and Last name and then Email. Set Profile to one of the custom Services Manager profiles and select a role. Make sure that the check box Generate New Password and Notify User Immediately is selected. Then click the Save button.
4. You will receive an email with a link to log in as your new user. Visit this login link.
5. Set your new password.
6. Click Setup. In the Personal Setup area, click My Personal Information, Grant Login Access.
7. Grant login access to your administrator by entering a date in the second input field and clicking the Save button. This is a time-saving step that allows you, the administrator, to log in temporarily as the user without going through the full login process of entering a username and password.
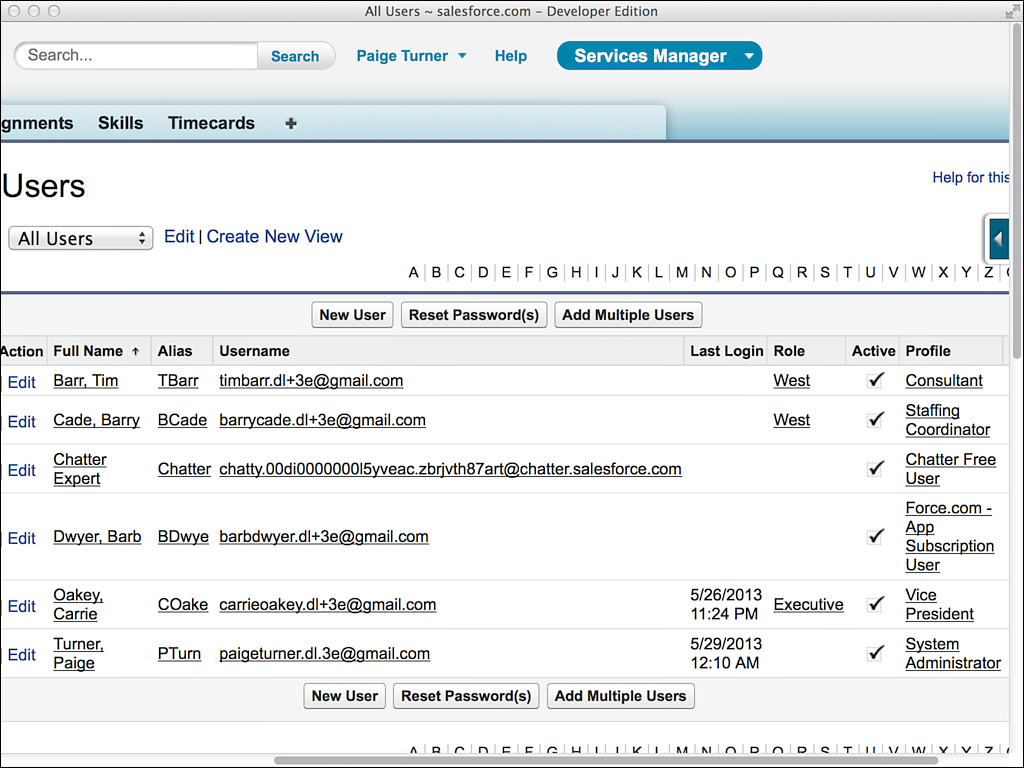
Repeat this process for each new user. When you’re done, you should have a list of users resembling the one shown in Figure 3.15.
Prepare Data
If you log in as a nonadministrator, you’ll notice that no Project records are visible. But you imported some in the preceding chapter, so where are they? Because your sharing model is set to Private, they are accessible only to the owner, which is the administrator user you used to import them.
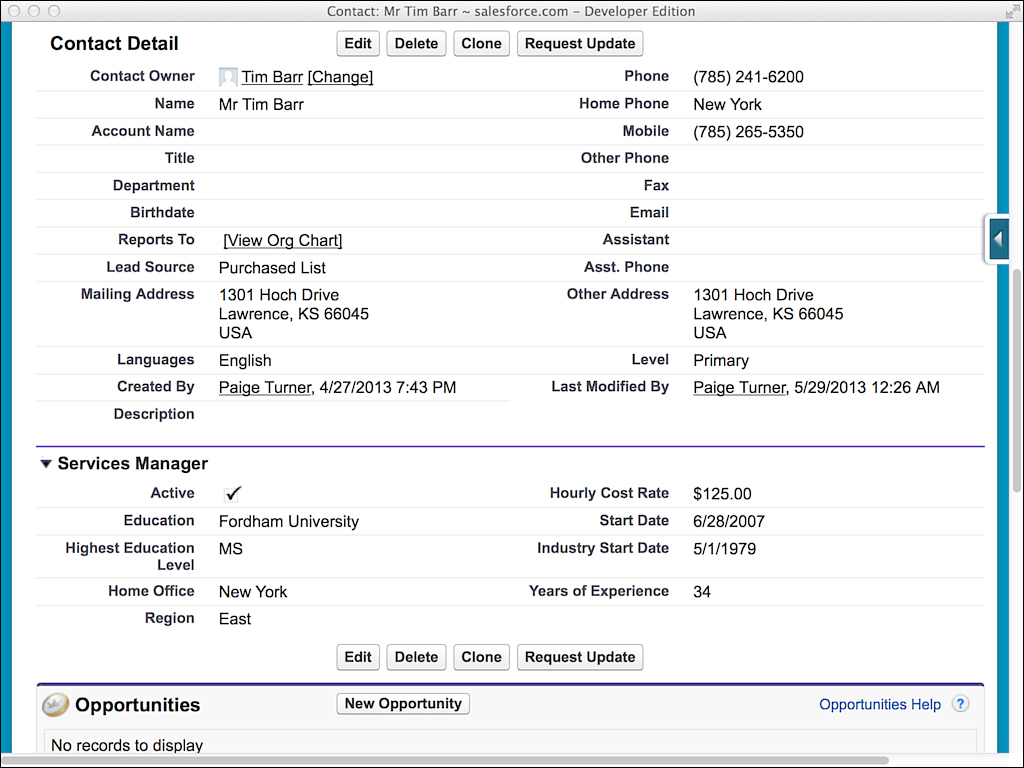
To get started with testing profiles, you need to transfer ownership of some records. Log in as the administrator. Grant your Consultant user ownership of a Contact record by visiting the record and clicking the Change link beside the owner name. Figure 3.16 shows the record with a new owner. Note that the owner is different from the user who created the record.
Repeat the same process to transfer ownership of a Project to your user in the Staffing Coordinator profile.
Test the Consultant Profile
Now log in as a user in the Consultant profile. Click the Contacts tab and click the Go button. You should see the Contact record. Using the Timecard tab, verify that you can create a new record. Do the same for the Skills tab. Note that the Assignment tab does not contain a New button. That’s because the Consultant profile prohibits this user from creating an Assignment record. Also notice that the Hourly Cost field is hidden.
Before you leave this record, click the New Skill button and add a few skills to the consultant. Then click around in the other tabs to verify that the consultant cannot create a Project or Contact and cannot see the hidden fields in these objects.
Test the Staffing Coordinator Profile
When you’re satisfied with the Consultant, log out and log in as a Staffing Coordinator. Verify the following behaviors of this profile:
![]() Can create, edit, and delete Projects and view all their fields
Can create, edit, and delete Projects and view all their fields
![]() Can create, edit, and delete Assignments
Can create, edit, and delete Assignments
![]() Can create, edit, and delete Contacts
Can create, edit, and delete Contacts
![]() Cannot create, edit, or delete Skills
Cannot create, edit, or delete Skills
![]() Cannot create, read, edit, or delete Timecards
Cannot create, read, edit, or delete Timecards
Test the Executive Role, Vice President Profile
Log in as your Executive VP user and verify that this user has full access to any of the records owned by the other users. This includes the ability to edit, delete, and change ownership and share the records.
Recall that the privileged access of this user stems from a combination of two Force.com security features:
1. Executive role—The Executive role is at the top of the role hierarchy. All Project and Resource records owned by users below this level are automatically shared with users belonging to the Executive role.
2. Vice President profile—The Vice President profile has full access to all the objects and fields used in the Services Manager.
Test Business Unit Collaboration
Say that the Central business unit’s Staffing Coordinator requests a specialized consultant for a high-profile project, but this consultant works in the West. Verify that the security model supports this scenario using the following steps:
1. Log in as the System Administrator or an Executive VP user.
2. Locate the record of a Contact working in the West. Verify this by clicking the Contact record’s Owner field and examining the value of that user’s role.
3. Click the Sharing button.
4. Click the Add button.
5. In the Search drop-down list, select Roles.
6. Select Role: Central and click the Add button. The Share With list now contains Role: Central. Keep the Access Level at Read Only because you do not want the Central users to be modifying this West-owned Contact.
7. Click the Save button.
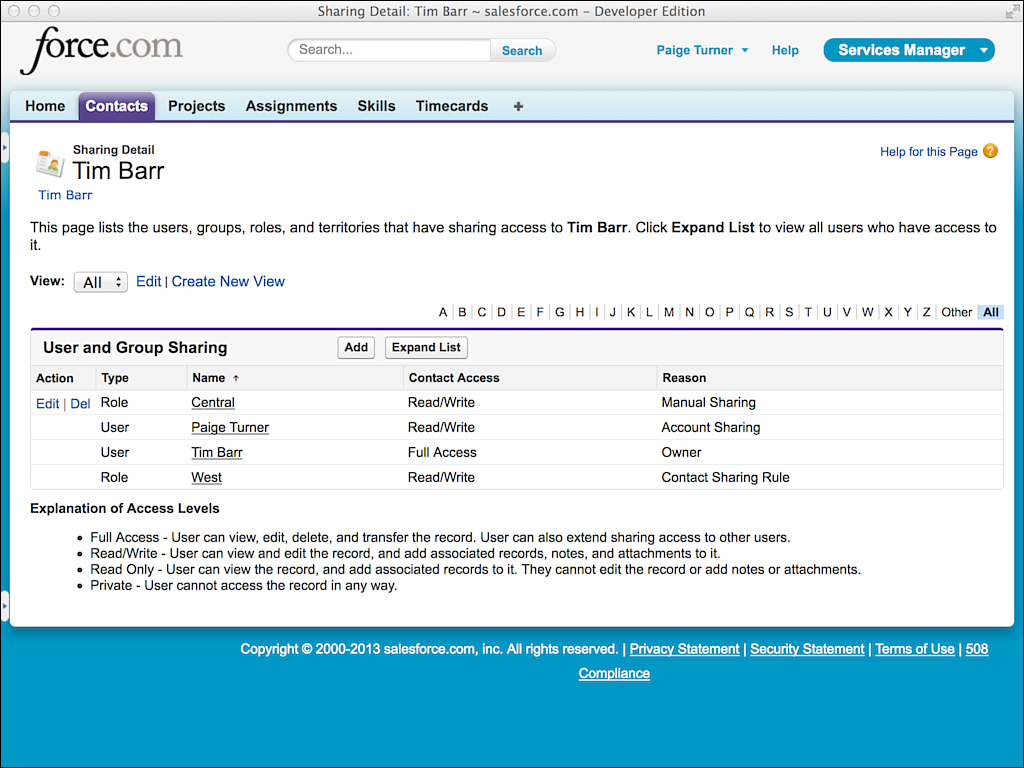
The sharing detail screen for this Contact should look like Figure 3.17. Note the presence of both the sharing rule and the newly added manual share.
Now that the record is shared with Central, it’s time to test it. Make sure you’re logged in as the System Administrator. Modify the Staffing Coordinator user so that it belongs to the Central role, and log in as that user. Staff the West consultant to a project by creating an Assignment, setting this consultant as the Contact. If you are able to do this, the manual share is working as intended.