
Getting Started with Visualforce
This subsection offers a path to getting your hands on Visualforce, divided into three parts, as follows:
1. Development process—Begin your development contrasting Visualforce with standard Web application development.
2. Development tools—Take a look at Visualforce development in the Force.com IDE and the native user interface.
3. “Hello World” example—Build your first Visualforce page with a custom controller.
Development Process
Visualforce development projects are much like standard Web application development projects. They have server-side logic to be coded, and user interfaces to be designed, wired up, and tested. User interface developers must collaborate closely with their server-side counterparts to make sure that the necessary data and logic are available to them. The user interfaces themselves are changing rapidly to satisfy the aesthetic and usability demands of project stakeholders.
Unlike with other Web application projects, Force.com eliminates much of the work of choosing and integrating Web frameworks. In terms of simply serving data-driven Web content, Force.com is the only framework you need. The important task then becomes strategizing on how best to use the platform to minimize custom development effort and maintenance cost while maximizing reuse and flexibility.
Walk through the native user interface and think carefully about what features you can reuse, extend, and override. Force.com offers a lot of user interface functionality by default and exposes a variety of hooks into it. Work with the native user interface where possible, rather than circumventing it. The further your project goes toward a fully custom user interface, the more work you spend to implement things that are potentially already provided, maintained, and constantly improved by Force.com.
Development Tools
The two tools for working with Visualforce are the native user interface and the Force.com IDE. The examples in this book can be built in either tool, but all screenshots are shown from the Force.com IDE.
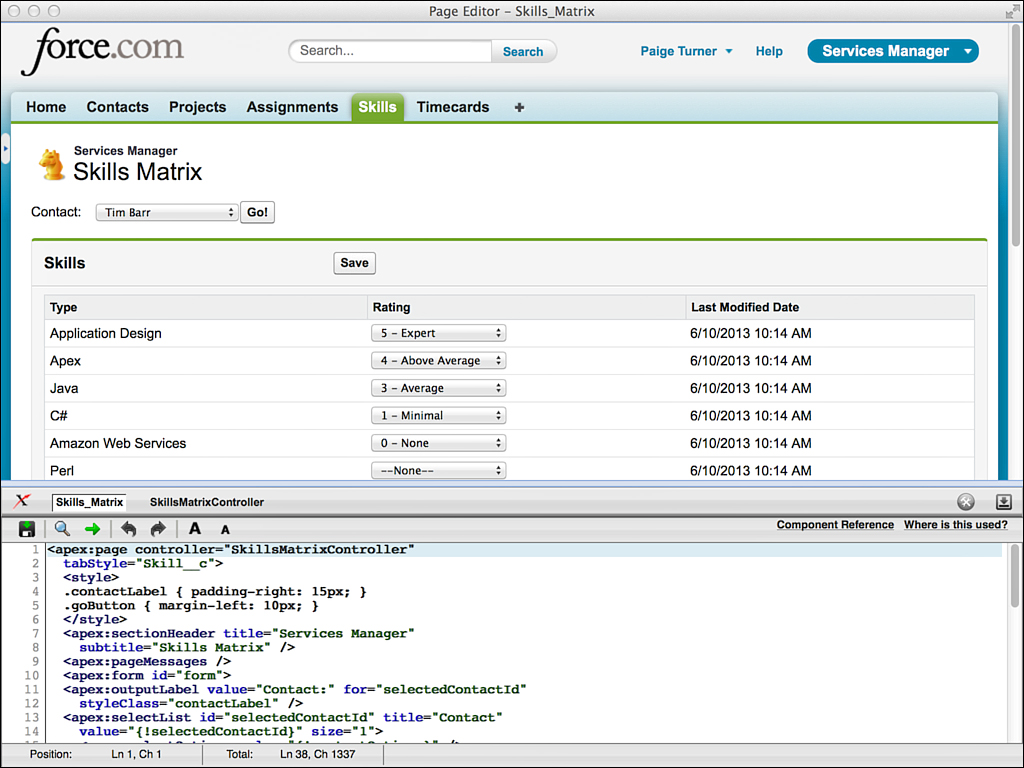
In the native user interface, developers can enable a footer on the bottom of all Visualforce pages that includes syntax highlighting and an integrated help system. Called development mode, it’s enabled on a per-user basis; you can enable it by visiting the Personal Setup area and clicking My Personal Information, Personal Information and checking both the Development Mode and Show View State in Development Mode boxes. You must have Customize Application permission enabled on your profile to select these options. With development mode enabled, you can create new Visualforce pages on the fly by visiting them (for example, /apex/myPage) as well as edit existing pages. Figure 6.2 shows an example of editing a Visualforce page in development mode.
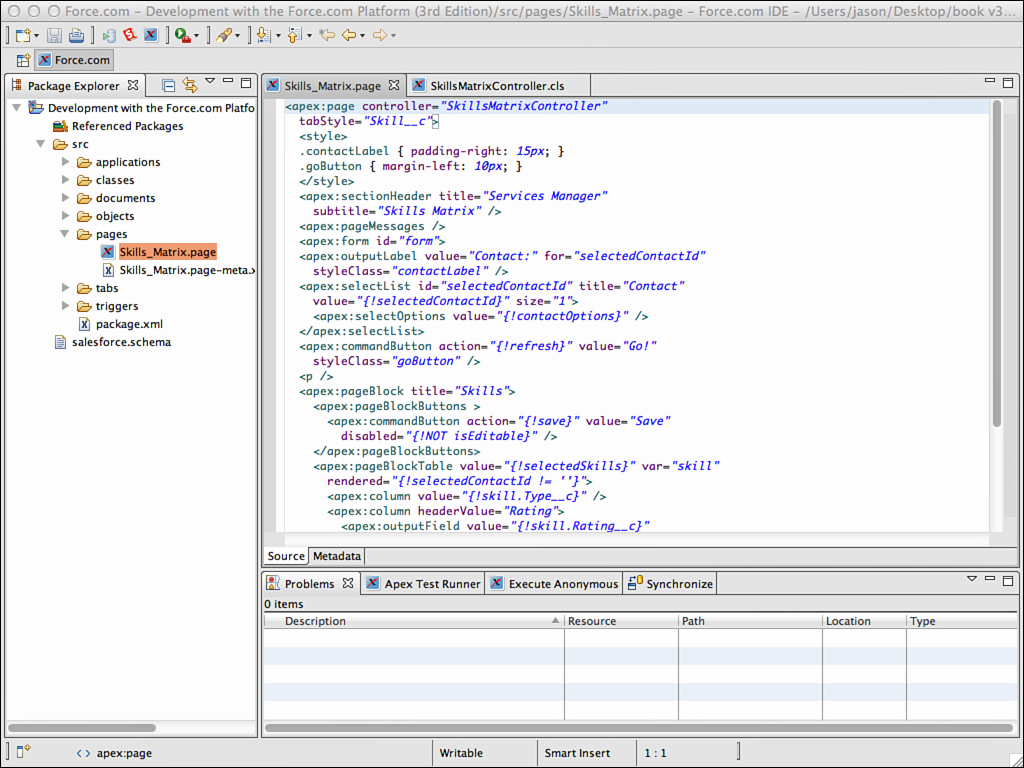
Force.com IDE integrates Visualforce pages and controllers into the familiar Eclipse user interface. In Figure 6.3, the Visualforce page editor is active. You’ve already worked with the Force.com IDE to create triggers. Visualforce controllers are displayed in the folder named classes. Visualforce pages are in a separate folder named pages.
“Hello World” Example
To get a sense for Visualforce controllers and pages, follow these steps to create a simple working example:
1. Open the Force.com IDE, select a Force.com Project, and select File, New, Visualforce Page. Alternatively, you can right-click any object within a Force.com Project to reach the New menu.
2. Enter MyPage6_1 for the label, press Tab, and click the Finish button.
3. In the page editor, enter the code shown in Listing 6.1. Do not save it yet. If you do, it will fail to compile because it references a controller class that doesn’t exist.
<apex:page controller="MyPageController6_1">
<apex:form>
Your name: <apex:inputText value="{!name}" />
<apex:outputText value="{!message}" />
<apex:commandButton action="{!hello}" value="Say Hi" />
</apex:form>
</apex:page>
4. Select File, New, Apex Class. Enter MyPageController6_1 for the name and click the Finish button.
5. In the Apex code editor, enter the code shown in Listing 6.2. Select File, Save All to save both the controller and the page code. Check the Problems view to make sure that there are no compilation errors.
Listing 6.2 MyPageController6_1 Code
public class MyPageController6_1 {
public String name { get; set; }
public String message { get; private set; }
public PageReference hello() {
message = 'Hello, ' + name;
return null;
}
}
6. In your Web browser, log in to Force.com and edit the URL to remove everything after the hostname, replacing it with /apex/MyPage6_1. Your URL should look something like this: https://na6.salesforce.com/apex/MyPage6_1. You should see your custom Visualforce page. Enter your name and click the Say Hi button to see the hello message.