
Project 27: Dutch Rabbit
There are between fifty and one hundred breeds of domestic rabbit—it depends on who you talk to—from dwarf rabbits weighing as little as two pounds to giant rabbits weighing as much as fifteen pounds. Dutch rabbits are of small to medium size. They are popular as both pets and painting subjects!

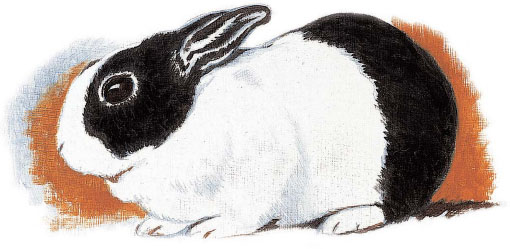
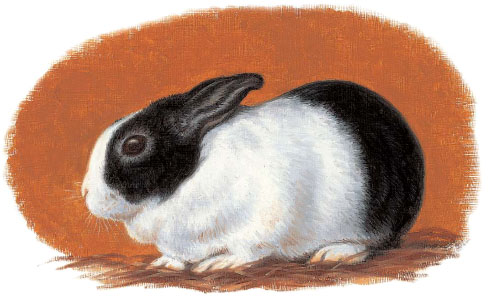
Reference Photo
Materials
Paints
Burnt Sienna
Burnt Umber
Cadmium Red Light
Payne’s Gray
Titanium White
Ultramarine Blue
Yellow Ochre
Brushes
no. 0 and 1 rounds
no. 2 and 4 filberts

1 Establish the Lights, Darks and Basic Form
Lightly sketch the rabbit with pencil. Use Payne’s Gray and a no. 1 round to paint the basic lights and darks. Use a no. 2 filbert for the broader areas.
2 Paint the Darker Values
For the black fur, mix Burnt Umber and Ultramarine Blue, and paint with a no. 4 filbert. Use short brushstrokes in the direction of fur growth. Use a no. 1 round for the smaller details, such as the ears. Paint the eye with some of the black mixture with more Burnt Umber added.
To paint the shadows under the belly, between the toes and under the neck, use Burnt Umber and a no. 1 round. Dip your brush in Liquin only when the paint seems too thick.

3 Paint the Shadows and Begin the Details
For whatever background you choose, be sure to soften the edges of the dark fur color against it using a no. 2 filbert. Next mix the bluish shadow color for the white part of the fur with Titanium White, Ultramarine Blue and a small amount of Burnt Sienna. With a no. 4 filbert, paint with brushstrokes that follow the hair growth. For the bluish shadows in the black fur, add a little Burnt Umber to some of the color you just mixed. With a no. 1 round, paint around the eye and begin painting detail in the fur of the ear and other areas.
Tip
When painting fur, use parallel brushstrokes that follow the direction of the hair growth. Be sure to vary your strokes—make some slightly longer and some a little shorter—and vary the direction of the strokes a little. This will make the fur look more natural, and you’ll avoid the “blow-dried” look.
DUTCH RABBIT
Oil on gesso-primed Masonite
8” × 10” (20cm × 25cm)
4 Paint Lightest Values, Create Fur and Add Details
Paint over the areas of fur where you left the white of the panel showing with Titanium White and a no. 4 filbert, using brushstrokes that overlap the bluish shadow areas with individual strokes to create a furry look. Follow the rabbit’s hair pattern. Use separate no. 1 rounds, one for the bluish shadow color and one for the black fur color, to blend the edges where the white and black fur meet.
For the pinkish nose, mix Cadmium Red Light, Yellow Ochre, Titanium White and a bit of Burnt Umber. Paint with a no. 0 round. Tone it down with a little Titanium White and a no. 1 round if needed. Paint the whiskers with Titanium White using a no. 0 round. To integrate the rabbit with its surroundings (in this example, straw), reflect a little of the straw color up onto the bluish shadows on the rabbit with a few brushstrokes. (I wiped most of the paint off on a paper towel first so I wouldn’t overdo it).