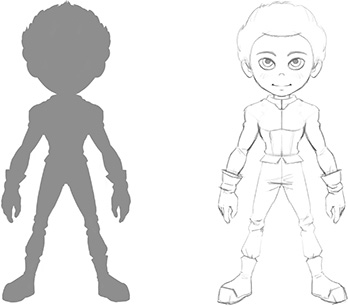
Base Design
Next, you’re going to create your base design by taking your final thumbnail and turning it into a drawing. Just sketch some strokes around the borders and define some of the figure’s interior shapes. At this stage, you want to end up with a basic version of the character, so don’t worry too much about details; you’ll add those in the next pass.
You’ll also be adding clothing at this stage and you can place as many different variations as you want over the silhouette. It’s OK to explore and create different versions of this base design, so that later on you can choose the designs you like, mix them together, and keep modifying them until you achieve the design you like best. However, keep in mind you don’t want to add things that will make the design too complex later, so you should avoid complex design elements and aim for a more easily achievable design.
There is no need for a really refined drawing at this point; a quick rough sketch will do, such as the one in Figure 5.3. It will help you understand how the character may eventually look so that later you can dive into the specific design of each of its parts, and finally combine everything for a clean finished version. If something doesn’t look great, don’t worry, there’s still a lot of time to change things and get them to work nicely.
As you can see, the hairstyle is not yet well defined; that’s one of the parts of the character that will require some technical thinking, as hair is always a challenge. If you want to go for realistic hair particles (you can use 3D particles to grow hair on a surface, comb it, and cut it to create the hairstyle, and later add the effects of gravity or wind to it), you need to have a detailed understanding of how they look and move to make sure your hairstyle will work when designed using particles (otherwise it’s easy to screw things up). If you prefer to go with a hand-modeled mesh, you’ll have more options, but you’ll also want to keep in mind the limitations of the mesh method. For this character, you will use a mesh, as it’s easier, and for this type of character design it will work just fine.
For now, Jim’s face is also just a placeholder that you will finish in the next section of this chapter.

