
Chapter 9. Working with outsiders
Chapter Learning Objectives
![]() Understand your client’s needs and goals.
Understand your client’s needs and goals.
![]() Create designs for the targeted demographics and audiences.
Create designs for the targeted demographics and audiences.
![]() Consider copyright, permissions, and licensing.
Consider copyright, permissions, and licensing.
![]() Identify key elements of project management.
Identify key elements of project management.
![]() Communicate about projects.
Communicate about projects.
Chapter ACA Objectives
DOMAIN 1.0
SETTING PROJECT REQUIREMENTS
1.1 Identify the purpose, audience, and audience needs for preparing print and digital media publications.
1.2 Summarize how designers make decisions about the type of content to include in a project, including considerations such as copyright, project fit, permissions, and licensing.
1.3 Demonstrate knowledge of project management tasks and responsibilities.
1.4 Communicate with others (such as peers and clients) about design plans.
As a designer, you need to work with others. Being a designer and being an artist are two different careers, but most people who do creative work for a living need to do both.
If you love being creative and enjoy spending time coming up with the most amazing designs, you can turn a passion into a paying career. As your design skills grow, along with them you will probably develop an immense passion for creating designs for others. The secret to this part of the job is twofold: really listen and really care. That sounds easy, but challenging clients, coworkers, and deadlines can be a test of patience, especially when you’re already juggling all the details of creating a project.
In this chapter, you’ll learn more about managing design projects and smoothing out their inevitable bumps. From leading original client briefings, to understanding copyright and licensing issues, to developing core project management skills, this chapter offers advice to help you provide your clients with clear objectives and project deliverables that ensure everyone’s expectations are met.
Who You’re Talking FOR and Who You’re Talking TO
The first step in designing for a particular project is to understand the client’s needs. This is critical because, among other things, the client pays the bills. First and foremost, the client is hiring you to speak for them. As a designer, that’s a weighty responsibility. You are being trusted to communicate for an entire company or cause. Therefore, you first and foremost need to address that client’s needs and goals for the project. This will be the guiding principle when answering design questions. You must constantly remember your goals and focus narrowly on them to streamline your workflow and minimize distractions.
![]() Video 9.1
Video 9.1
Let’s look at a few example scenarios:
![]() Rockin’ Zombies is a metal-opera-jazz-bluegrass fusion band that wants to promote an upcoming free concert at the local farmers’ market.
Rockin’ Zombies is a metal-opera-jazz-bluegrass fusion band that wants to promote an upcoming free concert at the local farmers’ market.
![]() Hoi Polloi Church needs a brochure for its project to solicit volunteers and donations to help orphaned children recover from Hurricane Sally.
Hoi Polloi Church needs a brochure for its project to solicit volunteers and donations to help orphaned children recover from Hurricane Sally.
![]() OfficeHome Custodial Services wants a flyer to share with businesses about its upscale, environmentally friendly office cleaning services.
OfficeHome Custodial Services wants a flyer to share with businesses about its upscale, environmentally friendly office cleaning services.
![]() Zak’s Bulldozer wants to promote its tree removal for residential homes using low-impact tools.
Zak’s Bulldozer wants to promote its tree removal for residential homes using low-impact tools.
![]() The city’s Health Department wants a campaign to promote healthy eating and active lifestyle changes and to inform and warn people about common bad habits.
The city’s Health Department wants a campaign to promote healthy eating and active lifestyle changes and to inform and warn people about common bad habits.
![]() Pop-Lite is a new, collapsible photographer’s light, and the inventors need a logo and image for their kickstarter campaign.
Pop-Lite is a new, collapsible photographer’s light, and the inventors need a logo and image for their kickstarter campaign.
Each project has different goals, right? Some want to give away something for free. Some want to make money. Some want to solicit help from others. It’s important to help the client pin down the project goals—and that can be difficult to do.
Single Voice, Single Message
Here’s a brainteaser. You have 20 close friends, and you can no longer understand what they say. Why? They are close enough to talk to one another. They are all speaking your language. They are all speaking loud enough for you to hear clearly. They have no health or physical impairments. So what’s happening?
![]() Video 9.2
Video 9.2
If a design says too much, it says nothing. It becomes “noisy” and makes it difficult for the viewer to focus on the main idea. This reality is similar to the design concept of focal point. Design projects have a kind of focal point, too. It’s important to clearly define and pin down the most important goals of a project. Sometimes, clients are trying to clearly define their company purpose, vision, or dreams for their organization. Hearing the overall goals and dreams for the business are very helpful in the design process, and necessary so that you understand your client. But to get a project done efficiently—and create a project that communicates well—you must work with the client to establish and narrow the goals for this particular project (Figure 9.1).

Figure 9.1 Be sure you have a clear and concise understanding of the client’s goals for the project.
The short version of a campaign’s goals is often called the “elevator pitch” because it summarizes the project in the time that it would take for an elevator ride. It’s communicating your purpose in a short, simple sentence. I normally push a client to shoot for seven words or less. The goal is to clearly define the goals for this particular design project.
Here are some elevator pitches related to the previous scenarios:
![]() Come to our free concert.
Come to our free concert.
![]() Help child victims of a disaster.
Help child victims of a disaster.
![]() Get safe cleaning services for your office.
Get safe cleaning services for your office.
![]() Trees removed without damaging your yard.
Trees removed without damaging your yard.
![]() Get healthy and avoid hidden dangers.
Get healthy and avoid hidden dangers.
![]() Get fun and functional little photo lights.
Get fun and functional little photo lights.
Admittedly, these pitches are not elegant or enticing. There’s no “pop” to the message. But they are the very core of what you’re trying to communicate. It is the reason your client is paying you to design the art. You’ll need more detail than this to produce the best design, but focusing on this core goal can help you reign in the insidious forces of project creep (which I’ll talk about later). But first, let this sink in:
The client’s goals are the # 1 priority.
If the goal is unclear, the finished product will be unclear. Figure out the goal and you can always come back to it as a “home base” when the project starts to grow or lose its focus. Sometimes the goal isn’t obvious or turns out to be different than it first appeared. But it’s always critical, and one of your first jobs is to help the client focus on the primary goal of the project. Nonetheless, at the end of the day, you work for the client, so the client calls the shots, has the final say, and makes the decisions—even if you disagree.
Now let’s talk about the second most important person on the project—the one who doesn’t really exist. I’m talking about the ideal audience.
![]() ACA Objective 1.2
ACA Objective 1.2
Ideal Ivan and Danielle Demographic
In real life, you shouldn’t judge people, make assumptions, and lump them together. But we do. And as designers, we must! This is called developing a “demographic” for the project and “identifying the target audience.” It’s a critical step in helping your clients bridge the gap to the audience they wants to reach. You do this by identifying the common characteristics of that audience and creating an image in everyone’s minds of the typical customer: Ideal Ivan and Danielle Demographic. Some clients will say “everybody needs my product,” but those clients will still need to focus on a specific target demographic for this project. As the old saying goes, “Aim at nothing, and you’ll hit it every time.” Those are wise words, especially when identifying a target audience.
![]() Video 9.3
Video 9.3
Identifying a target demographic (Figure 9.2) for your project is a critical step, second only to defining the client goals. And generally, it’s also a part of those client goals. For example, when you want to create a new fishing pole, you can easily picture your target audience: fishermen. So you’re probably not going to use the same graphics, words, images, and feel as you would to reach a punk rock audience. And at the same time, expectant mothers probably wouldn’t be drawn in by images that would reach your fishermen or punk rocker target.

Creating a demographic helps you focus on who you want to get your message. It’s understanding the goals of your listener/viewer as well as the speaker, your client. You need to make sure you share information in a way that will connect or resonate with that audience. And if you understand what your audience needs and feels, you can show how what you’re sharing meets those needs.
The easiest way to do this is to create imaginary “perfect fits” for your client’s project. Here are some points to consider:
![]() Income: Determine if you want to focus on quality, exclusivity, or price.
Income: Determine if you want to focus on quality, exclusivity, or price.
![]() Education: Establish the vocabulary and complexity of the design.
Education: Establish the vocabulary and complexity of the design.
![]() Age: Dictate the general appeal, attitude, and vocabulary.
Age: Dictate the general appeal, attitude, and vocabulary.
![]() Hobbies: Help choose images, vocabulary, and attitudes.
Hobbies: Help choose images, vocabulary, and attitudes.
![]() Concerns, cares, and passions: Identify core beliefs, trigger points, and so on.
Concerns, cares, and passions: Identify core beliefs, trigger points, and so on.
It’s pretty easy to see how different audiences will need different images. You don’t want images of extreme sports in an ad aimed at expectant mothers. You wouldn’t use a crowded nightclub image in a design for a camping and canoe outfitter company. It’s a pretty obvious concept, but inexperienced designers sometimes design to please themselves, and that isn’t always what pleases the target audience.
What makes your audience unique? Who has the problems that this product solves? Have those pictures in your mind. Work these ideas over with your client and help them envision their “typical customer.” Then look for images that will appeal to that ideal customer, this project’s target demographic.
Think of yourself as a matchmaker. You’re trying to introduce your client to the perfect customer or consumer. Speak in the language that the ideal clients would want to hear, and use images that will bring their lifestyle and outlook together with your client.
The Golden Rule for Client Projects
Design is about helping others with their vision. It’s about communicating a message. So when it comes down to it, use the business version of the golden rule: He that has the gold makes the rules.
![]() Video 9.4
Video 9.4
Ultimately, you work for your clients. Help them see what you regard as the most effective way to reach the audience and identify the right questions to ask, but don’t fight with them. Your clients have insight or perspective about their target audience that you are unaware of. When you disagree with clients about a design decision, help them realize their vision for their project. If you don’t like it, you don’t have to put the final piece in your portfolio, but you’ll still get to put their check in your bank. If it comes down to what the client wants versus what you think the identified audience will respond to, do what the client asks. It’s the client’s project, audience, and money (Figure 9.3).

This rule has one exception that you need to follow at all times. When your client asks you to skirt copyright law, you are still responsible to respect the law and your fellow designers. Often they’re just confused, and you can help them understand that you can’t copy other designs or employ copyrighted materials without authorization. Along those lines, let’s take a moment to talk about copyright.
![]() ACA Objective 1.2
ACA Objective 1.2
Copyrights and Wrongs
Copyright is actually an amazing set of laws that seeks to protect and promote artists along with their art, creativity, and learning. It’s gotten a really bad rap, and you should set aside any preconceived ideas for a bit and think through the copyright concept (Figure 9.4).

Copyright law is generally misunderstood by many people, so understanding it is an awesome way to score high on trivia night. You may also help your struggling author and artist friends realize that they don’t have to pay an attorney tons of money to “make sure they get their stuff copyrighted.” You can do it for them, or show them how to do it themselves. It’s free and easy. As a matter of fact, it’s probably already done.
Keep in mind that I’m a teacher and writer, not a lawyer. This chapter is not legal advice; it’s just intended to help you understand the law and the reasons it exists so you can appreciate it. It’s easier to obey a law that you understand and appreciate, and copyright laws protect our rights. So let’s get on board.
Here’s something to remember: Copyright law promotes freedom and creativity. Let’s explore how.
Copyright Happens
The first thing to know is that copyright just happens. If something can be copied, then it’s copyrighted. You needn’t fill out any special forms, report to a government office, or do anything extra to put it in place. The law is written so that copyright happens as soon as something original and creative is recorded in a “fixed form.” This means that as soon as you write something down, sketch it out, or click the shutter on your camera, whatever you just recorded is copyrighted. The only reason you might take any additional steps is to establish verifiable proof of when a creation was copyrighted, because the person who can prove that he or she recorded it first owns the copyright.
![]() Video 9.5
Video 9.5
Imagine that you’re in a restaurant talking with a friend. During this conversation you make up a song on the spot. A famous singer in the booth behind yours hears you, and writes it down. He claims the copyright to those lyrics, makes a million bucks with your spontaneous song, and there’s little you can do about it. However, if you recorded it on your phone when you sang it, you recorded it in fixed form first. So, you own the copyright on the lyrics, and the artist now owes you a truck full of money. Kind of weird, eh?
Why does the law have this quirky little rule? Because the courts have to decide who actually owns copyright when its ownership is contested. And courts rely on tangible proof. So the law makes it simple by stating that she who first records something in fixed form wins. This way, you’re not going to try to sue someone if you have no proof that you were first. But even if you were, and you can’t prove it, you’re out of luck.
So why are there copyright notices on music, DVDs, and one of the first pages of this book? If we don’t need it, why do we display it?
Simply put, it reminds people who owns this copyrighted material. When no date and copyright symbol are displayed, people may think they can legally make photocopies of this book for their friends. Most people assume if no copyright notice appears, then no copyright exists. (They’re totally wrong.) The presence of a visible copyright statement discourages this conclusion and behavior.
So it certainly can’t cause any harm to scratch a copyright symbol on your art when you’re finished with it (Figure 9.5), but it’s more to remind the public than to protect you. You’re already protected by law. Adding the copyright symbol to your work is like putting one of those security system signs in your front yard. It won’t stop a really determined thief, but it can deter less committed offenders. If you think it destroys the look of your front yard, you don’t need it for protection.

Figure 9.5 You don’t need the mark or any sort of label, but it does help others know your work is copyrighted.
Placing a Copyright Notice in Digital Content
The beauty of digital files is that they have the ability to contain hidden information that never compromises the enjoyment of the document itself. As a result, you can add copyright information to digital content without having a visually distracting copyright notice on the artwork. You do this by adding information known as metadata to your digital files.
![]() Video 9.6
Video 9.6
Metadata is information that doesn’t show up on the document itself, but is hidden inside the file. This is a perfect way to store copyright information, contact information, and so on. On some digital cameras, metadata can even record the lens information, the location via GPS, whether a flash was attached and fired, the camera settings, and more. In digital files, metadata can share the computer on which it was created, the time, and even the name of the creator. Be sure to use metadata when you’re publishing your work online, whether it’s using Publish Online, exporting as an eBook, or exporting as a PDF, and always check files, such as images and graphics, that your clients give you to make sure that you’re not violating another designer’s means of making money when you’re trying to make some yourself.
Tip
A number of Adobe applications, including InDesign, Photoshop, and Illustrator, provide easy access to a file’s metadata. Choose File > File Info to see this metadata or add your own.
“But I’m not trying to make any money with their art, so it’s OK, right?!” Well, that’s a tough question with a few interesting rules attached.
![]() ACA Objective 1.2
ACA Objective 1.2
Playing Fair with Copyrighted Material
Can you use copyrighted material when you’re practicing with InDesign? Can you make a funny image using a movie poster by replacing the faces of the actors with the faces of your friends? What about using cool images from your favorite video game as you’re practicing with InDesign?
![]() Video 9.7
Video 9.7
All these uses are completely legit. The guys that came up with the copyright laws were very careful to make sure that the laws don’t limit—but promote—creativity. They did this with a set of ideas known as fair use.
Fair use policy is a set of rules that make sure copyright protection doesn’t come at the cost of creativity and freedom. Copyright can’t be used to limit someone’s personal growth or learning, freedom of speech, or artistic expression and creative exploration. Those ideas are more important than copyright, so copyright doesn’t apply when it gets in the way of these higher ideals. You are free to use copyrighted materials in the pursuit of these higher goals. Some people (mistakenly) believe that fair use doesn’t apply to copyrighted materials; but in fact, it only applies to copyrighted materials. Here is a list of issues that a court would consider when making a decision about fair use:
![]() Purpose: If you used the work to teach, learn, voice your own opinion, inspire you to create a new piece of art, or report news, you’re probably safe. Protected reasons include educational purposes (teaching, research), freedom of speech (commentary or criticism), news reporting, and transformative work (parody or using the work in a new way). It isn’t considered fair use if you’re making money from the use, using it just for entertainment, or trying to pass it off as your own work.
Purpose: If you used the work to teach, learn, voice your own opinion, inspire you to create a new piece of art, or report news, you’re probably safe. Protected reasons include educational purposes (teaching, research), freedom of speech (commentary or criticism), news reporting, and transformative work (parody or using the work in a new way). It isn’t considered fair use if you’re making money from the use, using it just for entertainment, or trying to pass it off as your own work.
![]() Nature: If the nature of the original work was factual, published information, or the work was critical to favoring education, you’re probably safe. Was the content already published, fact based, and important for society to know? Then you’re pretty safe to use the work. But if it was unpublished, creative (such as art, music, film, novels), and fictional, you’re probably not cleared to use it.
Nature: If the nature of the original work was factual, published information, or the work was critical to favoring education, you’re probably safe. Was the content already published, fact based, and important for society to know? Then you’re pretty safe to use the work. But if it was unpublished, creative (such as art, music, film, novels), and fictional, you’re probably not cleared to use it.
![]() Amount: If you use a small amount of a copyrighted work, it’s more likely that your use of the work was fair use. If you used only a small quantity—and not the main idea or focus of the work, or just enough to teach or learn from—you’re probably safe. If you used a large portion of the work or basically ripped off the central idea or the “heart of the work,” it isn’t fair use.
Amount: If you use a small amount of a copyrighted work, it’s more likely that your use of the work was fair use. If you used only a small quantity—and not the main idea or focus of the work, or just enough to teach or learn from—you’re probably safe. If you used a large portion of the work or basically ripped off the central idea or the “heart of the work,” it isn’t fair use.
![]() Effect: If nobody was harmed because of the action you took, then your action was probably fair use. If you used a legitimate copy of the original work, and it didn’t affect the sale of another copy, and you had no other way to get a copy, you’re in pretty good shape. But if your copy made it less likely that someone would buy the original or you made a large number of copies, you’re probably hurting the original creator, and that’s not fair use.
Effect: If nobody was harmed because of the action you took, then your action was probably fair use. If you used a legitimate copy of the original work, and it didn’t affect the sale of another copy, and you had no other way to get a copy, you’re in pretty good shape. But if your copy made it less likely that someone would buy the original or you made a large number of copies, you’re probably hurting the original creator, and that’s not fair use.
As mentioned earlier, copyright law really tries to address a simple question: “How can we promote more freedom and creativity in the world?” This is the question that copyright laws seek to answer. Fair use makes sure that beginning artists can experiment using anything they want. Just be sure not to share anything that might be another artist’s copyrighted work.
But as a beginning designer, how can you get quality assets to use in real-world projects? Happily, you have access to more free resources than ever before in history via the Internet and free stock photo sites. Let’s look at some in the next section.
Uncopyrighting
You have a couple ways in which to undo copyright. One is voluntary. An author can choose to release the copyright to his material. Believe it or not, this can be more difficult to do than you’d expect. Copyright law really tries to protect creators, and it can be difficult to not be protected by copyright law.
![]() Video 9.8
Video 9.8
The second way is to let the copyright expire. Copyrights normally expire between 50 and 100 years after the death of the original author, but exceptions to this rule and extensions can be requested. It’s beyond the scope of this book to discuss copyright at length, but it is important to realize that some materials have expired copyrights. When copyright is expired or released, the work is said to be in the public domain. This means that copyright no longer applies to the content, and you can use the material without worrying about infringement.
![]() ACA Objective 1.2
ACA Objective 1.2
Licensing
Licensing is another way that you can legally use copyrighted material. As designers and artists, licensing is fairly common because it allows you to use copyrighted material for a certain time and in a certain way, by paying a fee established by the copyright holder according to the use of the material.
Stock photos are really popular items licensed by photographers, and you can find them from many sources at varying prices. Stock photos are images for which the author retains copyright, but you can purchase a license to use these images in your designs. For almost everyone, this is a much less expensive solution than hiring a photographer to go to a location and shoot, process, and sell you the rights to an image.
Creative Commons
In the last decade or so, a lot of exploration has been done in finding creative ways to license creative works. Creative Commons licensing is built upon copyright law, but offers ways that artists can release their works for limited use, and still choose the way the works are used and shared.
Creative Commons licenses include many different combinations of the following attributes and use many different symbols to identify the type of license
Note
Adobe Stock is a great resource for sourcing stock images. You can easily search for stock images from the CC Libraries panel in InDesign, and download watermarked previews for use in your designs, prior to purchasing them for a client project.
(Figure 9.6). You’ll need to do some research when using Creative Commons licensed materials and when releasing assets with Creative Commons licensing.
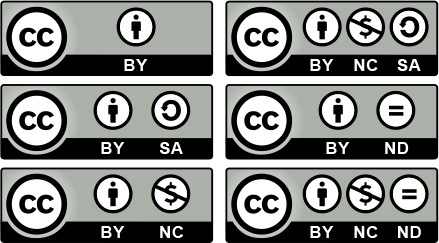
![]() Public Domain licenses, or “CC0” licenses, allow artists to release their works to the public domain. It’s a bit difficult to give your materials away to the public domain, but CC0 is generally recognized as a way to do so and is respected in most parts of the world.
Public Domain licenses, or “CC0” licenses, allow artists to release their works to the public domain. It’s a bit difficult to give your materials away to the public domain, but CC0 is generally recognized as a way to do so and is respected in most parts of the world.
![]() Attribution (marked as “BY”) requires that you credit the original author when using his or her work. You can do whatever you want with the work as long as you give that credit.
Attribution (marked as “BY”) requires that you credit the original author when using his or her work. You can do whatever you want with the work as long as you give that credit.
![]() ShareAlike (marked as “SA”) allows you to use the item in anything you want as long as your creation is shared under the same license as the original work.
ShareAlike (marked as “SA”) allows you to use the item in anything you want as long as your creation is shared under the same license as the original work.
![]() NoDerivs (marked as “ND”) requires that you not change the material when you incorporate it into your own work. You can use NoDerivs material freely, but you must pass it along without change.
NoDerivs (marked as “ND”) requires that you not change the material when you incorporate it into your own work. You can use NoDerivs material freely, but you must pass it along without change.
![]() NonCommercial (marked as “NC”) means that people can use your work in their own creative works as long as they don’t charge for it. You’re getting it free, so if you want to use it, then you have to be generous and also give away your work for free.
NonCommercial (marked as “NC”) means that people can use your work in their own creative works as long as they don’t charge for it. You’re getting it free, so if you want to use it, then you have to be generous and also give away your work for free.
Creative Commons licenses are widely accepted and used, and you can find a ton of amazing resources that use this licensing. If you have any questions about Creative Commons licenses, you can find out everything from a general overview to very detailed legal descriptions at www.creativecommons.org.
People Permissions
Because many assets you use in InDesign include photographs, we need to talk about extra permissions such as model releases. This type of release is required when a person’s face is identifiable in the photo and the image will be used to promote something—whether it’s a product or idea. Any work you do for a client is by definition a commercial use, and would require a model release for every identifiable face.
Think Like a Boss
Some might say that the only thing you need to know to succeed in life is how to solve a problem (Figure 9.7). That’s not how to solve a specific problem; that would be only an exercise in memory. A well-trained monkey can mimic a person’s actions and get a similar result. But he can’t think with the depth of a human. My personal preference for solving problems is to work to understand things deeply and explore all the nuances of a potential solution. But for others, this process is a little outside their comfort zones and they find it faster and easier to copy someone else’s solution.

To get design ideas for client projects, you could look at other designers’ projects for inspiration or look at designs created for a similar audience. You can look at online portfolios, such as Behance, for inspiration or use social media, such as Pinterest or Instagram.
But what do you do when you’re the leader? What happens when you need to do something new and fresh for your job? What if the boss doesn’t know how to do it and that’s why she hired you? How do you respond when the client’s main request is this: “Do something that hasn’t been done before.”
That’s where the problem-solving process comes in—the only skill you really need to be successful. If you can do that, you can figure out anything.
![]() ACA Objective 1.3
ACA Objective 1.3
Project Management
Project management is really just the problem-solving process in action—geared toward supervising resources, people, and team-based projects. The DNA of project management is problem solving and organizing the process so that you tackle the right issues at the right time using the right tools. Project-management systems take on a million forms (as do problem-solving systems), but if you truly grasp the ideas behind the labels, you can translate them into whatever management strategy your client, team, or boss is using.
![]() Video 9.9
Video 9.9
The problem-solving process is creative in itself. A good solution to a problem can be artistic in its elegance and efficient grace. A problem solved well can be beautiful. This is the most important section of this whole book, because if you can grasp problem solving, you can learn whatever you need to learn now and in the future. Here is where we shove you out of the nest.
The following process will help when you need to solve a technical problem on hardware or equipment, handle a design problem within InDesign, or figure out how to get your hand out of that jar you got it stuck in. It will help you translate a tutorial written for an earlier version of InDesign into your current version (things change fast these days). And it boils down to three simple steps: learn, think, and do.
Learn
The first step of a problem-solving process is to learn. It includes two important steps: Learning what the problem is, and learning how others have solved similar problems (research and investigate). It seems simple, but the process can be confusing. Most projects with major problems get stuck at this initial step because they didn’t learn well—or at all. Let’s talk about them.
![]() Video 9.10
Video 9.10
Understand the Problem
I’ve already talked about understanding the problem earlier in the chapter: The first step of every project is to understand the problem. For most design projects, you must figure out how to most effectively help your client share goals with the target audience. If the client is clear, then it’s about getting to the essence of what you want to communicate, and communicate it so that your target audience can act on it.
Mess it up here, and by definition, you are not solving the problem. You haven’t properly identified it, so how can you solve it? You might be solving a problem, but you’re not solving the problem. Sometimes you can actually make the problem worse by implementing a plan that creates a new problem without solving the real one.
You can avoid trouble down the road by clearly understanding and defining the problem at the start. “My client wants to sell a million interactive eBooks” is not a problem you can solve, it’s a desire the client has. So what’s the problem you can help with? He hasn’t sold eBooks before? That’s not it either. How do you get to the bottom of the problem?
Start with good questions (Figure 9.8): Do people need an interactive eBook? If so, do people know interactive eBooks are a thing? If so, do they choose a competing eBook? If so, why do they choose this other eBook? Why do you think they should choose the eBook you will create for your client? Who would be most likely to buy the eBook? What is your budget for eBook advertising? What do you want to spend on this particular project? What are your expectations?

Figure 9.8 Nailing down the client’s goals and preferences at the beginning of the project will help develop an efficient plan.
Many clients become frustrated with this set of questions. They just want to see some action so that they can feel like they’re doing something. But let me repeat that old saying: “Aim at nothing, and you’ll hit it every time.” This is when you sharpen your axe so you don’t have to bang at the tree all day.
This part of the project can be fairly informal on smaller projects, but can be huge on large projects. Here’s a list of critical questions to answer:
![]() Purpose: Why are you doing this design project? What result would you consider a success?
Purpose: Why are you doing this design project? What result would you consider a success?
![]() Target: Who needs this message or product? Describe your typical customer.
Target: Who needs this message or product? Describe your typical customer.
![]() Limits: What are the limits for the project? Budget and time are most necessary to nail down.
Limits: What are the limits for the project? Budget and time are most necessary to nail down.
![]() Preferences: Aside from the results already discussed, are there any other results you’d like or expect from this project?
Preferences: Aside from the results already discussed, are there any other results you’d like or expect from this project?
These examples are intended to show how quickly you can determine a client’s expectations. The answers to these questions define the size of the job and how you’ll best be able to work with the client.
Sketches and written notes from this initial step will help. Gather as much information as you can to make the rest of the project go smoothly. The more you find out now, the less you’ll have to redesign later, because the client hates the color, the layout, or the general direction you took the project. Invest the time now, or pay it back with interest later. With a clear idea of what the problem is, you’ll get the information you need to solve it in the next step.
Research and Investigate
After you understand exactly what your client is expecting, you can start doing the research to arrive at the answers you need. Let’s take a quick look at that word:
re-search. It literally means “search again.” Lots of people fail to re-search, they just search. They look at the most obvious places and approaches, and if things don’t immediately click, they settle for a poor, but quick and easy solution.
Depending on the job, researching can be a relatively quick process. Find out about the competitive products, learn about the problem you’re trying to solve, and understand the demographic you’re going to target. Sometimes this can be done in your initial conversations with the client, but for larger projects you may need to spend more time. The main thing is to be sure to analyze the problem, and look for ways that others have solved similar problems. Again, the more research you do, the better information you’ll have about the problem you’re trying to solve, which will help you with the next step.
Think
The next couple of steps represent the “thinking” phase. You can do this quickly using a pen and napkin, or you can do it in depth and generate tons of documentation along the way, particularly on large projects. But thinking is the part that most of us often mistake as the beginning. Remember that if the learning step isn’t done well, your thinking step might be headed in the wrong direction.
![]() Video 9.11
Video 9.11
As a designer, you’ll often do much of your thinking on paper (Figure 9.9). Sketch it out first and have that reference to show the client and to come back to for clarity.

Brainstorm
Like “re-search,” you need to really grasp the meaning of brainstorm. It’s a brain-storm. Not a brain drizzle. A full-on typhoon of ideas (Figure 9.10). It’s critical—absolutely critical—that you get out of the “analyze” mode of thinking and into your “creative” mode. They are two different mindsets. Actually, they’re opposite mindsets. If you start thinking critically instead of creatively, you’ve changed direction and will lose ground on your brainstorming task. If you start moving in the critical direction, that’s the opposite of creative. Stop that! Don’t try to work hard on brainstorming. Work relaxed instead.

Figure 9.10 Brainstorming is an inherently disorganized and messy process—clean up your ideas later.
But sometimes analysis happens. You start analyzing how to complete your ideas when you should be creating them. Here are some of the things that trigger the critical mode of thinking. Don’t do them when brainstorming.
![]() The No-No’s: Judging your ideas. Trying to finish an idea when you should still be brainstorming. Getting stuck on a particular idea. Planning out the project. Thinking about how much time you have. Thinking about the budget. Thinking about numbers. Grouping or sorting your ideas. Developing the idea that you think is best.
The No-No’s: Judging your ideas. Trying to finish an idea when you should still be brainstorming. Getting stuck on a particular idea. Planning out the project. Thinking about how much time you have. Thinking about the budget. Thinking about numbers. Grouping or sorting your ideas. Developing the idea that you think is best.
Here’s what you should be doing:
![]() The Go-Go’s: Listen to music. Look at cool art online. Call a friend. Doodle on something else. Read a poem. Take a break. Go for a walk. Listen to some comedy radio. Write a haiku. Meditate for 5 minutes. Exercise. Sleep on it.
The Go-Go’s: Listen to music. Look at cool art online. Call a friend. Doodle on something else. Read a poem. Take a break. Go for a walk. Listen to some comedy radio. Write a haiku. Meditate for 5 minutes. Exercise. Sleep on it.
When you’re in brainstorming mode, don’t edit your ideas. Let them flow. If a crummy idea pops into your head, put it on paper. If you don’t, it will keep popping up until it’s been given a little respect. Give the weak ideas respect. They open doors for the great ones. Brainstorming is completely a matter of creating ideas.
Pick and Plan
After brainstorming, you need to pick a solution that you generated in your brainstorming session and plan things out. You’ll find that the plan you go with is rarely your first idea. Through the process of brainstorming, the idea will go through several iterations. A common mistake for beginners is to fall in love with an early idea—beware of this pitfall (Figure 9.11). Your best idea is lurking in the background of your mind, and you have to get rid of all the simple ideas that pop up first. For a small project or a one-person team, you might quickly hammer out a contract and get to work, but in larger projects, the planning needs to be detailed and focused.
![]() Video 9.12
Video 9.12

The larger the project, the more formal this process will be. Small projects with just one person working on them will have little planning needed for moving forward. But larger projects will need a project plan to set the project requirements for the team.
Setting Project Requirements
This is where the action happens. Look through the ideas you’ve generated and pick the one that seems best and plan how to make it happen. This is where you determine exactly what needs to be done, establish some direction, and identify a clear target. Did you catch that last sentence? This planning stage (which most creative types naturally tend to resist, myself included) is where you clarify what needs to be done, establish your direction, and identify a clear target. We resist it because it seems to limit us. It ropes in our creative freedom and it gives us a checklist—all things that many creatives hate. These things are creative kryptonite—or at least we think they are. But let’s really consider this for a moment.
If you don’t perform this admittedly tedious step, what won’t you have? You won’t have a definition of what needs to be done, a direction to head in, or a target to hit. Everyone will be in the dark. Although this step doesn’t seem creative in itself, creativity isn’t the priority at this particular juncture. You’re at a journey versus destination moment. Creativity without limits is a journey, which is great for your own work, but a disaster for a client-driven job. A client-driven project requires clearly defined goals—a destination. You need to arrive somewhere specific (Figure 9.12).
Figure 9.12 A well-developed plan with sketches will help ensure a smooth working relationship with the client.
Two critical points that need to be a part of every project plan are the project scope and project deadline.
![]() Project scope is the amount of work to be done. On the designer’s side, this is the most important thing to establish. If the scope isn’t clear, you’re subject to the Achilles heel of design work: project creep. This is a pervasive problem in our industry (and I’ll address it later in detail), but simply writing down a defined scope can prevent the problem. Get in writing exactly what you need to do and make sure specific numbers are attached.
Project scope is the amount of work to be done. On the designer’s side, this is the most important thing to establish. If the scope isn’t clear, you’re subject to the Achilles heel of design work: project creep. This is a pervasive problem in our industry (and I’ll address it later in detail), but simply writing down a defined scope can prevent the problem. Get in writing exactly what you need to do and make sure specific numbers are attached.
![]() Project deadlines dictate when the work needs to be done. This is the client’s most important element. The deadline often affects the price. If the client needs 10 JPEG images in 6 months, you can probably offer a discount. If they need art by tomorrow morning, then they’ll have to pay an additional “rush” fee. Deadlines on large projects also can be broken down into phases, each with its own fee. This division of tasks helps you pay the bills by generating cash flow during a large and lengthy project. It also limits the impact—for you—of payment delay.
Project deadlines dictate when the work needs to be done. This is the client’s most important element. The deadline often affects the price. If the client needs 10 JPEG images in 6 months, you can probably offer a discount. If they need art by tomorrow morning, then they’ll have to pay an additional “rush” fee. Deadlines on large projects also can be broken down into phases, each with its own fee. This division of tasks helps you pay the bills by generating cash flow during a large and lengthy project. It also limits the impact—for you—of payment delay.
I strongly encourage you to also include the following items in your InDesign project plans. These items, when shared and discussed with your client, will save time, money, and disagreements. These additional deliverables are the raw materials of project planning and help convey the exact target of the project. It’s my opinion, and that of experienced designers, that the following two deliverables are critical for every design project.
![]() Sketches are really helpful to show the client your design direction. Even better is when the client has an idea of what they’re looking for and can give you their own sketch. Does this limit your creative freedom? Yes! It also saves you a ton of time. The goal of a client job is to get a project done to their satisfaction. If they’re very particular and know what they want, you’re not going to convince them otherwise. Sketches save time because they limit your direction to a direction that the client will accept, and they help you get to that acceptance faster. That means you get finished and paid sooner. The better the sketches are before you get into actual design, the fewer changes and redesigns you’ll need. You don’t need to be a master sketch artist. Just convey the idea. Sometimes sketches may just be wireframes, very rough representative sketches of how to lay out the document.
Sketches are really helpful to show the client your design direction. Even better is when the client has an idea of what they’re looking for and can give you their own sketch. Does this limit your creative freedom? Yes! It also saves you a ton of time. The goal of a client job is to get a project done to their satisfaction. If they’re very particular and know what they want, you’re not going to convince them otherwise. Sketches save time because they limit your direction to a direction that the client will accept, and they help you get to that acceptance faster. That means you get finished and paid sooner. The better the sketches are before you get into actual design, the fewer changes and redesigns you’ll need. You don’t need to be a master sketch artist. Just convey the idea. Sometimes sketches may just be wireframes, very rough representative sketches of how to lay out the document.
![]() Specifications are detailed, clearly written goals and limits for a project. Many times, the specifications themselves will be referred to as the “project plan” and become part of the contract. This is admittedly the least creative and most boring document you will create, but it is also the most critical. All project plans should include two critical pieces of information: the scope of the project and the deadlines that need to be met. Be sure to always include both of these items in your project specifications.
Specifications are detailed, clearly written goals and limits for a project. Many times, the specifications themselves will be referred to as the “project plan” and become part of the contract. This is admittedly the least creative and most boring document you will create, but it is also the most critical. All project plans should include two critical pieces of information: the scope of the project and the deadlines that need to be met. Be sure to always include both of these items in your project specifications.
Avoiding Project Creep
No, the project creep is not the person on your project who stares at you from around the corner. That is creepy, but that’s not the meaning. Project creep is when the project starts to lose its focus and spin out of control, eating up more and more time and effort (Figure 9.13). It is really important to be aware of this phenomenon. It happens all the time. And the main culprit in every case is a poorly designed project plan that lacked clear specifications and deadlines.
![]() Video 9.13
Video 9.13

Figure 9.13 A project can appear small, but have lots of issues underneath the surface. A solid contract will avoid this becoming your problem.
Here’s how it happens: Joe Client creates a product and wants to sell it. He comes to you for marketing materials. You determine that he wants a logo, a flyer, and a three-page informational website. A price of $2,500 is settled on and you’ve got a month to get it done. You go to work.
Then Joe realizes that he also wants some images for social media. Could you just make a few? He also realizes that he needs to put his new logo on new business cards. Could you just design a card with the logo on it? Oh, and he can’t figure out how to get his product onto his favorite online marketplace. Could you just help him set that up? And he changed his launch date. He doesn’t need it next month, he needs it next week because he just reserved a booth at a large convention. By the way, do you know anything about designing booths?
Can you see how critical it is that you created a detailed project plan with task definitions and deadlines attached? Sometimes the client asks for something and it takes you 30 seconds. It’s a good idea to always happily deliver on these little items. A favor is any job that takes you 5 minutes or less. After that, the favor turns into work. And your only defense is your contract defining a clearly stated scope.
Just make sure that the project’s scope is clearly stated. If the contract says that you’ll provide any images for the company’s web presence, then you’re in trouble. On the other hand, if it says that you’ll specifically provide up to nine images for a three-page website, then you’re in great shape. Taking the hour it requires to specify your project and its deadlines in detail will save you from many hours of work and contract revisions.
If the client approved a sketch with a basic layout, and then asks for something different, you need to charge them for the change—if it’s going to take more than 5 to 10 minutes. Sticking to this policy helps the client think about changes before sending them to you. If you fail to charge when addressing impromptu changes, the client has no reason to think about the requests in advance. Charging your customer for additional changes focuses them on what they really want.
Of course, if the client asks for something that actually makes the job easier and faster, then make the change and do it for free. The bottom line is this: Establish good will whenever it’s good for both you and your client. But when an 11th hour alteration serves only one side of the relationship, the requesting side has to pay for the service. In the end, this arrangement ensures that everyone ends up winning.
Do
The last phase of the project plan is to knock it out. This is the “two snaps and a twist” phase because it generally happens pretty quickly when you have a good plan—unless there’s a hitch. (I’ll get to that soon.) But at this point, on most design projects, you’re pretty much wrapping things up.
![]() Video 9.14
Video 9.14
Build It
This step is pretty obvious: Make it happen. This phase is where most people think all the action is. But honestly, if you’ve done the prior steps well, this can be the fastest part of the process. You already know what to do, now just do it. The design decisions have been made and you get to work. Of course, when doing this step, it’s best to regularly refer to the specifications and keep the client informed. The best way to do so is to have a very intentional feedback loop in place.
![]() ACA Objective 1.4
ACA Objective 1.4
Feedback Loop
A feedback loop is a system set up to constantly encourage and require input and approvals on the project direction. Keeping your client informed is the best way to speed through the process (Figure 9.14). For an InDesign project, iterative work establishes really effective guideposts to send to the client for review and input. Iterative work is work you’re sharing as it’s done. Doing so performs a couple of critical functions. First, it lets the client see that work is being done and helps reassure them that the process has momentum. Second, it lets the client chime in on anything that they don’t like while it’s still easy to make a change.

Figure 9.14 A good feedback loop helps to ensure that what you are thinking is what the client will approve.
Establishing this open communication channel encourages and enforces a healthy exchange of opinions and can enable you to most efficiently adjust and fine-tune your project to suit your client.
Test and Evaluate
This very last step can also be fast if you’ve had a good feedback loop in place. For InDesign projects, it’s essentially checking the work against your project plan and making sure that you met all the specifications to satisfy you and your client (Figure 9.15). If not, you should essentially start the problem-solving process again to understand the current problem. Find out exactly what the client believes doesn’t meet the requirements.

Assuming a good project plan with sketches and a good feedback loop, the test and evaluation phase should just require minor tweaks—no different than any other iterative work resolution. If you didn’t have a good feedback loop and the first time the client sees your work is upon delivery, that client could become really unhappy and demand innumerable changes. Avoid this migraine headache with an effective and well-defined feedback loop as part of your well-developed plan. Those two tools are your weapon against project creep and unreasonable clients.
Working for “The Man”
Many graphic designers begin their careers working at larger firms, which can actually be a much easier way to get started than freelancing with your own business. If you’re exclusively an artist, this type of job may require you to do the only tasks you’re best at doing. In a large firm, someone else does the sales, manages client relationships and projects, and creates technical specifications. Often, you’ll use the same print house or web templates, you’ll know exactly what size images you need, and you may even have templates. As a designer at a larger firm, you’re responsible only for the sketches, mock-ups, and the final image processing. Everything else is handled by someone else, which is a good trade-off for designers who often don’t like the detail-oriented checklist work of project management and bookkeeping.
![]() Video 9.15
Video 9.15
Working within an experienced company can also be an amazing education, as you can develop your strengths, learn about the industry, and slowly increase your involvement in the other aspects of this career beyond InDesign proficiency.
Conclusion
Much of this chapter digressed from the hands-on InDesign stuff that most books cover. But the lack of this information can present a problem for many beginning designers. You need to master a lot of industry information, creative knowledge, and business skills to be successful. Many creative people have a hard time with the business side of the career, but it’s best to understand these ideas and concepts now before a lack of understanding becomes a problem. The tips and techniques that you’ve read in this chapter will truly help eliminate a lot of the inherent frustration in the complexity of working with and for other people. InDesign is a creative application and tends to attract creative types. The qualities that make us great at thinking outside the box and designing new and beautiful documents are the same qualities that may make us less skilled at the organized detail work of business and client management.
![]() Video 9.16
Video 9.16
Congratulations! You have reached the end of Learn Adobe InDesign CC for Print and Digital Media Publication and have prepared yourself to sit the Adobe Certified Associate Exam. Well done!