
High Dynamic Range
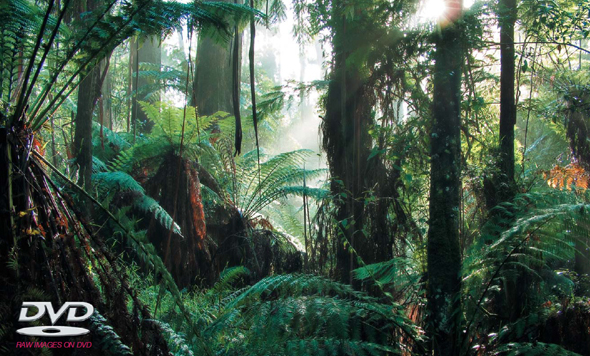
Contrast no problem - discover the secrets to limitless dynamic range
Contrary to popular opinion - what you see is not what you always get. You may be able to see the detail in those dark shadows and bright highlights when the sun is shining - but can your image sensor? Contrast in a scene is often a photographer’s worst enemy. Contrast is a sneak thief that steals away the detail in the highlights or shadows (sometimes both). A wedding photographer will deal with the problem by using fill-flash to lower the subject contrast; commercial photographers diffuse their own light source or use additional fill lighting and check for missing detail using the Histogram or a Polaroid.
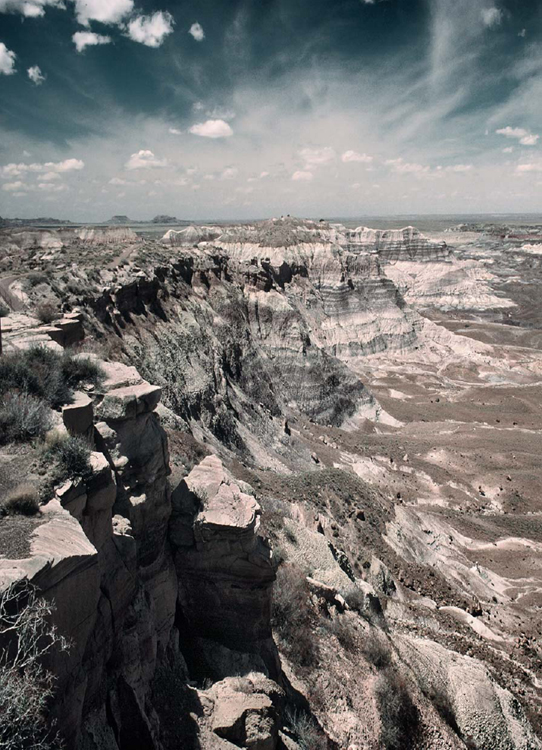
Landscape photographers however have drawn the short straw when it comes to solving the contrast problem. For the landscape photographer there is no ‘quick fix’. A reflector that can fill the shadows of the Grand Canyon has yet to be made and diffusing the sun’s light is only going to happen if the clouds are prepared to play ball.
Ansel Adams (the famous landscape photographer) developed ‘The Zone System’ to deal with the high contrast vistas he encountered in California. By careful exposure and processing he found he could extend the film’s ability to record high contrast landscapes and create a black-and-white print with full detail. Unlike film however the latitude of a digital imaging sensor (its ability to record a subject brightness range) is fixed. In this respect the sensor is a straitjacket for our aims to create tonally rich images when the sun is shining … or is it? Here is a post-production ‘tone system’ that will enrich you and your images.
Note > It is recommended to capture in RAW mode to exploit the full dynamic range that your image sensor is capable of as JPEG or TIFF processing in-camera may clip the shadow and highlight detail (see Camera Raw, page 24).

1. The first step to tonal riches is all in-camera. If we can’t fit all the goodies in one exposure -then we’ll just have to take two. The idea is to montage, or blend, the best of both worlds (the light and dark side of the camera’s, not quite, all seeing eye). To make the post-production easier we need to take a little care in the pre-production, i.e. mount the camera securely on a sturdy tripod. Take two exposures, one overexposing from the auto reading, and the other underexposing from the auto reading. One or two stops either side of the meter indicated exposure should cover most high contrast situations.
PERFORMANCE TIP
Setting your camera to ‘auto bracket exposure mode’ means that you don’t have to touch the camera between the two exposures, thereby ensuring the first and second exposures can be exactly aligned with the minimum of fuss. Unfortunately for me, the little Fuji FinePix s7000 I was using for this image has auto bracket exposure but it is not operational in RAW capture mode - the only respectable format for self-respecting landscape photographers. This is where you dig out your trusty cable release, and, if you are really lucky, have somewhere to screw it into! The only other movement to be aware of is something beyond your control. If there is a gale blowing (or even a moderate gust) you are not going to get the leaves on the trees to align perfectly in post-production. This also goes for fast moving clouds and anything else that is likely to be zooming around in the fraction of a second between the first and second exposures.
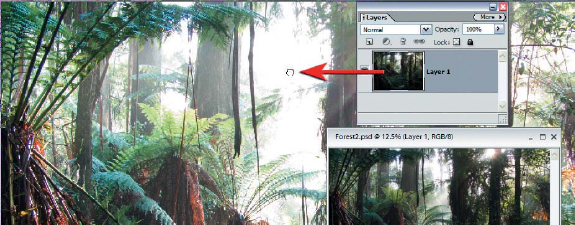
2. Select the Move Tool in the Tools palette and drag the dark underexposed image into the window of the lighter overexposed image (alternatively just drag the thumbnail from the Layers palette with any tool selected). Holding down the Shift key as you let go of the image will align the two layers (but not necessarily the two images).
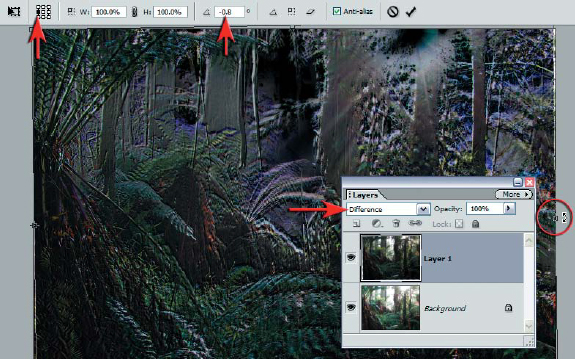
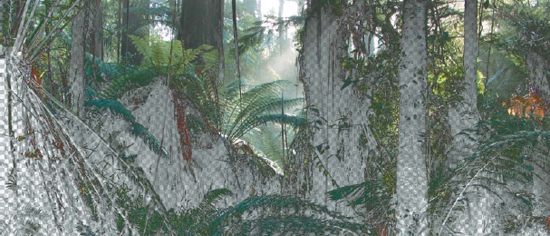
3. In the Layers palette set the blend mode of the top layer to ‘Difference’ to check the alignment of the two images. If they align - no white edges will be apparent (usually the case if the tripod was sturdy and the two exposures were made via an auto feature or cable release). If you had to resort to a friend’s right shoulder you will now spend the time you thought you had saved earlier. To make a perfect alignment you need to select ‘Free Transform’ from the Image >Transform menu. Nudge the left side into alignment and then move the reference point location in the Options bar to the left-hand side of the square. Highlight the numbers in the rotation field in the Options bar and then rotate the image into final alignment.
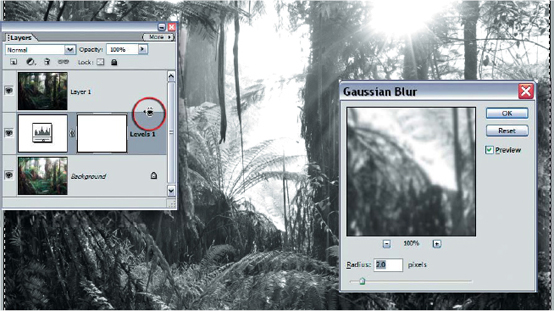
4. Add a levels adjustment layer above the background layer. Make no adjustments as only the mask is required. Group the top layer with this adjustment layer (hold down the Alt key as you click on the dividing line between the two layers. Click on the Background layer and choose ‘All’ from the Select menu (Ctrl+A). Copy to the clipboard and then Alt+Click the adjustment layer thumbnail. The image window should appear white as the layer mask is empty. Now choose paste from the edit menu (Ctrl+V). Apply a small amount of Gaussian Blur to this mask before Alt+Clicking once again to return to the normal view.
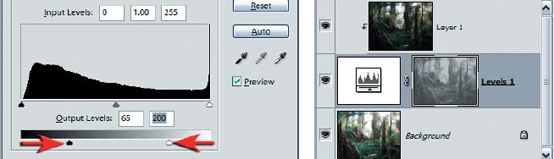
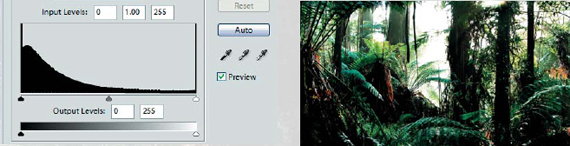
5. Apply a levels adjustment to this layer mask (Ctrl+L) and drag in the Output sliders (directly beneath the Shadow and Highlight sliders) until the final contrast appears high but not clipped (lowering the contrast of the mask increases the contrast of the final image). It is important to recreate the expanded contrast of the original scene otherwise the image will look slightly surreal if the overall contrast is low.
PERFORMANCE TIP
In the full version of Photoshop the user has access to the ‘Advanced Blending Options’. In this dialog box it is possible to reduce the opacity of the shadow tones on the top layer to reveal the shadow tones beneath. The effect can be faded in gradually creating a blend of the optimum highlights from the top layer and the optimum shadow tones of the background layer. The advanced blending options are only available to users of the full version of Photoshop, but the same results can be achieved using a layer style preset loaded into the presets folder in Elements. The layer styles provided on the support DVD give the Elements user the option of partial transparency based on tonality.
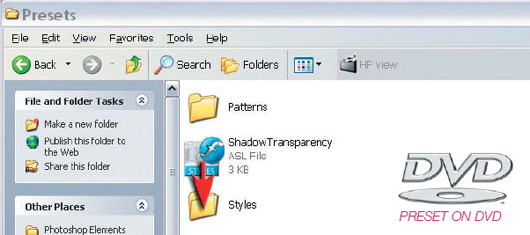
Photoshop Elements users can access the transparency layer style by first loading the preset that is available on the supporting DVD into the styles folder of the application software. The preset was created in the full version of Photoshop but can be read by Photoshop Elements. The software must be restarted after loading the preset into the folder before Elements can find it.
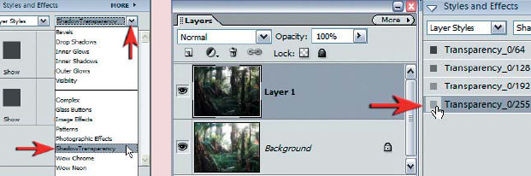
Select the top layer in the Layers palette and then click on each of the four presets in turn (now located in the Styles and Effects palette) and choose the one that renders the best tonality.
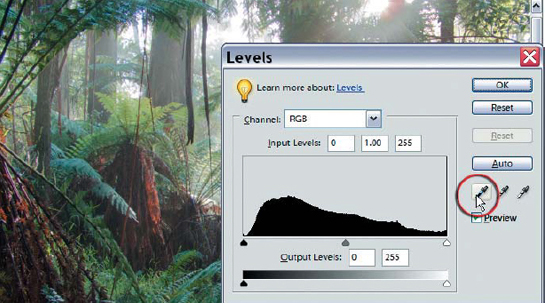
Create an adjustment layer by clicking on the ‘Create new adjustment layer’ icon and choose ‘Levels’ from the menu. The final step in the process is to target the deepest shadows and brightest highlights to the values best suited to your chosen output device. My own Epson inkjet paper handles the highlights really well and tones of 250 are easily distinguishable from the paper white (255). The precise targeting of the shadow tones is dependent on the inks and paper being used and can be anywhere between 10 and 20. Do not rely on your monitor at this stage if your final output is print - if in doubt print a test strip and readjust the target points if required. To target a tone refer to Project 4 in Part 1. Select OK when you are satisfied your image is looking fabulous.
Note > Finding the optimum values for your printer and media can be achieved by printing a tonal step wedge with known values to plot what your printer is capable of.
Additional images are available on the DVD to enable you to create an image with High Dynamic Range