
Chapter 1. Getting Started
One of the reasons why InDesign has become so popular is that it uses many of the same tools, panels, and onscreen elements that are found in Adobe Photoshop and Adobe Illustrator. With the cs3 version of InDesign, all the programs have undergone a significant change from their previous interface elements.
So, although you may feel you have a strong foundation in previous versions of the Adobe products, most likely you will still need to take a look at the pages in this chapter. In it, you will discover some hidden features in the new interface.
And if you haven’t looked at the other cs3 products, this chapter will serve as an excellent introduction to the interface changes in all the Creative Suite 3 applications.
Choosing Panels
Most of the commands and features that control InDesign are found in the onscreen panels. Each of the panels covers special features. The panels are similar to those found in other Adobe applications. Although they first appear on your screen the way Adobe arranges them, we’ll tackle them in alphabetical order.
Align panel
The Align panel ![]() (Window > Object & Layout > Align) aligns and distributes objects on a page (see Chapter 4, “Working with Objects”).
(Window > Object & Layout > Align) aligns and distributes objects on a page (see Chapter 4, “Working with Objects”).
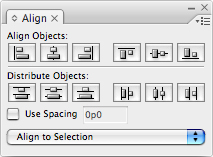
![]() Use the Align panel to align objects or distribute the space between objects.
Use the Align panel to align objects or distribute the space between objects.
Assignments panel
The Assignments panel ![]() (Window > Assignments) lets you control the editorial revisions of InCopy stories.
(Window > Assignments) lets you control the editorial revisions of InCopy stories.
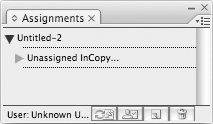
![]() The Assignments panel lets you check stories in and out of an InDesign/InCopy workflow.
The Assignments panel lets you check stories in and out of an InDesign/InCopy workflow.
Attributes panel
The Attributes panel ![]() (Window > Attributes) allows you to set fills and strokes to overprint (see Chapter 5, “Working in Color”). It also lets you create non-printing objects (see Chapter 19, “Output”).
(Window > Attributes) allows you to set fills and strokes to overprint (see Chapter 5, “Working in Color”). It also lets you create non-printing objects (see Chapter 19, “Output”).
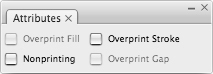
![]() The Attributes panel lets you set the overprinting controls for fills and strokes or set objects to not print.
The Attributes panel lets you set the overprinting controls for fills and strokes or set objects to not print.
Book panel
The Book panel ![]() (File > New > Book) is created by the user and contains documents that can be managed and synchronized using the Book features (see Chapter 10, “Pages and Books”).
(File > New > Book) is created by the user and contains documents that can be managed and synchronized using the Book features (see Chapter 10, “Pages and Books”).
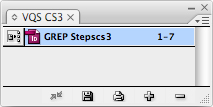
![]() The Book panel is created by the user. It synchronizes document styles and manages page numbering.
The Book panel is created by the user. It synchronizes document styles and manages page numbering.
Bookmarks panel
The Bookmarks panel ![]() (Window > Interactive > Bookmarks) allows you to define pages as bookmarks. These bookmarks are then used as navigation aids in PDF documents (see the online Chapter 18, “Interactive PDF Elements”).
(Window > Interactive > Bookmarks) allows you to define pages as bookmarks. These bookmarks are then used as navigation aids in PDF documents (see the online Chapter 18, “Interactive PDF Elements”).
![]() The Bookmarks panel lets you create navigation bookmarks that are used in Adobe PDF documents.
The Bookmarks panel lets you create navigation bookmarks that are used in Adobe PDF documents.
Cell Styles panel
The Cell Styles panel ![]() (Window > Type & Tables > Cell Styles) allows you to coordinate the appearance of cells in tables (see Chapter 13, “Tabs and Tables”).
(Window > Type & Tables > Cell Styles) allows you to coordinate the appearance of cells in tables (see Chapter 13, “Tabs and Tables”).
![]() The Cell Styles panel is used to format the appearance of cells in tables.
The Cell Styles panel is used to format the appearance of cells in tables.
Character panel
The Character panel ![]() (Window > Type & Tables > Character or Type > Character) controls character-level attributes such as the typeface and point size (see Chapter 3, “Basic Text”).
(Window > Type & Tables > Character or Type > Character) controls character-level attributes such as the typeface and point size (see Chapter 3, “Basic Text”).
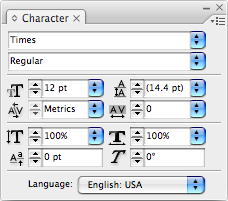
![]() Use the Character panel to format the appearance of text characters.
Use the Character panel to format the appearance of text characters.
Character Styles panel
The Character Styles panel ![]() (Window > Type & Tables > Character Styles or Type > Character Styles) lets you define and work with character styles (see Chapter 14, “Automating Your Work”).
(Window > Type & Tables > Character Styles or Type > Character Styles) lets you define and work with character styles (see Chapter 14, “Automating Your Work”).
![]() Use the Character Styles panel to automate the formatting of text characters.
Use the Character Styles panel to automate the formatting of text characters.
Color panel
The Color panel ![]() (Window > Color) allows you to mix or apply colors (see Chapter 5, “Working in Color”).
(Window > Color) allows you to mix or apply colors (see Chapter 5, “Working in Color”).
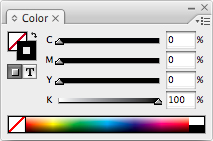
![]() The Color panel is used to mix colors to apply to text and objects.
The Color panel is used to mix colors to apply to text and objects.
Command Bar panel
The Command Bar panel ![]() (Window > Object & Layout > Command Bar) allows you to click an icon to apply commonly used commands (see Chapter 2, “Document Setup”).
(Window > Object & Layout > Command Bar) allows you to click an icon to apply commonly used commands (see Chapter 2, “Document Setup”).
![]()
![]() The Command Bar panel contains common commands such as Open, Save, and Print. (Only a portion is shown here.)
The Command Bar panel contains common commands such as Open, Save, and Print. (Only a portion is shown here.)
Control panel
The Control panel ![]() (Window > Control) changes its layout depending on the object selected on the page. If you are working with text, the Control panel shows a combination of the Paragraph and Character panels. If you are working with objects, the panel shows a combination of the Transform and Stroke panels. The Control panel is covered in Chapters 3, 4, and 13.
(Window > Control) changes its layout depending on the object selected on the page. If you are working with text, the Control panel shows a combination of the Paragraph and Character panels. If you are working with objects, the panel shows a combination of the Transform and Stroke panels. The Control panel is covered in Chapters 3, 4, and 13.
![]()
![]() The Control panel changes its options depending on the selected object. (Only a portion is shown here.)
The Control panel changes its options depending on the selected object. (Only a portion is shown here.)
Data Merge panel
The Data Merge panel ![]() (Window > Automation > Data Merge) gives you the controls for merging information from databases into InDesign documents.
(Window > Automation > Data Merge) gives you the controls for merging information from databases into InDesign documents.
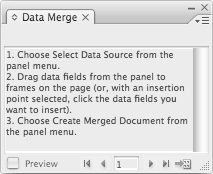
![]() The Data Merge panel lets you integrate data from spreadsheets into your layouts.
The Data Merge panel lets you integrate data from spreadsheets into your layouts.
Effects panel
The Effects panel ![]() (Window > Effects) contains the special opacity, blend mode, and other effects you can apply to elements in the layout (see Chapter 6, “Styling Objects”).
(Window > Effects) contains the special opacity, blend mode, and other effects you can apply to elements in the layout (see Chapter 6, “Styling Objects”).
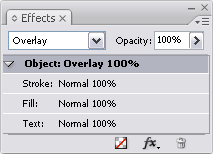
![]() The Effects panel lets you apply opacity and other effects to elements in a layout.
The Effects panel lets you apply opacity and other effects to elements in a layout.
Flattener Preview panel
The Flattener Preview panel ![]() (Window > Output > Flattener Preview) lets you display the page as it would look after flattening has been applied during the printing process (see Chapter 19, “Output”).
(Window > Output > Flattener Preview) lets you display the page as it would look after flattening has been applied during the printing process (see Chapter 19, “Output”).
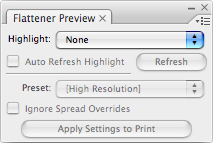
![]() The Flattener Preview panel shows how effects will affect objects and images.
The Flattener Preview panel shows how effects will affect objects and images.
Glyphs panel
The Glyphs panel ![]() (Window > Type & Tables > Glyphs or Type > Glyphs) lets you insert or replace characters from a font (see Chapter 3, “Basic Text”). The Glyphs panel also helps you work with OpenType features (see Chapter 16, “Typography Controls”).
(Window > Type & Tables > Glyphs or Type > Glyphs) lets you insert or replace characters from a font (see Chapter 3, “Basic Text”). The Glyphs panel also helps you work with OpenType features (see Chapter 16, “Typography Controls”).
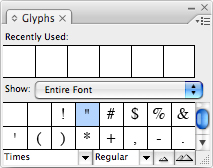
![]() The Glyphs panel lets you insert characters from a font.
The Glyphs panel lets you insert characters from a font.
Gradient panel
The Gradient panel ![]() (Window > Gradient) lets you define and control the appearance of gradients or color blends (see Chapter 5, “Working in Color”).
(Window > Gradient) lets you define and control the appearance of gradients or color blends (see Chapter 5, “Working in Color”).

![]() The Gradient panel lets you create color blends.
The Gradient panel lets you create color blends.
Hyperlinks panel
The Hyperlinks panel ![]() (Window > Interactive > Hyperlinks) is used to create links that let you easily navigate around PDF and html documents (see Chapter 18, “Interactive PDF Elements”).
(Window > Interactive > Hyperlinks) is used to create links that let you easily navigate around PDF and html documents (see Chapter 18, “Interactive PDF Elements”).
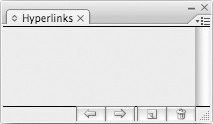
![]() Use the Hyperlinks panel to create and store links to other pages in a PDF document or on the Web.
Use the Hyperlinks panel to create and store links to other pages in a PDF document or on the Web.
Index panel
The Index panel ![]() (Window > Type & Tables > Index) lets you create cross-referenced index entries for a document or book (see Chapter 10, “Pages and Books”).
(Window > Type & Tables > Index) lets you create cross-referenced index entries for a document or book (see Chapter 10, “Pages and Books”).
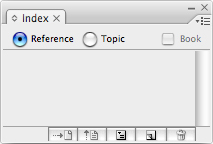
![]() The Index panel lets you create and manage index entries for a document or book.
The Index panel lets you create and manage index entries for a document or book.
Info panel
The Info panel ![]() (Window > Info) gives you feedback on the type of object selected, and the action taken on that object (see Chapter 4, “Working with Objects”).
(Window > Info) gives you feedback on the type of object selected, and the action taken on that object (see Chapter 4, “Working with Objects”).

![]() The Info panel shows the attributes of objects. These attributes change depending on the object chosen.
The Info panel shows the attributes of objects. These attributes change depending on the object chosen.
Layers panel
The Layers panel ![]() (Window > Layers) controls the stacking order, editability, and visibility of different layers (see Chapter 11, “Layers”).
(Window > Layers) controls the stacking order, editability, and visibility of different layers (see Chapter 11, “Layers”).
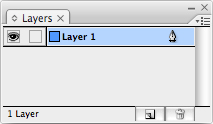
![]() Use the Layers panel to add layers and change their display.
Use the Layers panel to add layers and change their display.
Links panel
The Links panel ![]() (Window > Links) controls the status of placed images (see Chapter 8, “Imported Graphics”).
(Window > Links) controls the status of placed images (see Chapter 8, “Imported Graphics”).
![]() The Links panel displays a list of all the imported graphics and text files.
The Links panel displays a list of all the imported graphics and text files.
Navigator panel
The Navigator panel ![]() (Window > Object & Layout > Navigator) lets you see the layout of pages as well as zoom in to a portion of a page or spread (see Chapter 2, “Document Setup”).
(Window > Object & Layout > Navigator) lets you see the layout of pages as well as zoom in to a portion of a page or spread (see Chapter 2, “Document Setup”).
![]() Use the Navigator panel to see a preview of your document and move around the pages.
Use the Navigator panel to see a preview of your document and move around the pages.
Notes panel
The Notes panel ![]() (Window > Notes) is used to insert queries and comments into text as part of an InDesign/InCopy workflow.
(Window > Notes) is used to insert queries and comments into text as part of an InDesign/InCopy workflow.
![]() Use the Notes panel to insert comments into text stories.
Use the Notes panel to insert comments into text stories.
Object Styles panel
The Object Styles panel ![]() (Window > Object Styles) lets you quickly apply complex formatting to text and graphic frames (see Chapter 14, “Automating Your Work”).
(Window > Object Styles) lets you quickly apply complex formatting to text and graphic frames (see Chapter 14, “Automating Your Work”).
![]() The Object Styles panel lets you create and apply object styles for frames.
The Object Styles panel lets you create and apply object styles for frames.
Pages panel
The Pages panel ![]() (Window > Pages) lets you add and control pages and master pages, as well as move from one page to another (see Chapter 10, “Pages and Books”).
(Window > Pages) lets you add and control pages and master pages, as well as move from one page to another (see Chapter 10, “Pages and Books”).
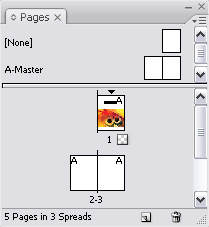
![]() The Pages panel lets you add and delete pages, apply master pages, and move through the document.
The Pages panel lets you add and delete pages, apply master pages, and move through the document.
Paragraph panel
The Paragraph panel ![]() (Window > Type & Tables > Paragraph) controls paragraph-level attributes such as the alignment and margin indents (see Chapter 3, “Basic Text”).
(Window > Type & Tables > Paragraph) controls paragraph-level attributes such as the alignment and margin indents (see Chapter 3, “Basic Text”).
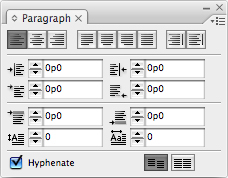
![]() The Paragraph panel contains all the formatting controls for text paragraphs.
The Paragraph panel contains all the formatting controls for text paragraphs.
Paragraph Styles panel
The Paragraph Styles panel ![]() (Window > Type & Tables > Paragraph Styles) lets you define and apply paragraph styles (see Chapter 14, “Automating Your Work”).
(Window > Type & Tables > Paragraph Styles) lets you define and apply paragraph styles (see Chapter 14, “Automating Your Work”).
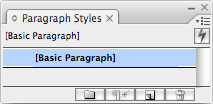
![]() The Paragraph Styles panel makes it easy to apply complex formatting to paragraphs.
The Paragraph Styles panel makes it easy to apply complex formatting to paragraphs.
Pathfinder panel
The Pathfinder panel ![]() (Window > Object & Layout > Pathfinder) allows you to apply the Pathfinder and Convert Shape commands that change the shapes of objects (see Chapter 4, “Working with Objects”).
(Window > Object & Layout > Pathfinder) allows you to apply the Pathfinder and Convert Shape commands that change the shapes of objects (see Chapter 4, “Working with Objects”).

![]() The Pathfinder panel allows you to easily change the shape of objects.
The Pathfinder panel allows you to easily change the shape of objects.
Script Label panel
The Script Label panel ![]() (Window > Automation > Script Label) lets you edit labels that are applied to objects as part of scripts.
(Window > Automation > Script Label) lets you edit labels that are applied to objects as part of scripts.
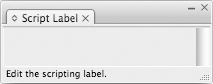
![]() The Script Label panel allows you to edit the labels applied to objects in a script.
The Script Label panel allows you to edit the labels applied to objects in a script.
Scripts panel
The Scripts panel ![]() (Window > Automation > Scripts) displays the scripts that have been placed inside the Scripts folder. These scripts can be run directly from within InDesign (see Chapter 14, “Automating Your Work”).
(Window > Automation > Scripts) displays the scripts that have been placed inside the Scripts folder. These scripts can be run directly from within InDesign (see Chapter 14, “Automating Your Work”).
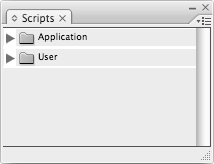
![]() The Scripts panel allows you to run scripts directly within InDesign.
The Scripts panel allows you to run scripts directly within InDesign.
Separations Preview panel
The Separations Preview panel ![]() (Window > Output > Separations Preview) lets you change the display for the color plates in the document. This lets you see the individual color separations (see Chapter 19, “Output”).
(Window > Output > Separations Preview) lets you change the display for the color plates in the document. This lets you see the individual color separations (see Chapter 19, “Output”).
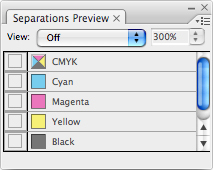
![]() The Separations Preview panel lets you see the color plates that are in a document.
The Separations Preview panel lets you see the color plates that are in a document.
Story panel
The Story panel ![]() (Window > Type & Tables > Story) lets you change the automatic margin alignment to an optical margin alignment that adjusts the position of punctuation and serifs (see Chapter 14, “Automating Your Work”).
(Window > Type & Tables > Story) lets you change the automatic margin alignment to an optical margin alignment that adjusts the position of punctuation and serifs (see Chapter 14, “Automating Your Work”).
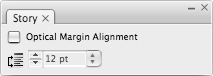
![]() Use the Story panel to control the optical margin alignment for hanging punctuation.
Use the Story panel to control the optical margin alignment for hanging punctuation.
Stroke panel
The Stroke panel ![]() (Window > Stroke) controls attributes such as stroke width, dashes, and end arrows and symbols (see Chapter 6, “Styling Objects”).
(Window > Stroke) controls attributes such as stroke width, dashes, and end arrows and symbols (see Chapter 6, “Styling Objects”).

![]() The Stroke panel controls the appearance of rules and lines around objects.
The Stroke panel controls the appearance of rules and lines around objects.
Swatches panel
The Swatches panel ![]() (Window > Swatches) stores the colors and gradients used in a document (see Chapter 5, “Working in Color”).
(Window > Swatches) stores the colors and gradients used in a document (see Chapter 5, “Working in Color”).
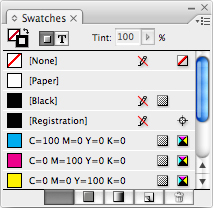
![]() The Swatches panel stores colors and gradients.
The Swatches panel stores colors and gradients.
Table panel
The Table panel ![]() (Window > Type & Tables > Table) contains the formatting controls for creating tables within text frames (see Chapter 13, “Tabs and Tables”).
(Window > Type & Tables > Table) contains the formatting controls for creating tables within text frames (see Chapter 13, “Tabs and Tables”).
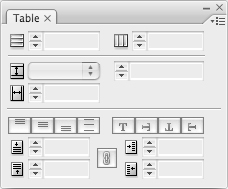
![]() Use the Table panel to format tables and table cells.
Use the Table panel to format tables and table cells.
Table Styles panel
The Table Styles panel ![]() (Window > Type & Tables > Table Styles) allows you to easily apply and modify the appearance of tables (see Chapter 13, “Tabs and Tables”).
(Window > Type & Tables > Table Styles) allows you to easily apply and modify the appearance of tables (see Chapter 13, “Tabs and Tables”).
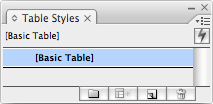
![]() Use the Table Styles panel to modify the appearance of tables.
Use the Table Styles panel to modify the appearance of tables.
Tabs panel
The Tabs panel ![]() (Type > Tabs) controls the position of the tab stops for text (see Chapter 13, “Tabs and Tables”).
(Type > Tabs) controls the position of the tab stops for text (see Chapter 13, “Tabs and Tables”).
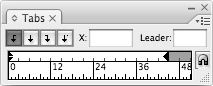
![]() The Tabs panel lets you position and format tabs within text.
The Tabs panel lets you position and format tabs within text.
Tags panel
The Tags panel ![]() (Window > Tags) lets you apply and control XML (extensible markup language) tags in a document. Working with tags is beyond the scope of this book. For more information on using XML tags, see Real World InDesign cs3, by Olav Martin Kvern and David Blatner, published by Peachpit Press in association with Adobe Press.
(Window > Tags) lets you apply and control XML (extensible markup language) tags in a document. Working with tags is beyond the scope of this book. For more information on using XML tags, see Real World InDesign cs3, by Olav Martin Kvern and David Blatner, published by Peachpit Press in association with Adobe Press.

![]() Use the Tags panel to control tags in a document.
Use the Tags panel to control tags in a document.
Text Wrap panel
The Text Wrap panel ![]() (Window > Text Wrap) controls how text wraps around objects and placed images (see Chapter 9, “Text Effects”).
(Window > Text Wrap) controls how text wraps around objects and placed images (see Chapter 9, “Text Effects”).
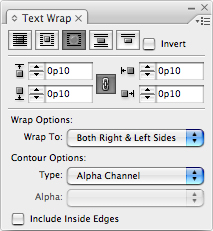
![]() Use the Text Wrap panel to control how text wraps around objects and images.
Use the Text Wrap panel to control how text wraps around objects and images.
Transform panel
The Transform panel ![]() (Window > Object & Layout > Transform) lets you see the size and position of objects. You can also use the Transform panel to apply transformations such as scaling and rotation (see Chapter 4, “Working with Objects”).
(Window > Object & Layout > Transform) lets you see the size and position of objects. You can also use the Transform panel to apply transformations such as scaling and rotation (see Chapter 4, “Working with Objects”).
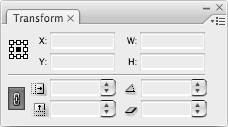
![]() The Transform panel lets you control the position and size of objects.
The Transform panel lets you control the position and size of objects.
Trap Presets panel
The Trap Presets panel ![]() (Window > Output > Trap Presets) is used to store different settings for how colors are trapped between one object and another. Setting traps is not covered in this book. Talk to the print shop that will output your file before you attempt to set traps in InDesign.
(Window > Output > Trap Presets) is used to store different settings for how colors are trapped between one object and another. Setting traps is not covered in this book. Talk to the print shop that will output your file before you attempt to set traps in InDesign.
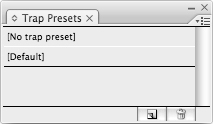
![]() The Trap Presets panel lets you store and apply trapping settings.
The Trap Presets panel lets you store and apply trapping settings.
Working with Panels
If you don’t see a panel onscreen, you can open it by choosing the command in the Window menu.
To open a panel:
• Choose the name of the panel from the Window menu or submenu.
To close a panel:
• Click the close control in the panel’s title bar ![]() .
.
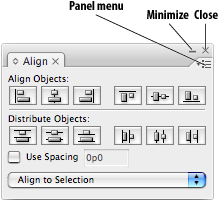
![]() The controls for panels.
The controls for panels.
You can also shrink a panel so that it only displays the panel tab.
To shrink a panel display:
• Click the minimize icon ![]() to collapse the panel.
to collapse the panel.
To expand a panel display:
• If the panel is collapsed, click the minimize icon to expand the panel ![]() .
.
![]()
![]() A minimized panel.
A minimized panel.
In addition to the panel buttons and fields, most panels contain a menu with additional commands.
- Click the panel menu icon to open the panel menu.
- Choose a command from the menu.
- Make sure the insertion point is not within a text frame to avoid inserting a tab character into your text.
- Press the Tab key. This hides all the panels including the Tools panel.
or
Press Shift+Tab key. This hides all the panels except the Tools panel.
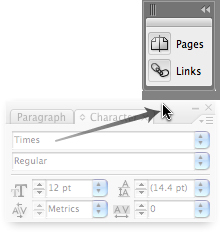
Another way to save screen space is to move one panel so that it is located within the boundaries of another. This is called nesting.
- Position the cursor over the panel tab.
- Drag the tab so that the outline is inside another panel. A black rectangle around the inside perimeter of the panel indicates that the two panels will be nested
 .
.
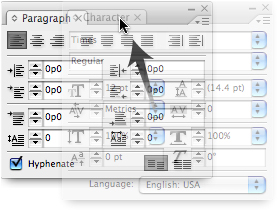 Drag the panel tab into another panel area to nest panels.
 - Release the mouse button. The panel appears next to the other item.
- Drag the panel tab so that the outline is completely outside the other panel.
- Release the mouse button. The panel appears as a separate onscreen item.
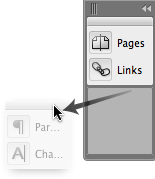
Another way to arrange panels is to dock the panel to the sides of your screen.
- Drag the panel tab to the left or right side of the screen. A vertical outline of the tab appears at the edge of the screen
 .
.
 Drag a panel to the left or right side of the screen to dock the panel.
 - Release the mouse. This adheres the panel to the side of the screen.
- Drag the panel title bar so that the outline is completely outside the dock area.
- Release the mouse button. The docked panel appears as a separate panel
 .
.
 Drag a panel away from the left or right dock area to undock the panel.
Using Workspaces
I don’t know any two InDesign users who agree as to how to arrange their panels. Although my panels may start out neatly arranged, within a short time I’ve got them scattered all over my screen—especially if I am demonstrating in front of a class.
Fortunately, you can arrange and save your panel arrangements into workspaces that you can call up at any time.
Tip
InDesign ships with a workspace labeled Default. This is the workspace that the panels revert to if you delete the InDesign preferences.
- Arrange your panels as you want them to appear on the screen.
- Choose Window > Workspace > Save Workspace. The Save Workspace dialog box appears
 .
.
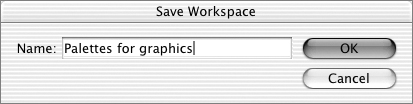 The Save Workspace dialog box lets you name the custom workspace configuration.
 - Enter a name for the workspace.
- Click the OK button. The name of the workspace appears in the Workspace menu.
To apply a workspace:
• Choose the custom workspace from the Window > Workspace menu.
- Choose Window > Workspace > Delete. The Delete Workspace dialog box appears
 .
.
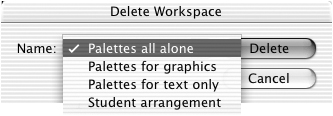 The Delete Workspace dialog box lets you choose the workspace you want to delete.
 - Use the pop-up menu to choose the workspace you want to delete.
- Click the Delete button to delete the workspace.
Using the Tools Panel
The Tools panel contains the tools for working in InDesign, as well as controls for applying the colors of fills and strokes ![]() . Some of the tools have fly-out panels that let you access the other tools in the category
. Some of the tools have fly-out panels that let you access the other tools in the category ![]() . (See the exercise on the next page for how to access the fly-out panels.)
. (See the exercise on the next page for how to access the fly-out panels.)
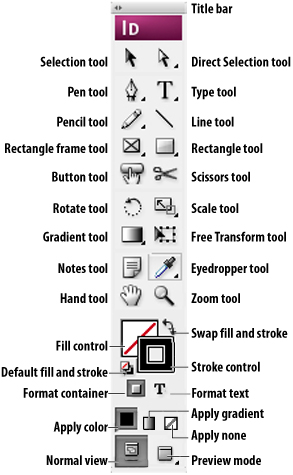
![]() The Tools panel at its default tool display.
The Tools panel at its default tool display.
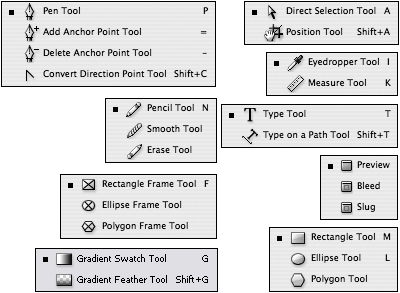
![]() The fly-out panels in the Tools panel.
The fly-out panels in the Tools panel.
To choose a tool:
• Click the tool in the Tools panel.
or
Tap the individual keyboard shortcuts for each of the tools.
Tip
You can change the arrangement of the Tools panel from single column to double column or horizontal column using the preferences.
or
Double-click the title bar on the Tools panel to change the arrangement.
Tools and controls in the Tools panel that have a small triangle in their slot have other tools hidden in a fly-out panel.
To open the other tools in the Tools panel:
- Press the fly-out triangle on the tool slot. The fly-out panel appears
 .
.
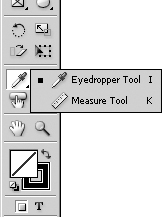 A fly-out panel displays the additional tools for that slot in the Tools panel.
 - Choose one of the tools listed in the fly-out panel.
To see the tool keyboard shortcuts:
• Move the cursor over the tool and pause. A tool tip appears with the name of the tool and the keyboard shortcut ![]() .
.
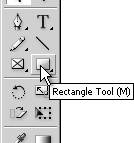
![]() Pause over a tool to see the tool tip with the tool name and keyboard shortcut.
Pause over a tool to see the tool tip with the tool name and keyboard shortcut.
Tip
If you don’t see the tool tip after pausing for a moment, make sure the Tool Tips control is turned on in the application preferences (see Chapter 21, “Customizing InDesign”).
Tip
You can change or add keyboard shortcuts for tools using the keyboard shortcut controls (see Chapter 21, “Customizing InDesign”).
Using Contextual Menus
Contextual menus are menus that change depending on the type of object selected or where the mouse is positioned ![]() . The benefit of contextual menus is that you don’t have to move all the way up to the menu bar to invoke a command. Also, the menu changes to provide you commands that are appropriate for the type of object chosen.
. The benefit of contextual menus is that you don’t have to move all the way up to the menu bar to invoke a command. Also, the menu changes to provide you commands that are appropriate for the type of object chosen.
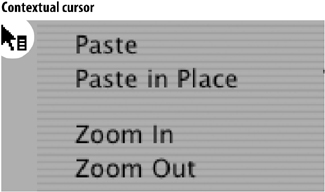
![]() The contextual menu changes depending on what type of object is selected.
The contextual menu changes depending on what type of object is selected.
To display contextual menus:
• (Mac) Hold the Control key and click the mouse button.
or
(Win) Click the right mouse button.