
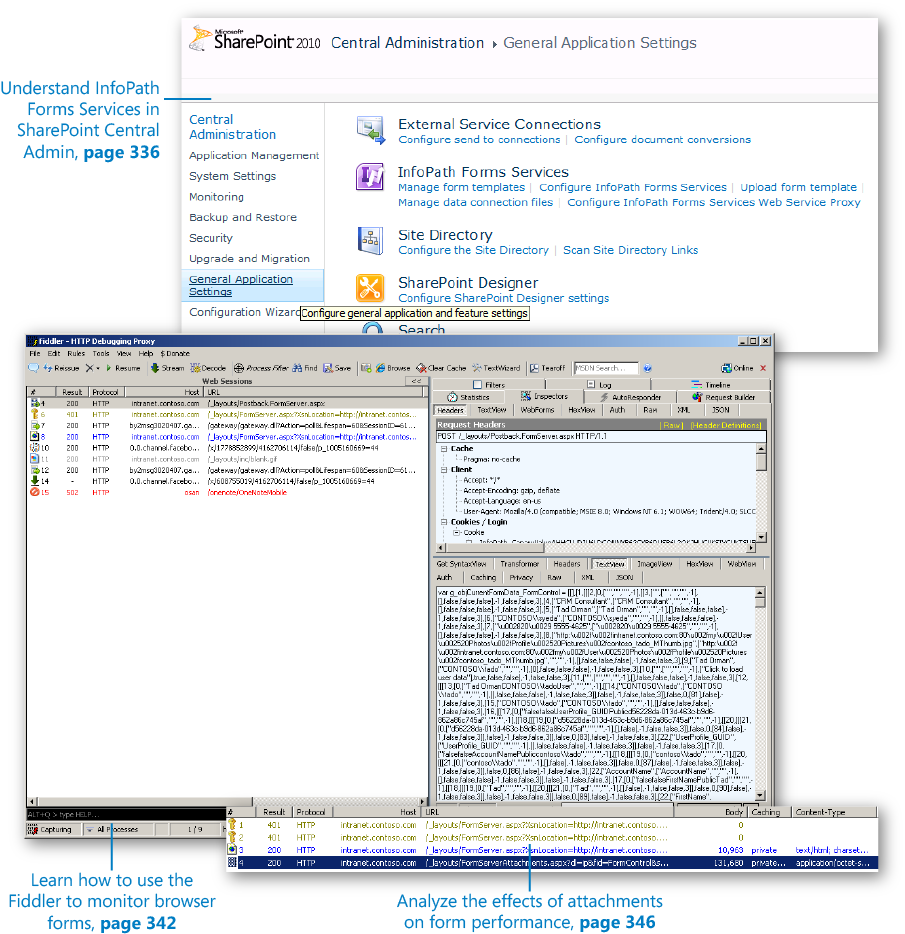
Chapter 12. Managing and Monitoring InfoPath Forms Services
Chapter at a Glance
Because this book is focused primarily on Microsoft InfoPath plus Microsoft SharePoint 2010 scenarios, it is imperative that we include a chapter on more advanced topics related to InfoPath Form Services (IPFS). Until now, you’ve received a fairly rudimentary introduction to IPFS. This chapter will dive into the more technical aspects of how IPFS works, how you can ensure the best performance, and how to manage an IPFS environment.
At the most basic level, IPFS seems like a simple idea: allow form templates that have been created in InfoPath to be published to a SharePoint site and then rendered in a browser on the client system, rather than in the InfoPath client. Despite the conceptual simplicity of IPFS, a great deal of behind-the-scenes technology is required to deliver this level of form parity for browser clients. While we certainly do not have the space in this book to cover every technical detail of IPFS, you will learn the requisite minimum technical knowledge to become a competent steward of the browser-based forms in your environment.
IPFS integrates with the core SharePoint Server platform, which includes several server products and components that are built on the SharePoint 2010 platform. Assuming you have a properly designed SharePoint farm, IPFS does not really require much in the way of care and feeding. This is the good news. However, because IPFS is a SharePoint server-based technology, you might want to understand some of its administrative tools and techniques, even if you’re not the primary SharePoint administrator. This chapter’s exercises will help to familiarize you with some of the most important IPFS administration tools.
IPFS Settings in SharePoint Central Administration
In the SharePoint Central Administration console, in the General Application Settings area, you will find important settings that control various facets of IPFS across the entire SharePoint farm. Unless you are managing a very large SharePoint environment (or a multi-tenant hosting service), these are not settings that you will need to adjust very often, but it is important to know what modifications are possible at the SharePoint farm level.
Tip
If you are charged with administering a SharePoint environment, you will probably find it useful to become proficient with Windows PowerShell scripting. IPFS offers a rich set of PowerShell commands that can help to automate and improve efficiency of most administrative tasks. Most of the GUI-based administrative tasks that we discuss in the upcoming exercise have companion commands available in PowerShell, as well. A full reference is available on TechNet at http://technet.microsoft.com/en-us/library/ee906553.aspx.
To ensure that you have a basic understanding of the IPFS administrative options for your SharePoint environment, the following exercise walks you through the primary IPFS configuration settings in SharePoint Central Administration.
Note
SET UP This exercise assumes you have an appropriate level of administrative access to a SharePoint server.
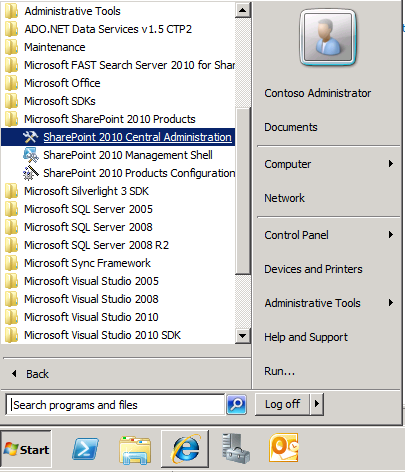
From the Start menu, in the Microsoft SharePoint 2010 Products folder, open SharePoint 2010 Central Administration.
Tip
You can find the SharePoint program folder on the Start menu of any server installed in the SharePoint farm. You can also access SharePoint Central Administration by going to a URL from a browser on a system than has access to your SharePoint environment. The URL begins with http://, followed by your server name, followed by a colon, and then the port number that was assigned to Central Administration when SharePoint was installed—for example, http://yoursharepointserver:1234.
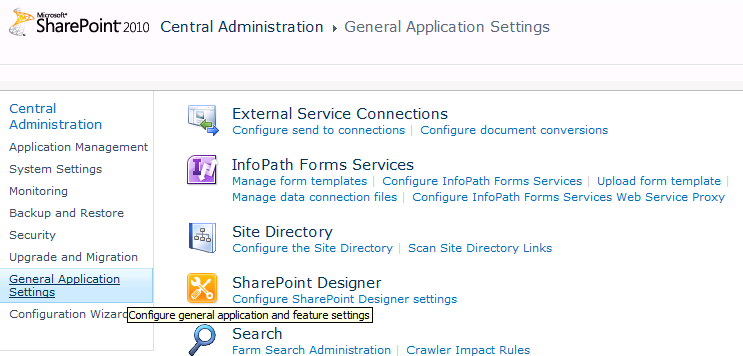
In SharePoint Central Administration, click General Application Settings.
In the InfoPath Forms Services section, click the Manage form templates link. This is used for uploading administrator-approved form templates that potentially need to be available across the entire farm. (Administrator-approved templates were covered in Chapter 6, if you need a refresher.)
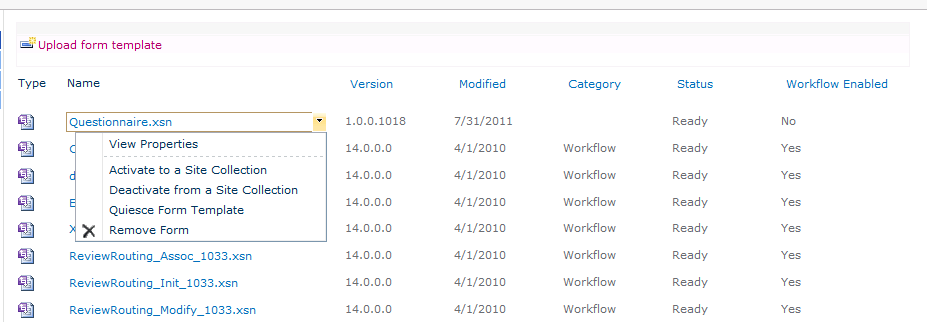
Click the drop-down selector on any of the templates you’ve uploaded; you’ll see that some have useful options for activating, deactivating, quiescing, or removing the template.
Note
To quiesce a template basically means to instruct SharePoint that you want to exclude the availability of a form for new instances, removing it from service only after all users have finished using it. Remove form, on the other hand, removes the form from service instantly whether or not anyone is using it.
Click back to General Application Settings, and then click Configure InfoPath Forms Services.
On the Configure InfoPath Forms Services page, you will find a variety of settings with which you can tweak performance and security settings for IPFS across the entire SharePoint farm. In most cases, the default settings are best. However, always select the very important Allow users to browser-enable form templates check box. If that option is cleared, users cannot publish browser-based templates anywhere on your SharePoint farm.
In the Thresholds area, notice that the maximum number of postbacks on any given form session is 75. Later in this chapter, you’ll learn how to analyze a form to understand when, where, and why your form is generating postbacks. Average sized, well-designed, browser-based forms should have only a handful of postbacks.
Below the Thresholds area, in the User Sessions section, there are two important settings. The first setting defines the maximum amount of time that a single user IPFS session can stay “alive” on the SharePoint farm: 1,440 minutes. Although that seems like a lot, keep in mind that SharePoint will terminate any browser sessions that do not post back to the server for 60 minutes. So even though a user could theoretically continue to fill out a browser-based form for an entire 24-hour period, he would need to be actively working on the form at least once per hour. The other setting here is a critical one: the maximum size of any form instance. Normally, this isn’t a problem, but in the case where you’ve added file/picture attachment controls on your form, the user could add very large files. Without this control in place, you could have a real mess on your hands. The default of 4 MB should be sufficient in most cases.
Tip
Remember, the User Session settings are farm-wide settings. This means raising or lowering any of the default values impacts every site collection in your SharePoint environment. Use caution before making any changes to the defaults. If you are unsure about any of the settings on this page, it’s best to just leave them set at their default values. They have been configured for optimum performance and maximum security.
Go back to General Application Settings.
The following are brief descriptions of the available links here:
The Upload form template link takes you to the same page you can get to from the Manage form templates link. If your primary task is to upload a new template, rather than manage an existing template, this is a handy shortcut.
Manage data connection files is a place to upload cross-domain data connection files that you want to make available to the entire farm. These are the same type of DCL connections that you saw in Chapter 7, except that this is a way to upload them to a central location for use anywhere in the farm.
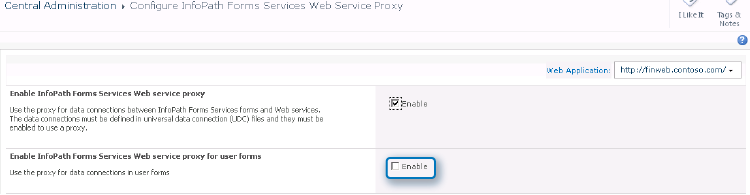
The last link on the IPFS section of the General Application Settings screen is Configure InfoPath Forms Services Web Service Proxy. Clicking this link opens the Web Service Proxy page.


One of the most common challenges with browser-based forms (aside from performance) is related to the security and authentication process. Sometimes, form designers are surprised when their forms work just fine in the InfoPath client but fail anytime someone attempts to use the same form in the browser. This often happens because (unlike the InfoPath client) a browser form communicates with the server via the XMLHTTP protocol, which is stateless. In other words, the browser form cannot pass on the user credentials to remote data sources the same way a regular InfoPath client form can (via NT LAN Manager [NTLM]). This more complex submission process can introduce authentication problems in scenarios for which the data connections are in different domains (other servers). This is generally referred to as a double-hop problem, and it is a very common challenge for IPFS administrators.
Occasionally, you will have scenarios in which you want to connect a browser-based form to a web services data source that resides outside the domain of your SharePoint environment. In these cases, user authentication can become very complex because the browser-based forms do not have the ability to forward the user credentials to the remote server. Conveniently though, SharePoint provides the web proxy service for IPFS, which will essentially act as a proxy between the form and the third-tier data source. The web proxy service provides a facility for SharePoint to pass on the user’s authentication credentials to the remote web service, ensuring that the user can fill out the form and retrieve data from the web service, as expected. Notice in the following screenshot that you are given the option to enable the web proxy for user forms. This option controls whether or not the web service proxy is available to forms uploaded by users. If the Enable check box is left cleared, only forms uploaded by administrators can use the web service proxy.
Tip
To take advantage of the web service proxy, the data connections will need to be defined in a UDC file, as was discussed in Chapter 7.
IPFS Performance Factors
We are all familiar with the frustrating experience of using slow websites on the Internet. Because IPFS is an HTTP-based system, you can encounter some of the same performance challenges as slow Internet sites—if you don’t have a solid plan in place to mitigate the potential issues. Aside from a poorly designed SharePoint environment (a discussion of which is beyond the scope of this book), several conditions can negatively impact the performance of browser-enabled forms. The following are the most common factors that you are likely to encounter:
HTML Some forms grow to a size that requires large amounts of HTML to be transferred between the server and the browser. This can reduce the responsiveness of a browser-based form.
XML Similar to the HTML problem, some complex forms can cause performance issues. Because IPFS processes the form XML on the server, forms with large amounts of complex XML create additional server overhead. Large amounts of XML can also slow form rendering in the browser.
Postbacks Some form controls, actions, and certain features require the browser to communicate with the server during the form-filling session (above and beyond the initial load of the form). This interchange of data is called a postback.
Slow network In the case of browser-based forms, the user’s perception of performance is heavily determined by the speed of the network connection between their client system and the SharePoint server farm. If the network connection is slow, it won’t matter how well-designed your forms are, they will still feel slow to the users.
SharePoint servers not scaled properly for concurrent form users Many people filling out a browser-based form at the same time can potentially place a heavy stress on the server, which can decrease performance while causing an increase in latency.
Many of these potential performance inhibitors can be easily eliminated by making one or more design changes within your browser form. The challenge when chasing down an IPFS performance issue is to narrow down the potential candidate pool of problems; that can be a difficult task without sufficient information. Therefore, a deeper understanding of how IPFS actually communicates with a SharePoint server and obtaining a snapshot of the underlying web traffic that your form is generating is sometimes a necessary task.
To facilitate this information gathering, you need to install one additional software utility on your system. This free tool is called Fiddler, and its primary purpose is to log all HTTP activity between your computer and a website (in this case, the server hosting the browser form). Even if you’ve never done any network traffic analysis, Fiddler makes it very easy to see all the details of what your form is doing at load and submission time.
In the following three exercises, you will use Fiddler to help you understand how to do basic performance analysis of IPFS forms.
Installing Fiddler and Monitoring the IPFS Form Load Process
Note
SET UP Open a browser on your system, and navigate to http://www.fiddler2.com/fiddler2/.
Download and install the Fiddler tool per the instructions on the Fiddler website.
Find the final version of the products.xsn template that you created in Chapter 1, (or download it from the Chapter01 practice files folder on the companion website). Open products.xsn in Design mode in InfoPath Designer.
Publish the products.xsn template as a browser form to a form library on your SharePoint server.
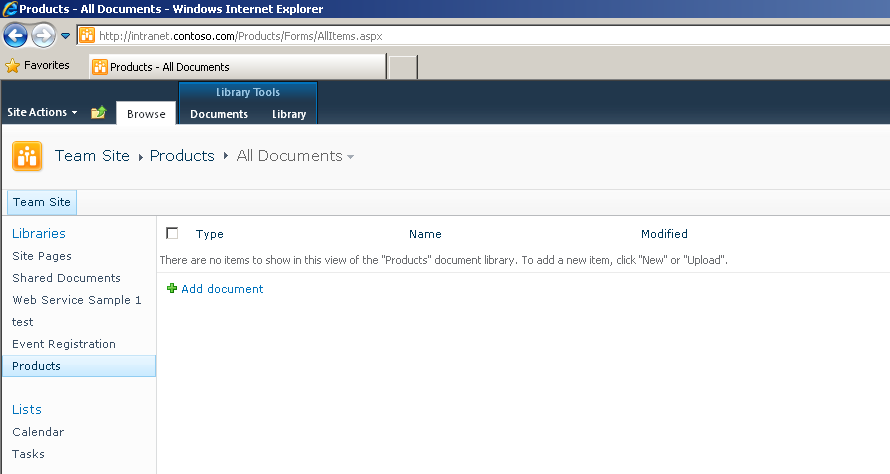
Go to the SharePoint library where the products form is published, and leave your browser window open as shown in the following screenshot.
Open Fiddler on your system. You can find it in the Start menu.
Note
A full tutorial of Fiddler is beyond the scope of this book, but you will find it to be an easy, intuitive tool. The Fiddler interface consists of two main parts, the Web Sessions pane on the left and the details area where you can view the statistics, raw text, images, XML, and so forth that are actually part of the HTTP traffic.
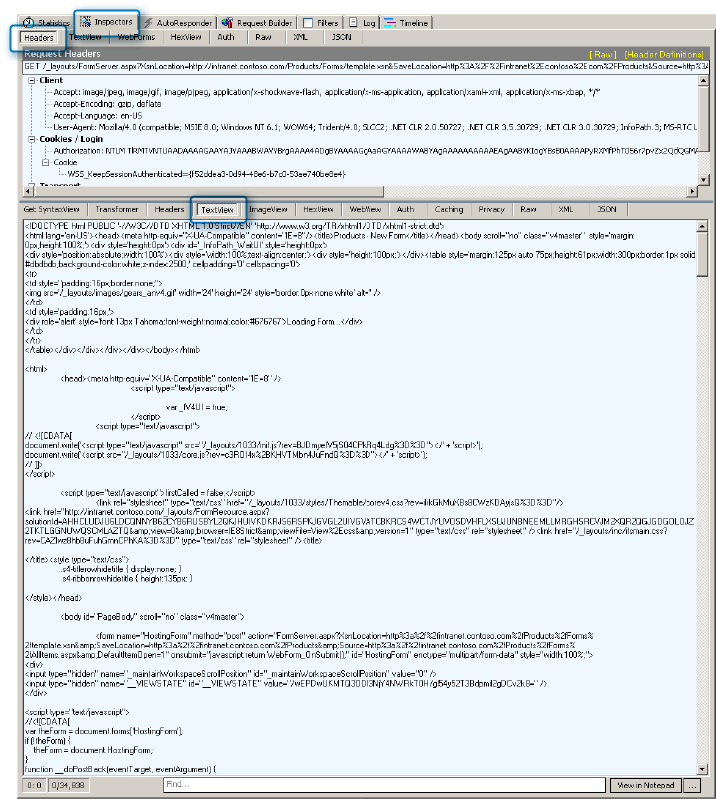
On the top of the right pane, click the Inspectors tab, the Headers tab on the Request Headers pane, and the TextView tab for the details pane.
In the Edit menu in Fiddler, choose Select All, and then press the Delete key to remove all the entries.
Press F12 again to start capturing only the web traffic related to the products form.
Return to your browser, and then click the Add document link to create a new instance of the products form.
Go back to Fiddler. Press F12 one more time to stop the capture.
You should now have an entry in Fiddler that appears as shown in the following screenshot.
Note
The primary entry that you are concerned with is the one in blue (the second entry in the screenshot that follows), which is a 200 HTTP HTML event. This particular capture row represents the actual contents of the products form that have been pushed down to your browser from IPFS. As you will see, this includes all the HTML, JavaScript, and data from external sources such as the products.xml file that is attached to the form as a resource file. Perhaps the most useful piece of information on this particular pane is the Body column, which represents the size of the form that is pushed from the IPFS server to the browser on your client system. In this case, it is 10,797 bytes. (Your result might vary a little.)
Select the primary 200 HTTP event (blue) by clicking it. In the Request Headers pane, you will now see some of the detailed header information from this particular event.
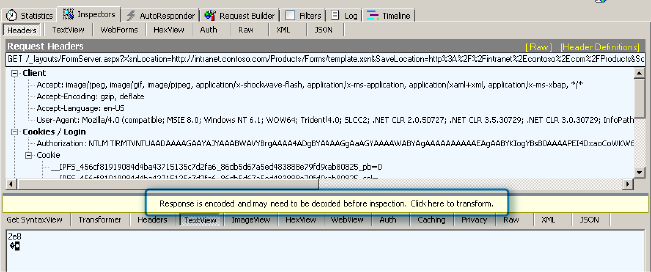
In the details area, ensure that TextView is still selected. You will likely need to click the message that says Response is encoded and may need to be decoded before inspection.
Note
Note After you have transformed the text, Fiddler gives you a view into the raw HTML so that you can see the details. Even if you’re not familiar with HTML, these details can still help you see exactly what’s going on in your form. If you want to analyze a form’s contents to figure out what is happening when IPFS creates a new instance of the form, you now have all the data necessary to do so. Even the XML resource file that you created and attached to the form template is available here.
In the bottom of the details pane, use the Find box to search for data from the XML file you attached to the form back in Chapter 1. Type widget in the search box, and you will see Fiddler has captured everything. Notice that the prices are also embedded in the HTML.

Tip
The fact all the product data is downloaded to the user’s browser when the form is loaded illustrates a very important point for troubleshooting performance. When a user loads an instance of an IPFS form, the size of the initial package of HTML that is pushed down with the form is dependent on the size of the form, number of controls, XML resource files, images, and so on. It doesn’t take much imagination to realize what would happen if the products file had several thousand items in it. That’s why a much better strategy for a large data set would be a filtered data connection where the data resides on a server rather than an embedded XML resource file.

You can see from the preceding exercise that monitoring the details of IPFS HTTP traffic is easy to do with a web analysis program such as Fiddler and that such a program can be an invaluable addition to your toolkit when troubleshooting performance problems.
Monitoring the Products Form with a Picture Control
As mentioned earlier in the chapter, there are many possible reasons why your IPFS forms are not performing as well as you’d like. One of the most obvious is a form that generates a lot of traffic because of the size of the HTML that the form is generating. Among the many ways that you can end up with large, unwieldy forms, one of the most common is giving users the ability to add attachments. When a user embeds a file or picture in a browser-based form, the attachments must be saved with the form to the SharePoint form library.
We’re not encouraging you to disallow all attachments; this is merely one example of how a form can quickly grow into a performance challenge. Therefore, the point of the following exercise is not to pick on any certain controls but to illustrate how to use Fiddler to monitor a form that has an attachment. In the exercise, you’ll use the picture control because it’s easy to work with.
Note
SET UP Open your products.xsn template in InfoPath Designer. You can also download it from the practice files location.
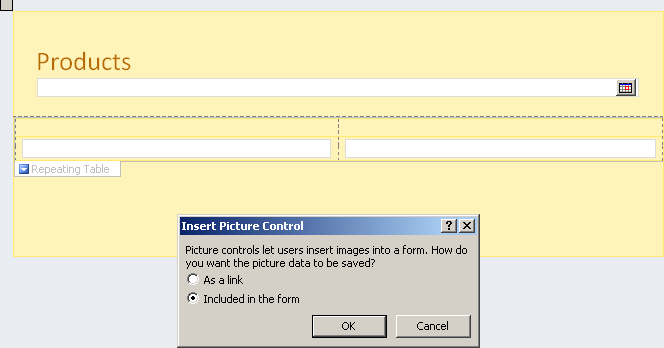
Add a Picture control to the products.xsn template, and then in the Insert Picture Control dialog, select Included in the form, as shown in the following screenshot.
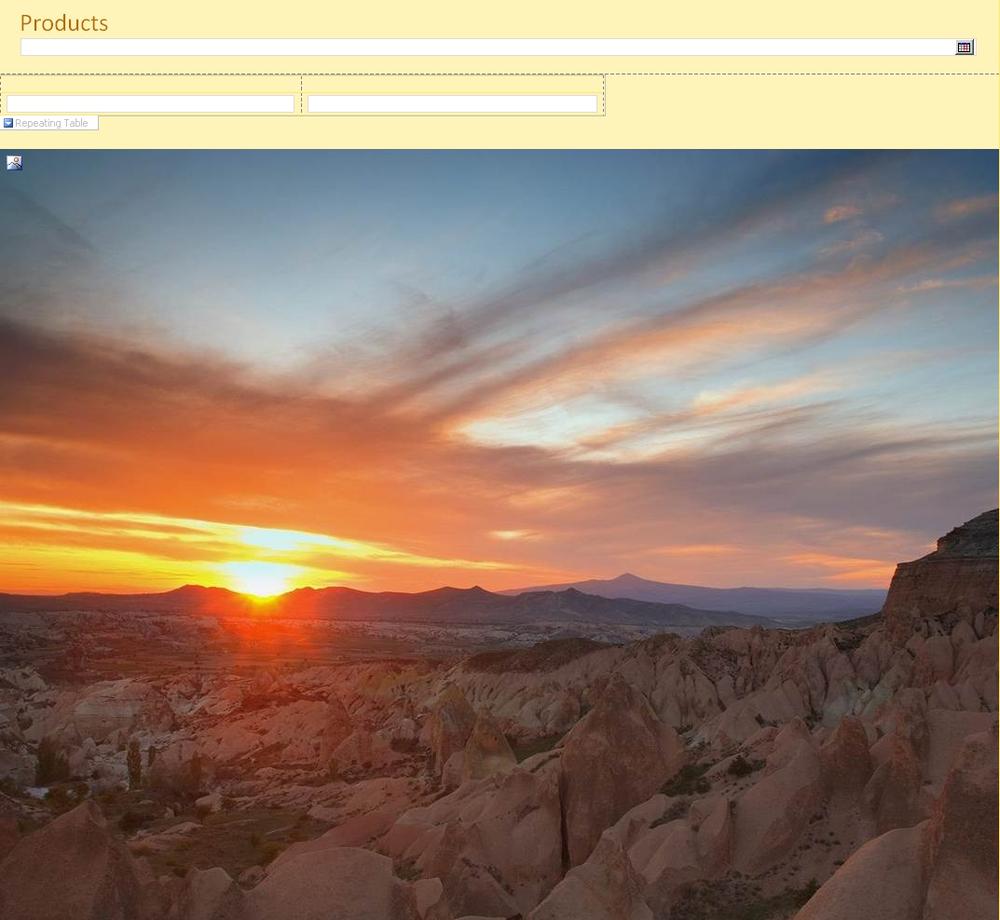
Right-click the Picture control, and then select the Specify a default picture option. Browse to find a picture on your computer to attach to your form.
It doesn’t really matter what image you pick for the purposes of the exercise; look for something around a megabyte or two in size.
After you have added a picture, republish the products form to the same form library that you used in the previous exercise (or a new library if you didn’t do the previous exercise). You can republish the form by using the Quick Publish button on the InfoPath Quick Access Toolbar.
Repeat steps 5–13 from the previous exercise.
To summarize, open Fiddler, clean out any web sessions that you captured, and then capture the web traffic for the new instance of the products form, now that you’ve attached a picture to it.
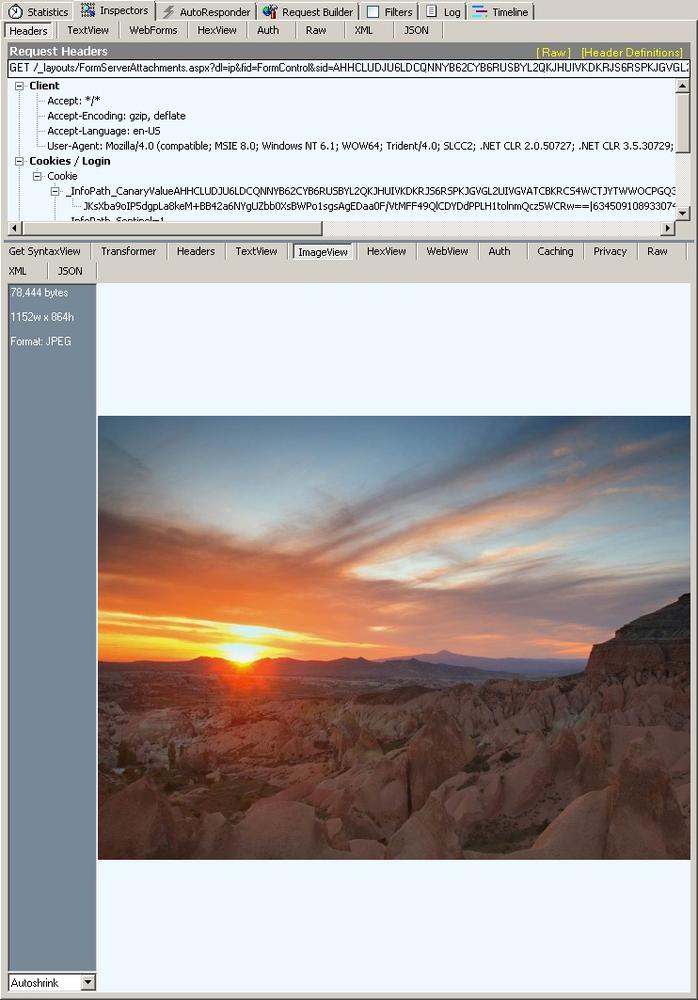
The primary thing you should notice is that Fiddler now has a second entry when your form instantiates. Your original form is still a nice compact 10 KB, but the overall IPFS traffic has grown dramatically due to the image embedded in the form. As shown in the screenshot that follows, it has added over 131 KB. This might not seem like much, but imagine a production system with several forms and lots of users, each of them generating extra traffic on the SharePoint server. Images are used here in the exercise as an easy way to illustrate how to monitor a form for size problems, but in the real world, a form can become unwieldy in numerous ways. Fiddler can help diagnose a variety of problems.
To see the actual image you added to the form, highlight the new entry in Fiddler, and then in the details pane, click ImageView. Again, the power of a tool like Fiddler becomes evident when the time comes to troubleshoot an IPFS performance issue.

Maximizing Performance by Minimizing Postbacks
Aside from the overall size of the HTML generated for a form (which we looked at in the previous two exercises), probably the most common of all the potential factors that might affect IPFS performance are postbacks. Some form controls, actions, and features require a user’s browser to communicate with the server while in the process of a form-filling session. The interchange of data during a session is called a postback, and it usually occurs when a form needs to send data from the user’s browser back to the server for processing and then has to wait for a response to update and re-render the form. This can make postbacks a particularly expensive performance problem because they can quickly increase the required network traffic for a form each time a postback occurs.
Note
Postbacks are relevant only for browser forms because of the stateless nature of HTTP communication. No postback concerns arise when using the InfoPath Filler client because the InfoPath Windows client requires much less communication with a server than an identical IPFS form. The InfoPath client does much of the processing that IPFS forms require a server to do, thus network communication is reduced.
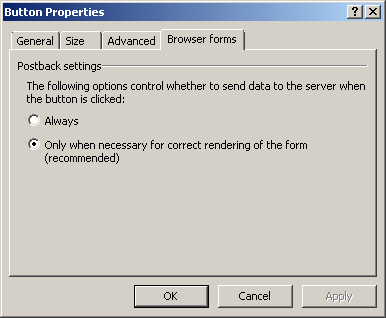
Because IPFS forms are so reliant on the server, postbacks will sometimes be unavoidably necessary. Fortunately, the challenges that postbacks pose can be mitigated by a forms designer who has the knowledge and techniques to minimize them. Sometimes the difference between creating a poor performing form and a good one is not to eliminate postbacks but rather to minimize them by giving thought to the problems postbacks can cause if the form user interface is built without appropriate consideration of performance. When designing a browser form, most controls have an option on the control properties for forcing postbacks (see the following illustration). This would be a rare exception though; generally, best practice is to leave this option at the default setting.
Armed with the proper knowledge of postbacks—why they occur and how to monitor your forms to identify potential problems—you can design a form to minimize the situations that cause them, usually without losing important functionality.
A few of the most common scenarios that cause postbacks are as follows:
Data connections The function of a data connection is to make a query connection to an external data source—such as an XML file, a database, a SharePoint list, or a web service—so that a form can receive and be updated with some data from the data source. When a data connection is activated by an event in a form, such as a button click rule, the form is required to communicate with the server to fetch the data, creating a postback situation.
Calculations A calculation can cause a postback because quite often the calculation requires processing by the server.
Switching views Using multiple views is often considered a best practice to improve the usability and performance of InfoPath forms. By careful grouping of related items and limiting the number of controls in each view, you can improve the form-loading performance rather than placing everything in a single view. So while best practice principles dictate that views are useful, you, as the designer, should be aware that each time the view is switched, a postback is required to send the user’s information to the server, retrieve the new view, and then reload it in the browser.
Tip
If you’d like to monitor a view-switching postback, you can publish the Blue Yonder Records Management Request form from Chapter 5, to a form library as a browser form. Use Fiddler to monitor the form-load process, and then watch what happens when you switch views in the form. Notice that each view switch is an HTTP event that is essentially equivalent to reloading the entire form.
Multiple binding events Events such as insertion or removal of repeating tables and repeating or optional sections also cause postbacks.
Tip
For an example of an optional section postback type, you can publish the Flight Delay Form from Chapter 3, to a form library as a browser form. After you have published it, make sure that you are capturing traffic with Fiddler. Open a new form instance, and then in the Choice Section, switch from a hyperlink to a file attachment, as shown in the following illustration.
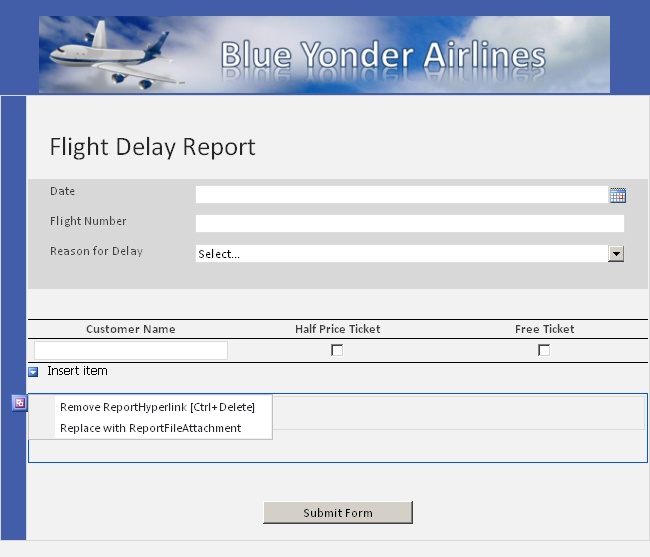
If you watch activity in Fiddler while making the selection indicated above in the Flight Delay form, you’ll see a postback event that looks similar to the following illustration, triggered by the selection of a different option in the choice group.
Monitoring a Data Connection Postback with Fiddler
In the following exercise, you will use Fiddler to monitor a form-load process and then capture a postback event during the form-filling experience. The form is one you’re already familiar with if you completed the exercises in Chapter 9.
Note
SET UP Browse to the form library where you published the Event Registration form in Chapter 9. Alternatively, if you did not complete the exercises in Chapter 9, for the purposes of this exercise, any form with a data connection that loads as a result of a rule on a button will work.
In the form library, add a new instance of the form by clicking the Add Document link.
You should see an event in Fiddler that represents the initial form load, similar to the screenshot below.
After you have loaded the form, enter a user’s name in the people picker control, and then click the Load User Data button.
Switch back to Fiddler, and you will see a postback event that was generated because the button click made the call to the User Profile web service data connection.
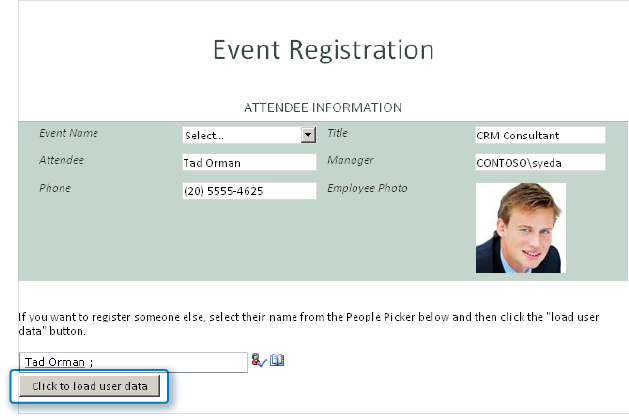
The event generated by the preceding exercise did not cause a large amount of network traffic. However, in a real world scenario, where the button is connected to a larger data source such as a database, the postback events could become very unwieldy. Some designers will set the data to load when the form is first loaded. This strategy can be problematic because the initial form load has a great deal of impact on users’ perception of overall performance of the form. In some circumstances, a better approach is to give users a button in the interface that loads data (similar to the Event Registration form). This approach sets the expectation that a delay will occur so that users are not surprised when the form takes a few seconds to fetch data.
Now you know how to monitor a form and watch for postbacks. This is a useful skill for any IPFS forms designer. Postbacks are a necessary evil with browser forms; it is simply the nature of the way any HTTP-based form application must work. So the goal isn’t to eliminate them—that’s not really possible. However, now that you know when, where, and why they occur, you can design your forms to minimize the impact on performance and usability that postbacks will cause for your users.
Key Points
SharePoint Central Administration has a rich set of GUI administration tools for IPFS.
Fiddler is a free web traffic analysis tool by which every IPFS administrator and form designer can benefit.
IPFS performance is heavily dependent on well-designed forms.
Large attachments can diminish performance of an IPFS form, especially in high volume scenarios.
Form designers should try to minimize the impact of postbacks whenever possible.