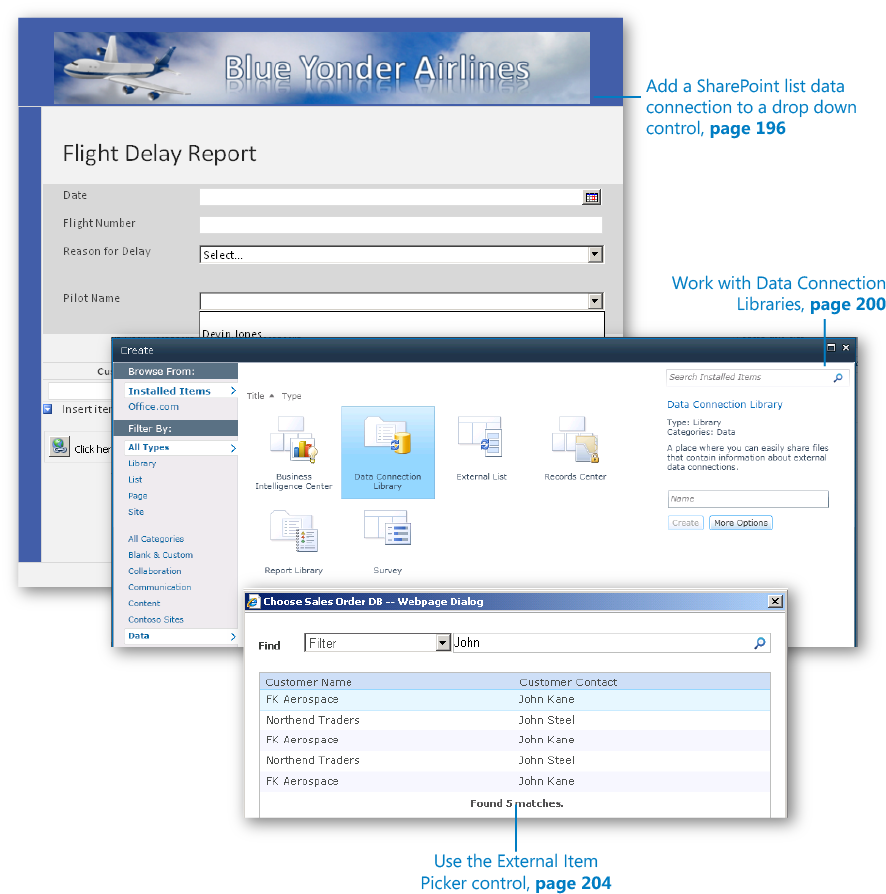
Chapter 7. Receiving Data from SharePoint Lists and Business Connectivity Services
Chapter at a Glance
Note
Practice Files Before you can complete the exercises in this chapter, you need to copy the book’s practice files to your computer. The practice files you’ll use to complete the exercises in this chapter are in the Chapter 7 practice file folder. A complete list of practice files is provided in Downloading the Practice Files and eBook on page xxvi.
Receive Data Connections
In Chapter 6, you learned about data connections for submitting Microsoft InfoPath forms to SharePoint. In this chapter, you will learn about using data connections for retrieving data from SharePoint lists. You will use standard SharePoint lists, and you will also work with the new External Item Picker control in your forms. The External Item Picker is used to select items from SharePoint’s Business Connectivity Services (BCS). BCS is used to connect a SharePoint list to an external data source such as a customer or product database.
In this chapter, we will focus primarily on SharePoint list data connections. Chapter 9, shows you how to use web service data connections to query data from SharePoint. InfoPath offers more data source options, such as XML files and databases, but those are beyond the scope of this book, because we want to focus primarily on the core SharePoint scenarios.
The deep integration between InfoPath and SharePoint gives InfoPath the ability to use SharePoint 2010 lists as secondary data connections to easily retrieve data into form controls. For many forms, an obvious benefit of using a SharePoint list data connection is that the data already exists and is maintained in a SharePoint list. Therefore, the form can always pull in the most up-to-date information from SharePoint rather than trying to duplicate the same information within your form. Also, if the data is maintained in SharePoint, it will be much easier to allow business users to provide updates to the information that your form consumes, without the need to actually modify the form.
Adding a SharePoint List Data Connection
In the following exercise, you will add a control on an existing form so that the form can receive information from a SharePoint list.
Note
SET UP In InfoPath Designer, in Design mode, open the form Flight Delay Form Post Exercise 4 from the practice files location. This is the same form you created in the last exercise of Chapter 3.
In the scenario behind this exercise, you have had a request to add another field of information to the Flight Delay form to capture the name of the flight’s captain. One effective way to handle this requirement might be to add a SharePoint receive data connection because you already have a list of pilots’ names in SharePoint.
Publish the Flight Delay form to a form library in SharePoint (if it is not already).
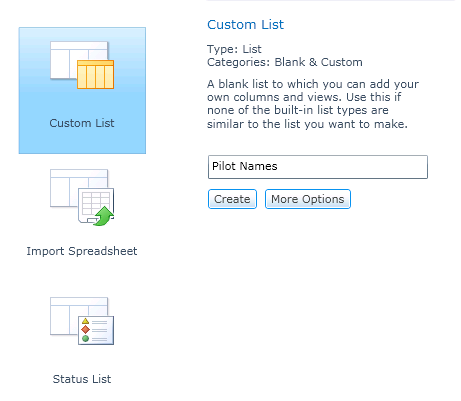
Create a new SharePoint custom list in the same site. Call the list Pilot Names.
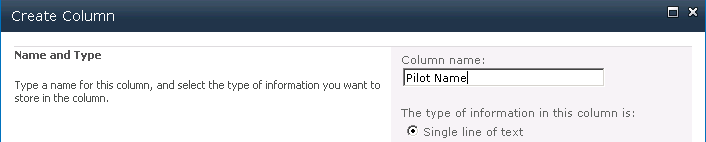
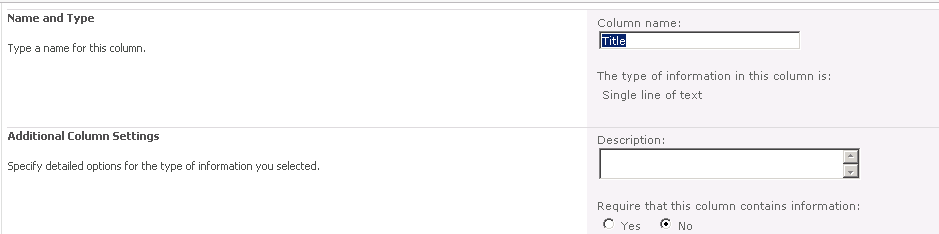
On the ribbon, on the List tab, click the List Settings button. Set the Require that this column contains information option of the Title column to No.
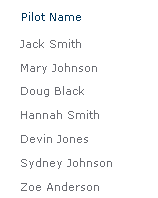
Enter the following seven pilot names in your list:
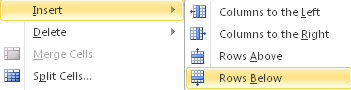
Switch back to the Flight Delay form in InfoPath Designer. In the table on the top part of the form, right-click in the area below the Reason for Delay field.
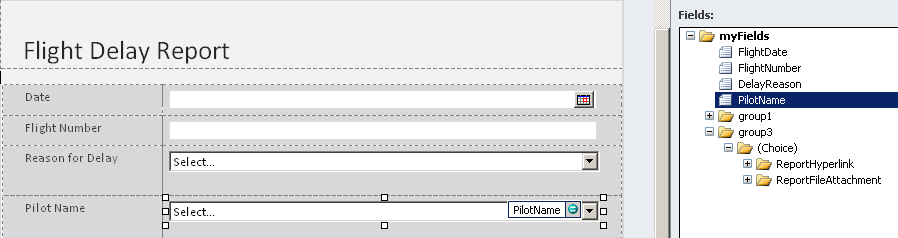
In the label area, add the text Pilot Name, and then insert a Drop-Down List Box control. In the control’s properties, rename it PilotName.
On the ribbon, on the Data tab, click the From SharePoint List button to create a receive data connection on your form.
The Data Connection Wizard opens.
Provide the required information in the wizard to add the Pilot Names list you added in step 2. On the third page of the wizard, select the check box to add the Pilot Name field.
For the remainder of the wizard pages, accept the defaults, and then click Finish.
Now you need to connect the SharePoint list receive to the Drop-Down List Box control.
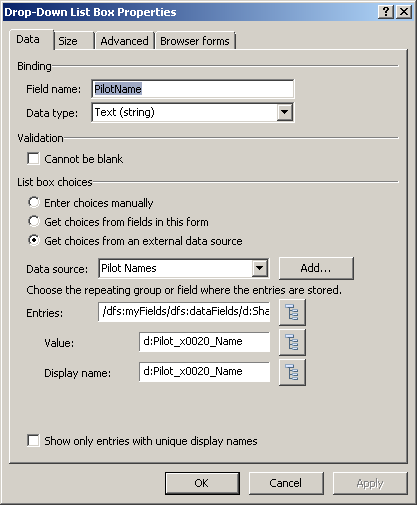
In the properties for the Pilot Name Drop-Down List Box control, select Get choices from an external data source and ensure that Pilot Names is selected, as shown in the following screenshot.
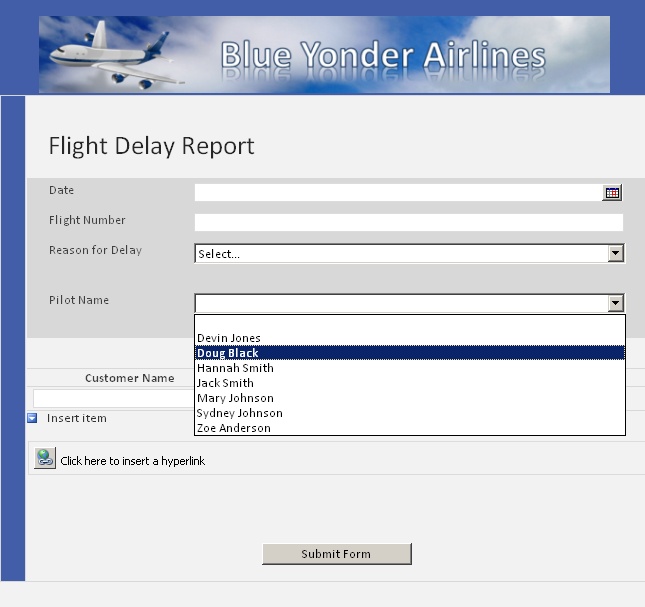
Click OK, and then press F5 to preview the form.
You should now have the information from the SharePoint list available in your Pilot Name field.
Use the Quick Publish button to update the form library with your new and improved form.
Now, anytime a new pilot name is added in the SharePoint list, your form will automatically display the name in the Drop-Down List Box control.


Note
CLEAN UP You can leave InfoPath Designer open if you intend to continue on to the next exercise. Otherwise, save your form and close InfoPath.
Note
For a more sophisticated example of consuming SharePoint lists in a form, read the blog article at http://www.wonderlaura.com/Lists/Posts/Post.aspx?ID=129, which describes how you can add multiple SharePoint list data connections in your form so that they connect and query one another.
Data Connection Libraries
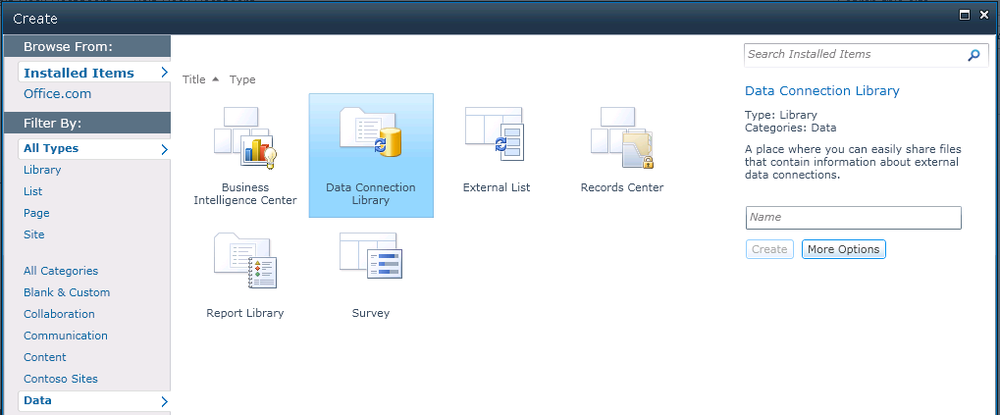
Data connections from SharePoint lists generally work great in either InfoPath filler or browser forms. However, using data connections in browser-enabled InfoPath form templates introduces some potential management and authentication challenges that can be addressed by simply converting your data connections in InfoPath to Universal Data Connection (UDC) files. UDC files abstract the data connection information from the form template and place the connection information in a special SharePoint library called a Data Connection Library (DCL), as shown in the following illustration.
InfoPath 2010 uses data connections that adhere to the UDC file type. They have either a .udcx or a .xml file extension. You can connect to various types of data sources with UDC files, which are stored on the SharePoint server and then used as data connections in your form templates. Using a UDC file in a Data Connection Library offers several potential benefits, including the following:
You can publish a form template that can access data sources in a different security domain (that is, another server). This is a very useful capability because browser form authentication can be very challenging when crossing security domains.
It will be easy for you to configure data connections that work in both the InfoPath Filler client and in InfoPath Forms Services.
You can easily modify the UDC file to redirect data connections to new or updated data sources without modifying all the forms that reference the UDC file. This is much easier than having to go back and update every form template.
Last but definitely not least, you can have a single place to publish data connections that can be shared across multiple forms and even multiple servers. Think of a common data source you might use in your business that might be useful in many different forms—perhaps a list of department names, job titles, store locations, and so on. It would be much easier to maintain the data connection and security settings in one location for this type of information. All the forms in your business that need that information can reference one UDC. Combining a UDC file and a Data Connection Library is an excellent strategy for simplifying large or complex form environments.
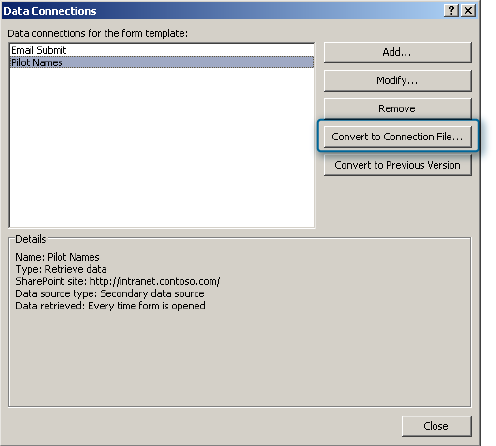
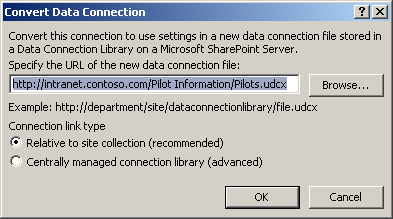
The process for adding a UDC is actually quite simple. First, you need to have a Data Connection Library set up in SharePoint. Assuming one is in place, you add your data connection in InfoPath as usual. In the Manage Data Connection dialog, you simply use the Convert To Connection File button, which will walk you through a wizard to convert and save your connection as a UDC file.
You will need to provide the location of the Data Connection Library in SharePoint. In the following screenshot, we are publishing the data connection as a UDC file named Pilots.udcx to a library named Pilot Information.
After you have done this, you can reuse the data connections in other new forms, by using the From SharePoint Server button on the ribbon’s Data tab.
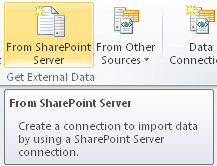
Next, browse for UDC files in Data Connection Libraries, and then pick the one you need for your new form.
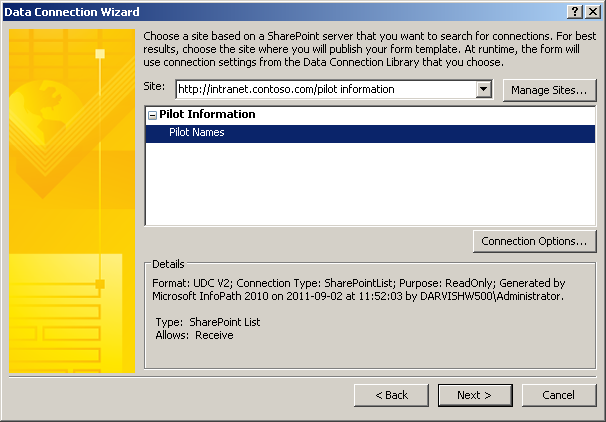
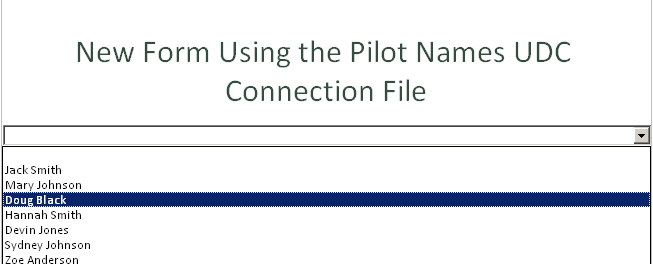
Now your new form can use the data from the Pilots Name SharePoint list data connection that you created in the previous exercise. However, it’s now stored in a centrally managed Data Connection Library, and all your forms that require this information can reference a single UDC file for their data.
The External Item Picker and Business Connectivity Services
Many companies use BCS in SharePoint to connect to external systems such as customer or product databases and make that information available in SharePoint. BCS is different from the previous types of data connections we’ve discussed in one major way: the data resides in its own application rather than in a SharePoint list. BCS gives SharePoint (and thus InfoPath) a “view” into that data, but the data still resides natively in its own application (typically a database).
Fortunately, for situations in which your company is utilizing BCS in SharePoint 2010, InfoPath 2010 has a control called the External Item Picker that exists specifically for consuming data from BCS. When added to a form, this control provides an easy way for users to select items from the data source to which BCS is connecting. For example, perhaps the user is filling out a customer service form, and you’d like her to select the customer name directly from BCS rather than creating a duplicate list of that information in SharePoint and another data connection in your form.
BCS is typically set up by a SharePoint administrator. Assuming that BCS is in place for you to utilize, the External Item Picker has several unique advantages for the InfoPath forms designer, including a pre-built security and data access model.
In the following exercise, you will follow the steps to add an External Item Picker control on to a form and set the control properties so that you can select an item from an external data source via the BCS. This exercise makes some assumptions about configuration work that is already done on your system to set up an external content type (ECT) in BCS. The ECT uses XML to define data that is stored in an external system, such as a Microsoft SQL Server database. If you’re not the SharePoint administrator, you will need to work with that person to gather some information that is required—and perhaps provide some instructions about how you need the ECT configured to make it work with InfoPath.
Create a new blank form, and then publish it to a form library in SharePoint.
Add an External Item Picker control to your form.
Right-click the control, select the control properties, and then click the General tab.
This page includes several properties that you will need to gather from your SharePoint System Administrator. The easiest way to collect these properties is by going to Manage Service Applications in Sharepoint 2010 Central Administration and choosing Business Data Connectivity Services.
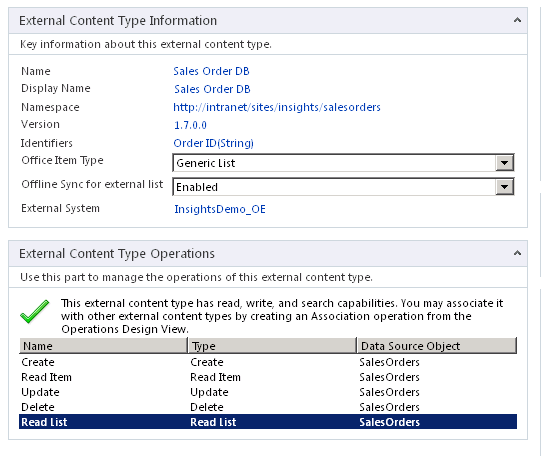
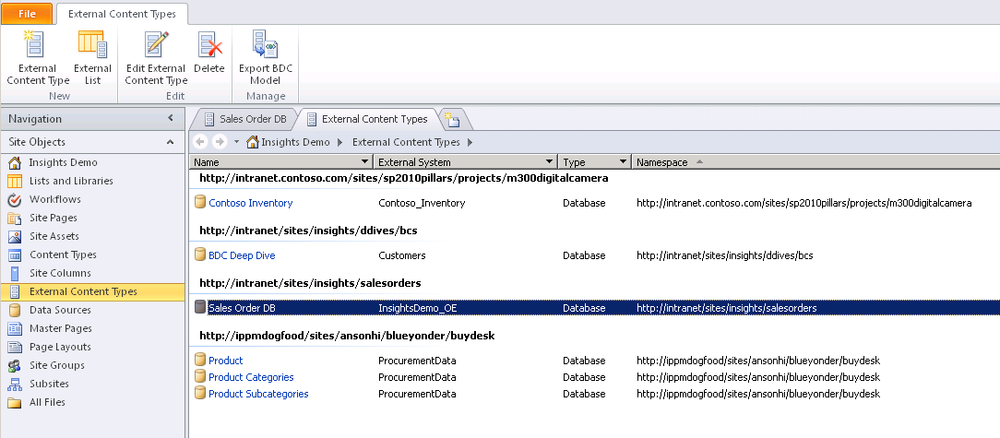
Click the specific ECT to which you want to connect. The following screenshot, shows an ECT with the name Sales Order DB.
Gather the following information from the External Content Type Information page:
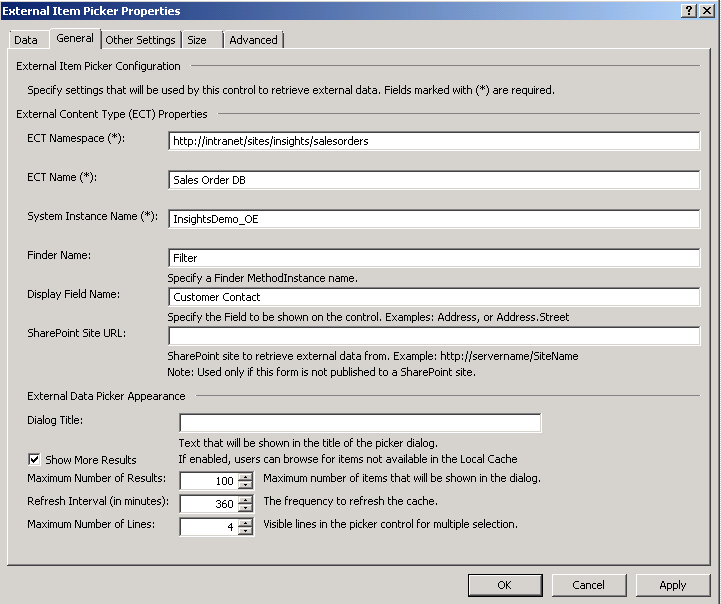
Switch back to InfoPath, with the properties of the External Item Picker control still open. Then do the following:
Populate the ECT Name field with Name.
Populate the System Instance Name with External System.
Skip the Finder Name for now; you will add that data in a later step.
Populate the Display Field Name with the actual database field that you’d like to use in the control. If your administrator used SharePoint Designer to create the ECT, you can easily go to the properties of the ECT in Designer and see all the available fields, as shown in the following screenshot. In this example, it is Customer Contact.
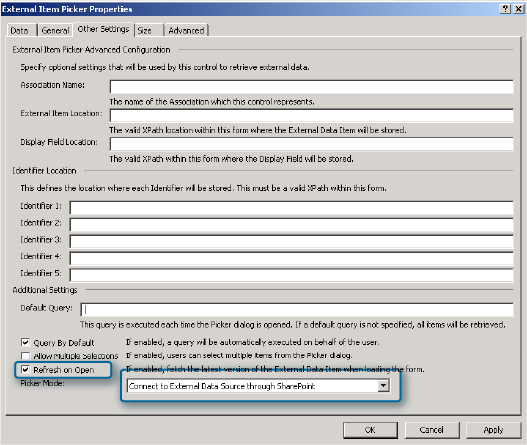
In the control properties dialog box, switch to the Other Settings tab. Ensure that the Refresh on Open check box is selected, and then switch the Picker Mode drop-down box at the bottom of the page to Connect to External Data Source through SharePoint. You need to set it that way because you are using BCS in SharePoint.
Switch back to the General tab.
You are almost finished, but to have your control work properly, one very important field remains to be filled out: the Finder Name field. The Finder Name is equivalent to a filter on the ECT. This gives the user the ability to search for information in the control. If you do not configure a filter, the user will be presented with a list of all results from the database, and he will have to scroll through them all rather than simply searching.
If your administrator has already defined a filter on the Read List operation of the ECT, add the filter name to the Finder Name field in the External Item Picker Controls Properties dialog box. In this example, the filter name is simply Filter.
Click Apply, and then OK.
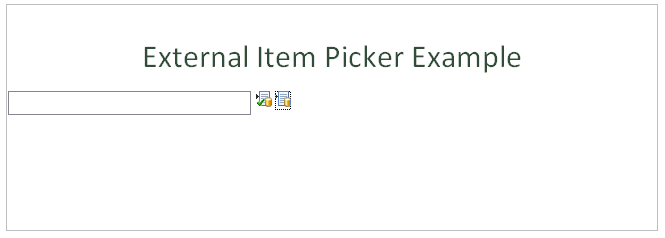
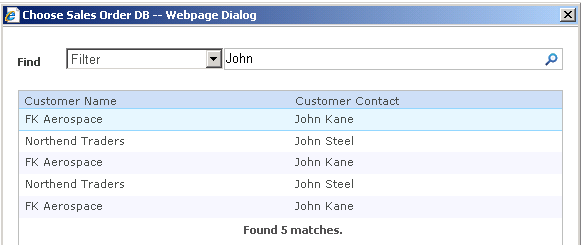
You should be back on your form design surface. Use the Quick Publish button to update the form library with your new form. If you go to the form library and create a new form instance, you should be able to use the External Item Picker control to browse and search for data from the external system.


Tip
Do not be discouraged if this control doesn’t work properly on your first, second, third, or even tenth attempt. It is one of the most complex InfoPath controls. Several moving parts need to be set just right in SharePoint and InfoPath to make the External Item Picker work properly. Verify that you have entered everything accurately at every possible point along the way.
Adding a Filter to a Business Connectivity External Content Type
Part of the reason the External Item Picker control is so daunting for new forms designers is that it requires knowing exactly which information from the ECT in SharePoint must be added to the control properties so that everything works correctly. That information was covered in the previous exercise. In most cases, an ECT will be created either in Microsoft Visual Studio or SharePoint Designer 2010. In either case, the developer or administrator should be able to give you the necessary data. However, to make the External Item Picker work as intended, the one extra step that you might need to ask them to take is to add a wildcard filter so that your users can search for the information. The filter must be added in a very specific manner for it to work properly. The screenshots included in the following exercise are from an ECT that has been set up in SharePoint Designer. The instructions will provide the steps necessary for you or your SharePoint administrator to add the filter to new or existing ECTs.
Select the appropriate ECT; in this case, it is Sales Order DB.
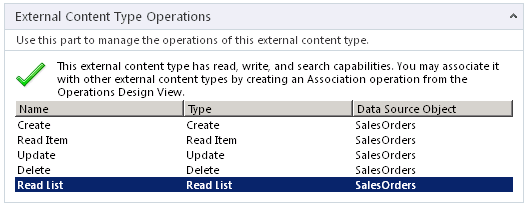
In the External Content Type Operations dialog box, double-click Read List to open the Read List Operation Properties Wizard.
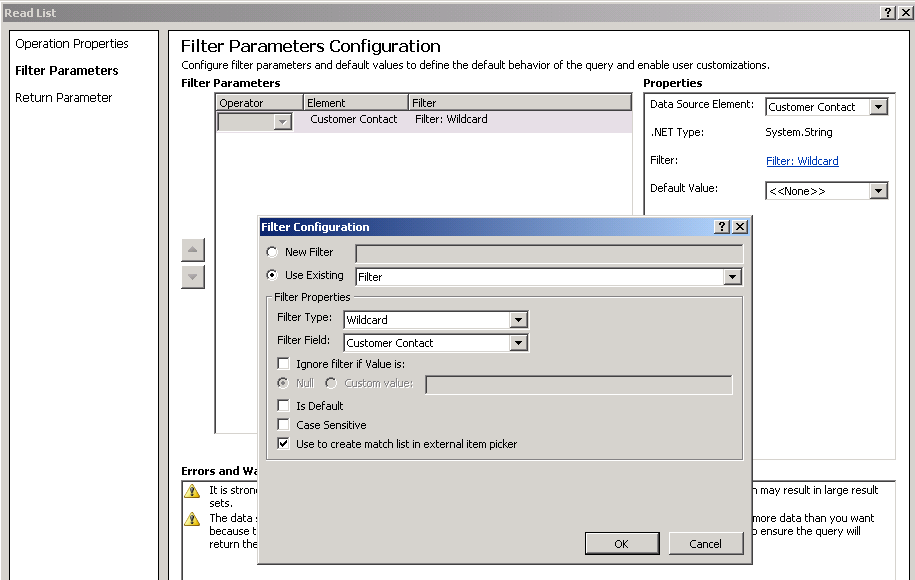
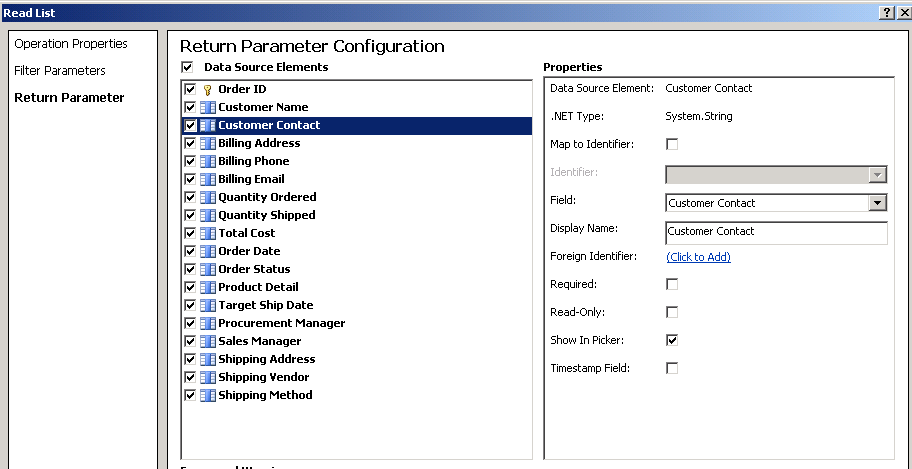
On the Filter Parameters page of the wizard, set your configuration as shown in the following illustration.
The name of the filter will be the same name that you use to populate the Finder Name field in the External Item Picker properties in InfoPath. The Data Source Element and Filter field should be set to the same field from the database as the one you want the picker control in InfoPath to display.
On the Return Parameter page, ensure that you have selected the appropriate Data Source Element option and that the Show In Picker check box is selected.
When you’ve completed the Read List Operation Properties Wizard, save your changes in SharePoint Designer. This will update the ECT properties in BCS and allow your form to filter on the data source.
Key Points
InfoPath 2010 provides very tight integration with data in SharePoint lists.
SharePoint lists are easily maintainable by business users and are thus a great way to ensure that the data in your forms is current.
Data Connection Libraries make the administration of data sources much easier by centralizing security and management.
By using the External Item Picker control, InfoPath can consume data from external systems through SharePoint 2010 BCS.