
Chapter 5. Adding Logic and Rules to Forms
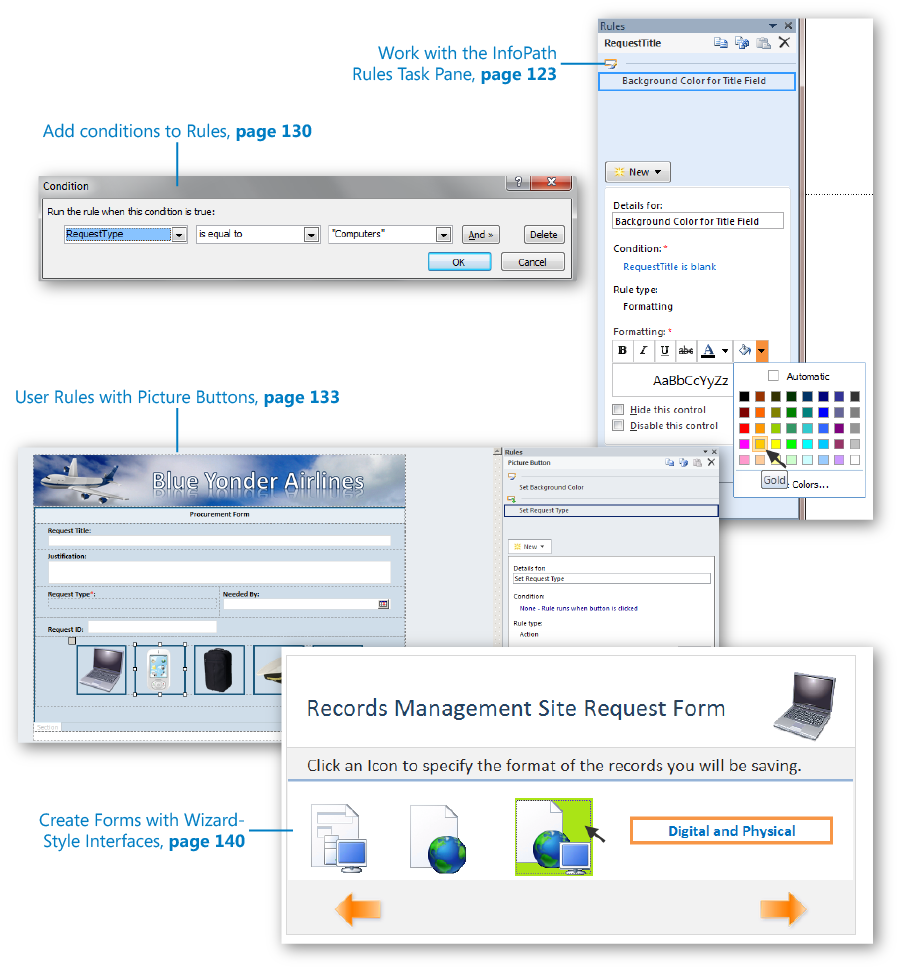
Chapter at a Glance
The core purpose of most forms is to gather useful data. To help facilitate this in an efficient, accurate, and intuitive manner, InfoPath has several built-in mechanisms for adding logic and formatting to your forms. In the past, if a digital form required sophisticated data validation, logic, or conditional formatting, it almost always required extensive involvement from a programmer who understood how to build the logic in computer programming code. InfoPath simplifies much of the complexity of adding logic to forms but still retains the power to support the complex requirements you might have for adding logic and validation to your forms.
Part of the appeal of digital forms versus paper is the ability that software-based forms have to dynamically adapt to user input. For example, imagine that you have a form field that asks a simple yes/no question. If the user’s answer is “yes,” perhaps he is presented with further required input fields, or perhaps he is automatically presented with an entirely new section of the form that was previously hidden. However, if the answer to the question is “no,” perhaps he is automatically redirected to an entirely different page (view) of the same form. This ability to adapt and respond in real time to user input is a major part of the InfoPath logic engine. The most common method you will use to add this type of logic to your forms is by using rules in InfoPath, of which there are three types: validation, actions, and formatting. We will briefly describe each of these rule types in the next section.
Note
Practice Files Before you can complete the exercises in this chapter, you need to copy the book’s practice files to your computer. The practice files you’ll use to complete the exercises in this chapter are in the Chapter 5 practice file folder. A complete list of practice files is provided in Downloading the Practice Files and eBook on page xxvi.
Primary Types of Form Logic in InfoPath
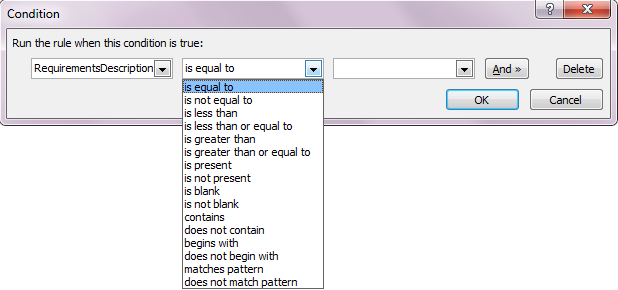
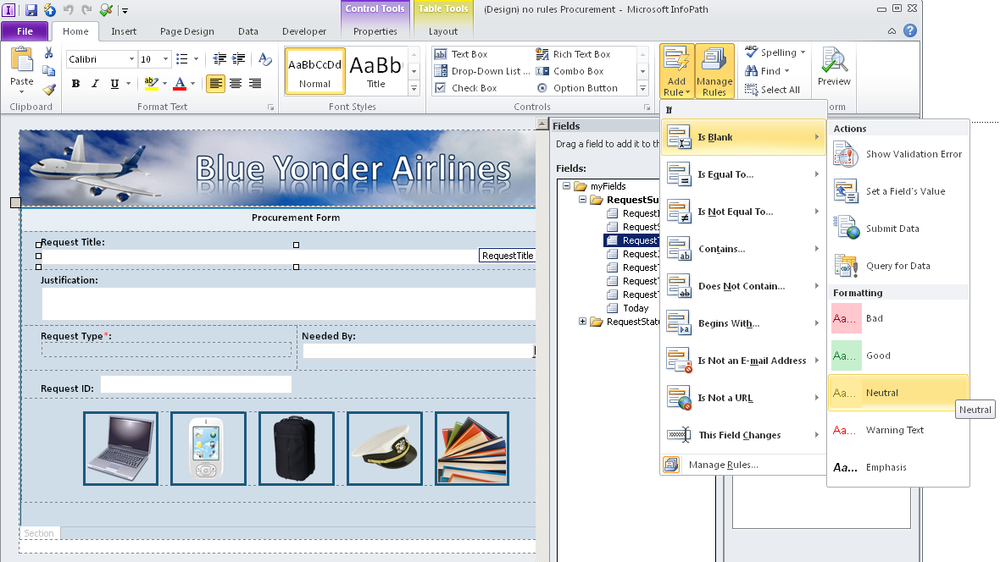
Data validation rules help to ensure that users enter data into your forms in an accurate and consistent manner, in exactly the format you intended. A common example is the use of data validation to ensure that a user types a Social Security number in a specific format (for example, 999-99-9999). This validation rule uses the matches pattern condition. You can use data validation to present the user with ScreenTips and error messages that help guide her to enter the data correctly. Other examples of data validation rules within forms could be ensuring that a user has entered an email address or phone number as you intended. The following screenshot shows how most of the InfoPath data validation logic conditions are self-explanatory. These rules make adding validation logic to forms easy, even for the non-programmer.
Another type of rule that you can add to your forms is called an action rule. Actions can be triggered in your forms in a variety of ways; they are often initiated by user-driven events such as a button click. An example of an action would be setting the value displayed in a field based on a selection the user makes in a drop-down control in another part of the form. You can add multiple actions to a rule, making action rules extremely powerful tools. The primary types of action rules are briefly described in the following:
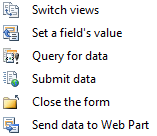
Switch Views An action typically applied to a button or image that switches the user to another view in the form.
Set A Field’s Value Use this when you want the value in one field to be automatically determined by the value from another field.
Query For Data You can use this when you need to run a query against a data source to submit or receive data.
Submit Data Most forms need this for publishing the form to SharePoint or some other location.
Close The Form This action is often useful when you want your form to be automatically closed on the user’s computer after the necessary input has been provided.
Send Data To Web Part This is a new Microsoft SharePoint 2010 Web Part, specifically designed for hosting InfoPath forms. This helps you send data between InfoPath and other Web Parts. We’ll cover this action in more depth in a later chapter.
A third type of rule is called conditional formatting. This is a very useful type of form logic with which you can manipulate the appearance of the form as the user fills it out. An example would be hiding an entire section of the form unless the user selects “yes” on a check box control. If he selects “no,” the section remains hidden. Formatting rules allow you to create forms with dynamic interfaces that display only the relevant fields/sections. The primary types of conditional formatting rules are as follows:
Font formatting (bold, color, and so on)
Background color
Hiding a control (including an entire section)
Disabling a control
In addition to rules, InfoPath also supports formulas and functions for situations in which you need to have more power and flexibility than the pre-defined rules allow for. InfoPath has functions that support a broad array of capabilities, such as date and time, math, and text manipulation.
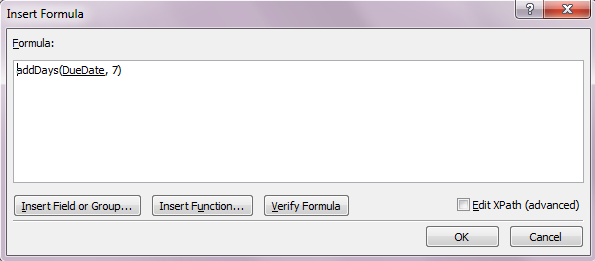
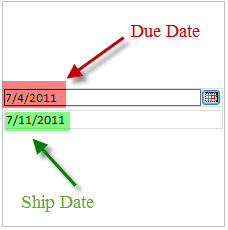
Inserting a formula can be very powerful. The Formulas input box allows you to add fields or groups, functions, and operators that are used to calculate and display other values. As a quick example to illustrate this concept, the following two screenshots are from a simple form with just two fields: DueDate and ShipDate. In this case, what you want to do is have the user select a date from the DueDate field, which is a date picker control. Then the formula calculates the value of the ShipDate field by using the addDays function to automatically add seven days. You can see how the InfoPath formula builder was used to easily build this logic.
InfoPath functions are not unlike those you might have worked with in Microsoft Excel or SharePoint. Functions typically return a value that is derived from the results of a calculation. Each function has values called arguments.
Functions generally fall into one of the following categories:
Date and time functions
Field functions
Math functions
Text functions
URL functions
User functions
Functions consist of three parts:
InfoPath functions can be used with default values and rules. You will have an opportunity to apply a few simple date and text functions in this chapter and then work with more complex scenarios in Chapter 14.
Working with Validation and Formatting
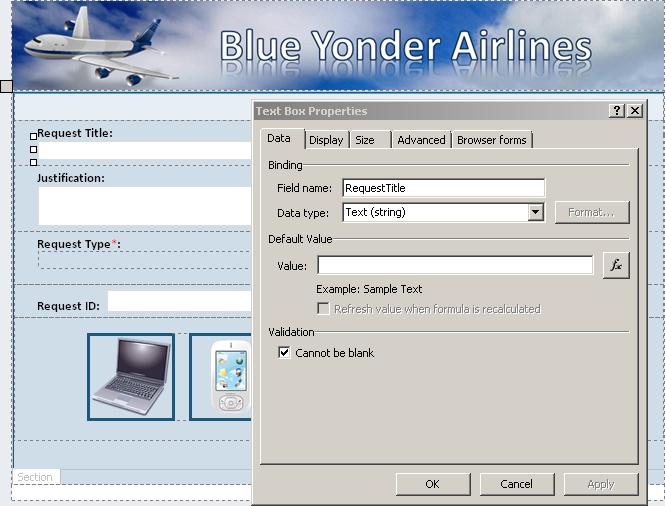
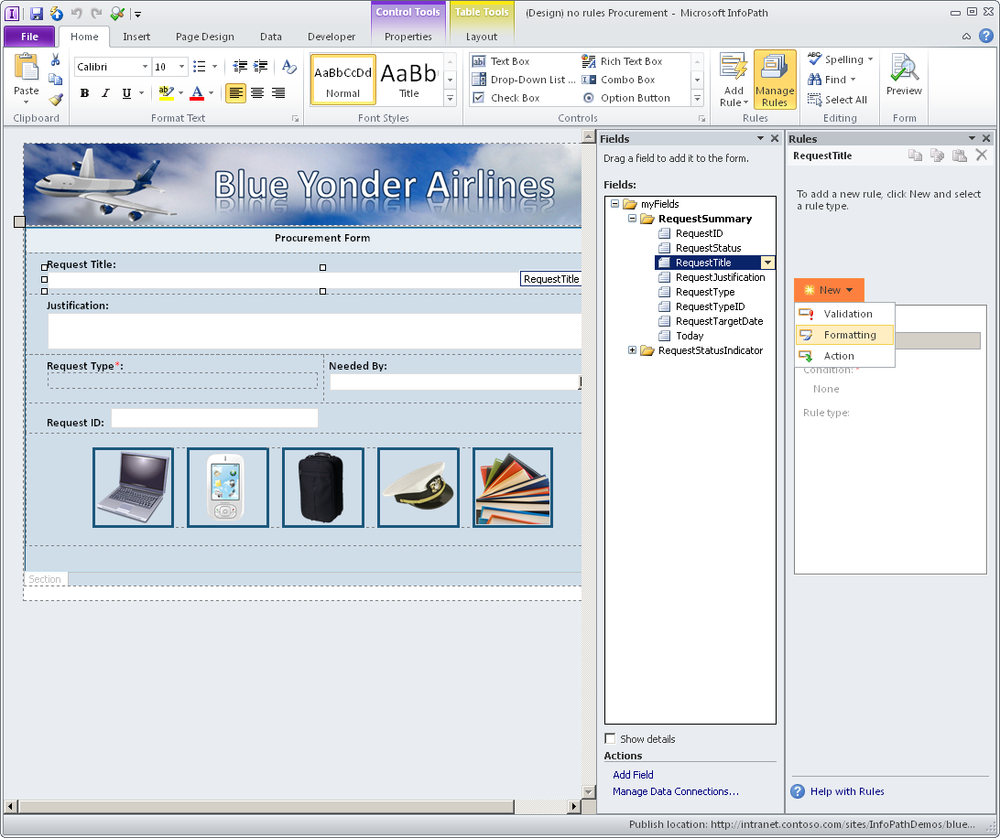
The first sample form you’ll be using for this chapter is a procurement form that the fictitious Blue Yonder Airlines company provides its employees for purchasing items they need to do their jobs. The form gathers basic information from the user that’s necessary to place an order, such as name, date, and product details.
In this first exercise, you will add a validation and formatting rule for the Request Title field. The validation will ensure that the field cannot be blank and also will give the user a visual cue by using a background color formatting rule.
Note
SET UP Open the no rules Procurement form template that is provided in the practice files. Open the form in Design mode (right-click the file), and then choose Design.
In the form template, right-click the Request Title field, and then choose Text Box Properties. Under the Validation section, select Cannot be blank, and then click OK.
This designates the field as required; the user must always provide a title. If she does not, she will not be allowed to complete the form.
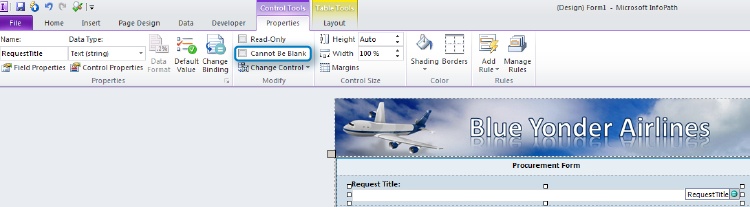
On the ribbon, click the Manage Rules button to open the Rules Task pane (on the right side of the InfoPath Designer).
Ensure that you have selected the Request Title text box in the form design area. A single left-click will make it the active selection.
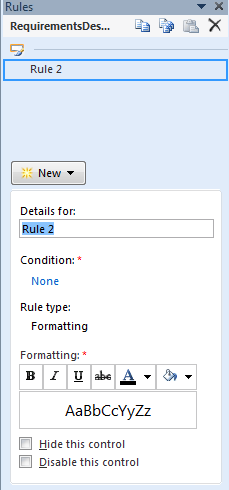
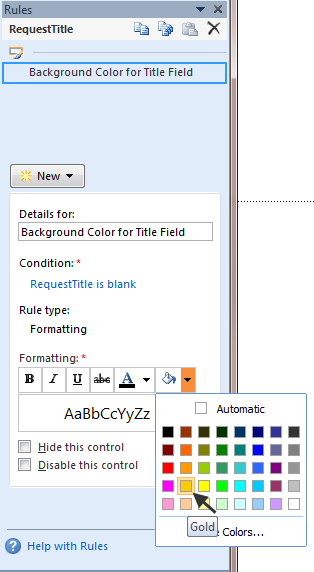
In the Rules pane, select New, and then select Formatting. Give your rule a descriptive name, such as Background Color for Title Field.
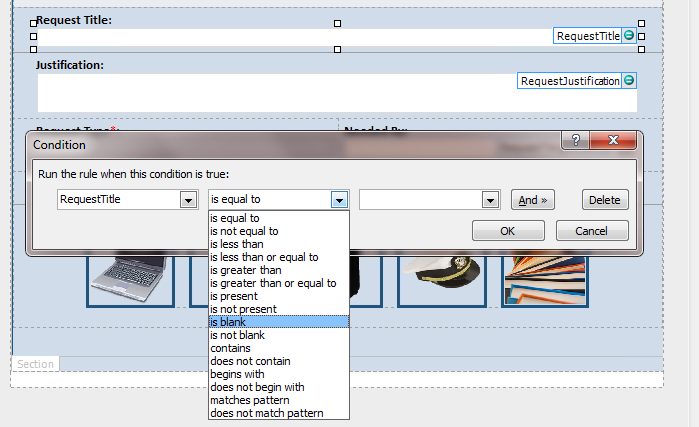
In the Rules pane, in the Condition section, click None to open the Condition dialog box. Select the middle drop-down list, pick is blank, and then click OK.
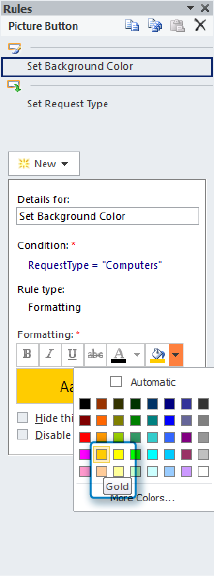
In the Rules pane, in the Formatting section, click the arrow to the right of the Shading Color tool (the bucket), and then select Gold.
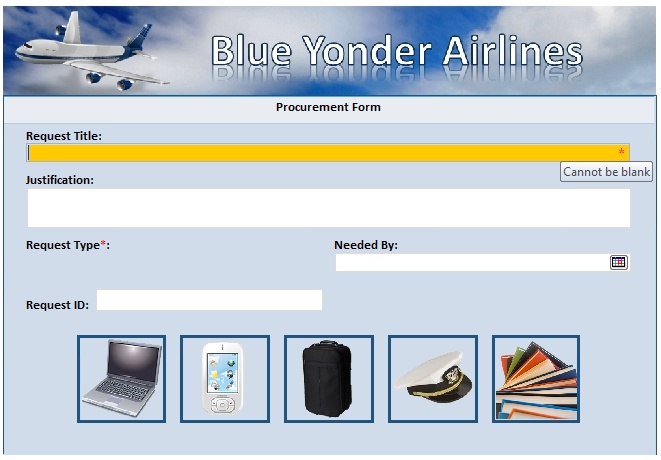
On the ribbon click Preview.
Notice that your Request Title field has a red asterisk in it and also shows a ScreenTip that says Cannot be blank when you hover over the field. This is InfoPath’s way of visually indicating to the user that the field requires data input. You took it one step further and added a formatting rule that forces the Title field to remain gold as long as it is equal to “is blank.” Notice that if you type something in the field and then tab to the next field, the color reverts back to white. This is your rule doing exactly what it is supposed to—congratulations!
Tip
Remember that F5 is the shortcut key for previewing your form. You will be previewing a lot in this chapter.
Using Functions to Set a Default Value
Now you will utilize some of the InfoPath functions to add more logic to the Home (default) view of the Blue Yonder procurement form. The specific functions you will use for this exercise are concat and now.
Your task is to create a unique value in the RequestID field. Among the many approaches to automatically generating unique values in data fields, one new option is to use the Document ID Service in SharePoint.
For this example, you are going to use the now and concat functions to set a default value on your Request ID text field. This will automatically generate a unique value in the RequestID field for each form instance the user creates. This unique value can be used for a variety of purposes: tracking/reporting, workflows, or to provide a unique name for the form when it is saved to SharePoint.
Note
SET UP In Design mode, open the Procurement form template that you saved from the previous exercise. Alternatively, you can open the no rules Procurement form template from the practice files.
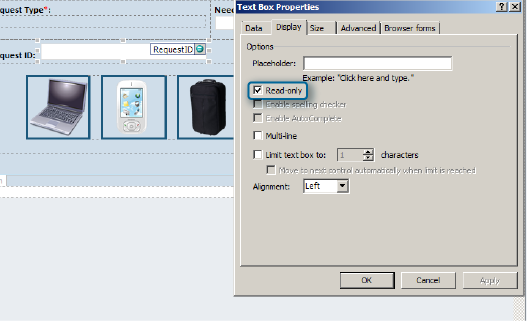
In the form template, right-click the Request ID field, and then in the shortcut menu that opens, choose Text Box Properties. Click the Display tab, and then select Read-only in the Options area so that the user cannot change the ID that you are going to generate.
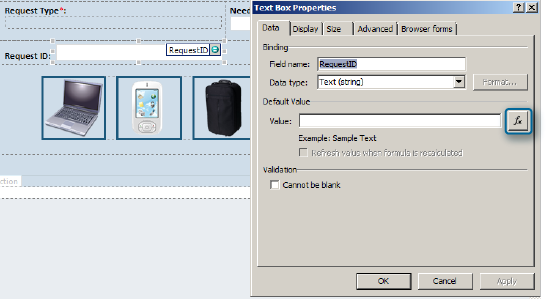
In the Text Box Properties dialog box, click the Data tab. In the Default Value area, click the fx (for function) button.
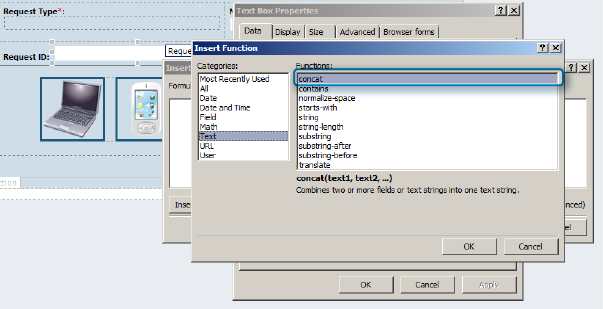
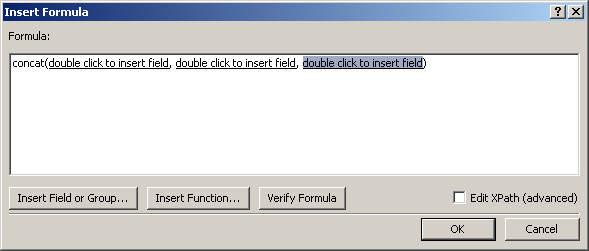
Select Insert Function, and then choose Text from the list. Double-click concat (which should be the first option).
In the Insert Formula dialog box, place your cursor over each of the three links labeled double click to insert field, and then carefully delete each of them and the commas, leaving only concat().
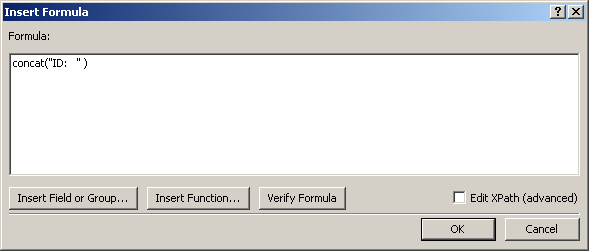
Place your cursor between the two parentheses, and then type ID: (including the colon).
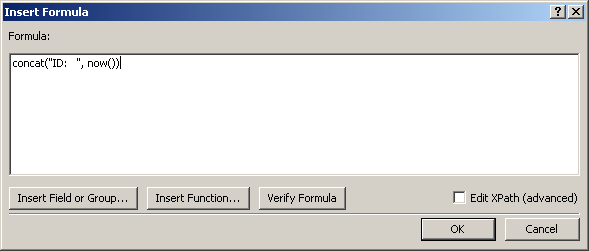
Type a comma directly after the last quote but just to the left of the closing parenthesis. Click the Insert Function button, choose Date and Time, click now, and then click OK. Your formula should look like the illustration that follows.
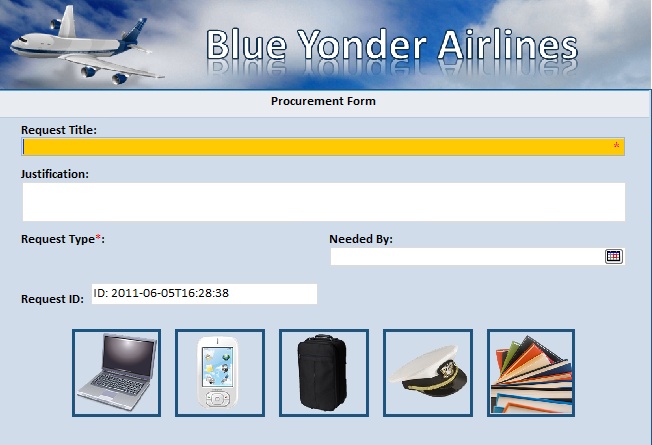
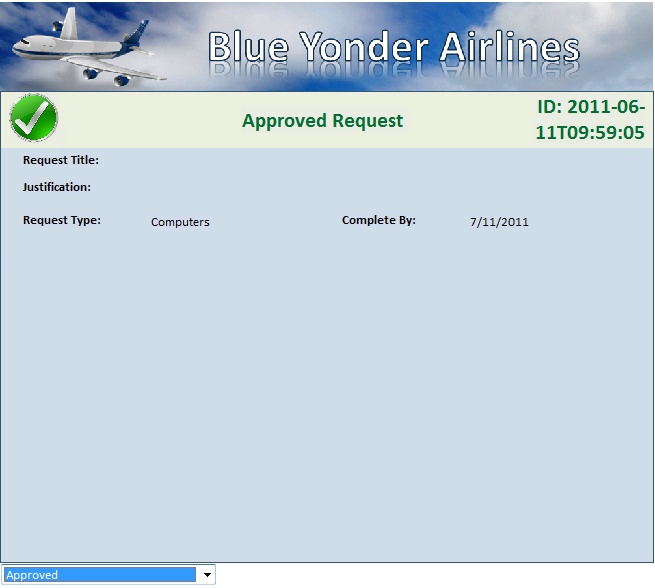
Click OK, and then click OK again. On the ribbon, click Preview; you should have an automatically generated ID number in the Request ID field.
Using the now() function is a useful and simple way of generating field values that will almost certainly be unique because this function returns the system time including the seconds. Also notice that if you click inside the Request ID field and attempt to alter the text, you are unable to do so because you designated the field as read-only.

Adding Action and Formatting Rules
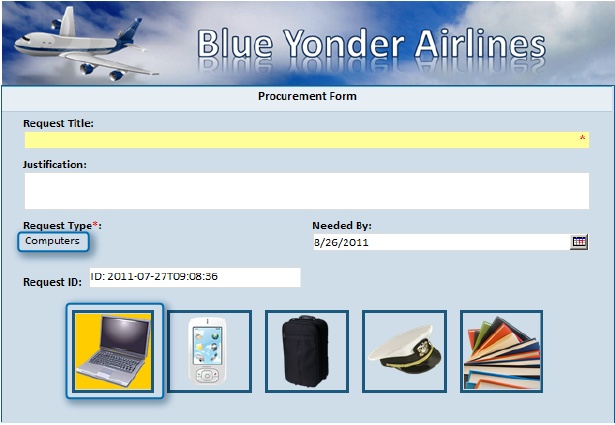
In the following exercise, you will add action rules to all the picture buttons in the procurement form. This will set the value of the RequestType field to match the appropriate product category that the user selects. Each picture button will also have a formatting rule that adds background color to the button currently selected. This will provide the user with a visual cue that indicates which button they’ve selected.
Note
SET UP In Design mode, open the Procurement form template that you saved from the previous exercise. Alternatively, you can open the no rules Procurement form template from the practice files.
In the Procurement form, ensure that you have selected the picture button of the computer.
In the Rules pane, create a new formatting rule called Set Background Color.
To create a new condition where RequestType is equal to Computers, choose type text from the drop-down list on the right, type in Computers, and then click OK.
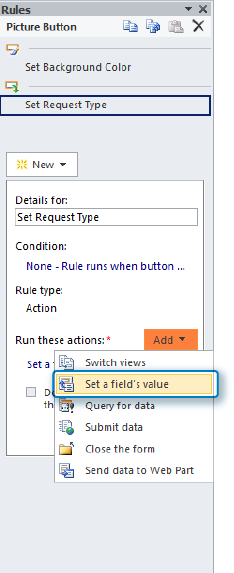
In the Rules pane, create a new Action rule called Set Request Type.
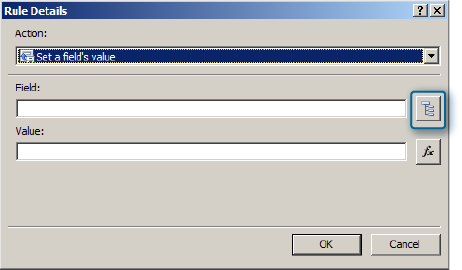
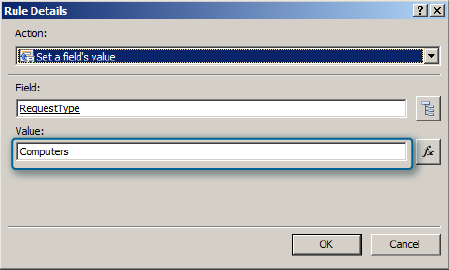
Click Add, and then select Set a field’s value from the drop-down list.
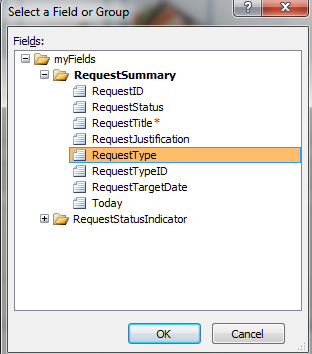
Select RequestType, and then click OK.
In the Value field, type Computers, and then click OK.
Select the Preview button for your form, and then click the Computers picture button.
You should see both of your rules take effect: the background color changes on the Computer picture button, and the Request Type field is set to Computers.
Repeat steps 3 through 10 for each of the other four picture buttons. Add the same two rules that you did for the Computers picture button, but set them equal to the following text for each picture button respectively:
Cell phones
Luggage and gear
Apparel and uniforms
Training courses
Preview the form by pressing F5, confirm your rules are working properly for each picture button, and then save your form template.


Working with Sections and Conditional Formatting
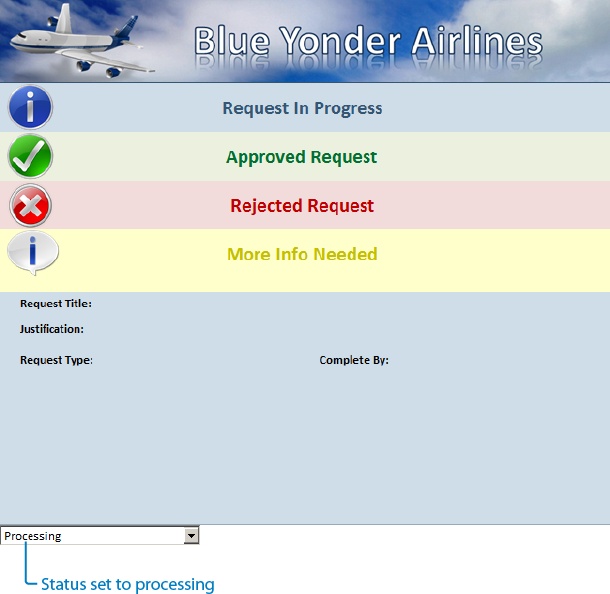
Using conditional formatting on sections is very useful when you want to hide or applying formatting to all controls in that container via a rule. In the following exercise, you will work in the second view in the procurement form (View Request) and add conditional formatting rules to the form status sections. This will allow you to show only the current status of the form (Approved, Pending, and so on), while hiding all the other possible statuses. You will use the Request Status drop-down field to determine which status is currently in effect.
Note
SET UP In Design mode, open the Procurement form template that you saved from the previous exercise. Alternatively, you can open the no rules Procurement form template from the practice files.
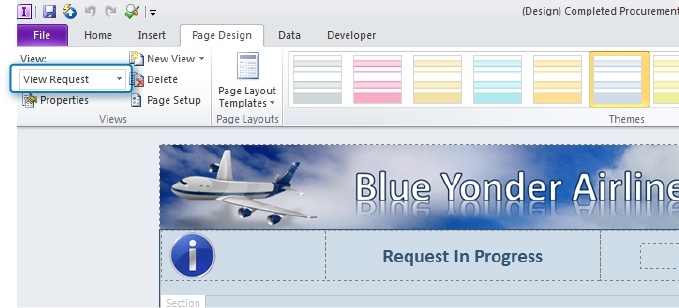
On the ribbon, click Page Design, and then select View Request in the View selector.
Click the Home tab, and then click the Manage Rules button to open the Rules pane.
In the Request in Progress section, click the Section button to make this section the active selection in the Rules pane.
In the Rules pane, add a new formatting rule called Hide Section.
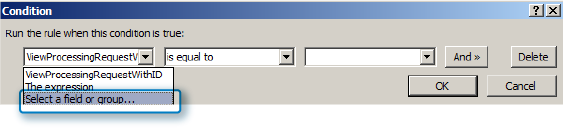
Add a new condition, and then in the Condition dialog box, set the first drop-down field to Select a field or group.
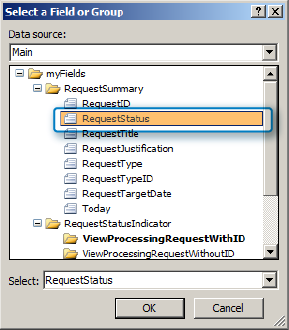
In the Select a Field or Group dialog box, browse up to the Request Summary group, and then select the RequestStatus field.
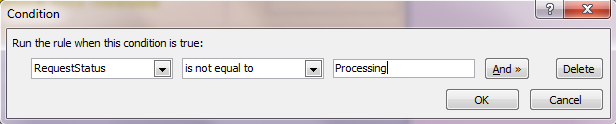
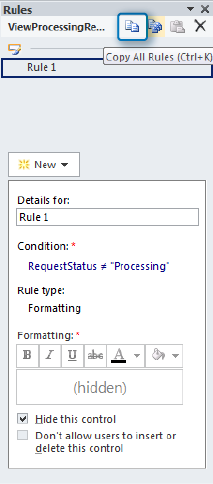
In the Condition dialog box, finish the condition by setting your rule to is not equal to. Choose the Type Text option, type Processing, and then click OK.
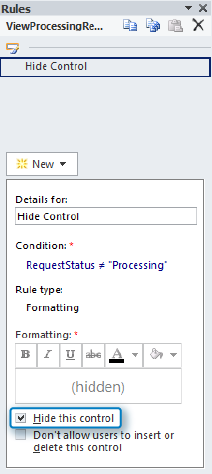
In the Rules pane, in the formatting area, select the Hide this control check box.
What the rule is logically telling the form is that if the user has not currently set the Request Status field to Processing, hide this entire section of the form.
On the ribbon, click the Preview button.
In preview mode, experiment with setting the Request Status drop-down field to Processing and then changing it to something else.
If you’ve properly completed the process, the Request in Progress section should disappear if you have selected anything other than Processing in the Request Status field.
Add the same Hide Section formatting rule that you created (steps 3 through 8) to the Approved Request, Rejected Request, and More Info Needed sections.
The text in the condition dialog box for each of these sections should be Approved, Rejected, and More Info, respectively, because that is the text we have set in the Request Status Drop-Down List Box control.
Tip
InfoPath 2010 introduces the ability to copy rules. This can save you time when you need to apply the same rule to multiple sections or controls. Simply click the copy rule button (or copy all rules) in the Rules pane, as shown in the following screenshot. Then, navigate to the target control/section and paste the rule by using the paste button.
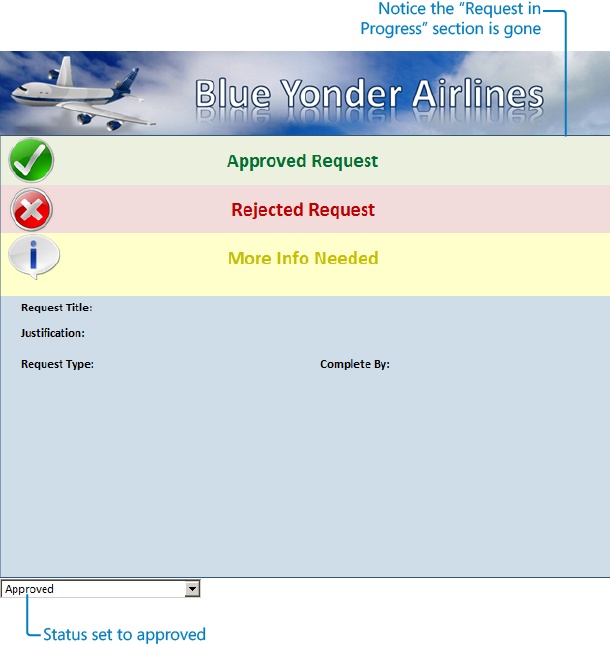
After you have added the rule for each of the remaining three sections, preview the form.
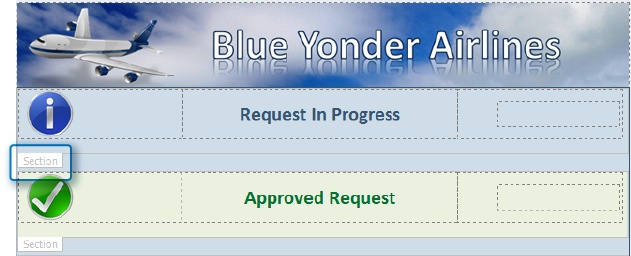
If you have performed the steps correctly, you should now see only the specific status section that matches the status that you select from your drop-down field. The following screenshot shows what your form should look like if you select Approved in the Request Status drop-down.
Using Rules to Create a Wizard-Style Form with Multiple Views
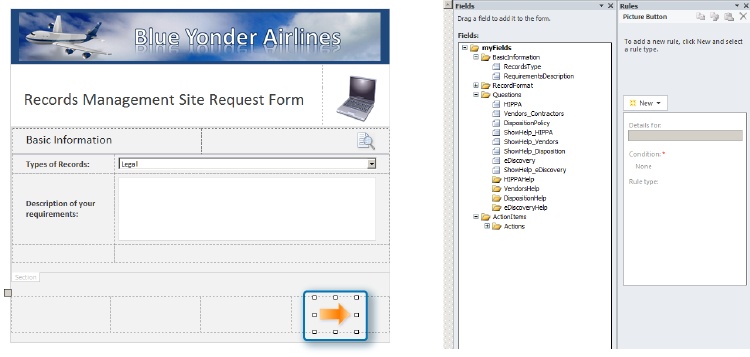
In the following exercise, you will be working with a form whose purpose is to capture provisioning requests from Blue Yonder employees. These requests need SharePoint Records Management sites to support the document storage requirements. The form is mostly complete; you simply need to add a few remaining rules to finish it. By adding the final logic touches to the form, you will have a chance to explore the full potential of using InfoPath’s rules to create a very rich, wizard-style form.
Note
SET UP In Design mode, open the form called Blue Yonder Records Management SharePoint Site Request form.
On the default (Home) view of the form, you are collecting only a couple of basic pieces of information from the users: what types of records they need to save on their SharePoint site, and a description of their purpose. Now, you will add a rule to the arrow image, which will allow the user to navigate to the second view of the form. The arrow is a picture button control, which means that we can add rules to it.
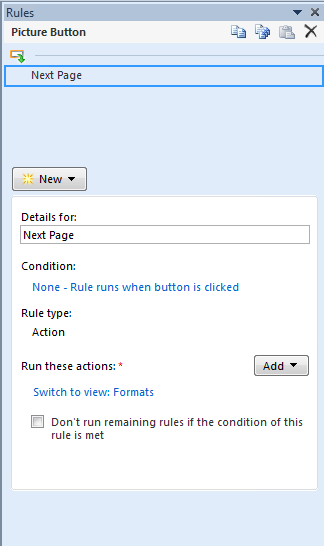
On the ribbon, open the Rules pane, and then click the arrow.
In the Rules pane, add a new action rule that switches the view to the Formats view. You can name the rule something like Next Page.
On the ribbon, click the Page Design tab, and then switch to the second view of the form, the Formats view.
Tip
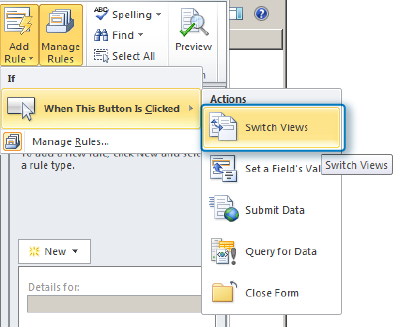
Like many of the steps in this chapter, adding the rule to switch views could have been accomplished quickly by using the Add Rule button on the ribbon. As shown in the following illustration, it accomplishes the same switch views task as using the Rules pane, but with fewer clicks. Remember to always activate the control to which you want to add a rule by clicking it once, prior to clicking the Add Rule button on the ribbon.
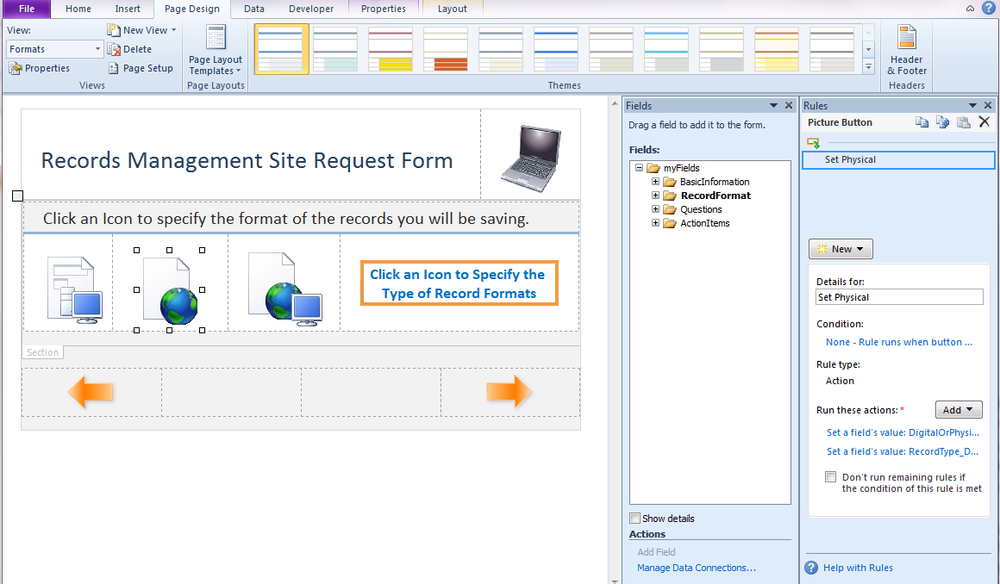
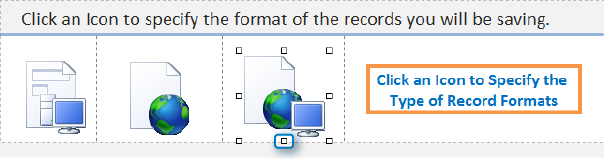
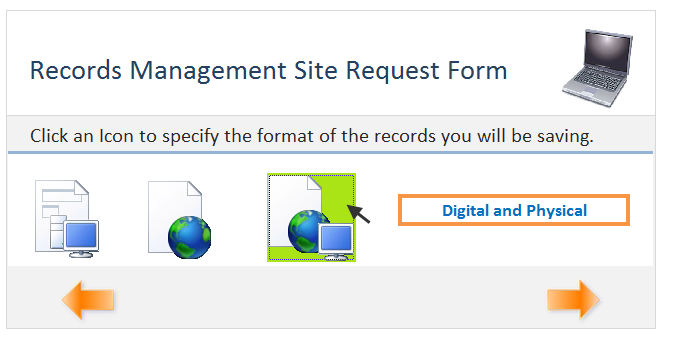
On the Formats view, the form again makes use of picture buttons to provide the user a richer experience. It displays arrows for providing navigation between the views of the form. If you click an arrow and look at its rules in the Rules pane as shown in the following screenshot, you can see the logic behind it.
You will use the three picture buttons in the middle of the page to represent the current format of the records that the users will be saving in their SharePoint sites. The first button represents digital records only, the second, physical records only (documents that would be scanned), and the third button represents digital and physical records. The rules have already been added for the first two buttons. Your job is to add the rules for the third, the Digital and Physical button. Each of the first two buttons has one rule with two actions. The first action sets a hidden field called DigitalOrPhysical to the appropriate format, based on user selection. The second action sets the text inside the label to match whatever format the user has selected.
To get a feel for what the first two picture buttons do, first select each image and review their rules in the Rules pane. Now preview the form, and then click the buttons to see how they set the labels appropriately. Also notice, if you click the third button, nothing happens.
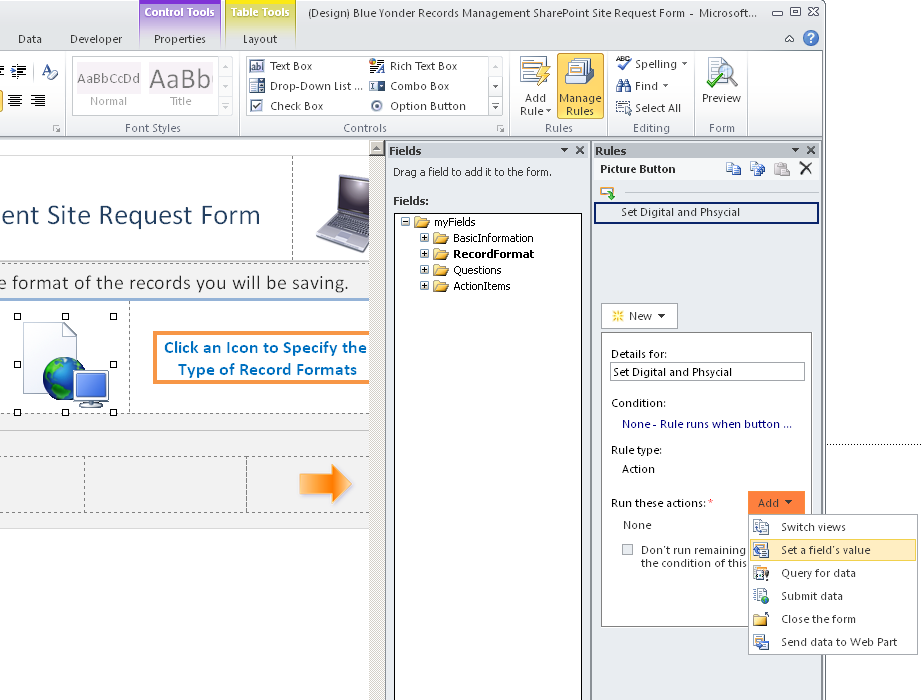
Close the preview, and then select the third picture button.
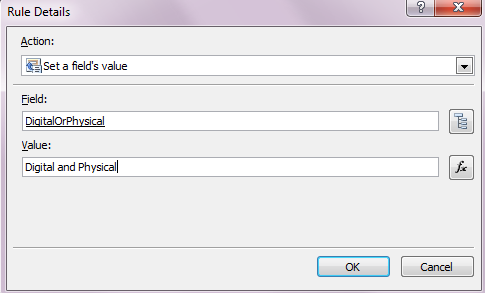
In the Rules pane, add a new action rule called Set Digital and Physical. Both of the actions you are going to create will be setting a fields value.
To set the DigitalOrPhysical field contained in the Record Format group, type Digital and Physical in the value field.
Tip
Notice that the DigitalorPhysical field is not actually shown on the design surface. This is a good example of a case where you need a field to store a variable data value, but you don’t actually need it directly displayed on the form. You will find this to be a useful technique. A hidden field in your form can effectively serve the same function as a variable would in a programming language.
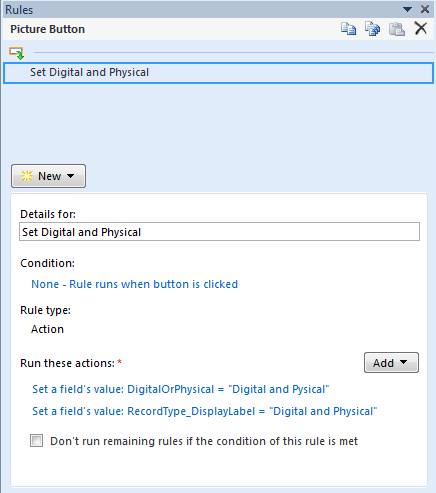
Type in the same value (Digital and Physical) for the RecordType_DisplayLabel field as well as in the Record Format group.
You should now have two actions in your rule for the third picture button.
Preview the form by using either the Preview button on the ribbon or the F5 key.
All three of the picture buttons should now set the label on the right appropriately, depending on which one you select.
On the ribbon, click the Page Design tab, and then switch to the third view of the form, the Questions view.
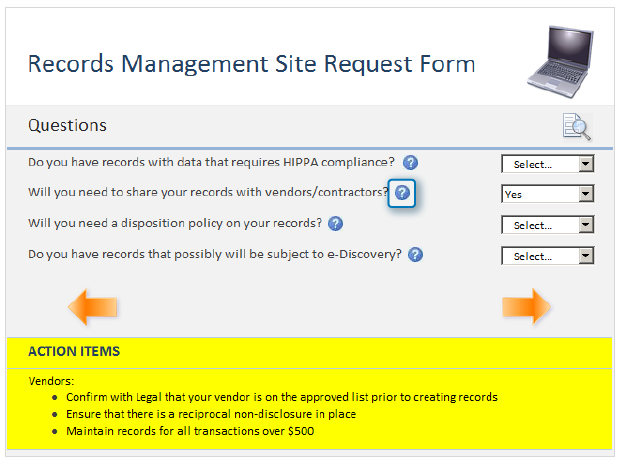
On this view, you will be presenting the form user with a series of questions related to records they are creating in their SharePoint site.
Preview the form, and then select Yes from the drop-downs on all the questions.
Notice that when you select Yes for the vendor/contractor question, an additional section of information becomes visible at the bottom of the form. Also, click the blue question mark icon next to the vendors/contractors question; you will see that help is available on demand. Both of these elements make use of rules to show and hide a section based on user input. Designing a form in this manner makes it more dynamic and rich, while also improving usability because you are not overwhelming the user with information they might not need.
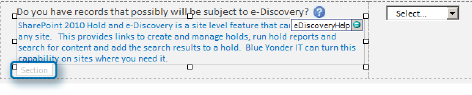
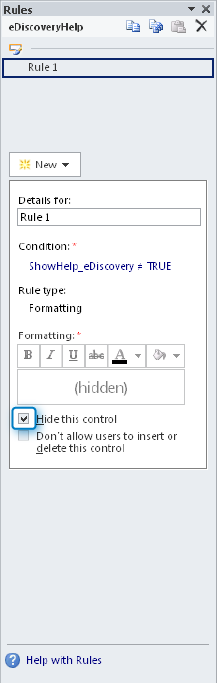
As with the previous two views, this one is already partially completed for you; your task will be to add the remaining rule. You might have noticed in Preview mode that the help content for the e-Discovery section appeared whether or not you clicked the help button. Therefore, you need to add a rule to hide the e-Discovery help section unless the ShowHelp_eDiscovery field is set to true. That is, unless the user has clicked the question mark for help on the e-Discovery section, keep it hidden.
Select the eDiscoveryHelp section.
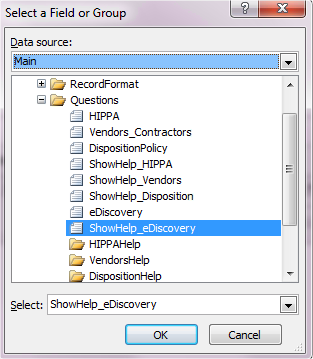
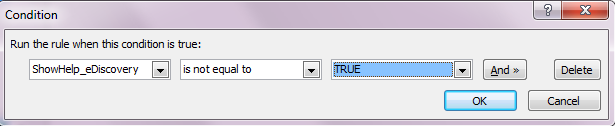
Open the Rules pane, and then add a new formatting rule for this section. Add a condition where you select a field, and find the ShowHelp_eDiscovery field under the Questions group.
Set the condition is not equal to to TRUE.
In the Rules pane, select Hide This Control.
Preview the form.
You will notice the e-Discovery help section is now hidden until you click the question mark button. This is an excellent example of using a formatting rule to provide a more interactive form experience.
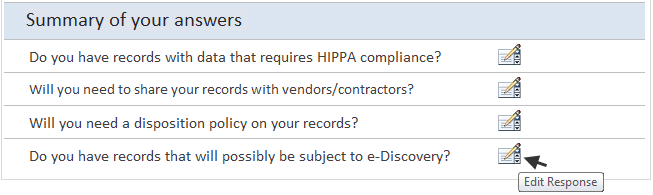
On the ribbon, using the Page Design tab, switch to the final summary view shown in the following screenshot.
As with the previous three views, this one is nearly complete. You will add the remaining rule. Before you do that, preview the form and become familiar with the functionality. The primary things to notice are the picture buttons on the page, which allow navigation to other parts of the form. The picture buttons just to the right of the summary questions allow the user to navigate back to the Questions view and edit their answers.
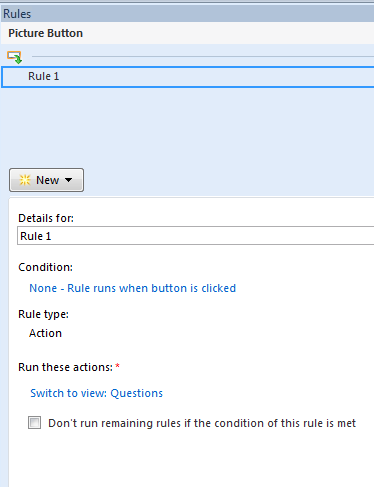
The fourth button on the question about e-Discovery does not have a rule applied to it yet. Therefore, using the Rules pane, add an action rule on the button that, when clicked, will transfer the user back to the Questions view.
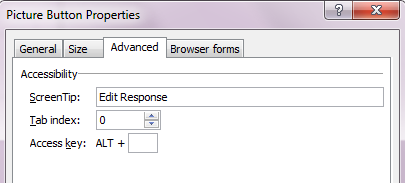
Notice the use of ScreenTips to help the user understand the purpose of the button. The ScreenTips are in the properties of the picture button, which you can see by right-clicking and choosing Picture Button Properties. Look for the Advanced tab.
The form you just created is worth spending further time to investigate all the different action and formatting rules. Preview the form, and use it as an actual user would, filling it out completely and seeing how it works. As you do this, switch back into Design mode with the Rules and Fields panes open to clearly understand how everything fits together.
Key Points
InfoPath provides multiple methods for easily adding logic and rules to your forms, without programming.
InfoPath data validation is a powerful way to ensure users enter data correctly.
InfoPath 2010 has improved the rules interface via the new Rules task pane.
Creating navigation for forms with multiple views/pages is easily achieved using Action rules.
Demonstrate the capabilities of building a user input form by simply using the Formatting Rules functionality.