
Chapter 6. Publishing and Submitting Form Data
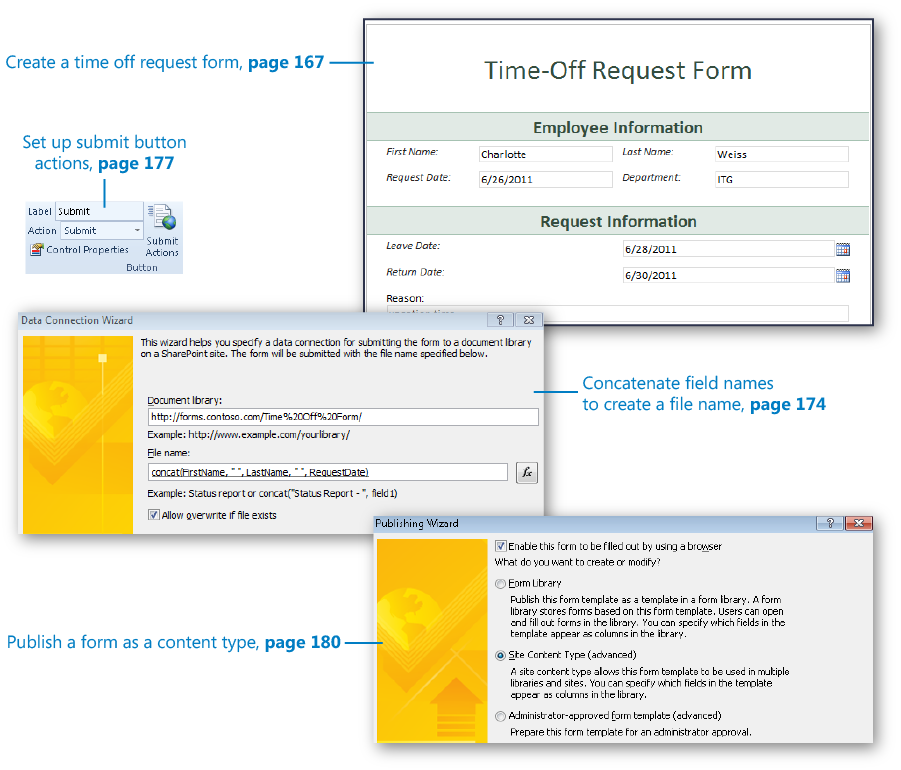
Chapter at a Glance
When creating a Microsoft InfoPath form, publishing a form means to send the form template to a certain location as an XSN file. After a form has been published, it can be filled out and submitted to Microsoft SharePoint. You can use several different methods to publish a form, and the method that is selected depends on several different factors and requirements.
In this chapter, you will learn about the different ways to publish a form, along with the reasons to select each of these methods. The examples will walk you through publishing your own form, and you’ll learn how important it is to create a data connection for the submittal of information to your SharePoint site. Furthermore, you’ll understand how form fields can be promoted to SharePoint columns in document form libraries.
Publishing Methods
In previous chapters, you learned how to create an InfoPath form, how to add layouts and controls, and even how to create a simple SharePoint list form. Because this chapter mainly focuses on publishing methods, we will create simple forms, with the emphasis on the publishing and submission processes. The methods and best practices that you’ll learn will apply in all forms that are created, except for SharePoint list forms. In Chapter 4, you might have noticed that the creation of data connections and the selection of a publishing method were not required because they were automatically built-in. The three different publishing choices are as follows:
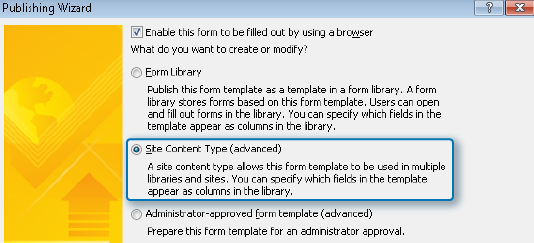
Form library Publish to a SharePoint form library when the form needs to be filled out and submitted only to a single location. When a form is published to a form library, the form template’s XSN file becomes the template for the library. Typically, when publishing to a library, the form will also be submitted to that same library.
Site content type Publish to a content type when the form will need to be used in multiple libraries. When a form has been published by using this method, the new form content type can be added to many different libraries in the site. When publishing as a content type to the top level of a site collection, the content type can be utilized in all of the sites and libraries in the site collection.
Administrator-approved form template Publish a form as an administrator-approved template when it needs to be globally deployed across the farm or when customized code has been included in it. When this type of form is published, unlike when using the other two publishing methods, it is not automatically deployed in SharePoint. This method creates an XSN file as output, which then must be uploaded into InfoPath Forms Services by a server administrator.
Now that you have a basic understanding of the three different publishing methods, it’s time to get to work on some exercises. At Contoso, all employees will navigate to the same form library in SharePoint, where every time-off request is collected in one SharePoint form library. When gathered, all of the company time requests can be sorted and filtered, and multiple views can be created. Because all of the forms must reside in one location for further reporting and dissemination, only a single form library is needed.
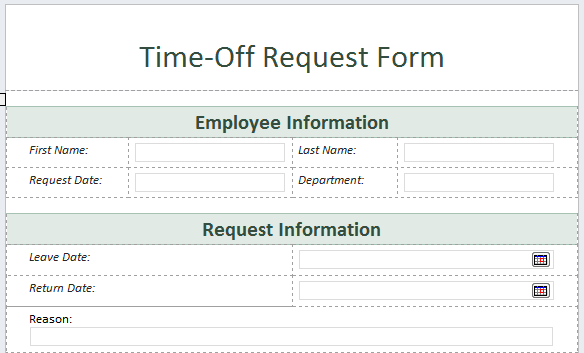
In the following exercise, you will create a company time-off request form. This form will be used in every exercise in this chapter.
Note
SET UP In the web browser, open your SharePoint site so that a new list can be created. Create a new folder on your computer called C:InfoPath Files.
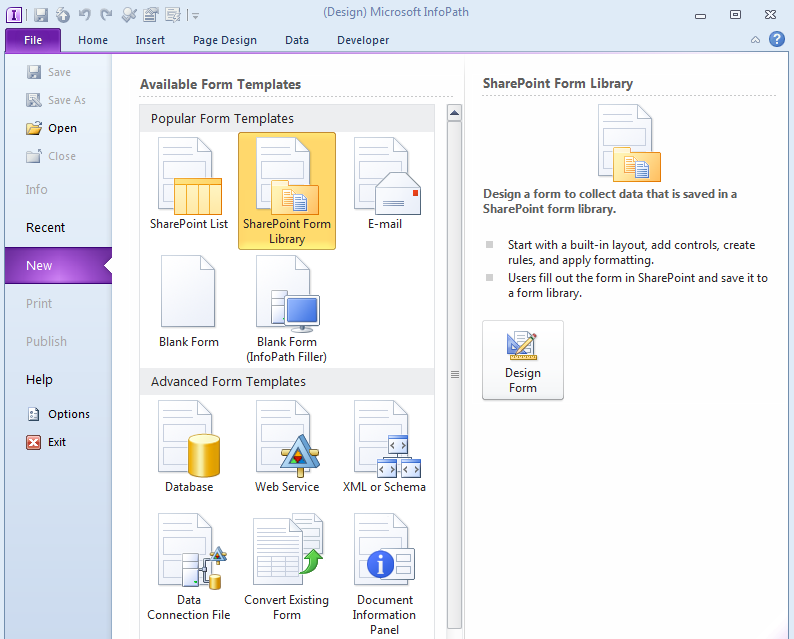
To open the new file screen in InfoPath, from the Start menu in Windows, click All Programs | Microsoft Office | Microsoft InfoPath Designer 2010.
In the Popular Form Templates section, click to select SharePoint Form Library, and then on the right side of the screen, click Design Form.
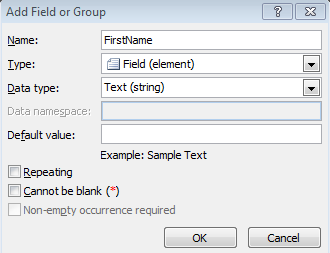
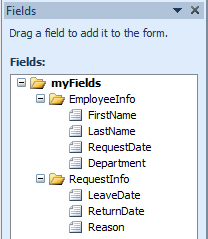
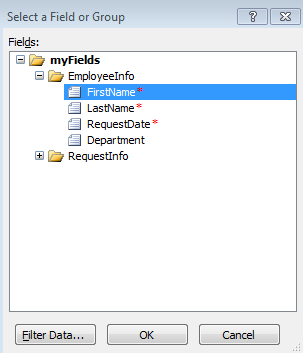
Before we add controls to the form, some fields can be created in the Fields pane on the right side of the screen. Right-click myFields, and then click Add to open the Add Field or Group dialog.
In the Name text box, enter EmployeeInfo. In the Type text box, enter Group, and then click OK.
The goal here is to organize all of our fields by group, into logical sections.
Tip
Creating and keeping fields organized is beneficial to you, the form creator. This will make your job easier, especially with forms that have over 50 fields. Be sure that the organization of the fields is complete before the form goes live and is used in production. Rearranging fields later can cause loss of data.
In the myFields section, use the same method to create another group called RequestInfo, and then click OK.
Right-click EmployeeInfo, and then click Add. Name the field FirstName, with a type of Field (element) and a data type of Text (string). Click OK.
Use the following table to repeat step 6, creating the rest of the fields under each of the two groups that were created in steps 4 and 5.
Name
Type
Data Type
Under Group
LastName
Field (element)
Text (string)
EmployeeInfo
RequestDate
Field (element)
Date and Time (dateTime)
EmployeeInfo
Department
Field (element)
Text (string)
EmployeeInfo
LeaveDate
Field (element)
Date (date)
RequestInfo
ReturnDate
Field (element)
Date (date)
RequestInfo
Reason
Field (element)
Text (string)
RequestInfo
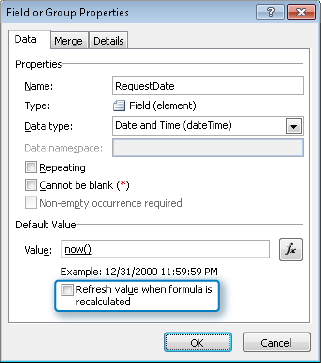
Double-click the RequestDate field, and then click the function button next to the default value.
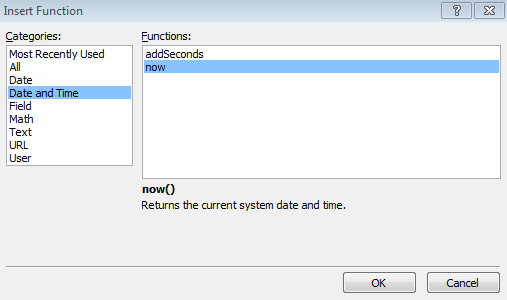
Click the Insert Function button. In the Categories section, choose Date and Time, in the Functions section, select now, and then click OK.
After the request date has been captured, you don’t want the date in this field to change the next time the form is opened, so clear the Refresh value when formula is recalculated check box, and then click OK.
Tip
The now() function can be used because this RequestDate field was created as a dateTime field. If the field had been created as just a Date field, the today() function could be used instead. In this case, we want the RequestDate always to be unique for each form. Therefore, capturing the date and time down to the second ensures that the field’s value is unique.
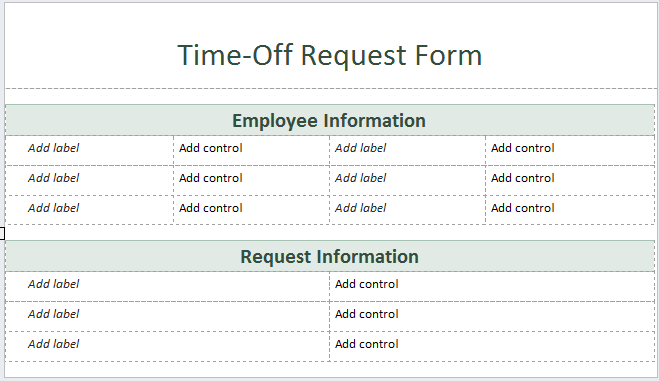
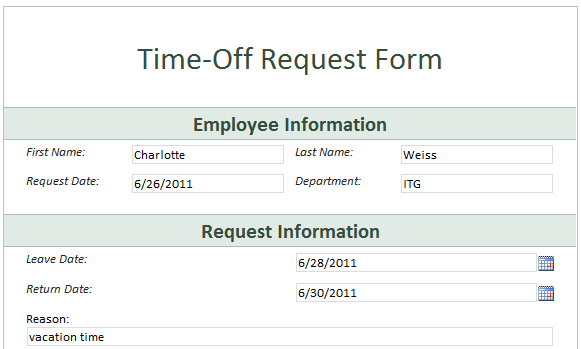
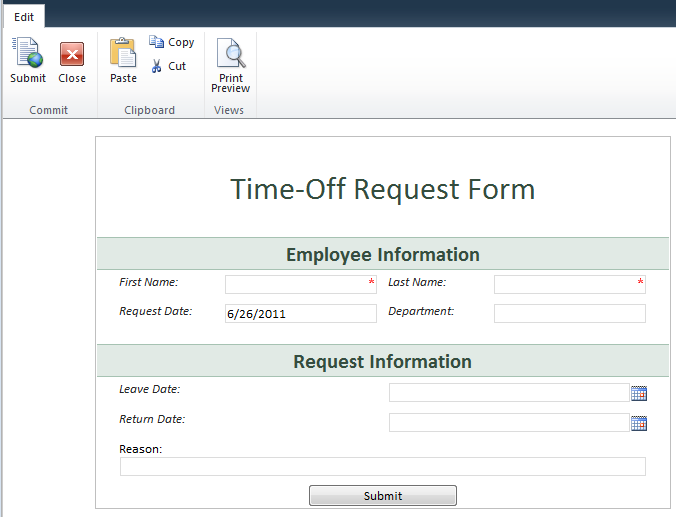
Now we need to add some text to the layout. Click in the form’s Click to add title field, and type Time-Off Request Form. Click in the first Click to add heading field, and then type Employee Information; in the second Click to add heading field, type Request Information.
Drag the FirstName and LastName fields to the first row of the Employee Information section.
The Request Date field is a little different. It will be set as read-only. Because a date and time picker cannot be set as read-only, it will be inserted as a text field. In the far-left cell of the second row of the Employee Information section, type Request Date: (including the colon).
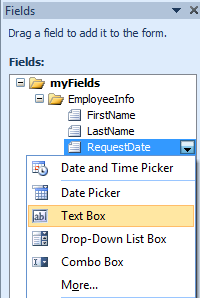
Press the Tab key on the keyboard so that the cursor is in the second cell of the second row. In the list of fields on the right, click the drop-down arrow on the RequestDate field, and then click Text Box.
Double-click the Request Date text box on the form, and then on the ribbon, on the Properties tab, select the Read Only check box.
Drag the Department field to the second row of the same section. Select the third row under this section, and then delete the entire row.
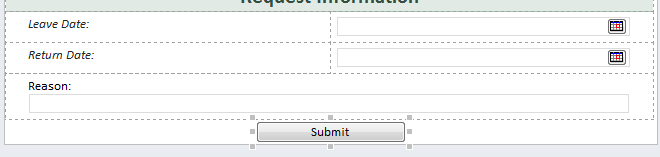
In the Request Information section, place the LeaveDate field in the first row, the ReturnDate field in the second row, and the Reason field in the third row. Merge the two cells in the third row.


Now that the form has been created, it will be used as the basis of the rest of the exercises in this chapter.
Note
CLEAN UP Leave InfoPath Designer and the browser open if you are continuing to the next section of this chapter. Otherwise, click Save to save the XSN file to your computer, close InfoPath Designer, and close the browser.
In the following exercise, the time-off request form will be published to SharePoint as a form library.
Note
SET UP If the Time Off Request form is not currently open in InfoPath Designer 2010, navigate to the location on the computer where it was saved in the Clean Up of the previous exercise. Right-click the XSN file, and then select Design.
Click the File menu, click Publish, and then click SharePoint Server.
The Save As screen appears, prompting you to save the XSN file. The XSN file is the template file of the new InfoPath form. The location that the file is being saved to is simply a backup copy of the file.
Select the folder called C:InfoPath Files, and name the file TimeOff.xsn. This will start the Publishing Wizard.
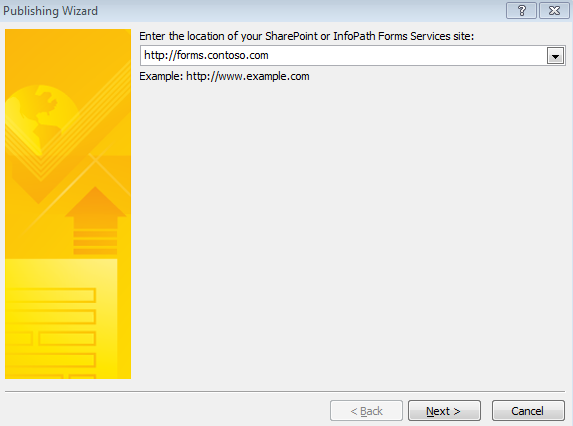
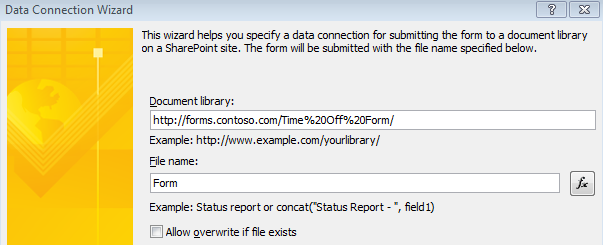
On the first page of the Publishing Wizard, type the URL of the SharePoint site where you would like the new form to be located, and then click Next.
In this example, Contoso uses a site called forms.contoso.com, where all company forms are published.
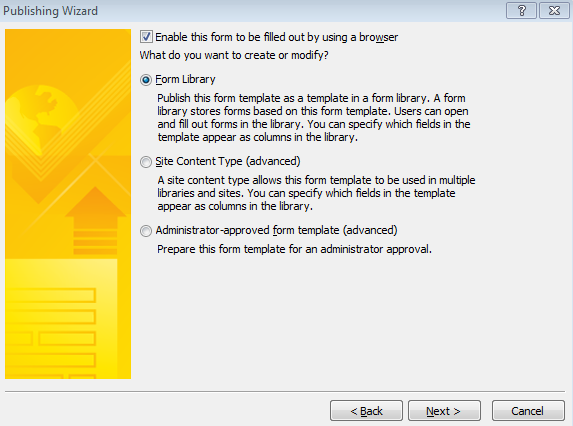
During the creation of this new form, the default compatibility level has been browser-based. Because the form will be used in only one form library and will need to be filled out in the browser, the default settings can be used on this screen. Click Next.
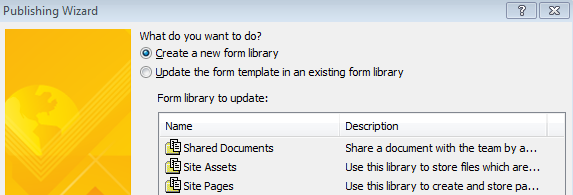
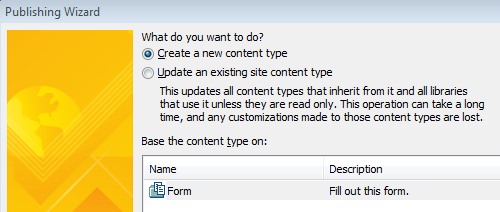
Because this is the first time that this form is being published, select the Create a new form library option. Click Next.
Type Time Off Form as the name of the form library. In the Description field, type This is the time-off request form. Click Next.
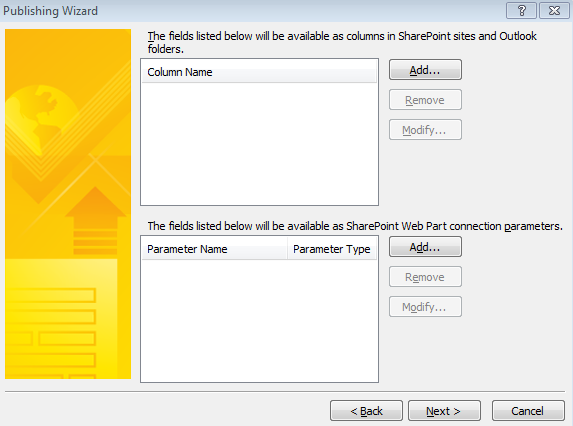
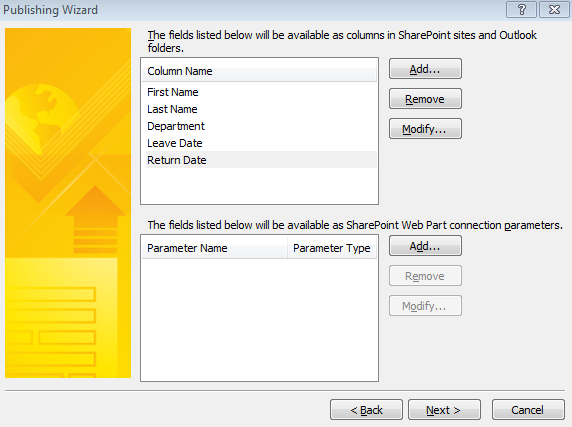
On the next page of the wizard, your fields from the form can be promoted to become columns in the SharePoint library. For now, the columns will be left out until the next exercise, so simply click Next.
Tip
The bottom half of this screen is where parameters can be added. Chapter 8, which discusses the InfoPath Form Web Part, contains a section on parameters, with examples of how they can be used.
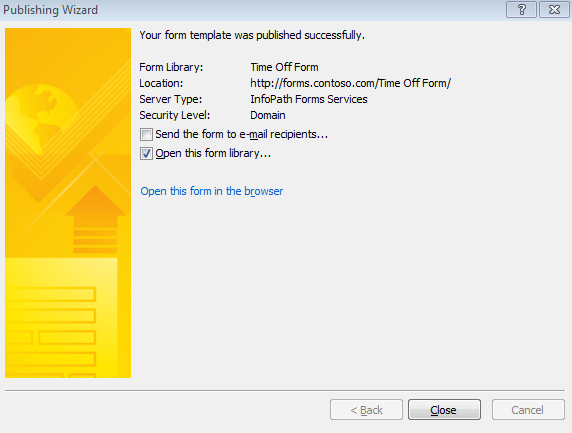
On the last page of the wizard, verify the summary of form information, and then click Publish.
Open the browser and navigate to the URL that was used in step 3. In the left navigation panel under Libraries, click Time Off Form. Click Add Document to fill out a new form.


Notice that this very basic form leaves much to be desired. Several major improvements need to be made. One of the most glaring issues that we will cover in-depth in this chapter is that there is no Submit button by default, and no validation.
Promoting Columns
Because there is a choice as to which fields are promoted, you’ll want to identify the most important fields for promotion. Following are some essential considerations regarding fields and columns:
Reporting Think about the full life cycle of a form and what the most pertinent data is. Just as with any list or library in SharePoint, these columns can be used to quickly sort and filter information, and views can be created. Which fields will need to be readily available for these purposes?
Workflows If workflows will be used, what data does the workflow need?
Site columns For columns that are more common or will be used in other parts of the business solution as a whole, you have the option to create the columns as site columns (preferably before publishing the form), versus library columns.
Columns can be promoted in two different ways in InfoPath. One way is to click the File menu, choose Form Options, and then click the Property Promotion section. Another way is through the Publishing Wizard, as was demonstrated in the preceding exercise. The latter of the two provides additional options. The following illustration shows the settings available when adding each column.
Note
The Publishing Wizard also has available options regarding the selection of fields to become parameters. Parameters are covered in depth in Chapter 8.
Field To Display As Column In this section, click to select the field that needs to be added as a column. It’s always a best practice to organize the fields well and use good naming conventions.
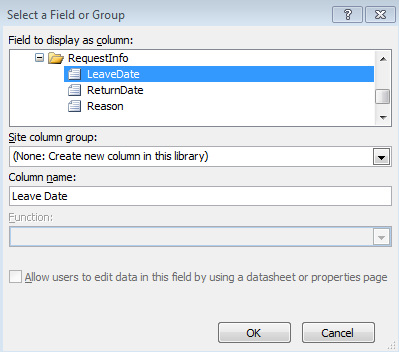
Site Column Group This drop-down box allows for the selection of an existing site column group. This is the same set of groupings that are available if you click Site Settings | Site Columns. The groups are used to organize the columns, and this drop-down box is used to narrow the list of columns in the column name box. If the name of the currently selected column matches that of an already existing site column, the site column group will automatically be selected and the column name will default to the name of the existing column. If the name of the column does not already exist, this field will show the following entry: (None: Create New Column In This Library).
Column Name Type or select the desired column name in SharePoint. If a column of that name does not already exist, one will be suggested to you. This suggested field name can be changed. In the previous example screenshot, the column name suggestion is Leave Date, but it can be edited to be simply called Leave. If the name of the column matches an existing site column, that site column name will already be selected here as a drop-down box. In this case, the name can be modified. The option (None: Create New Column In This Library) is selected in the Site column group drop-down box.
Function This drop-down box is available only for fields that are in repeating controls. When multiple data values are being considered, there are options as to which of the values will exist in the SharePoint column when forms are submitted. The common functions are as follows:
First The first value in the repeating control.
Last The last (most recently added) value in the repeating control.
Count A number count of all of the values in the repeating control field.
Merge This is a space-delimited list of all of the values in the field of the repeating control.
Sum, Average, Min, Max These functions are available only with number fields, and they perform the various functions. The result of the selected function will be the value shown in the column in SharePoint.
Allow Users To Edit Data In This Field By Using A Datasheet Or Properties Page This option allows the data in this field both to be displayed in a column and to be edited in SharePoint without opening the form in InfoPath. This setting is most often used when the data in the field needs to be changed via workflow.
When fields are modified from SharePoint, users can potentially view the form library in Datasheet view, or they can click to edit the properties of an item without actually opening the form in InfoPath.
Note
By default, the Datasheet view is available. You can change this configuration to No in the configuration library’s advanced settings so that items cannot be edited in the datasheet.
In the following exercise, you will promote fields from an InfoPath form to become columns in SharePoint.
Note
SET UP In the web browser, open your SharePoint site and browse to the Time Off Request form that was created previously in this chapter. If the Time Off Request form is not currently open in InfoPath Designer 2010, navigate to the location on the computer where it was saved in the Clean Up of the first exercise. Right-click the XSN file, and select Design.
In the Time Off Request form in InfoPath Designer 2010, click the File menu, click Publish, and then click SharePoint Server.
Click Next three times, which will take you to the screen where columns and parameters are selected.
Click the Add button to add the first field.
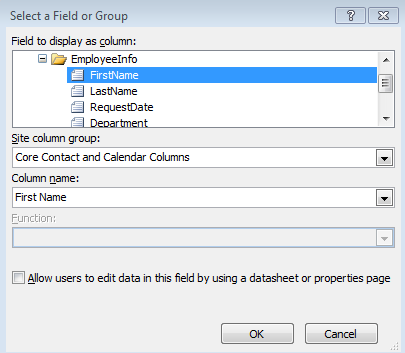
Expand the EmployeeInfo group, and then click to select the FirstName field.
Because First Name is an already existing site column, InfoPath suggests this column by default. This is a field that is used when new contact lists are created in SharePoint, so it exists in the Core Contact and Calendar Columns group in the list of site columns. Click OK.
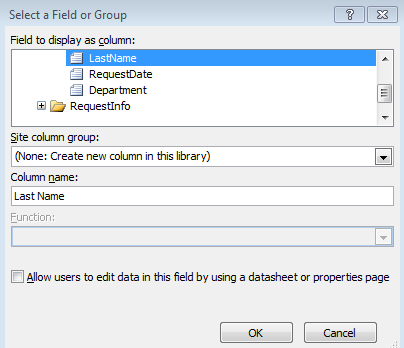
Click Add, but this time select LastName. Click OK.
Click Add, click Department, and then click OK. Do the same for the LeaveDate and ReturnDate fields.
Notice that InfoPath has recognized where you used capitalization in the field names and has automatically added a space in the column names. Click Next.
Click Publish, select the Open this form library check box, and then click Close.
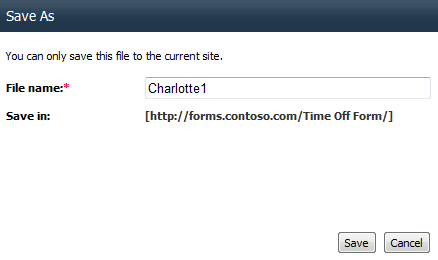
In the form library in the browser, notice that there are several new columns. Click Add Document to fill out a new form. Put your own name in the form, and then fill out the other fields.
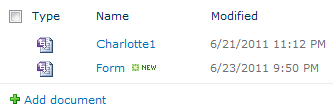
Click Save at the upper-left. Enter your name with the number 1 appended, as shown in the following illustration, and then click Save.
Click Close at the top.
Note
CLEAN UP Leave InfoPath Designer and the browser open if you are continuing to the next section of this chapter. Otherwise, click Save, close InfoPath Designer, and then close the browser.
Now that some columns have been promoted and a form has been filled out, it’s obvious that some data is readily available to sort through. Some data, which might exist in large text boxes such as the Reason field, is better off left in the form and not as a column. Users can simply click to open a form to see more detailed information contained within it. Also notice the columns on the library settings page. The columns that were created new through the Publishing Wizard are shown here as gray text. The already-existing columns are editable. Therefore, during publishing, selecting columns that already exist has almost the same effect as choosing Allow Users To Edit Data In This Field By Using A Datasheet Or Properties.
Submitting to SharePoint
In the previous exercises in this chapter, the process of filling out a form probably seemed quite inefficient: saving a file, entering a name, and then clicking Close. Plus, the amount of clicks involved is cumbersome. It leaves a lot of room for error when end users have this much freedom. In this section, you will learn how to create a data connection to submit a form to a SharePoint form library. With a data connection, the file name and location can be controlled, as well as form validation. Understanding the proper method for creating a data connection for submission is important both for form accuracy and for the general end-user experience.
In form planning, the following factors should be considered before creating the data connection to submit to SharePoint:
What field or combination of fields is unique to each form? For each form that is submitted, an XML file is created in a SharePoint form library. If you would like each form to be a unique file, which is usually the case, you need to ensure that each file name is unique in the library each time someone submits a form.
After the form has been submitted the first time, does it ever need to be edited again? There is a setting that will enable you to ensure that the file is never overwritten, but in most scenarios the form will be modified again. Think about form approval processes, or forms that contain additional “office use only” fields.
Which fields are required when a form is initially submitted? If fields are going to be used as part of the file name, they should also be required fields. This way, all or part of the file name will not be missing.
Will multiple views be used? In many cases, several different views are created, with each view having its own submit buttons. Each of these different submit buttons can have different rules behind it so that different actions are triggered depending on where you are in the form. If this is the case, the Default Submit Connection might not be something that you will want to utilize. This default button is automatically displayed on the ribbon on every view, negating any different rules that exist on different submit buttons on various views.
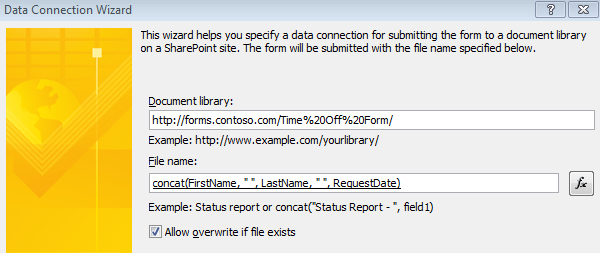
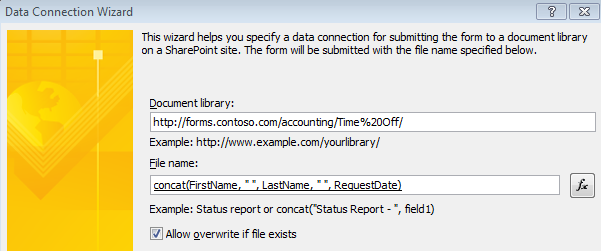
When creating a data connection to submit to the SharePoint form library, the page shown in the following illustration is an important part of the Data Connection Wizard.
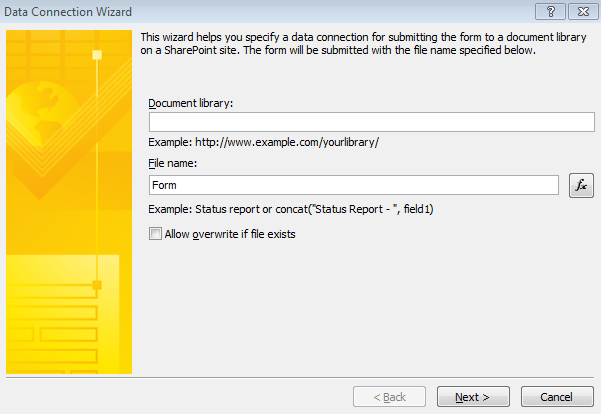
The available settings are as follows:
Document Library This is the URL to the document library (form library) where the forms will be submitted. It is recommended that the form be published to SharePoint before creating this data connection so that the location will exist before getting to this point. An example of the syntax is shown in the previous screenshot.
File Name This is one of the most misunderstood settings in InfoPath. By default, the file name is Form. This is not a setting that will ever need to be kept as default. If Form were used as the file name, only one form could be submitted to the form library. Typically, the syntax of this file name should be created so that it is unique to each form that is filled out. There’s a function button to the right of the file name text box so that formulas can be utilized—for example, to concatenate multiple fields.
Allow Overwrite If File Exists Select this check box if the form will ever need to be edited after it has been initially submitted. If this box is left unchecked, an error will be encountered if resubmission of an existing file is attempted.
Now that you’ve read the high-level overview of settings, the next few exercises will teach you how to create a data connection to submit to SharePoint. You will learn some effects of creating a submit connection in different ways so that the best practices will become apparent.
Note
SET UP In the web browser, open your SharePoint site and browse to the Time Off Request form that was created previously in this chapter. If the Time Off Request form is not currently open in InfoPath Designer 2010, browse to the location on the computer where it was saved in the previous exercises. Right-click the XSN file, and then select Design.
Before the data connection can be created in InfoPath, the document library URL must be obtained. In the Quick Launch pane (on the left side of the page), click the name of the Time Off Form library. Then take a look at the URL in the browser’s address bar. It will look something like this: http://forms.contoso.com/Time%20Off %20Form/Forms/AllItems.aspx.
Copy only the following portion of the URL: http://forms.contoso.com/Time%20Off%20Form.
In the Request Time Off form in InfoPath Designer, in the Submit Form section on the Data tab, click To SharePoint Library.
In the Document library text box, paste the URL that you copied in step 1.
For demonstration purposes only, the rest of the default settings will be used. Click Next, and then click Finish.
Click the Quick Publish button. Leave InfoPath Designer open.
In the form library in the browser, click the Add Document button.
Fill out the first and last name fields with your own name, and then click Submit.
In the form library, notice that the name of the new XML file is Form. If you try to fill out another new form, an error occurs. This is because the data connection is saving every form as file name Form, and the Allow overwrite if file exists check box is not selected.


Note
CLEAN UP Leave InfoPath Designer and the browser open if you are continuing to the next section of this chapter. Otherwise, click Save, close InfoPath Designer, and then close the browser.
The preceding exercise provides a very simple example of how to create a data connection that you can submit to a form. It is apparent that the file name syntax is something that needs to be thought through, because the default setting is not useful.
In the following exercise, you will modify a data connection so that file names are unique to each form, and another difference between saving and submitting will be demonstrated.
Note
SET UP In the web browser, open your SharePoint site and browse to the Time Off Request form that was created previously in this chapter. If the Time Off Request form is not currently open in InfoPath Designer 2010, browse to the location on the computer where it was saved in the previous exercises. Right-click the XSN file, and then select Design.
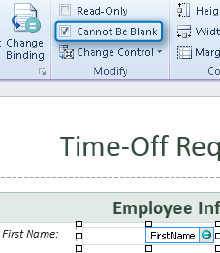
Now that we have some fields that are set up as required in InfoPath Designer, validation in InfoPath can be demonstrated. Double-click the First Name text box, and select the Cannot Be Blank check box.
Repeat step 1 for the LastName field.
The Request Date field will be mandatory, but because it’s already been set with a default value and as read-only, it will always contain a value, so validation is unnecessary.
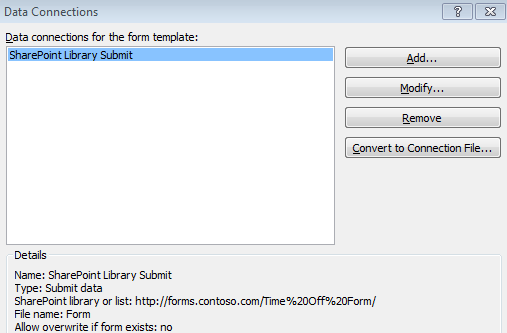
Select SharePoint Library Submit, and then click Modify.
Modifying the data connection ensures that each file submitted will not be called Form.
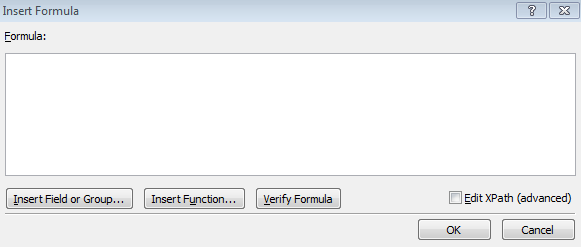
Click the fx button next to the File name text box.
This is the area where functions and fields can be used to formulate a unique file name.
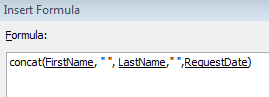
In this example, three fields will now be concatenated for the file name, with a space between each field name: FirstName, space, LastName, space, RequestDate.
Click the Insert Function button.
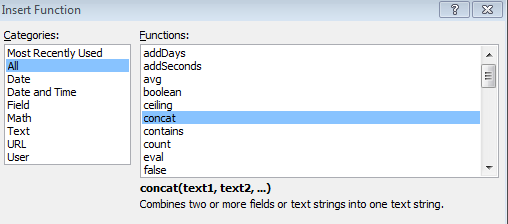
In the Categories section, select All, and then in the Functions section, select concat.
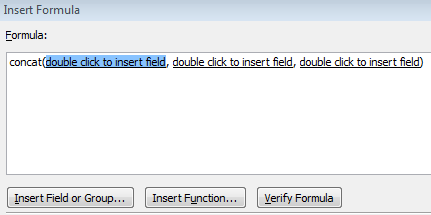
Notice that an example of the function’s syntax is displayed in gray at the bottom. Click OK.
Double-click the first item that says double click to insert field. Expand the EmployeeInfo group, select the FirstName field, and then click OK.
With a concatenation, text and spaces can be placed between the fields. After FirstName, the second field will be a space, and the third field is LastName. After the LastName field, type a comma, click the Insert Field or Group button to insert the RequestDate field, and then click OK. Click OK when the formula is complete.
Select the Allow overwrite if file exists check box. Click Next, and then click Finish.
In the Data Connections dialog box, click Close.
Click the Quick Publish button.
Go to the form library in the browser, and then click Add Document to fill out a new form.
Fill out all of the fields, and then click Submit.
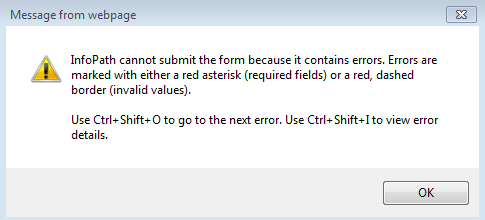
Take a look at the resultant file name. The fields have been concatenated to create a file name. As long as that combination of three fields is unique, none of the files will ever inadvertently overwrite existing files. By setting the request date default to the date and time that the form was created, you ensure that the form name is unique. Because the data connection has been set to allow overwrite, the submitted form can be opened later, modified, and submitted again. Fill out another new form and leave the last name blank. Take a look at the following error message:
Tip
If the Request Date had been set as a date field and not date/time, the form name might not be unique. For example, if a form was filled out with the employee name of John Smith and another form was filled out the same day with the name John Smith, the second form would be written over the first form. The full date and time might not be pretty to look at, but it is definitely unique.
When the submit data connection is used, forms cannot be submitted if required fields are empty. This is not the case with the Save and Save As buttons. Validation does not occur with these buttons.
Fill out yet another new form, and leave at least one required field empty. Click Save.
Notice that the same error message pops up regarding the required fields, but InfoPath still allows the file to be saved. The end user can name the file whatever she wants to.
Name your file Test Stuff, click Save, and then click Close.
Open the Test Stuff file again. Fill out the rest of the required fields, and then click Submit.
Back in the library, notice that there are now two different copies of the same form that was submitted.


Note
CLEAN UP Leave InfoPath Designer and the browser open if you are continuing to the next section of this chapter. Otherwise, click Save, close InfoPath Designer, and then close the browser.
In the preceding exercise, you learned some differences between saving and submitting a form. Saving a form allows freedom in file naming, and form validation rules do not apply. Submitting a form allows tight control over the file name syntax and enforces validation rules and required fields. When end users can both save and submit forms, the resulting set of files in the library can become quite disorganized. There are potentially varying copies of any one file, in various stages of completion.
In the following exercise, you will learn how to disable the Save and Save As buttons. The Submit button will also be placed in a more obvious place, instead of only on the ribbon at the top left.
Note
SET UP In the web browser, open your SharePoint site and browse to the Time Off Request form that was created previously in this chapter. If the Time Off Request form is not currently open in InfoPath Designer 2010, browse to the location on the computer where it was saved in the previous exercises. Right-click the XSN file, and then select Design.
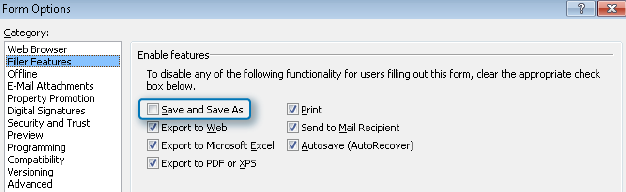
In InfoPath, click the File menu to display the Backstage view, and then choose Form Options.
In the Categories section, click Filler Features, and then in the Enable features section, clear the Save and Save As check box.
Again, in the Categories section, click Web Browser. Notice that the Save and Save As check boxes are now disabled. Click OK.
Now it’s time to add the submit button to the bottom of the form.
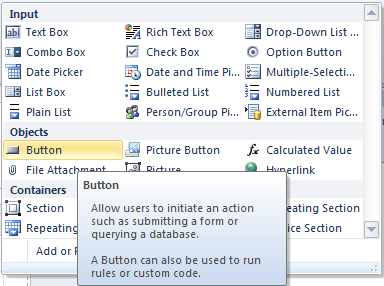
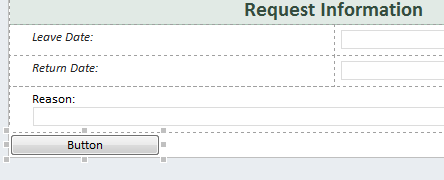
Put the cursor at the bottom of the Time Off form. On the Home tab in InfoPath, in the list of controls, click the Button control to add it to the form.
Now that a button control has been added to the form, double-click it. The ribbon will display the Properties tab, where properties of the button can be configured.
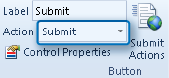
On the ribbon, on the Properties tab, click the Action drop-down box, and then click Submit.
As soon as the action drop-down is changed to submit, the Label box will automatically show Submit, and the button will now say Submit. For a visual enhancement, the button needs to be centered.
On the ribbon, on the Home tab, click the Center button in the Format text section.
Click the Quick Publish button. Leave InfoPath open.

Note
CLEAN UP Leave InfoPath Designer and the browser open if you are continuing to the next section of this chapter. Otherwise, click Save, close InfoPath Designer, and then close the browser.
The next time a form is filled out, the user interface will be a lot more intuitive. The Save and Save As buttons have now been removed, and the Submit button is in a prominent place.
Publishing As a Content Type
Now that a form has been published to a form library and the submission methods have been covered, we can take a look at how to publish a form as a content type. This method will be used when the same form needs to be filled out in multiple libraries in a site collection. Furthermore, with this method, multiple form content types can potentially be used in a single form library.
Content types exist at the upper-level site collection and at each site. If a form will be needed throughout the site collection, it will need to be published at the root site of the site collection. As is inherent with all content types, the form content type will be available for use in all sites and libraries below the site to which the content type has been published.
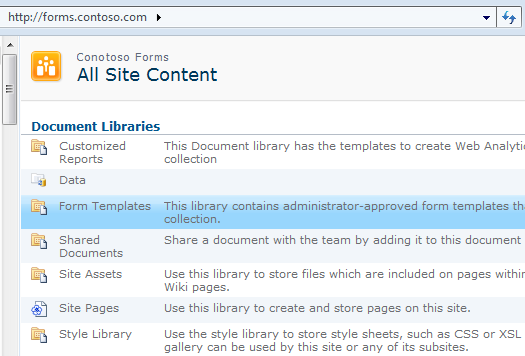
When publishing a form as a content type, there will be a prompt to save the XSN file to a document library. By default, the root site in the site collection will contain a document library called Form Templates. This is the perfect place to save the file.
Note
For more basic introductory information about content types, take a look at the following link on Office.com online help at http://office.microsoft.com/en-us/windows-sharepoint-services-help/introduction-to-content-types-HA010121570.aspx.
In the following exercise, you will learn how to publish a form to the site as a content type. Because a form has already been created, some small changes will be made so as to differentiate it from the form that was published directly to a form library. This will be a way of mimicking a completely different form, without spending the time to create a new form and new fields. The example is a Time Off Request form that will be filled out from each department’s site so that each department can have its own separate library of these requests.
Note
SET UP In the web browser, open your SharePoint site and browse to the Time Off Request form that was created previously in this chapter. If the Time Off Request form is not currently open in InfoPath Designer 2010, browse to the location on the computer where it was saved in the previous exercises. Right-click the XSN file, and then select Design.
For this exercise, the previously created form will be saved with a new name because you don’t want to cause confusion with the form library to which the Time Off Request form has already been published.
With the Time Off Request form opened in Design mode, click File, and then click Save As.
Where the previous file was named TimeOff, this new copy can be named Time Off CT. Select a location on your computer, and then click Save.
In the header of the form, add the word Departmental so that the form is named Departmental Time-Off Request Form.
Another quick visual way to differentiate it from the other form is to click the Page Design tab, and then select another color theme. In this example, Professional - Mission has been selected.
Click the File menu, choose Publish, and then click SharePoint Server.
Enter the URL of the top level of your site collection, and then click Next.
Select Create a new content type, and then click Next.
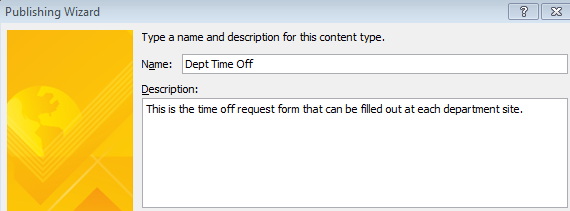
Name the content type Dept Time Off. For the description, type This is the time off request form that can be filled out at each department site. Click Next.
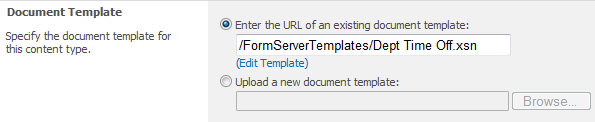
Specify a location and file name for the XSN file. This is where that default Form Templates library comes in handy. Click the Browse button, select Form Templates, and then click Save.
For the file name, type Dept Time Off, and then click Save.
On the page that lists the promoted columns, click Next, and then click Publish. On the last page of the wizard, click Close.


Note
CLEAN UP Leave InfoPath Designer and the browser open if you are continuing to the next section of this chapter. Otherwise, click Save, close InfoPath Designer, and then close the browser.
In the following example, you will come to understand the power of publishing a form as a content type. The form can be opened and filled out by clicking a link directly to that XSN file in the Form Templates library. However, the submit data connection is still configured to submit the file to that original Time Off library. So even though the form is ready to be filled out, more work needs to be done so that the file can be submitted to the right locations. There is an accounting department site and a marketing site, and the employees in each of those departments will submit to their own library.
In the following exercise, you will create new Marketing and Accounting sites so that Time Off Request libraries can be created in each, and you will associate the new content type to the libraries.
From the same root-level site that the content type was published to in the previous exercise, click the Site Actions button, and then click New Site.
Select the Team Site template. Use Accounting as both the name and the URL of the new site, and then click Create.
Browse back up to the root site. Repeat steps 1 and 2, naming the second new site Marketing.
Now you need to create form libraries in each subsite.
In the Marketing site, click Site Actions, and then click More Options.
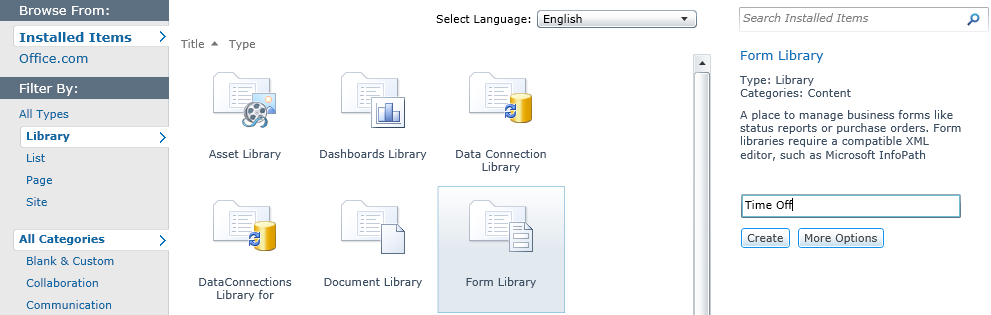
Select Form Library as the template. Name the library Time Off, and then click Create.
On the ribbon, on the Library tab, click Library Settings.
Click Advanced settings. Change Allow management of content types? to Yes, and then click OK.
In the Content Types section of the Form Library Settings dialog, click Add from existing site content types.
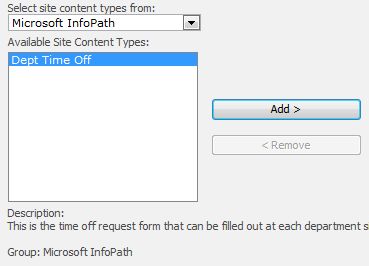
In the Microsoft InfoPath group, select Dept Time Off, click the Add button, and then click OK.
In the Content Types section in the Form Library Settings dialog box, click the name of the Form content type, and then click Delete this content type. Click OK to the confirmation message.
Browse to the new Accounting site, and then repeat steps 4 through 10.

Notice that in each of these new form libraries, as soon as the new content type was added, all of the promoted columns appeared in the library settings as columns in the library. Multiple libraries now exist so that Accounting and Marketing employees can go to their respective locations to fill out forms.
After a form has been created and published as a content type, it will probably need to be modified later. How can you get to it, especially if you don’t remember where the XSN file was saved on the hard disk, or if the person who created the form no longer works for the company? Good news! It’s still possible. On the Accounting site, click Site Settings | Site Content Types, and then click the name of your content type. Click Advanced Settings, and then click the (Edit Template) hyperlink.
In the following exercise, you will create data connections to submit to the Accounting and Marketing form libraries.
Note
SET UP In the web browser, open your SharePoint site that was used in the previous exercise. If the Time Off Request form Time Off CT is not currently open in InfoPath Designer 2010, browse to the location on the computer where it was saved in the previous exercises. Right-click the XSN file, and then select Design.
Navigate to the new Time Off library that was created on the Accounting site, and then from the browser’s address bar, copy the URL to the clipboard.
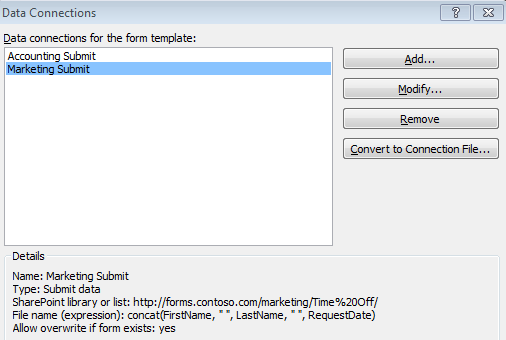
In the Departmental Time Off Request form in InfoPath Designer, on the ribbon, click the Data tab, and then click Data Connections.
Select the SharePoint Library Submit data connection, and then click the Modify button.
In the Document Library text box, paste the URL of the Accounting document library, and then click Next.
For the name of the data connection, rename it to Accounting Submit. Click Finish, and then click Close in the Data Connections dialog.
Another data connection needs to be created for submittal to the Marketing site. Navigate to the Marketing site that was created in the last exercise, and then click the Time Off form library. Copy the URL to the clipboard.
On the Data tab, click To SharePoint Library. Paste the URL to the Marketing site’s time-off form. Use the same file name syntax as was used for the Accounting data connection, and then click Next.
Name this data connection Marketing Submit, and then click Finish.
Click Close in the Data Connections dialog.
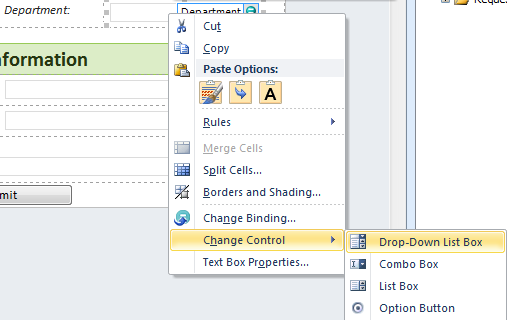
The existing Department field will be used to determine the correct department to which to submit each form.
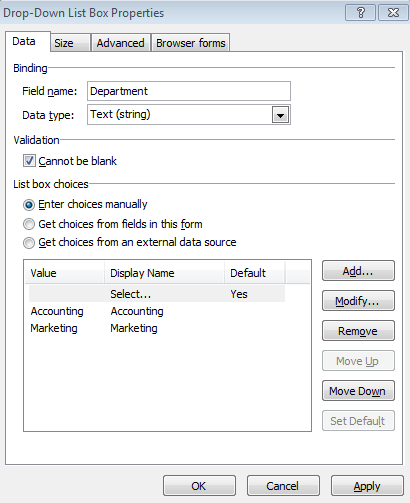
Right-click the Department text box, select Change Control, and then select Drop-Down List Box.
Click Control Properties, and then select the Cannot be blank check box.
Click the Add button. Type Accounting, and then click OK. Add the Marketing department, as well.
Click Select, and then click the Set Default button on the right.
The word Yes appears in the default column. Now, when people fill out this form, they are required to pick a department before submitting the form.
Click OK.
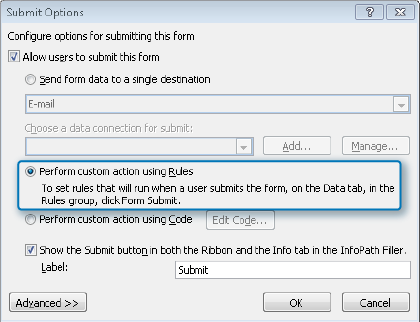
On the ribbon, click the Data tab, and then click Submit Options. Select Perform custom action using rules, and then click OK.
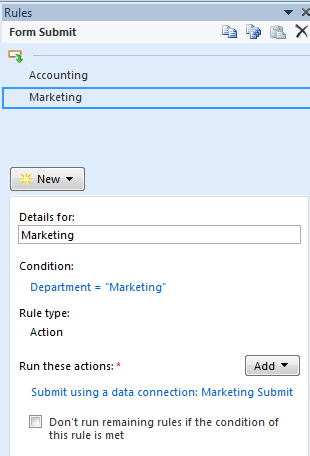
In the Form Submit Rules pane, change the name of Rule 1 to Accounting. Under the word Condition, click the link text so that a condition can be added.
Create a condition stating that Department is equal to “Accounting”, as shown in the following screenshot. Click OK.
Tip
This text is case sensitive, so if the beginning of the department name was capitalized in step 12, it also needs to be capitalized here.
This rule is done. It states that if the Accounting department is selected, the form will be submitted to the Accounting library.
While still in the Rules pane, click the New button, and then select Action. Name the rule Marketing, and then create a condition just like you did in step 17, except set the condition to Department is equal to “Marketing”.
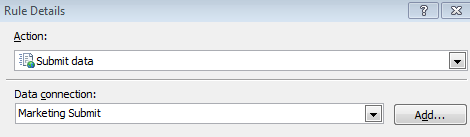
Next to Run these actions, click the Add button, and then click Submit Data.
In the Rule Details dialog, in the Data connection field, select Marketing Submit from the drop-down box, and then click OK.
Click Quick Publish.
The resultant behavior is that when people fill out this form, it is submitted to the library for the department that is selected in the Department drop-down box.


Try this form out by browsing to the Accounting site’s Time Off library. Fill out a new form. Notice that whichever department is chosen, the form is submitted to the appropriate library.
Administrator-Approved Templates
The administrator-approved template is the last of the three methods available for publishing forms. Under certain circumstances, the Publishing Wizard will allow only the option to publish the form as this type of template, with the other options disabled.
Important
Microsoft Office 365 has no interface to upload an administrator-approved template, so this section does not apply to those of you who are using that product.
Reasons why an administrator-approved template would be necessary include the following:
The form contains custom code (programming done by a developer) and needs to be a browser-based form.
The form security has been set to Full Trust or Restricted.
The form needs to be deployed globally, available to all site collections.
The form utilizes data connections that connect to site collections other than the URL where the form is being filled out.
To deploy this type of template, an XSN file needs to be generated and given to the SharePoint server administrator to upload to forms services.
In the following exercise, you will create an administrator-approved template and upload it to central administration.
Note
SET UP In the web browser, open your SharePoint site that was used in the previous exercise. If the Time Off Request form Time Off CT is not currently open in InfoPath Designer 2010, browse to the location on the computer where it was saved in the previous exercises. Right-click the XSN file, and then select Design.
With the Time Off Request form opened in Design mode, click File, and then click Save As.
This file will be saved with a new name because you will be deploying it differently than the other forms in previous exercises.
Name this new copy Time Off Admin. Select a location on your computer, and then click Save.
In the header, rename the form Global Time-Off Request Form.
Click File, click Publish, and then click SharePoint Server.
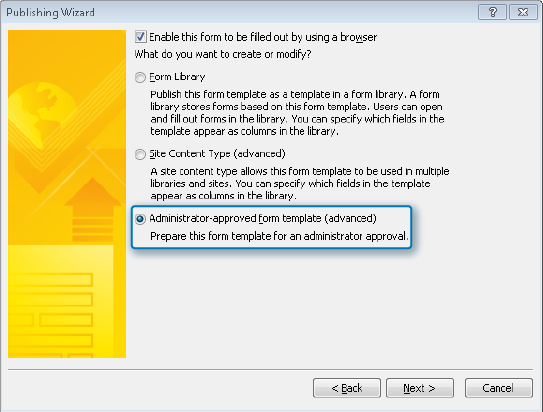
Click Next. Select Administrator-approved form template (advanced), and then click Next.
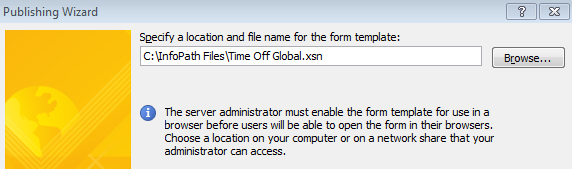
Specify a file name and location. This file can be saved to your hard disk and will be the file that is given to the SharePoint administrator. Click Browse, and then save the file to C:InfoPath Files. Name it Time Off Global. Click Next.
Tip
This new file is not to be confused with the file that was saved in step 1. That file is the one that you can edit and do further design work, later on; the file generated in step 6 is the one that is to be uploaded to Central Administration. To give this file to the server administrator, you can either email it to him or put it in a shared network location to which you both have access.
Click Next. Click Publish, and then click Close.
Go to Central Administration. (This step must be performed by someone who has the necessary access to SharePoint’s Central Administration site. In this exercise, it is assumed that you have this type of server access.)
Click General Application Settings on the left.
In the InfoPath Forms Services section, click Manage form templates.
Select the Time Off Global.XSN file that you created in step 6 of this exercise, and then click Open.
Click the Verify button so that the form will be checked for errors or issues. In the form verification success screenshot, click OK.
When the form has been verified, click Browse, select the Time Off Global file again, and then click Upload.
On the success screen, click OK.
Click the drop-down box on the newly uploaded form.
Click Activate to a Site Collection.


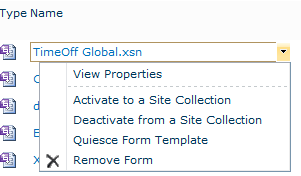
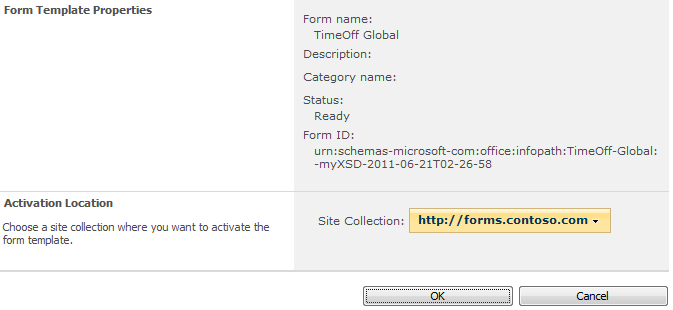
After it’s been determined which site collections will need to have this form available, it can be activated to those site collections. When that is done, the form will exist as a content type at the top level of those site collections. The experience regarding association of the content type to form libraries will be the same as it was in the exercise in this chapter where we published a form as a content type.
Note
Take a look at Chapter 12, for more information about these global form templates and the concepts behind activating to a site collection.
Key Points
There are three different methods for publishing a form library form to SharePoint: form library, site content type, and administrator-approved form template.
Columns can be selectively chosen to promote to SharePoint as columns in a form library.
When promoting columns, existing library or site columns can be selected, or new ones can be created.
By default, the only way that new forms are added to a library is by using the Save functionality, with which end users can designate the file names.
Form validation is not applicable when forms are saved instead of submitted.
It is important to plan the syntax of the file names when creating a connection to submit to SharePoint.
When the Save and Save As buttons are available, the form can be saved without validation, which means that required fields are not really required.
In Form Options, there are settings with which you can disable specific ribbon buttons.
When a form is published as a content type, it can be submitted to more than one library.
When a form is published as an administrator-approved template, it can be deployed and used in multiple site collections.