
Hour 10 Bringing Style to the Substance with Cascading Style Sheets
What You’ll Learn in This Hour:
![]() What Cascading Style Sheets are
What Cascading Style Sheets are
![]() How to create new styles from scratch
How to create new styles from scratch
![]() How to modify existing styles using the style tools
How to modify existing styles using the style tools
![]() How to use styles to change the appearance of words, sections or even the whole page
How to use styles to change the appearance of words, sections or even the whole page
Introduction
Although it might be informational, a website with no style is plain boring and probably won’t get many visitors. Now that you have a firm grasp on how to create content for your website, it’s time to make it look good. Enter CSS, or Cascading Style Sheets, a code language that lets you change the appearance of your pages and sites without messing up the Hypertext Markup Language (HTML) code. This is where Expression Web 2 really excels. With Expression Web 2’s built-in CSS capabilities, creating standards-based and cross-browser–compatible styles is easier than ever before, even if you don’t understand exactly what’s going on.
Expression Web gives you a multitude of ways to create and apply styles, many of which don’t require you to write a single line of code. In fact, you can make highly advanced and elaborate styles and layouts using these tools without even glancing at the actual code!
Styles can apply to individual objects, sections of a page, or even an entire site. It all depends on what you, the designer, want to do. Styles can do simple things such as change the font or color of a heading, or advanced things such as position content and set behaviors and multiple styles at the same time. Right now CSS is probably the most powerful tool in a web designer’s arsenal and it is the basis of most modern websites and blogs. Designers and developers with strong CSS skills are in high demand, and because Microsoft built Expression Web specifically to handle and generate proper standards-based code and CSS, you already have a leg up just by using the program.
CSS Sans Code
Because of Expression Web’s setup, you don’t need to know anything about CSS code to create styles in your document. In fact, creating and applying styles to documents can be as easy as a couple of mouse clicks.
Creating Styles with a Click of Your Mouse
In this example, you change the style or look of the subheadings in the default.html document. The idea of this exercise is to show you that changing one style can affect multiple sections within the page. If you haven’t already done so, open the default.html page in Design view.
1. With the default.html page open, click the New Style button in the Apply Styles task pane in the lower-right corner (see Figure 10.1). This opens the New Style dialog.
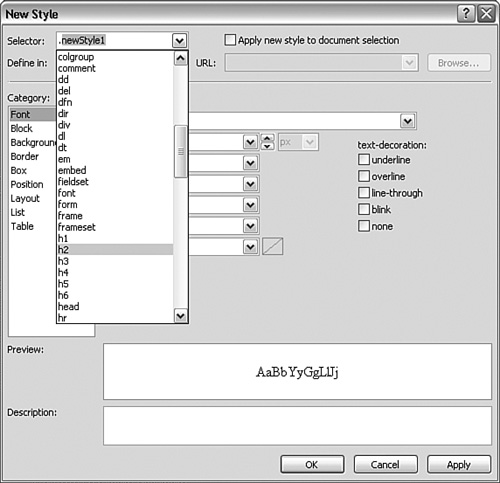
2. In the New Style dialog, open the Selector drop-down menu and scroll down to h2 (see Figure 10.2). Select h2 or, alternatively, type h2 in the Selector bar.
Doing so means the style you are creating applies to all the text that has Heading 2 as its style.
Figure 10.1 The Apply Styles task pane.
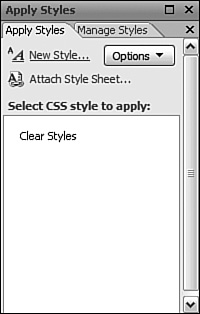
Figure 10.2 The New Style dialog showing the Selector drop-down menu with h2 chosen.
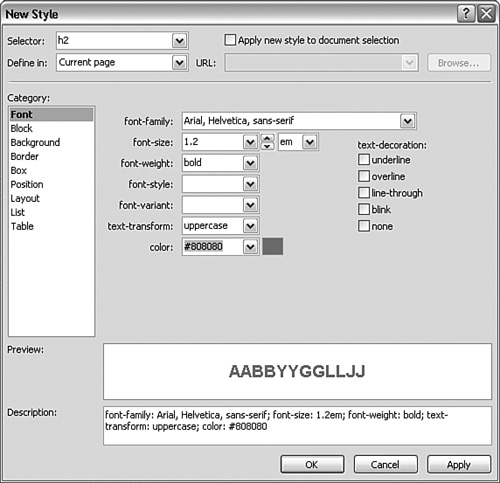
3. With the Font category selected, change the font-family to Arial, Helvetica, sans-serif with the drop-down menu. Set the font-size to 1.2 and change the units to em. Set the font-weight to bold and text-transform to uppercase. Finally change the color to gray using the drop-down menu. As you make these changes, you will see the changes in real-time in the Preview box and see the code being generated in the Description box (see Figure 10.3). Click OK to apply the changes.
Figure 10.3 The New Style dialog with all the new h2 styles set.
By looking through the page in Design view, you can see that the subheadings you styled with Heading 2 have changed. They are now a different font, all uppercase, and gray in color. Now that you’ve changed the subheadings, you probably want to change the main heading as well. To do so, simply click the New Style button again and follow the same procedure you used to change the subheadings, but change the Selector to h1 instead of h2. Because h1 is the primary heading, it should be slightly larger than h2, so a size of 1.4em is appropriate.
![]()
Font Sizes and How to Use Them
When you changed the font size of the styles, you probably noticed that you had many different units from which to choose: px, pt, in, cm, mm, pc, em, ex, and %. You are probably familiar with px (pixel), in (inch), cm (centimeter), mm (millimeter), but pt (point), em (em space; historically the width of the letter m but now the height of the letter m), and ex (x height; the height of the lowercase letter x) are new to most people. You are probably a bit confused also about why there are so many options. When you work in a word processing application you just set the font size, so why do you have to decide what kind of measurement to use when it comes to websites? The answer is both simple and complicated: The content of a website, although most often viewed on a computer monitor, a multitude of different media might display it—from cell phones to text readers and even paper printouts. CSS gives you the ability to define different styles depending on what type of media the viewer is using. So, although it makes sense to size content displayed on a computer monitor using pixels, it might make more sense to size content intended for printouts in centimeters or inches.
There is also the issue of absolute and relative sizes. Inches, centimeters, and millimeters are absolute sizes, meaning that they should always be the same size no matter what medium is displaying them. Pixels, em spaces, and ex heights are relative sizes, meaning they will vary in size depending on the medium displaying them and the settings in the program used to display them. (Pixel measurement is a bit different because it is relative based on the pixel size and resolution of the display unit; that is, better resolution means smaller pixels.)
So, how do you decide which unit to use? There is no definite answer to this question, but you are safe if you go by these two rules:
![]() Use px for content that has to have a set size (images, tables, fancy headings, menus, and so on).
Use px for content that has to have a set size (images, tables, fancy headings, menus, and so on).
![]() Use em for content that the user can resize to facilitate readability.
Use em for content that the user can resize to facilitate readability.
Many users have browsers that allow them to increase the size of the font on the page. em facilitates this sizing. In contrast, older browsers do not allow resizing of text sized with px.
The downside to using em as the sizing unit is that it is not consistent throughout different fonts, so a size of 1.2em in one font might be small but in another font might be large. On average, 0.8em equals 10 to 12px.
For further reading on the em size and why you should use it I recommend the article The amazing em unit and other best practices found at http://www.w3.org/WAI/GL/css2em.htm.
Creating Inline Styles
The previous example demonstrates how to make styles that affect all the content to which they apply, including new content you add later. If you want to make a style change to just one section of the page and do not use the style elsewhere, you create what is called an inline style.
1. In Design view, place the cursor anywhere inside the first paragraph to select it. Click the New Style button in the Apply Styles task pane as before.
2. In the Selector drop-down menu, select (Inline Style). Below the Selector you see that Define In field is Current tag: <p>, meaning that this inline style applies to only the content inside this paragraph.
3. In the Font category, set the font-weight to bold. In the Border category, uncheck the Same for All boxes and set the border-bottom-style to solid, the Bottom border-width to 2px and the border-bottom-color to gray (see Figure 10.4). Click OK.
As you can see in Design view the font in the first paragraph is now Bold and there is a 2 pixel thick line separating it from the rest of the text.
Figure 10.4 Under Border in the New Style dialog you can set the style, width and color of each of the four border sides..

Styling Small Selections
In the extreme, you can even set the style of just a small selection of words or even one word or one letter within a word by creating spans within the text and applying styles to them. You can do this in two ways.
Either:
1. In Design view, select the word kipple on the second line of the second paragraph.
2. Using the tools available from the Common toolbar, change the font to Courier New, give the word an outside border using the Outside Borders button, and change the font color to green using the Font Color button.
Or:
1. In Design view, select the word kipple on the second line of the second paragraph.
2. Click New Style in the Apply Styles task pane to open the New Style dialog. Check the Apply New Style to Document Selection box to ensure that the style applies only to the word you selected.
3. Under the Font category, change the font-family to Courier New, Courier, monospace, change the font-color to Green.
4. Under the Border category, set border-style to solid, border-width to 1px, and border-color to Green.
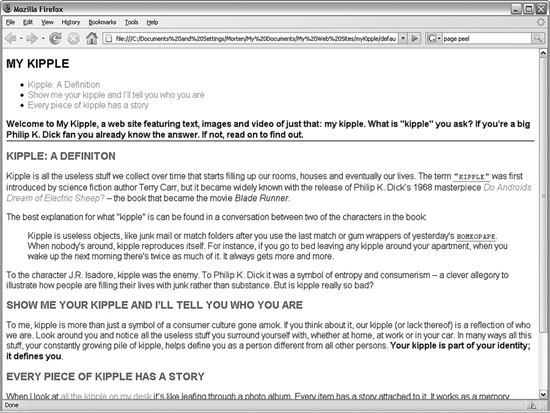
These two methods produce almost the same result: .style1 and .newStyle1, new style classes applies only to the word kipple, sets the font to Courier New, changes the color to green, and puts a one-pixel green box around it. The differences between the two methods are obvious: The first method is quick and easy if you are making rudimentary changes and produces a class called .style1. The second method is more cumbersome but gives you far more flexibility in terms of the final product and produces a class called .newStyle1. For example, when using the first method, the color of the box is the same as the color of the font. In the second method, you can set the color of the box to whatever you want and even set each side of the box to a different color (see Figure 10.5).
Figure 10.5 default.html as it appears in Firefox with the inline style and the span style applied.

Setting the Font Family for the Entire Document
Now you know how to make changes to preset styles, sections, and individual selections of a document. But what if you want to define certain attributes for the entire page, such as setting all text to one particular font family unless otherwise specified? By default, unstyled HTML text displays in Times New Roman. You can apply styles to any tag within the HTML code of the page, even the <body> tag that wraps all the content. By creating a body style, you can affect all the content within the <body> tag (that is, all the content on the page). Here is how to change all the text in the document to Arial, Helvetica using the <body> tag:
1. Click New Style in the Apply Styles task pane to open the New Style dialog. You do not need to select or highlight any portion of the document to create the body style.
2. In the Selector drop-down menu, select body or type body in the Selector area.
3. Under the Font category, change the font-family to Arial, Helvetica, sans-serif. Click OK.
By setting the font-family of the <body> tag, you changed to the new font any text that has not had its font-family defined by a custom style. Because you created a special style for the word kipple, it retains the Courier font. The same is true for the headings although you can’t see it because the body font and the heading fonts are the same.
![]()
How Exactly Do Cascading Style Sheets Work?
This last example begs the question “Why does the word kipple retain its special font-family even when the font-family for the entire document changes?” The short answer is that this is where Cascading Style Sheets get their name: They work based on a cascade, meaning that the last style or rule in the sequence has the highest priority and is the one applied. This is of course a very simplified version of events and it doesn’t always apply, but for this book it is sufficient. For an in-depth look at Cascading Style Sheets, pick up a copy of Eric A. Meyer’s book CSS: The Definitive Guide.
Try it Yourself
Styling Links (AKA Get Rid of the Underline)
You probably noticed that even though you changed the font-family for the entire document, the links retain that garish blue color and underline. The first things new web designers want to know are how to get rid of the underline and change the color of links. As you might have guessed, the answer is by using styles.
In Hour 7, “Get Visual Part 2—Advanced Image Editing, Thumbnails, and Hotspots,” you learned that all links are defined using the <a> tag. So, it follows that if you create an a style, you change the links.
1. Click New Style in the Apply Styles task pane to open the New Style dialog. You do not need to select or highlight any portion of the document to change the link style.
2. In the Selector drop-down menu, select a or type a in the Selector area.
3. Under the Font category, check the none option under text-decoration (even though it is not checked, the default setting for links is underline, so you have to explicitly tell the browser to not apply this option). Click <$I<body> tag;font family, applying to documents>OK.
Now the underline is gone but the links are still blue. Most designers want their links to be a different color, and to change the color, you have to modify the style you just created. You can do this using the Modify Style function.
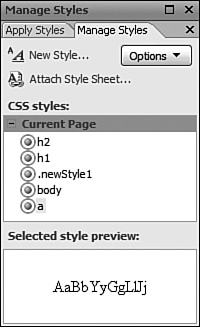
1. To access the styles you have already created, click the Manage Styles tab in the Apply Styles task pane. The Manage Styles task pane gives you a list of all the styles relating to the current document and uses visual aids to tell you what styles are active and what styles are applied to the current selection (see Figure 10.6). If you place the cursor on a link, you will see that the a style highlights, telling you that this is the last style in the cascade applied to your selection.
Figure 10.6 The Manage Styles task pane gives you information about available styles, active styles, and what style is applied to the current selection.
2. To edit the existing style, right-click the a style and select Modify Style from the context menu. This opens the Modify Style dialog, which is the same as the New Style dialog.
3. Under the Font category, change the font-color to a bright orange using the More Colors option (see Figure 10.7). Click OK.
Now all the links are orange instead of blue. But so are the subheadings!
Using the Cascade to Override Styles
Back in Hour 5, “Get Connected—Building Hyperlinks for Navigation and Further Exploration,” you set the subheadings as bookmarks using the <a> tag and now the color of the a style is overriding the color of the h2 style. This is where the cascade shows its true strength: Using CSS you can define multiple attributes to the same content and the browser picks the one that is most relevant based on a set of rules. In this case you want to create a style that applies to only text that is both a subheading and a link.
Figure 10.7 The More Colors option is always available whenever you set a color. From here you can pick a color from the expanded palette or use the eyedropper tool to pick a color from anywhere on your screen (even outside Expression Web).

1. Click the New Style button in the Manage Styles task pane to open the New Style dialog.
2. In the Selector bar, type h2 a. This literally means Heading 2 links. In the Font category, change the font-color to gray and click OK.
Now the subheadings return to their gray color because the browser picks the most specific style in the cascade (h2 a is more specific than either h2 or a).
![]()
Caveat: Not Everyone Has Your Fonts!
You might have noticed when you select a font style that Expression Web offers you font families rather than particular fonts. This is because HTML knows that not every computer has every font, so it gives the browser a variety of similar-looking fonts to choose from. There are three main font families based on the most common fonts that almost all computers have installed by default:
Arial, Helvetica, sans-serif
Times New Roman, Times, serif
Courier New, Courier, monospace
All these families work the same way. The browser looks for the first font to see whether the computer has it installed. If not, the browser goes to the second font. If the computer has neither of the two fonts installed, the browser looks for the first font that falls under the category (sans-serif, serif, or monospace).
You can set your text to any font you want but if you go outside the three main font families, you increase the chance that the computers used to view your page don’t have the necessary fonts and the page will not display properly. If the browser cannot find the defined font, it picks one of the default fonts—in certain cases that can lead to some strange results.
To be certain your page appears the same across all computers and browsers, I strongly advise you to stick to the three main font families for HTML text.
CSS Tools in Expression Web
Expression Web has a variety of built in tools to help you create CSS correctly and efficiently. You already used some of them in earlier examples, and now it’s time to take a closer look and familiarize yourself with each of them individually.
The Quick Tag Tools
Working with HTML documents it can be hard to remember, or even figure out, exactly what is going on because most of the content is in tags within tags within tags. Trying to navigate through this mishmash of code can be a daunting task for even an experienced developer. To fully understand why a certain element or segment of text looks and behaves the way it does, you need to know exactly what tags are applied and in what order. If you had to do this manually, it would be next to impossible. But with the Quick Tag Tools, it is so easy it borders on the absurd. To get a complete ordered list of all the tags applied to an element in Design, Split, or Code view, simply place the cursor on that element and look at the top of the view pane. There the Quick Tag tools list the entire sequence of tags and give you the option to edit each of them individually (see Figure 10.8).
Figure 10.8 The Quick Tag tools list all the tags applied to the selected content in order.
![]()
The Quick Tag tools also interact with other tools, such as the Tag and CSS Properties task panes and the Apply and Manage Styles task panes, to give you a complete picture of what Expression Web is doing to the content.
The Quick Tag Selector is the bar itself. After you click something in the page, the Quick Tag Selector displays all the applied tags. By hovering over each tags displayed on the bar, you cause a box in Design view to highlight the affected area of that tag. From here you can click any tag in the Selector to display its tag or CSS properties or to show what style is applied. You can open the Quick Tag Tools drop-down menu by clicking the arrow button next to the tag and make changes to the tag without navigating through all the code (see Figure 10.9).
Figure 10.9 You trigger the Quick Tag tools drop-down menu by clicking the down arrow next to each tag.

From here you can trigger the Quick Tag Editor that lets you edit the tag by clicking Edit Tag, insert new HTML, and even wrap the existing tag in a new tag (see Figure 10.10).
Figure 10.10 You trigger the Quick Tag Editor from the Quick Tag Selector.

You can also remove the tag altogether, change the positioning of the content, or select just the content or the whole tag in Code view.
The Quick Tag tools are an important part of the CSS creation and editing process because all tags have attached styles, and you need to know what tags are at the end of the cascade to see what styles apply to a tag and what if anything needs to be changed.
![]()
Not only are the Quick Tag tools excellent for helping you keep track of your own work, but they also make short process out of dissecting complicated websites designed by others.
The CSS Properties Task Pane
The CSS Properties task pane gives you a more detailed breakdown of what styles are applied to the selected elements and exactly what they do.
![]()
If you can’t find the CSS Properties task pane go to Task Panes on the main menu and select CSS Properties. It will appear in the bottom left hand corner.
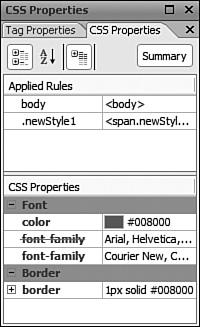
The top half of the task pane provides a list of all the applied rules or styles (the cascade), and the bottom part lists the attributes applied to the selected rule. You can select individual rules by clicking them in the top half of the task pane or by clicking the tags in the Quick Tag Selector. By default the bottom half of the CSS Properties task pane displays a list of all the available attributes for the selected style. If you want to see only those attributes that have a value, click the Summary button. As you have learned, CSS allows the same attribute to have many different values and the browser picks the one furthest down the cascade. The CSS Properties task pane shows you which attribute values are applied and which are ignored by using a red line to strike out the ones not in use (see Figure 10.11). This way you can easily see how the cascade is flowing and track errors in value attribution.
Figure 10.11 The red line shows that the Expression Web is ignoring the font-family attribute of the body style in favor of the one from .newStyle1.
The CSS Properties task pane lets you make direct changes to the selected CSS style by entering new values for all the attributes. This is a quick way to make the same kinds of changes you made in the Modify Style dialog, but it doesn’t give you the same kind of trial-and-error environment because all the changes are immediate. The CSS Properties task pane works in direct conjunction with the Apply and Manage Styles task panes.
The Apply Styles Task Pane
The Apply Styles task pane provides a visual representation of the applied and available styles by previewing them in a list (see Figure 10.12). The primary function of this task pane is to provide an easy way to apply styles to the selected content. To do so, simply select the content in Design view and click the desired style.
You can also use the Apply Styles task pane to remove styles from the content and select all the content to which the style is applied on the page.
The Manage Styles Task Pane
The Manage Styles task pane works in much the same way as the Apply Styles task pane, with the one major difference that you can’t simply click a style to apply it to a page (you have to right-click it and select Apply Style from the context menu). The Manage Styles task pane provides a complete list of all the styles in the page as well as a preview of the selected style (see Figure 10.13). As the name suggests, the Manage Styles task pane is an excellent tool for managing styles both when you want to edit a particular style and also when you start dealing with styles stored in different locations such as multiple style sheets.
Figure 10.12 The Apply Styles task pane displays all the applied and available styles and provides an easy way to apply new styles to the selected content.
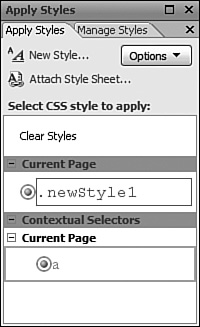
Figure 10.13 The Manage Styles task pane displays a complete list of all styles related to the open page and is an excellent tool for managing these styles.

The combination of these functionalities makes Expression Web an incredibly powerful tool when it comes to creating, editing, and troubleshooting CSS code. By familiarizing yourself with them you can work not only quicker and more effectively but also learn how to use CSS in a fun and hands-on way.
Color Coding in Apply and Manage Styles Task Panes
A colored dot that sometimes has a gray ring around it prefixes the styles in both the Apply and Manage Styles task panes. The dot’s color indicates the category to which each style belongs:
![]() Blue means the style is a selector such as
Blue means the style is a selector such as p, h1, a, or blockquote.
![]() Yellow means the style is an inline style.
Yellow means the style is an inline style.
![]() Red means the style is a CSS ID (prefixed by
Red means the style is a CSS ID (prefixed by #).
![]() Green means the style is a CSS class (prefixed by a period [
Green means the style is a CSS class (prefixed by a period [.]).
A gray circle surrounds the colored dot if the style is in use in the current page.
You will learn what CSS IDs and classes are in Hour 11, “Boxed In Part 2: Knee Deep in CSS.”
Try it Yourself
Use Various CSS Tools to Apply and Change Styles
Now that you know all the different CSS tools available, it’s time to put them to use. In this example, you use the various task panes to apply styles to content and then change the styles without using the Modify Style dialog.
1. In Design view, find and highlight the word homeopape in the blockquote.
2. With the Apply Styles tab selected in the task pane, click the .newStyle1 style to apply it to the selected text.
3. Click the <span.newStyle1> tag in the Quick Tag Selector to select the correct style. If Summary is active in the CSS Properties task pane, click the button to deactivate it so that you get a list of all available attributes.
4. Use the CSS Properties task pane to change the font-color to Maroon by clicking the drop-down menu under Font and Color (see Figure 10.14). Scroll down to font-variant and set it to small-caps.
Figure 10.14 Changing the values in the CSS Properties task pane makes instant changes to the CSS and the page.
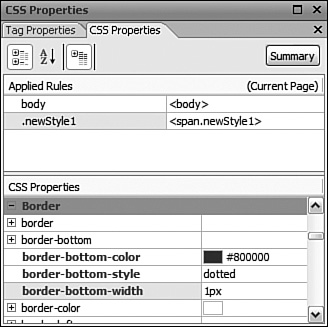
5. To change the border, scroll down until you find the border attribute and click the + sign to see all the available attributes. Delete the current attributes by clicking the border attribute value and pressing the Delete key or the Backspace key on your keyboard. Scroll down to border-bottom (you might have to change the layout of your workspace to see the whole name) and set the border-bottom-color to Maroon, the border-bottom-style to dotted, and the border-bottom-width to 1px.
The changes you just made to the .newStyle1 style are instant and affect both words that Expression Web applied the style to (see Figure 10.15). This technique is effective for making smaller adjustments or changes to your styles, but be careful: Unlike the Modify Style dialog, you cannot back out of multiple changes with a simple click. If you make many changes to your style, it can be hard to retrace your steps even with the Undo button.
Figure 10.15 default.html as it appears in Firefox with all the new styles applied.
Summary
Using Cascading Style Sheets gives you precise and easy control over how your content appears to the viewer. And with Expression Web’s many integrated CSS tools, even a novice can create advanced and standards-based styles without writing a single line of code. In this hour, you learned how to use these tools to edit existing styles and create new ones as well as how to apply styles to the whole page, sections of a page, and individual words. You saw how easy it is to modify existing styles using the Modify Style dialog and the CSS Properties task pane, and how the Quick Tag tools can help you find the relevant tags and styles quickly and decipher complicated code to see how and why elements in the page look the way they do.
Cascading Style Sheets apply to the page in a cascade. In this hour, you got a basic understanding of what this means and how to use this knowledge to style your content and solve problems. But so far you have only scratched the surface of what CSS is capable of. In the next hours, you will learn how to use CSS as a layout tool and unlock its true potential as well as how to move beyond simple point-and-click page styling to full-fledged CSS authoring and the creation of separate style sheets.
Q&A
Q. I changed my text size from 12 px to 12 em but now the text is incredibly large! What is the correct equivalent to 12 px in ems?
A. 1 em is the width of the letter ‘m’ that is defined as standard in the browser the user uses. So 12 em is the width of 12 m’s next to one another, thus the huge size. Because em is a relative size measurement there is no correct answer to this question. Depending on what font you are using a 12 px equivalent is usually between 0.8 and 1 em. To get the perfect size you need to do a bit of trial-and-error. Just remember that when dealing with ems you should always use decimals rather than full integers.
Q.I followed the tutorial and applied a class to some text but nothing happened!
A. If you created a class and nothing happened one of two things went wrong: Either you didn’t actually create the style (by accidentally pressing Cancel perhaps?) or the style wasn’t actually applied to the content. First check if the style is listed in the Manage Styles task pane. If it is, click on the element you wanted to style and check the Quick Tag Selector to see if the correct selector or class is applied. If you created a new class and the selector only says <p> or <h1> you need to apply the class manually by selecting the selector and clicking on the class in the Apply Styles task pane.
Q. When I select the different colors from the drop-down color options they are replaced by a weird code starting with # and followed by six letters and numbers. What is this?
A. When working with colors in the digital realm every shade has a distinct hexadecimal code preceded by #. That way the color is interpreted the same way by all applications, whether it be an image editor, web browser or word processor. In CSS you set colors by using their hexadecimal codes.
Workshop
The Workshop has quiz questions and exercises to help you put to use what you have just learned. If you get stuck, the answers to the quiz questions as in the next section. But try to answer them first. Otherwise you’ll only be cheating yourself.
Quiz
1. What part of the document does a CSS style apply to?
2. What happens if several styles with different values for the same attributes are applied to the content?
Answers
1. CSS styles are applied to the content within their respective tags; that is to say, a p style will be applied to any content within the <p> tags, an a style will be applied to any content within a <a> tag, and so on. You can also create spans around content and apply styles to them as well.
2. If several different attribute values are applied to the same content from different styles, the browser goes through the cascade and selects the attribute that is furthest down the line or is most specific. In most cases, this means the style that is attached to the closest tag.
Exercise
Two other styles in the default.html page were not styled in the earlier examples: the paragraph and the block quote. Use the techniques you learned in this hour to create a p style and a blockquote style, and apply some different attributes to them. Remember that because the font-family has already been set in the body style, you don’t need to change it. Try experimenting with background colors, borders, and text decorations and explore the many different options available under the Font category.