
Making it easy for visitors to find information on your website, and more important, making it easy for visitors to find the information that you want them to find, is a key factor in defining the success or failure of your new site. There are three basic mechanisms in Drupal to provide navigational capabilities to your site:
In this chapter, you will learn how to use Drupal's administrator's interface for creating and managing menus.
A menu, in its simplest form, is a horizontal or vertical list of links that direct a user to a new page. If you examine the home page of your new website, you'll see that there are at least six menus on that page alone. See Figure 5-1.

From top to bottom, the menus are:
the top black bar, starting with Content;
the gray bar at the top of the page, starting with Add Content;
the top site menu (top of the blue area), with Admin and Log out
the secondary menu in the right column, starting with Home;
the left hand column menu titled Management; and
the menu that is embedded in the article on the page, starting with "Create content."
Menus help a visitor to a site understand (and access) the content, features, and functions that the site provides.
On our example site that we're creating in this book, the menus shown on the page are all text links. Drupal also provides mechanisms for creating menus that are button and/or image based. I created a dynamic image-based menu for the Bloomfield Township Public Library (http://btpl.org) that uses a combination of buttons and images (images appear above the menu item that is being highlighted; for example, the boy with the paint on his fingers in Figure 5-2 is the highlighted menu item).

Creating menus is facilitated through a set of screens that are part of Drupal 7 core. There are three basic activities for creating items on menus
Adding an item to an existing menu. Drupal 7 comes with several menus already created. All you need to do is to add items to those menus.
Creating a new menu. If you need more than the two menus that come with Drupal 7, you can create a new menu.
Assigning the menu to a region of on a page. If you created a new menu, you'll need to assign it to a region on the page.
There are two general items that we can add to our page as menu items: a link to an existing element on our site (a content item, a list of content associated with a taxonomy term, and so on), or a link to a page that is external to our site.
There are two approaches for adding items to menus: you can use the menu administration form (see Figure 5-4) to create a new menu item, or you can create a menu link from the content item that you wish to reference from within the form used to create or edit that content item. The best practice is to use the content creation form (see Figure 5-3) or, as we will see later in the book, other element creation forms such as a panel page or a view. The reason for using this approach is that when you delete that content item, Drupal automatically removes the item from the menu to which it was assigned. If you use the manual approach of creating a menu item using the menu administration form, you as the site owner must remember to remove that item manually from the menu.
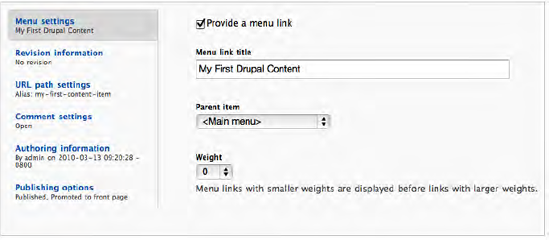
To create a new content item, click on any of the Create Content links that are available on the home page of your website (assuming you are still logged in as the administrator), and select the "Basic page" content type. As an example, enter a title and body for the new content type and then click on the "Provide a menu" vertical tab at the bottom of the screen (see Figure 5-3). Check the "Provide a menu" box, which reveals the fields for defining your menu. Enter the title for the item as you wish it to appear on the menu, and select the main menu as the one where you want the item to appear. After entering the values for your menu item, click on the Save button at the bottom of the page. Drupal then displays the page that you just created, with the menu item associated with this page now appearing in the Main menu at the top right of the darker blue area of the page.
Clicking on that link will take you directly to the page we just created, regardless of where you are on the website.
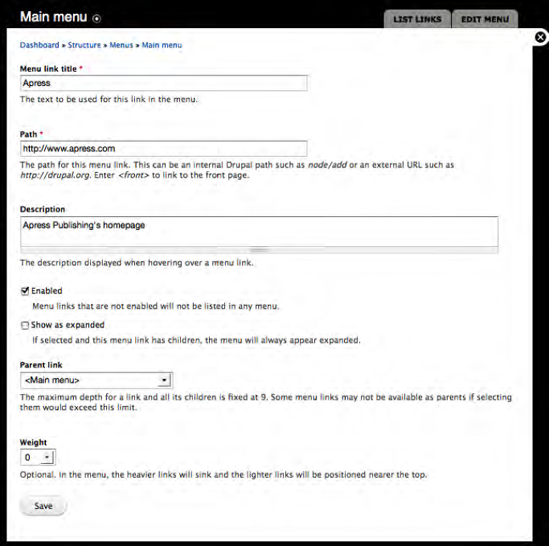
You can add links to external sites by adding a menu item. To do so, click on the Structure menu item at the top of the page. On the Structure page, click on the Menu link. On the Menu page, click on the "Add item" link for the Main menu. You should now see the "Add menu item" form (see Figure 5-4). Enter a title (in this example, I used Apress as the menu title), the path, which is the full URL to the external page to which we want to link (in the example I used www.apress.com), ensure that the enabled check box is checked, and for demonstration purposes, select the Main menu from the parent item drop down list.
Once you've entered all the values, click on the Save button at the bottom of the page (you may need to scroll down to see it). Drupal then displays the complete list of items that are assigned to the Main menu, including the new item that we just created.
You should now see the new menu item that you just added. Clicking on that menu item will take you to the external link that you entered when you created the menu item.
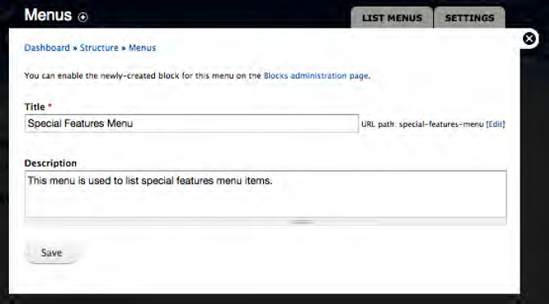
There may be situations where you need to create additional menus beyond what ships with Drupal 7. As an example, when creating Drupal-based websites for public libraries, I am often asked to build unique menus for each department in the library (a menu for adult services, youth services, teen services, circulation, and so on). In such a case, the basic menus shipped with Drupal 7 are not enough to fulfill the library's requirements. To create a new menu, click on the Structure menu item at the top of any page on your site. On the Structure page, click on Menus, and on the Menus page click on the Add Menu link. The form for creating a new menu is displayed (see Figure 5-5). On the form for creating a new menu, enter the title of the menu and a description (which is optional). Click the Save button, and you now have a new menu ready to assign items to using the same methods as described earlier in this chapter.
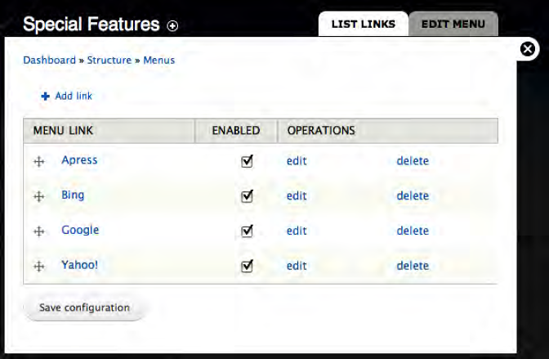
After saving the menu, you can now add items to it. As practice, create menu items for the following external links, using the process described in the section "Adding a Menu Item for an External Page": apress.com, yahoo.com, google.com, and bing.com. When completed, your menu should look something like that in Figure 5-6.
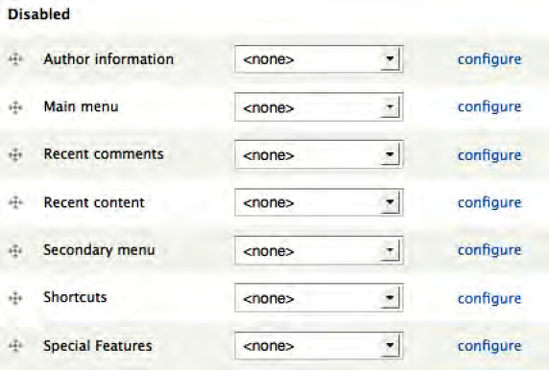
At this point the menu exists in Drupal, but it isn't assigned to a region on a page and, therefore, isn't visible to site visitors. To make your new menu visible, click on the Structure link at the top of any page, and on the Structure page click on the Blocks link. On the Blocks page, scroll down until you find Special Features (see Figure 5-7). In the list to the right of Special Features, pick the left sidebar option and then click on the Save Blocks button at the bottom of the page.
Click on the home icon at the top left of the screen to return to the home page and voila! There's your new menu. You may now place your order.
In this chapter I covered the basics of adding links to a menu and creating a new menu. I explained the process of adding content items to menus and adding links to external websites. I also covered how to enable a new menu so that it appears on your site.
In the next chapter I explain how to completely change the look of your website by installing and enabling a new theme. Be prepared to say "wow!"