
We have created our first sprite and understood how to move, rotate, and change its dimensions. We actually scaled it up massively compared to its original size. But this 15 x 15 sprite has something special.
If you select the Sprite (Dark) GameObject, you will see it has four dotted lines inside the Preview window in the Inspector view. This means it's a sliced sprite:
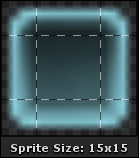
A sliced sprite is an image divided in nine sections, making it resizable while conserving its corners' proportions. Sliced sprites may be scaled as you wish—they still look beautiful.
Since Sprite (Dark) is a 9-slice sprite, we must tell our UISprite component to treat it as such. Perform the following steps to do so:
- Select the Sprite (Dark) GameObject.
- Click on the drop-down menu next to its Sprite Type field.
- Select Sliced.
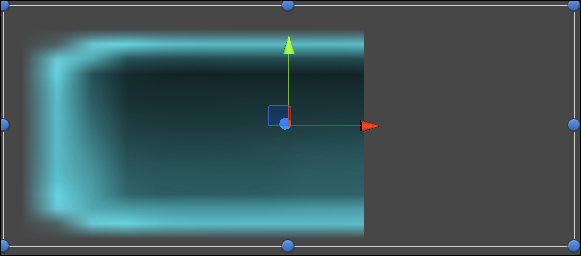
Notice how the sprite looks good now—it's not stretched anymore!
A tiling sprite is a pattern meant to be repeated indefinitely—it can be used to cover a large surface by repeating the same texture. Let's try it right now:
- In the Hierarchy view, rename Sprite (Dark) as
Window. - Select our Window GameObject and perform the following steps:
- Make sure it is at {
0,0,0} position and has a scale of {1,1,1}. - Make sure Depth is set to
0. - In the Color Tint parameter, change R to
115, G to240, B to255, and A to255.
- Make sure it is at {
Ok, we have our window. Let's create a tiled background to make it look better by performing the following steps:
- Select our Window GameObject and duplicate it with Ctrl + D.
- Rename the duplicate as
Background. - Select the new Background GameObject and perform the following steps:
- Set its UISprite's Depth parameter to
1. - Click on the drop-down menu next to the Sprite Type field.
- Select Tiled. It doesn't look good because our sprite is not a tiling sprite.
- Click on the Sprite button.
- Select the Honeycomb sprite, which is a tiling sprite.
- In the Color Tint parameter, change R to
115, G to240, B to255, and A to255.
- Set its UISprite's Depth parameter to
- Attach a component to it by navigating to Component | NGUI | UI | Stretch and perform the following steps:
- Drag-and-drop our Window GameObject inside the Container field.
- Set the Style field to Both.
- Attach a component to it by navigating to NGUI | Attach | Anchor and drag-and-drop our Window GameObject inside the Container field.
That looks better! We now have a tiling sprite for our window's background, and it looks as follows:

We used the UIStretch component to avoid setting dimensions manually; if you change the window's Dimensions, the background will resize itself automatically.
The UIAnchor component is used to make sure the background also moves with the window.
A filled sprite is useful to create life bars or progress bars; with this, you can set a sprite and change the Fill Amount parameter between 0 and 1 to hide a part of it. The following screenshot shows a partially hidden progress bar:
Let's create this effect with the following steps:
- Select our Background GameObject and set Sprite Type to Filled.
- Set Fill Dir to Horizontal.
Move the Fill Amount slider and you can see what it does on the game view. You've understood the filled sprite system. Now set the Sprite Type field back to Tiled.
Ok, we've seen different sprite widgets and parameters. Let's learn how to add text.