
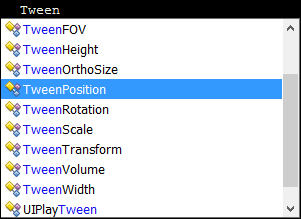
You can see all available Tweens by simply typing in Tween inside any method in your favorite IDE. You will see a list of Tween classes thanks to autocompletion, as shown in the following screenshot:
The strong point of these classes is that they work in one line and don't have to be executed for each frame; you just have to call their Begin() method!
Here, we will apply Tweens on widgets since we only have that in the scene. But keep in mind that it works in the exact same way with other GameObjects since NGUI widgets are GameObjects.
Let's use the TweenPosition class to make our main menu appear from the top of the screen on start. We will first use a simple Tween in only one line and then we will add an easing effect with a delay to make it nicer.
We can add a Tween Position component to our Container GameObject in MainMenu, but we need to see how we create a Tween in code. The following is how we do so:
- Select our Container GameObject from MainMenu and create and add a new
AppearFromAbove.csC# script to it. - Now open this new
AppearFromAbove.csscript and edit theStart()method so that it first sets thepositionvalue inContainerto a higher value than the screen's height. Then Tween it back to {0,0,0} in 1 second as follows:void Start () { //First, set the Menu's Y position to be out of screen: this.transform.localPosition = new Vector3(0,1080,0); //Start a TweenPosition of 1 second towards {0,0,0}: TweenPosition.Begin(this.gameObject, 1, Vector3.zero); }
Click on the play button. We now have our main menu coming down from the top of the screen with only two lines of code!
We created a simple Tween, but you can also configure your Tween to add a smoothing method and a delay, for example.
Let's try it now by replacing our Start() method's code with the following one:
void Start ()
{
  //First, set the Menu's Y position to be out of screen
  this.transform.localPosition = new Vector3(0, 1080, 0);
  //Start a TweenPosition of 1.5 second towards {0,0,0}
  TweenPosition tween = TweenPosition.Begin(this.gameObject, 1.5f, Vector3.zero);
  //Add a delay to our Tween
  tween.delay = 1f;
  //Add an easing in and out method to our Tween
  tween.method = UITweener.Method.EaseInOut;
}
Click on the play button. We have added a nice EaseInOut method to our Tween. The menu's vertical movement is now smoother, and all of this has been added through code. The following is a list of the different Tween methods that can add effects to Tweens:
Linear: This will create a simple linear tween—no smoothingEaseIn: This will make the tween smooth during the beginningEaseOut: This will make the tween smooth during the endEaseInOut: This will make the tween smooth both at the beginning and at the endBounceIn: This will give the tween bounce effect at the beginningBounceOut: This will give the tween bounce effect at the end
Now that you know how to use the TweenPosition class, you are capable of using other Tweens such as TweenScale, TweenRotation, TweenColor or any other available Tween, because they work the same way!