
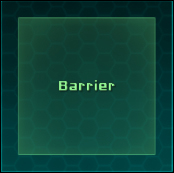
It is time to create our draggable barriers. The player will be able to drag-and-drop the BarrierObject prefab in the Viewport GameObject. This BarrierObject prefab will look as shown in the following screenshot:
First, we need to create our BarrierObject prefab's holder that will contain the draggable object:
- Select our UI GameObject.
- Create a new child with Alt + Shift + N and rename it as
Barrier. - Open the Widget Tool wizard by navigating to NGUI | Open and perform the given steps:
- Select Sprite for the Template parameter.
- Select Dark sprite for the Sprite field.
- With our Barrier GameObject selected, click on the Add To button.
- Select our new barrier's Sprite (Dark) GameObject and perform the following steps:
- Rename it as
Background. - Set its Sprite Type to Sliced.
- Set its Color Tint to {
0,250,250,170}. - Set its Depth value to
0. - Set its Dimensions to
200x200.
- Rename it as
- Select our Barrier GameObject.
- Attach a collider to it by navigating to NGUI | Attach a Collider and perform the following steps:
- Set its Center coordinates in Box Collider to {
0,0,0}. - Set the Size parameter of Box Collider to {
200,200,1}.
- Set its Center coordinates in Box Collider to {
- Attach Anchor to it by navigating to NGUI | Attach.
- Drag our Viewport GameObject in its Container field.
- Set its Side parameter to TopLeft.
- Set its Pixel Offset to {
100,-100}.
Ok, we have our BarrierObject holder's background at the top left-hand corner as shown in the following screenshot:
Let's create the actual BarrierObject prefab, which will be a custom button:
- Select our Barrier GameObject.
- Open the Widget tool wizard by navigating to NGUI | Create a Widget and perform the following steps:
- Drag the SciFi Font – Normal prefab into the Widget Tool wizard's Font field by navigating to Assets | NGUI | Examples | Atlases | SciFi.
- Select Button for the Template field.
- Select the Highlight sprite for the Background field.
- With our Barrier GameObject selected, click on the Add To button.
- Select our new Button GameObject from Barrier.
- Rename it as
BarrierObject. - Set its Center coordinates Box Collider to {
0,0,0}. - Set Size of Box Collider to {
160,160,0}.
- Rename it as
- Drag the Background GameObject from BarrierObject into the Target field in UIButton. Then perform the following steps:
- Set its Normal Color to {
125,255,155,130}. - Set its Hover Color to {
100,255,60,255}. - Set its Pressed Color to {
20,255,0,160}. - Set its Disabled Color to {
115,115,155,255}.
- Set its Normal Color to {
- Select the Background GameObject from BarrierObject and perform the following steps:
- Set its Depth value to
1. - Set its Dimensions to
160x160.
- Set its Depth value to
- Select the Label GameObject from BarrierObject and then perform the given steps:
- Set its text to
[99FF99]Barrier. - Set its Depth to
2.
- Set its text to
Ok. We now have our BarrierObject in the Barrier holder. Let's make it draggable by performing the following steps:
- Select our BarrierObject GameObject.
- Attach a Drag Object component to it by navigating to Component | NGUI | Interaction.
- Drag our BarrierObject GameObject in its Target field.
- Set its Scale parameter to {
1,1,0} to avoid Z scrolling. - Set its Drag Effect parameter to None. We want it to be precise.
- Create and attach a new
BarrierObjectController.csC# script to it.
Click on the play button. The BarrierObject prefab is now draggable. Now, it is time to handle the drop on the Viewport GameObject.
Before we continue, drag our BarrierObject in a folder of your choice in the Project view to make it a prefab.
In order to drop a barrier inside the Viewport GameObject, we need to catch the Viewport GameObject's OnDrop() event and check what was dropped:
- Select our Viewport GameObject.
- Create and attach a new
ViewportHolder.csC# script to it. - Open this new
ViewportHolder.csscript.
In this script, we can add a new OnDrop() method that will be called when an object is dropped on it:
void OnDrop(GameObject droppedObj)
{
  //Get the dropped object's BarrierObjectController
  BarrierObjectController barrierObj = droppedObj.GetComponent<BarrierObjectController>();

  //If it actually has one, destroy the droppedObj
  if(barrierObj != null){
    Destroy(droppedObj);
  }
}
Save the script and click on the play button. Surprisingly, when you drop the BarrierObject on the Viewport GameObject, nothing happens!
That's because, like in Chapter 3, Enhancing your UI, the Collider of BarrierObject is enabled when the OnPress(false) event occurs. This obstructs the collision detection of UICamera.
We just have to disable the collider while dragging, and re-enable it when dropping it. Let's also make it reposition itself if it isn't dropped on the Viewport GameObject. Open our BarrierObjectController.cs script, and add following OnPress() method to do so:
void OnPress(bool pressed)
{
  //Invert the Collider's state
  collider.enabled = !pressed;

  //If it has just been dropped
  if(!pressed)
  {
    //Get the target's collider
    Collider col = UICamera.lastHit.collider;
    //If the target has no collider or is not the viewport
    if(col == null || col.GetComponent<ViewportHolder>() == null)
    //Reset its localPosition to {0,0,0}
    transform.localPosition = Vector3.zero;
  }
}
Save the script and click on the play button. This time, the collider is disabled when the BarrierObject prefab is dropped. So, it is indeed dropped on the collider of Viewport and destroyed instantly.
If it is dropped somewhere else (out of screen or on the barrier's container), it is automatically replaced at the center of the barrier's container. Let's make this BarrierObject a prefab by dragging it in the folder of your choice inside the Project view.
We can now create an ActiveBarrier prefab that will be instantiated on the Viewport GameObject.