
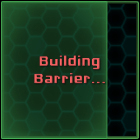
When a BarrierObject is dropped on the Viewport GameObject, we want to instantiate an ActiveBarrier prefab that will take a few seconds to build, using a slider as status indicator as shown in the following screenshot:
Let's create the ActiveBarrier prefab by performing the following steps:
- Select our Viewport GameObject.
- Create a new child with Alt + Shift + N.
- Select this new child and rename it as
ActiveBarrier. - Open the Widget Tool wizard by navigating to NGUI | Create a Widget and perform the following steps:
- Select Progress Bar for the Template field.
- Set Dark sprite as Empty.
- Set the Highlight sprite as Full.
- With our ActiveBarrier GameObject selected, click on the Add To button.
A Progress Bar has just been created as child of the ActiveBarrier GameObject as shown in the following screenshot:
It doesn't look like anything. Let's configure it to look like an ActiveBarrier prefab by performing the following steps:
- Select our new Background GameObject from Progress Bar and perform the following steps:
- Uncheck its Fill Center boolean to only keep edges.
- Set its Color Tint to {
100,200,100,255}. - Set its Depth to
1so that it can be rendered over the Viewport background. - Set its Dimensions to
160x160.
- Select our Foreground GameObject from Progress Bar and perform the following steps:
- Set its Color Tint to {
75,190,95,255}. - Set its Depth value to
2. - Set its Dimensions to
160x160.
- Set its Color Tint to {
- Select our Progress Bar from ActiveBarrier and perform the following steps:
- Rename it as
Slider. - Set its Transform Position to {
-80,0,0} to center it. - Set the UISlider value to
0to make sure it's empty at start.
- Rename it as
- Select our ActiveBarrier GameObject.
- Attach a collider to it by navigating to NGUI | Attach, and set its Size to {
160,160,1}.
The slider of ActiveBarrier GameObject is ready. If you click on the play button and change the Slider value in the Inspector view during runtime, you will see the ActiveBarrier prefab building itself.
Let's add a label that will show the status of ActiveBarrier: either Building or Built.
- Duplicate our Label GameObject in BarrierObject and perform the following steps:
- Drag it inside our ActiveBarrier GameObject.
- Reset its Transform Position to {
0,0,0}. - Set its Depth to
3. - Add a Localize component to it by navigating to Component | NGUI | UI.
- Set the key of UILocalize to
BuildingBarrier.
- Drag our ActiveBarrier in the folder of your choice inside the Project view to make it a prefab.
- Delete the ActiveBarrier instance from the scene.
Ok, our ActiveBarrier prefab is ready. Now, add the following localization strings to English.txt:
//Game
Barrier = [99FF99]Barrier
BuildingBarrier = [FF6666]Building
Barrier...
Wait = Wait
Also, add the following localization strings to French.txt:
//Game
Barrier = [99FF99]Barrière
BuildingBarrier = [FF6666]Construction
Barrière...
Wait = Attendez
Now, everything is set for our ActiveBarrier prefab.
Now that we have our prefab, we need to instantiate it when a BarrierObject prefab is dropped inside the Viewport GameObject.
Open our ViewportHolder.cs script and declare our necessary variables:
//We need our two barriers Prefabs
public Object barrierObjectPrefab;
public Object activeBarrierPrefab;

//We need the BarrierObject container
public GameObject barrierContainer;
Save the script. Let's go back to the scene and assign these variables in the Inspector view:
- Select the Viewport GameObject.
- Drag the BarrierObject prefab from the Project view in the BarrierObject prefab field of Viewport Holder.
- Drag the ActiveBarrier prefab from the Project view in the ActiveBarrier prefab field Viewport Holder.
- Drag the Barrier GameObject in UI from the Hierarchy view to the Barrier Container field in Viewport Holder.
The necessary variables are assigned. Go back to our ViewportHolder.cs script, and add the following two lines to call the appropriate methods, after Destroy(droppedObj):
RecreateBarrierObject();
CreateActiveBarrier(droppedObj.transform);
Now, we can add these two methods that will recreate our BarrierObject prefab. Also, we can add an ActiveBarrier prefab to the Viewport GameObject:
void RecreateBarrierObject()
{
  //Add a BarrierObject to the container
  Transform newBarrierTrans = NGUITools.AddChild(barrierContainer, barrierObjectPrefab as GameObject).transform;
  //Reset its localPosition to {0,0,0}
  newBarrierTrans.localPosition = Vector3.zero;
}

void CreateActiveBarrier(Transform barrierObjectTrans)
{
  //Add an ActiveBarrier to the Viewport
  Transform newActiveBarrierTrans = NGUITools.AddChild(gameObject, activeBarrierPrefab as GameObject).transform;
  //Set position to the droppedObject's position
  newActiveBarrierTrans.position = barrierObjectTrans.position;
}
Click on the play button. When you drag the BarrierObject prefab onto the Viewport GameObject, it creates our ActiveBarrier prefab; and it recreates a BarrierObject prefab to be able to drag another one.
Right now, our dropped ActiveBarrier instances stay empty and never build. Let's make them fill themselves at a speed depending on the number of barriers in the scene:
- Select our ActiveBarrier prefab in the Project view.
- Create and add an
ActiveBarrierController.csscript to it.
Open this new ActiveBarrierController.cs script, and add these necessary variables and the Awake() method to initialize them:
//We will need the Slider and the Label's UILocalize
private UISlider slider;
private UILocalize loc;

void Awake()
{
  //Get necessary components at Awake()
  slider = GetComponentInChildren<UISlider>();
  loc = GetComponentInChildren<UILocalize>();
}
Now that we have our necessary variables initialized, let's add a coroutine that will increase the UISlider value over time, at a rate depending on a given buildTime:
public IEnumerator Build(float buildTime)
{
    while(slider.value < 1) {
    slider.value += (Time.deltaTime / buildTime);
    yield return null;
  }
  //When slider value is > 1
  BuildFinished();
}
Ok. Let's add the BuildFinished() method that will set the Slider value to 1 (in case this value is higher), and change the UILocalize key:
private void BuildFinished()
{
  //Make sure it's at 1
  slider.value = 1;
  //Set the key to "normal" barrier and update Localization
  loc.key = "Barrier";
  loc.Localize();
}
Good. We just need to edit the ViewportHolder.cs script to add a barrierCount variable, and start the new Build() coroutine from ActiveBarrier.
Open the ViewportHolder.cs script and declare a new int after our barrierContainer:
public int barrierCount = 0;
Now, let's add these two simple lines of code to update the barrierCount variable and start the Build() coroutine on our new ActiveBarrier prefab:
//Update barrierCount
barrierCount++;
//Start the Build Coroutine with the correct buildTime
StartCoroutine(newActiveBarrierTrans.GetComponent<ActiveBarrierController>().Build(barrierCount *2));
Click on the play button. Now, our ActiveBarrier prefab builds itself depending on the number of ActiveBarriers on the scene!
You may have noticed that you cannot scroll if you click on an ActiveBarrier prefab. That's because it catches the events instead of our viewport.
Let's simply forward its events to the viewport:
- Select our ActiveBarrier prefab in the Project view.
- Attach a Forward Events component to it by navigating to Component | NGUI | Interaction and perform the following steps:
- Check its On Press Boolean.
- Check its On Drag Boolean.
- Open the
ActiveBarrierController.csscript that is attached to it.
We need to assign the target variable of the UIForward Event component when the ActiveBarrier prefab is created. To do so, add a new Start() method with the following:
void Start()
{
  //Set the UIForwardEvents' target to the viewport
  GetComponent<UIForwardEvents>().target = transform.parent.gameObject;
}
We can now scroll no matter what. We are missing something: a cooldown on the BarrierObjects that also depends on the number of ActiveBarriers.