
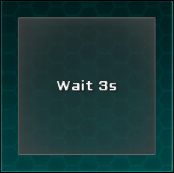
We will implement the cooldown system that will deactivate the BarrierObject button as shown in the following screenshot:
Then, we will make the barrier's apparition smoother by tweening its scale.
In order to implement the required cooldown, we need to open the BarrierObjectController.cs script and add the following two necessary variables with an initialization on Awake():
//We will need the Button and the Label
private UIButton button;
private UILabel label;

void Awake()
{
  //Get necessary components at Awake
  button = GetComponentInChildren<UIButton>();
  label = GetComponentInChildren<UILabel>();
}
Now that we have the button and label, we can add a Cooldown() coroutine that will deactivate the button and update the label to show the remaining time to the player:
public IEnumerator Cooldown(int cooldown)
{
  //Deactivate the Barrier button and update Color to Disable
  button.isEnabled = false;
  button.UpdateColor(false, true);

  while(cooldown > 0)
  {
    //Update Label with localized text each second
    label.text = Localization.instance.Get("Wait") + " " + cooldown.ToString() + "s";
    cooldown -= 1;
    //Wait for a second, then return to start of While
    yield return new WaitForSeconds(1);
  }
  //If cooldown <= 0
  CooldownFinished();
}
The previous coroutine updates the label and decreases the cooldown. We can now add the CooldownFinished() method that will reactivate the button and reset the label:
void CooldownFinished()
{
  //Reset the Label's Text to "normal" Barrier
  label.text = Localization.instance.Get("Barrier");
  //Reactivate the Barrier button and update Color to Normal
  button.isEnabled = true;
  button.UpdateColor(true, true);
}
Great, everything is ready for our cooldown. We just need to start the Cooldown() coroutine when a new BarrierObject prefab is created.
In order to do this, let's go back to our ViewportHolder.cs script and add the following line at the very end of the RecreateBarrierObject() method:
//Start the new BarrierObject's Cooldown Coroutine
StartCoroutine(newBarrierTrans.GetComponent<BarrierObjectController>().Cooldown((barrierCount +1) *3));
Perfect. Here, we needed to pass barrierCount +1 as argument because at this stage it is not yet updated (it is incremented in the CreateActiveBarrier() method).
Click on the play button. When you drop a BarrierObject prefab on the Viewport GameObject, you will only be able to drop another one when the cooldown is finished. The more barriers you have, the longer the cooldown.
Let's add a TweenScale to make the barrier's availability more obvious to the player. Go back to our BarrierObjectController.cs script and add the following two lines at the very end of the CooldownFinished() method:
//Set its scale to {0,0,0}
transform.localScale = Vector3.zero;
//Tween it back to make it appear smoothly
TweenScale.Begin(gameObject, 0.3f, new Vector3(1,1,1));
That's better. Now, the animated apparition of BarrierObject attracts the player's eye. But, hey, we created a notification in the previous chapter. Let's reuse it to make it even more obvious!