If we are creating an open world title or any kind of game where the player is outdoors, one thing that would be nice is the ability to have our world change the time of day at the same rate.
Before we start working, we should have a level created with a Sky_Sphere and a directional light (the default map has this). To be sure, you can use the DayNightCycle-Before map from the example code folder.
Perform the following steps to create a day/night cycle:
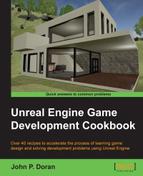
- As we discussed before, we can use Directional Lights to act like the sun. For our day/night cycle we will want our lighting to change over time, so let's select the
DirectionalLightStationaryobject from the Scene Outliner tab and then from the Details tab, change the Mobility property toMovable. Finally, change the name of the object toDirectionalLightMovable.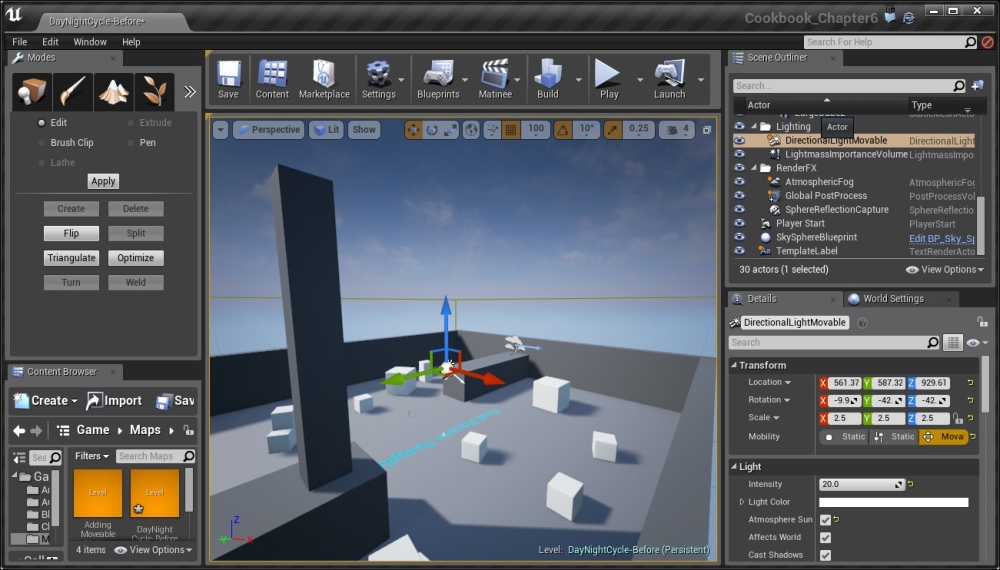
Making our DirectionalLight moveable
- To have this lighting change reflect correctly, the next thing we should do is build the lighting of our level by going to the toolbar above our level view and navigating to Build | Build Lighting Only.
Now, if we were to rotate the light right now, we would see the Sky's color will be modified:
However, the sun that is part of our
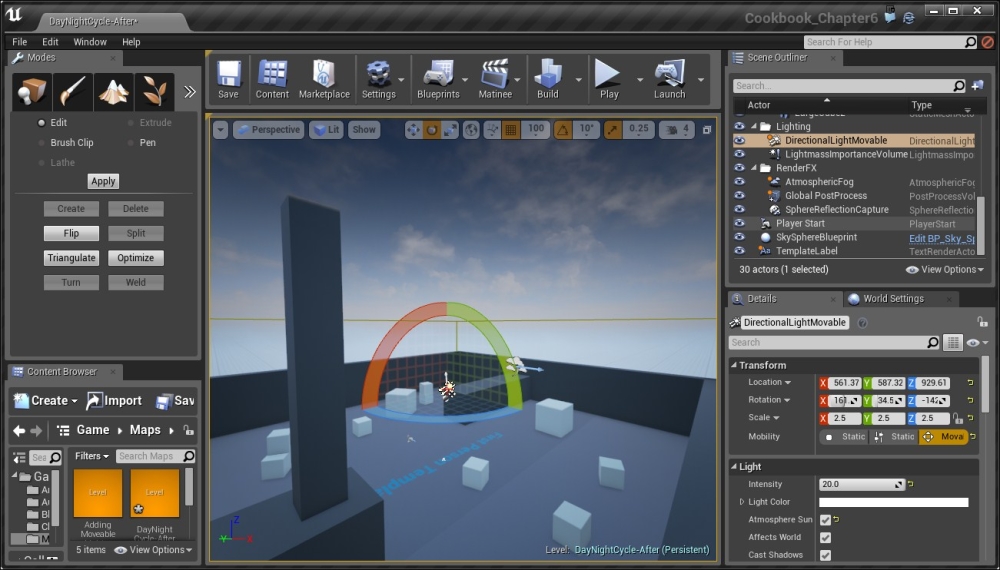
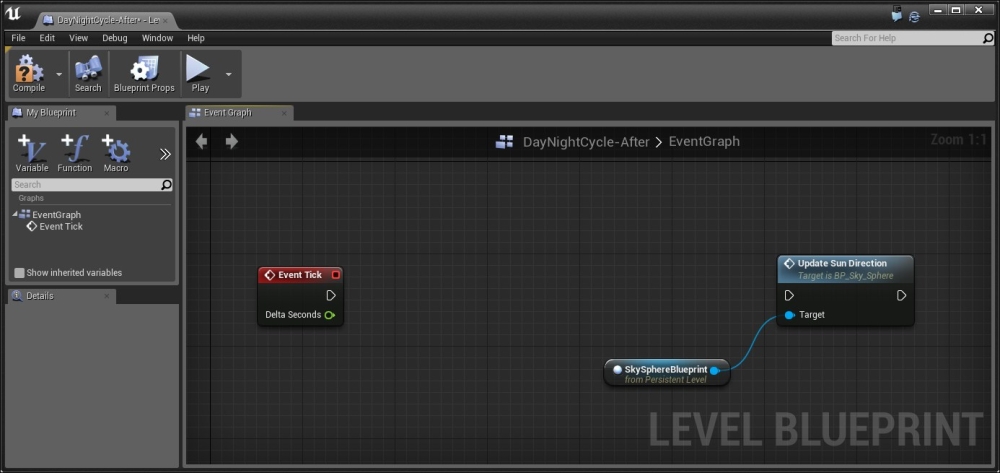
SunSpherewill not be modified by the changes. To fix this, we will need to use Unreal's Blueprints system. - Next, from the top-center toolbar, navigate to Blueprints | Open Level Blueprint, and you should be brought to the following screen:
- From the Blueprints editor, we right-click inside EventGraph and then select Add Event | Event Tick.
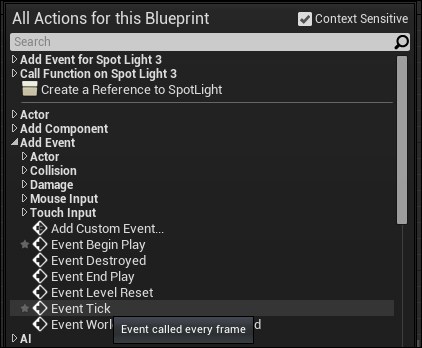
This creates a new event that will get called every frame that it is active and it has a parameter of Delta Seconds, which is how much time has elapsed for this particular frame.
- We want to have the Sky Sphere's sun at the same position as our Directional Light, so let's do that first. Go to the Scene Outliner tab and select the
SkySphereBlueprintobject by clicking on it. Once this is done, go back into the Blueprints screen and to the right of the Event Tick event, type inSunto show the properties that contain those letters. From there, select the Update Sun Direction option: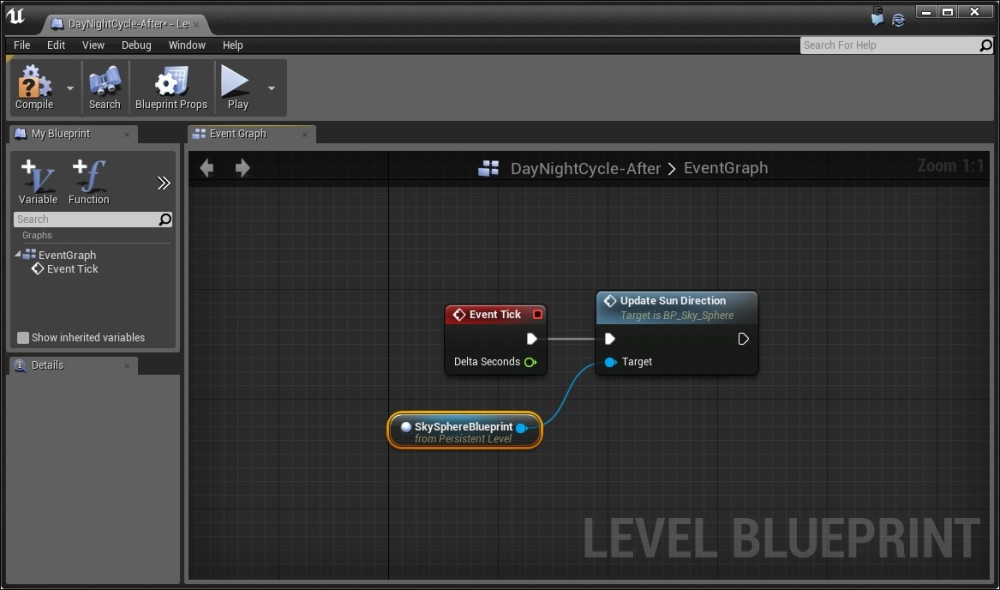
If the object was selected correctly, we should see the Target variable already filled in with the SkySphere.
To zoom in, use the mouse wheel. This action will find the rotation of the directional light in our level and modify it so that the sun will face the same way.
Note
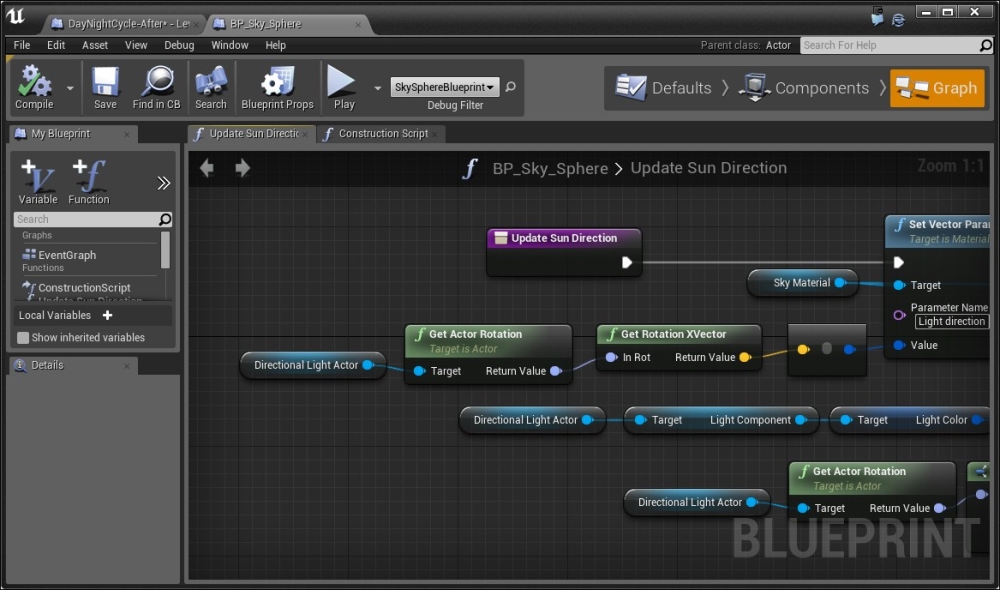
If you want to see what Update Sun Direction is actually doing, feel free to double-click on the action. We'll talk about what those actions mean later on in Chapter 8, Blueprint Scripting - Level Effects.
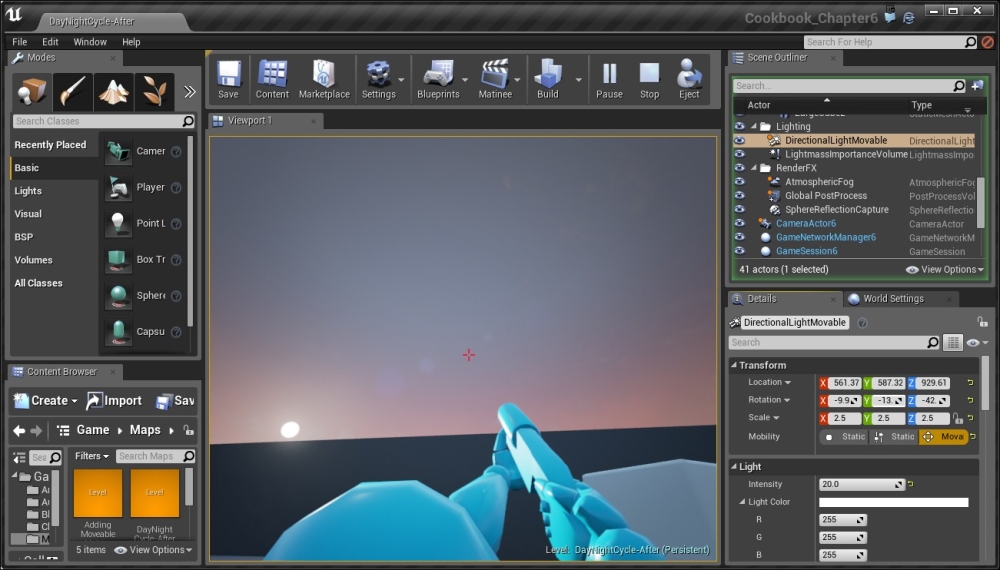
Blueprints are run while the game is played, so at this point, if we play the game, selecting the DirectionalLightMovable object, and rotating it from the Details tab, we'll notice that the sun in the sky rotates to face it!
Of course, at this point, we could rotate the light using a matinee for cutscenes and we'd be done, but in this instance, we want it to move automatically, so let's modify the level blueprint to do that.
- Next, we want to have the directional light continuously rotate along the Y axis. To do this, let's first move the Update Sun Direction action and the SkySphere Blueprint object off to the side so that we can put something in between by selecting both items and then dragging them. Finally, highlight the arrow from the left side of the Update Sun Direction action, hold down the Alt key and then click in order to break the connector.
The current state of the Event Graph (note the broken connection)
- From there, select the
DirectionalLightMoveableactor from the Scene Outliner tab and then right-click on Event Graph and select Add Actor Local Rotation (searching forRotationfrom the top search bar). Connect the Event Tick event's output arrow to the Add Actor Local Rotation node and then connect its output to the Update Sun Direction input. Finally, change the P (Pitch) value in the Delta Rotation property of the Add Actor Local Rotation action to10.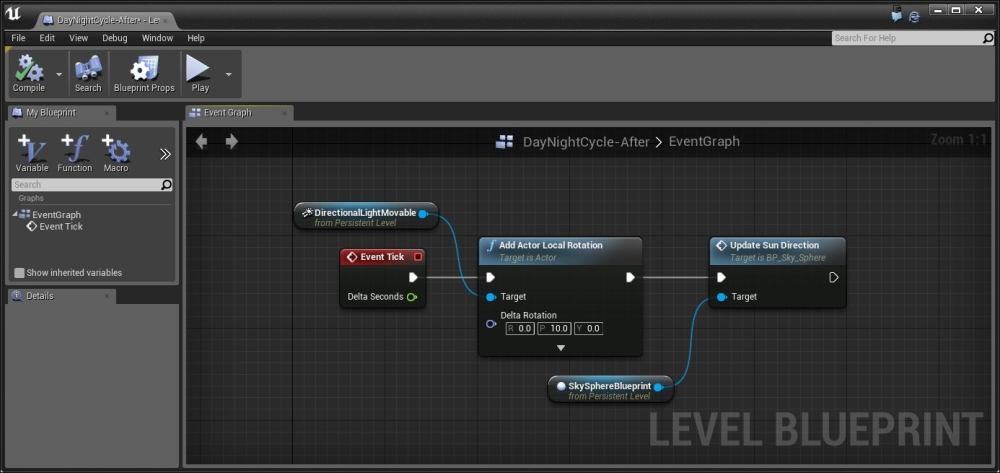
Working with DirectionalLightMoveable actor in the blueprint
The Add Actor Local Rotation node takes whatever value the Target object (directional light) has as its current Rotation and adds to it by the Delta Rotation vector. We do this before we update the sun's direction because we want the sun and the light to be at the same position (the sun would be a tad off, otherwise). The 10 value acts as the speed at which we want to move in that direction and can be modified to change the speed of our movement.
Now if we play the game, we'll notice that the sun is moving exactly as we wanted, but it is moving extremely fast! We could modify this value to fit whatever speed we'd like, but first, there's something that we need to note as we build even more complex actions—the Delta Seconds property that we talked about earlier.
The Delta Seconds value (commonly referred to as the Delta Time or dt in mathematics) is extremely important because in games, even though we often want things to run as quickly as possible (usually 60 times per second), the more complex or graphically intensive things get, the more time it takes the computer to do all of the calculations needed to update and render the completed frame. Using this value as a modifier makes sure that our events are dependent on time, not by frame, ensuring that the same things happen as time goes on. Since the value will also normally be 1/60 (or ~0.016), being multiplied by 10 will give us a much smaller number, which is what we want.
This value is a float, or floating point number; this is a variable or container of information that we can store and use in various areas of code.
Taking that into account, let's use the Delta Seconds value in creating our Delta Rotation:
- To the left of the Delta Rotation vector, right-click and create a Make Rot action (it makes a rotator from a Pitch, Yaw, and Roll value). Connect the Return Value from the Make Rot action to the Delta Rotation vector of the Add Actor Local Rotation action.
- To the left of the Make Rot action, right-click and create a Float * Float action, which we will use to multiply two floating point numbers together (in coding, the operator for multiplication is
*). Connect the Delta Seconds value from Event Tick into one of the two inputs and connect the output to Yaw of the Make Rot action. Finally, put in a value of10or whatever modifier you want into the other input.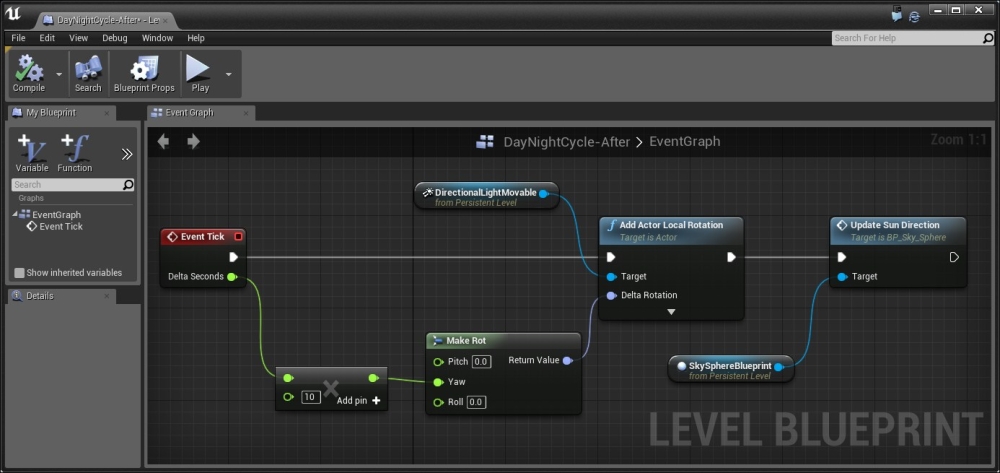
Using delta seconds within our rotation
- At this point, click on the Compile button, exit the level blueprint, and run the game!
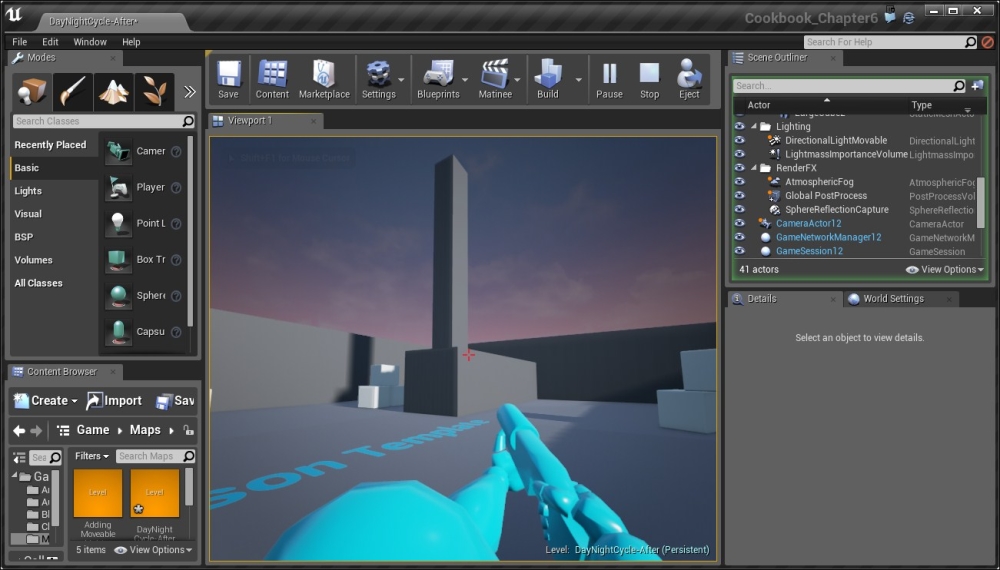
It works perfectly and we can modify this 10 value to make the value go faster (20 for 2x faster) or slower (1 for 10x slower), without having to worry about how complex the game is!
We just touched the tip of the iceberg when it comes to working in lighting! After all, we can't condense what someone's full time job is to 20 pages. However, I do have some external resources that may be useful should you decide to do more with it:
- While creating lighting, for efficiency's sake, it's important to keep in mind what areas need to have the highest quality lighting and what can be reduced. To do that we make use of lightmass. For information on that, refer to https://docs.unrealengine.com/latest/INT/Engine/Rendering/LightingAndShadows/Lightmass/Basics/index.html.
- While it's not needed so much for games, there are a lot of people who want to have realistic lighting for their levels for things such as architectural demos. For more details on that, visit https://docs.unrealengine.com/latest/INT/Resources/Showcases/RealisticRendering/index.html.
- For this, you can also download the maps shown from the Epic Games Launcher under the Learn tab if you select the Realistic Rendering option.
- In case you run into any problems with your lighting, a good guide to look into for troubleshooting can be found at https://wiki.unrealengine.com/LightingTroubleshootingGuide.
- You may also be interested in seeing the lighting of a map. 335Razor has a tutorial that recreates the lighting in one of the Unreal test maps at https://www.youtube.com/watch?v=KmY7X9cBQZ0.