
Now that we have some experience working with Blueprints, let's modify one that's already been created for us. In this section, we will cover how to add a flashlight to our game's character.
Before we start working within the Unreal Editor, we will need to have a project to work with. Follow these steps:
- First, open up the Unreal Editor by clicking on the Launch button from the Unreal Engine Launcher.
- Start a new project from the Project Browser tab by selecting the New Project tab. Select First person and make sure that With Starter Content is selected. Give the project a Name (
Cookbook_Chapter8). Once you are done, click on Create Project. - After the project is opened, go to the
Example Codefolder and drag and drop theNightScenemap provided in your project folder and open it:
At this point, if you were to play the game, it would be incredibly dark, as shown in the following screenshot:

For those who have gone through Chapter 6, Lighting and Shadows, this should look quite familiar. In that chapter, we actually created a flashlight and then attached it to our player at runtime.
However, we can modify the character's blueprint to make it so that our player will always have a flashlight on. Follow these steps:
- Go to the Content Browser tab and then to the
Blueprintsfolder. Find theMyCharacterfile.
Selecting the My Character blueprint
This blueprint is what's spawned when the game is started. It contains all of the logic for movement, the camera, and the shooting behaviour.
- Next, double-click on the file to open up the Blueprints for it. Initially, it will be on the Event Graph tab, which will have a lot of scripts on it, very similar to a level blueprint. But for now, click on the Viewport tab and zoom the camera out if needed.

The Viewport tab view in the blueprint editor
This section is similar to our level in that it has objects and they're placed in the world of our object, but it's apart from the level. You can move around the viewport on the right-hand side in exactly the same way as the main game. Zoom out so that you can see everything.
- To the left, you'll see a tab marked Components. Under this, it has the mesh, camera, and everything else that is to do with the physical presence of the class. We can add to this using the Add Component option. With this in mind, click on Add Component and select Spot Light (if you can't see it, use the search bar at the top).
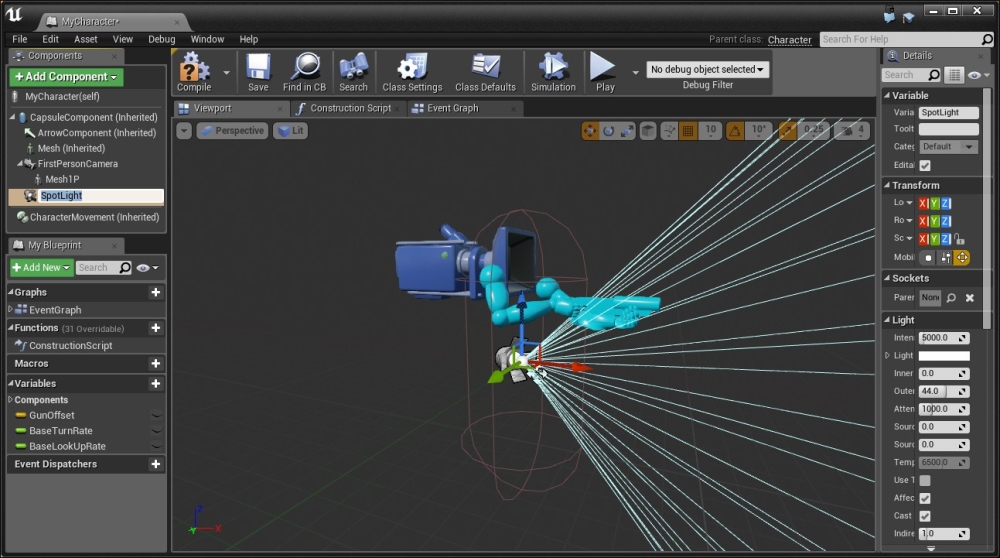
Adding a Spot Light to our character
You can see that the spotlight is already added for us.
- Go back into the main editor and play the game again.

You'll notice a couple of issues. First of all, the light is lighting the player in addition to what's in front of it. Also, if we look up and down, it does not move with us.
- With the game still playing, go back to the
MyCharacterblueprint and select our SpotLight object and move it (if the Move tool isn't there, press W). Notice that when we move it in the blueprint, it modifies what is done in the game. Move the light until it is in front of the barrel of the gun.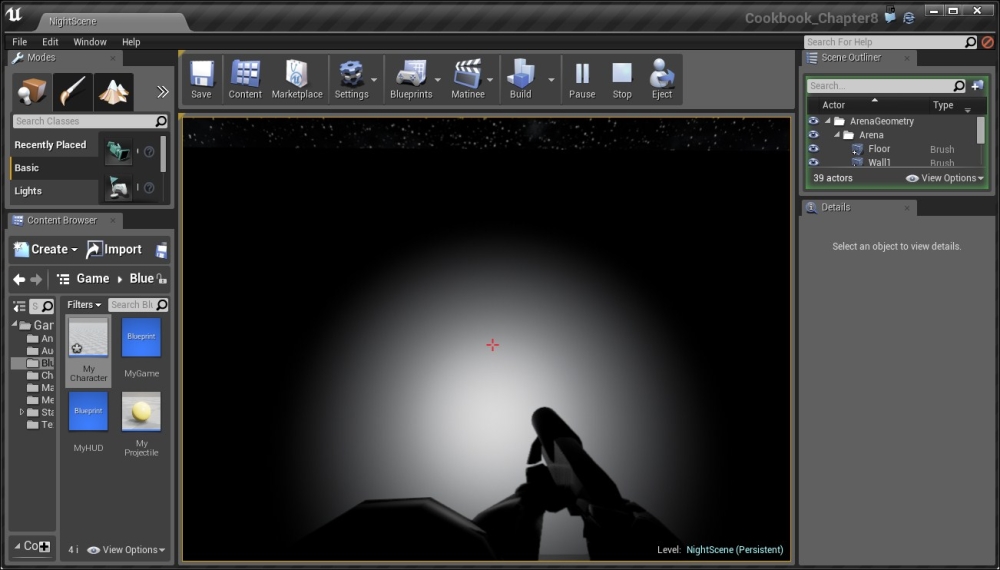
Moving the spot light in game
This solves the issue of lighting the player, but moving up and down is not working. To do this, we can make the SpotLight object a child of the camera. That way, whenever it moves, the light will move as well. Sadly, we cannot change this while the game is running.
- Stop the game and then drag and drop the
SpotLightobject on top of theFirstPersonCameraobject. You should see a green checkmark, saying that we can attach it.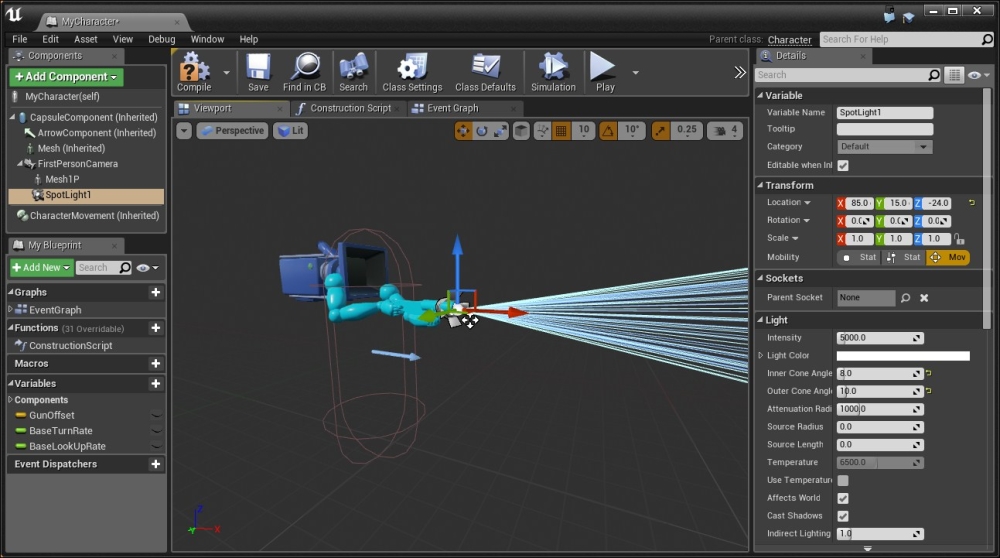
Attaching spotlight to the FirstPersonCamera object
- After this, go into the
SpotLightobjects and set the same parameters that we did in the Adding moveable lights – flashlight, part 1 recipe of Chapter 6, Lighting and Shadows or translate the object so that it is in front of the camera with Inner Cone Angle of8and Outer Cone Angle of10. - Click on the Compile button to save all the changes we've made before and confirm that it all works correctly with our project.
- Lastly, let's add in the ability to turn the flashlight on and off using an input event. Click on Event Graph and move it over until you have some empty space.
- Right-click on the empty space and type in
keyboard events. This will display all of the keyboard keys and allow us to trigger events based on when they are pressed or released. - Select F, and you'll see an event is created. To the right of it, right-click and create a Toggle Visibility (SpotLight1) action. Toggle means that it will turn it off if it's on and on if it's off.
- Next, connect the Pressed output of the F event to the input of the Toggle Visibility action.
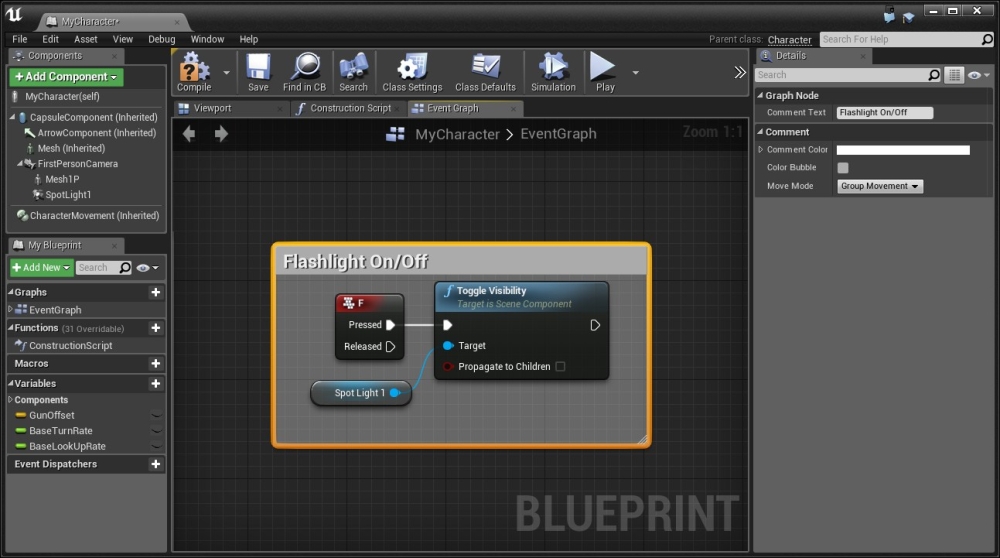
Connecting the Pressed output to the input of the Toggle Visibility action
- Compile, go to the Content Browser tab, save the
MyCharacterblueprint, and Play the game!
With this, we now have a flashlight that will follow our player's camera in all directions and exist in every single level we have in the game! Here, you learned how to modify the already existing blueprints and added in some simple player input using the F key to toggle visibility.