In the previous recipe, we used the Level Blueprint system in order to create a prototype of a feature we may want to have. In this recipe, we will see how we can convert this prototyped feature into a Class Blueprint which can be reused in every level.
Before we start working on this, we need to have a level blueprint to convert. Follow the previous recipe or open up the FlashingLight level provided in the example code.
The Level Blueprint is great, but it's limited in the fact that everything created is stuck within that level, and we'll generally have to copy/paste a lot to move things between levels (this was a problem back in the UE3 days with Kismet). To solve this issue, we have Class Blueprint, which we will create now:
- With our
Point Lightselected, go to the Details tab and scroll down to the Blueprint section. Then, click on the Replace With Composited Blueprint option. When the Select Path dialog comes up, select theBlueprintsfolder and enter the nameFlashingLight_Blueprint, then press Create Blueprint.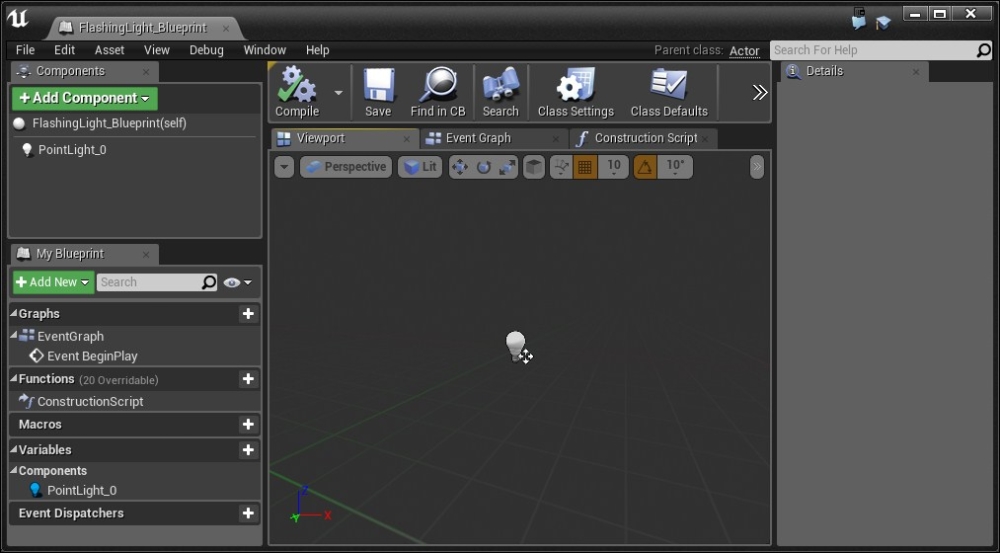
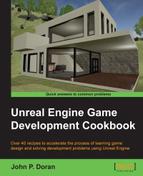
You'll then be brought to the Class Blueprint for our newly created action and it has the Point Light, which we created earlier, added. We are currently on the Components tab, which is where all of the pieces that make this blueprint reside. We'll look over this in another recipe, but for now, let's move over to the Event Graph tab.
- Click on the Event Graph tab. Just like before, we are given an empty blueprint to work with. However, this time you'll notice that the My Blueprint tab now has the
PointLight_0object as well as any other objects that may be part of the Components tab.
- Move over to our Level Blueprint and select all of the nodes we created. Hit Ctrl + C to copy the nodes.
- After this, move back to the Graph of FlashingLight_Blueprint again, select the Event Graph tab and then paste (Ctrl + V).
You'll note that all of our previous content moved over nicely, except for the Point Light. This is because we were previously using a reference to something in the level. When working with blueprints, you are only able to access things inside the blueprint itself (unless you can get a reference to it).
- Delete the Unknown element by selecting it and then hitting the Del key.

Deleting the Unknown element causes an error
This causes an error because we do not have something set for Target, but we will use our Blueprint's component to work with it.
- From the My Blueprint tab, drag and drop the
PointLight_0object into the Event Graph. You'll then have the two options of whether we want to modify the value of it (Set) or obtain the value to use (Get). In this instance, we will use Get.However, at this point, if we try to drag and drop the point light into the Target, you'll notice that there is a conflict due to the types not being the same.

This is easily solved, but I wanted to point out the similar problems like this may happen on occasion, so let's fix it.
- Delete the Set Intensity action and drag from
Point Light 0and create a new Set Intensity function using the correct component. Then, connect everything back the way it was in the previous version and then press the Compile button to make sure everything is working correctly.
Creating new Set Intensity function
- Lastly, move into the Level Blueprint window and delete our previously created actions. We won't need them anymore (note the warning that exists now because the object is now a blueprint).
- Save your blueprint and the level and then hit the Play button.

Everything is the same as before! However, now that our light is a blueprint, we can use it as many times as we want without having to copy/paste any actions.
- Drag and drop two copies of the blueprint into the level and position them wherever you'd like to and play the game again.
Playing the game with two copies of the blueprint
Now we have multiple lights, reacting in their own independent ways while learning about class blueprints! Also, since you have learned how to modify a property, you can also modify any of the other properties of the light, such as its color, position, and so on!