Now that we have an understanding of the interface of UE4, let's start with creating one of the most basic things, a room.
Before we start working within the Unreal Editor, we will need to have a project to work with:
- Open the Unreal Editor by clicking on the Launch button from the Unreal Engine Launcher.
- Start a new project from the Unreal Project Browser window by selecting the New Project tab. Select Third Person and make sure that With Starter Content is selected. Give the project a Name (for this chapter, I am using
Blueprints_Chapter2). Once you are done, click on Create Project.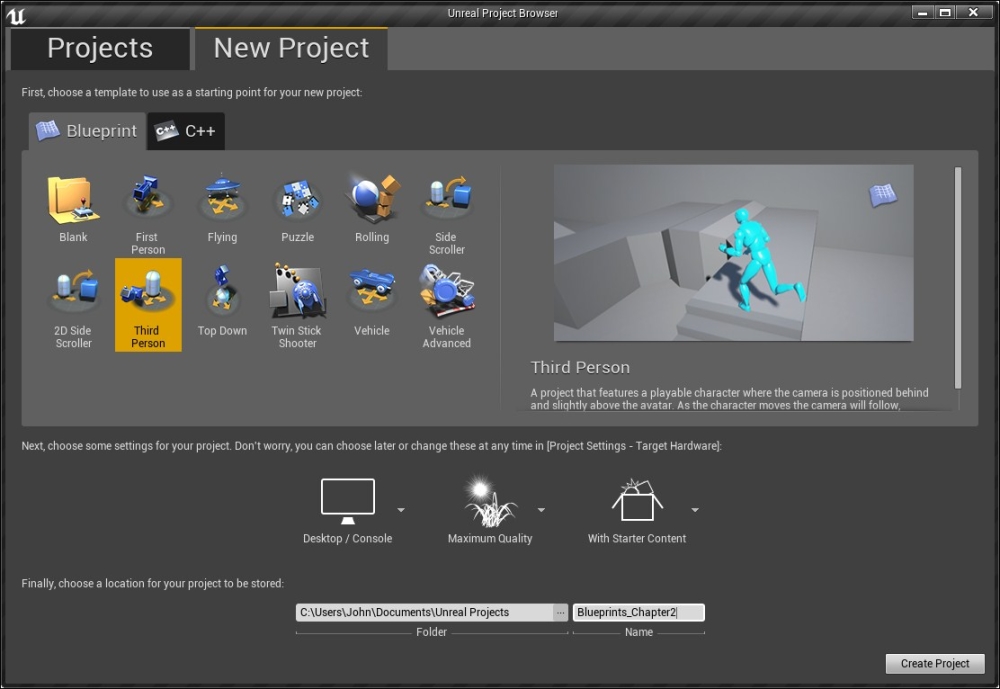
Now that we have our project set up, let's get started with building the room.
- With the editor open, we will first create a new level for us to work in. To do that, go to the top-left corner of the screen and go to File | New Level… or press Ctrl + N.
- From here, the New Level window pops up. Click on the Empty Level template, and you will find an empty level to work with.

If you look closely and tilt downward, you should see a never-ending grid that fades into the distance. This is a guide to help show you distances and make it easier to work within a 3D environment.
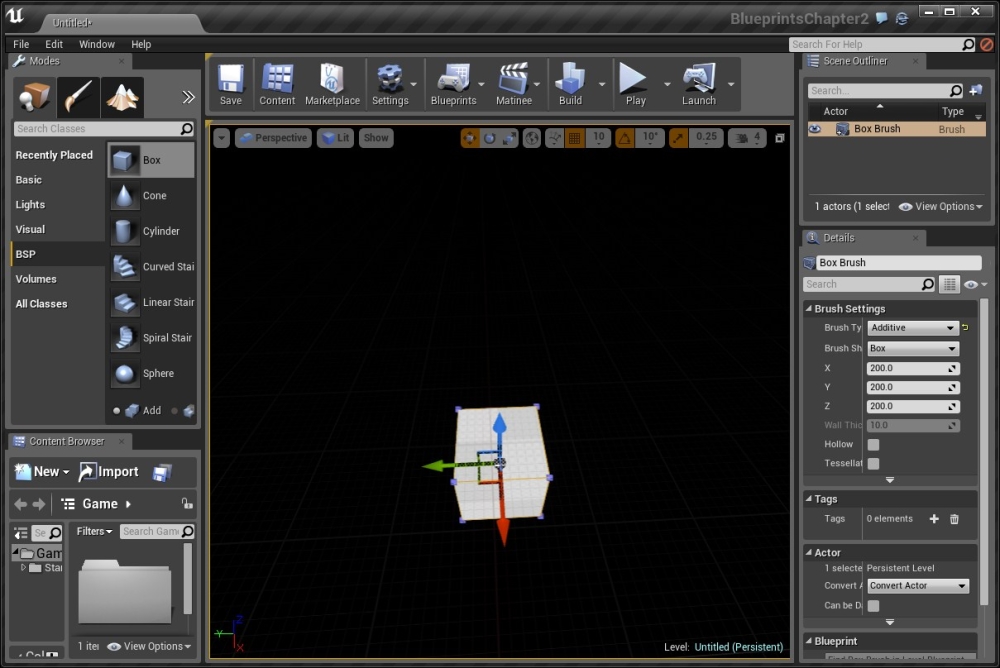
- Next, we will want to place some geometry into the world in which we can build out our room. To start out with, we will create a box. To do so, under the Modes tab, in the top-left corner, click on the place icon (the one on the far left that resembles a cube and lightbulb) to switch to the Place mode if not there already.
Note
For more info on the Place mode, refer to https://docs.unrealengine.com/latest/INT/Engine/UI/LevelEditor/Modes/PlaceMode/index.html.
- Now select the BSP category on the left-hand side, below the mode icons. From there, click and drag the Box button into the world. You may see it show up as some red lines initially, but give it a minute, and you'll see the box appear on the screen, as shown in the following screenshot:
Note
If you don't happen to see the box, that's because, by default, UE4 has the default lighting mode set to Lit, and as there is no light, everything will be just black once the lighting is built. You can switch to Unlit mode by going to the top-left area of the Level window and clicking on the Lit button and then selecting Unlit from the dropdown, or just using the hotkeys—Alt + 3, for Unlit and Alt + 4 for Lit.
Once the box is created and selected, note the Details tab on the right-hand side. This tab contains all the information about this brush that can be modified. If you know what size your brush will be, this can be very useful.
- From Brush Settings under the Details tab, change the X and Y values of the brush to
1000and the Z value to25.This will create a room that is about 10 x 10 m with a width of 25 cm. Be sure to note that it is Z that is the vertical axis inside the Unreal Engine. The X and Y values define how large we want our room to be, but I used a Z value of
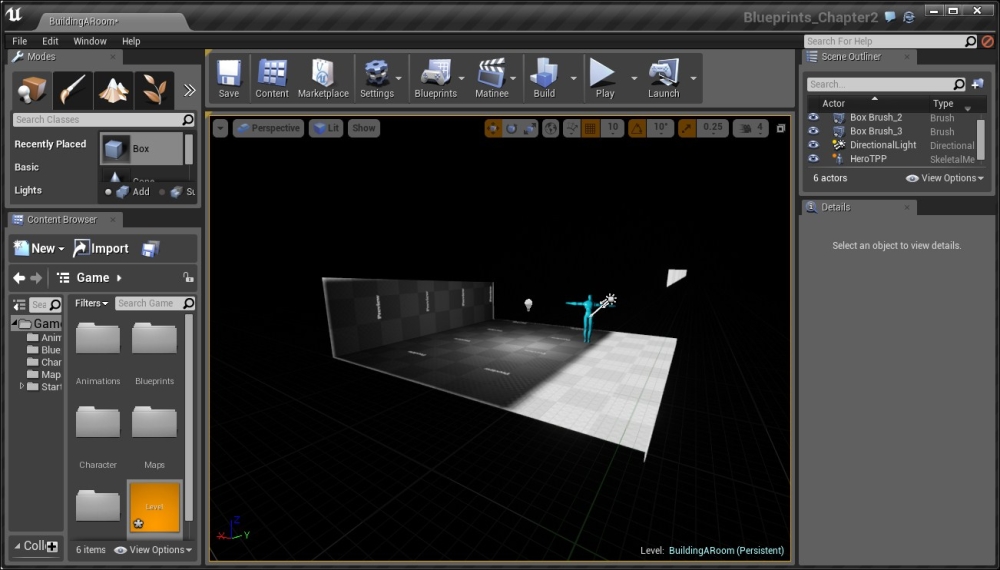
25because inside normal buildings, the joists or horizontal foundation supports between levels are about 10 inches (approximately, 25 cm) thick. - Now that we have a floor created, let's add a reference for us to work with. Under the Content Browser tab on the bottom-left, go into the
Characterfolder and drag and drop theHeroTPPskeletal mesh onto the scene.Having a character reference in the world makes it a lot nicer for us to see how the sizes of objects relate to our player.
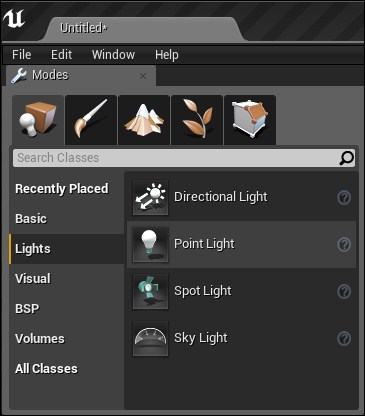
- If we were to run the game now, we won't be able to see anything due to lack of light. Let's fix this. Under the Modes tab, change the section to Lights and drag and drop Directional Light into the level.
A directional light acts similarly to the sun; no matter where it's placed, it will modify the objects in the area.

Effect of a directional light
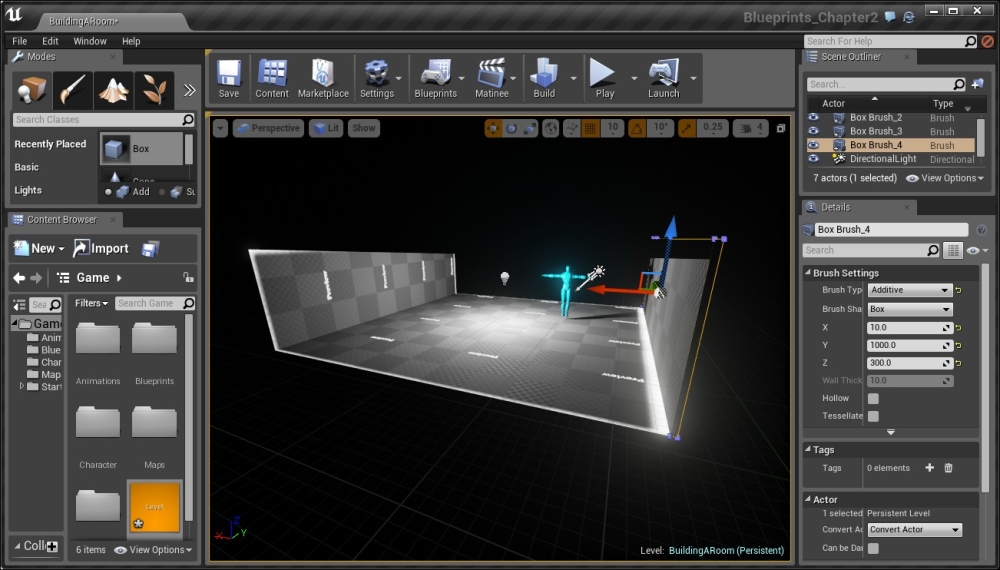
- The next thing we are going to do is to create walls for this room. To do this, let's first drag another box into our world, this time placing it above our floor. Once created, inside the Details tab, under the Brush Settings section, set X to
10, Y to1000, and Z to300. - Once finished, select the wall and use the transform gizmo (the three arrows) to move the object over the ground of our room (if you don't see the arrows, press the W key, and if you still do not see it, toggle Game Mode by pressing the G key) Once over it, press the End key, and you should see the brush fall down to hit the floor. Once this is finished, move the wall in the X and Y axis using the transform tool until it is flush with the edge of the level, which is to say they should be placed next to each other.

Creating walls for a room
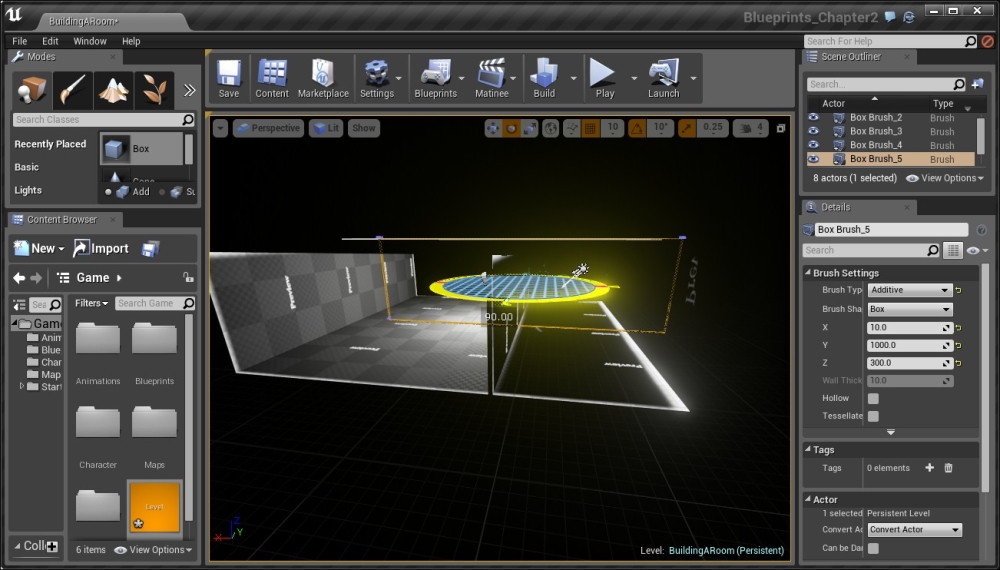
- We can add a ceiling to our room very easily. Click on the floor that we've created, hold down the Alt key and then drag the item by the blue arrow to be flush with the top of our wall that we created previously.
You'll notice that with the ceiling placed, there are now shadows covering a good portion of our level. If we want to be able to see in the room, we will need to add a new light, a Point Light.
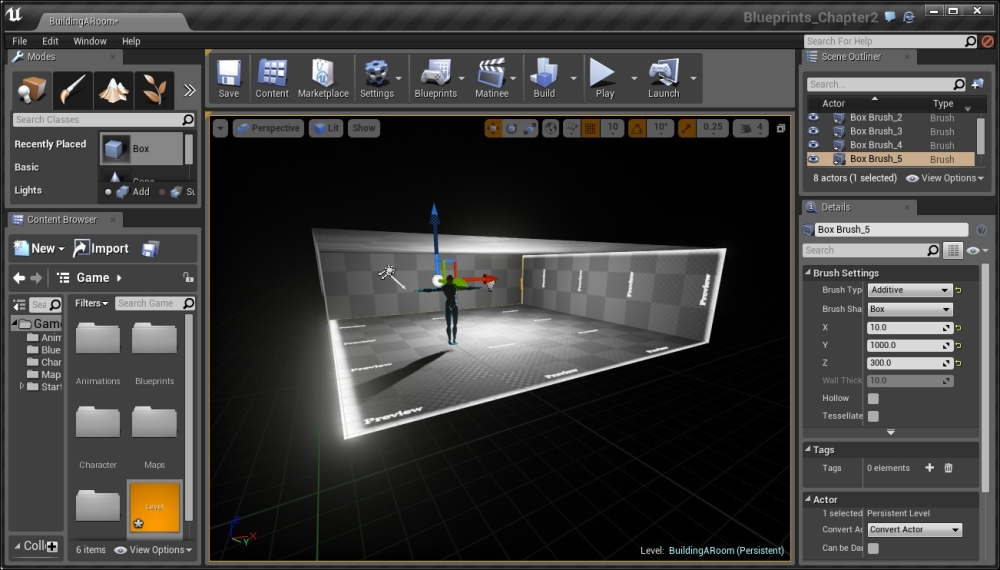
- Back in the Modes tab in Place mode, go down to the Lights section and select it. Once selected, you should see the Point Light option on the right-hand side.
- Drag and drop Point Light into the center of the room. You'll see that we can see in the room now!
A Point Light works similar to how a lightbulb does in the real world, shining equally in all directions from a single point.
Tip
Alternatively, you can create a point light by holding the L key and clicking on the center of the room.
For more information on point lights, refer to https://docs.unrealengine.com/latest/INT/Engine/Rendering/LightingAndShadows/LightTypes/Point/index.html.
- Next, let's close this room. With the wall selected, create a duplicate to go to the other side of the room by holding the Alt key and dragging it to the other side.
- Next, we will place the other two walls. We could create another box like the one we created before and give it different values, but in this instance, we will use the rotation tool instead. Select one of the walls and hold the Alt key and drag the item in the X axis (red). After that switch to the rotation tool (E) and then rotate the wall 90 degrees along the Z axis (blue).
The original wall has been duplicated and rotated
- When you let go, change back to the Translate tool (W) and then move the wall to fit the empty slot.
- Then, duplicate this newly created wall in order to close the gap. Now, to see what's going on in the level, you'll need to move into the map. Once inside, right-click on the floor and select Play From Here.

With that done, you now have a room that we can walk into!
Tip
If, by any chance, you fall from the edges of the surface, press Esc to exit the game, switch your view from Perspective to Top, right-click on one of the objects (walls or surface), press F to focus on that object and then, finally, switch your view back to Perspective.
Alternatively, you can also double-click on any object in Scene Outliner to zoom the camera to it.
It is also possible to create a room by creating a box with a size of 1010, 1010, and 300 with Hollow enabled and a Wall Thickness of 10, but you will lose a lot of control for larger areas.