
Now that we've created one of the simplest materials, let's get a little more complex by creating a mirror material while learning about some of the other properties the Material Editor has in the process!
Before we start working within the Unreal Editor, we will need to have a project to work with:
- First, open up the Unreal Editor by clicking on the Launch button from the Unreal Engine Launcher.
- Start a new project from the Project Browser window by selecting the New Project tab. Select First person and make sure that With Starter Content is selected and give the project a Name (
Cookbook_Chapter7). Once you are done, click on Create Project. - You should see a level similar to this:

To start creating a mirror material, we will perform similar steps to what we've done before:
- Go in and create another material in the Content Browser tab by going into the
Materialsfolder and right-clicking and selecting Material. - Rename the material to
Mirror Materialand double-click on it to enter into Material Editor. - Just like before, we want to give a color to our mirror. To do this, right-click to the left of the Base Color value and create
Constant3Vectorand give it a value of1,1,1(also known as white). - Next, we will want to modify the Metallic property, which will modify our material to be more metallic and shiny. Create a constant value by right-clicking and searching for Constant and set the value to
1.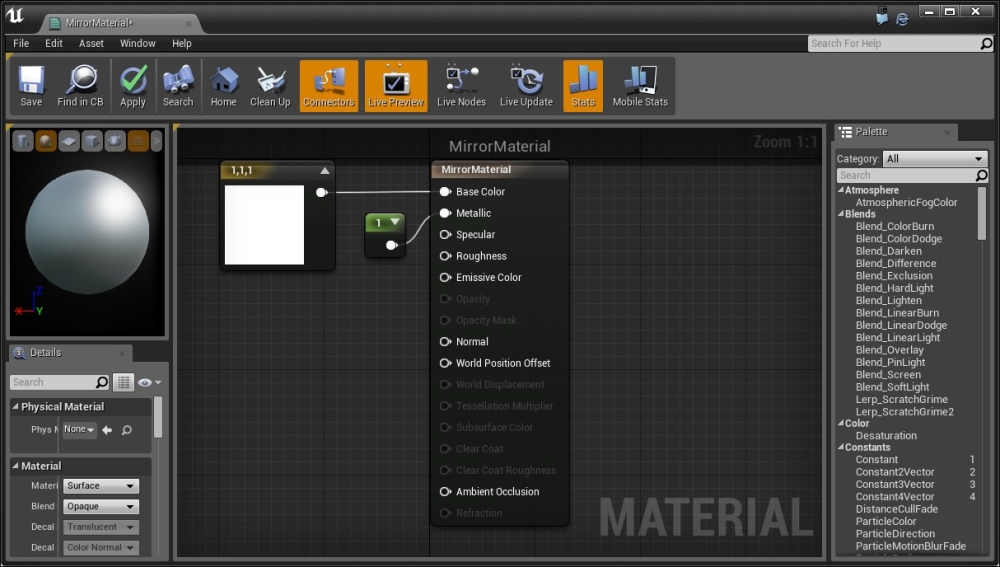
Notice how it makes the item much more shiny just as metals are in real life. When we set this value to
1, it means that it is a full metal object; we use0for non-metal objects and increase the number for more metallic things.Note
For more information on the Metallic property, visit https://docs.unrealengine.com/latest/INT/Resources/ContentExamples/MaterialNodes/1_2/index.html.
- Next, we will modify Roughness; this will modify the material in such a way that it will look more rugged or shiny depending on what we set it to, and it just so happens that when things are shiny, they are reflective, so we will set Roughness to
0.
From here, you get to see a skybox being reflected in the background that is representative of what you'd see if you applied this material; everything around it will be reflective like a mirror. The higher the value is for roughness, the less reflective it will become.
Note
For more information on the Roughness property, visit https://docs.unrealengine.com/latest/INT/Resources/ContentExamples/MaterialNodes/1_4/index.html.
- With this, click on the Apply button and close the Editor.
- Jump into the
Example_Maplevel in theMapsfolder and apply the newly createdMirror Materialto some of the surfaces by dragging and dropping them onto the scene.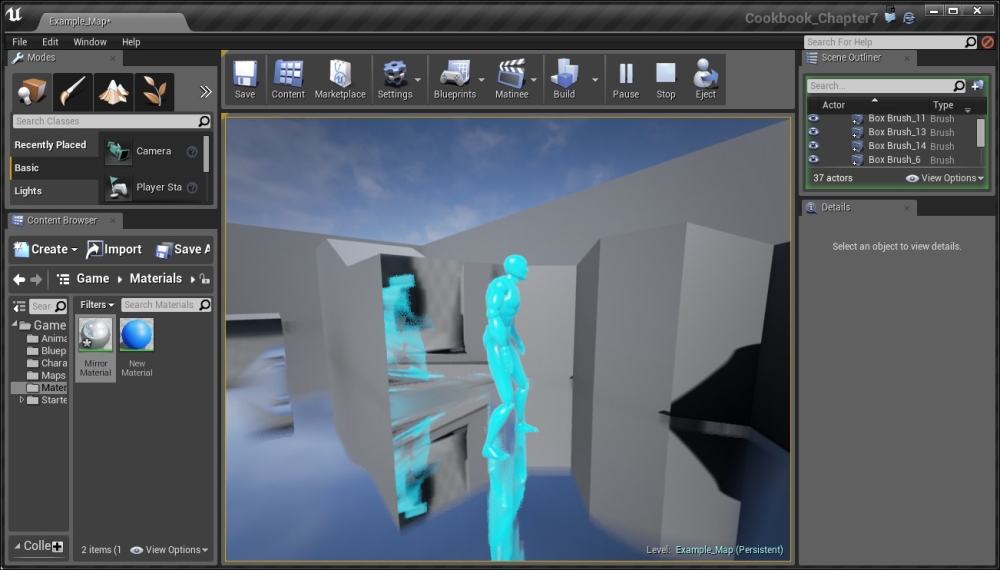
Applying the mirror effect
With this, we now have a new material that we can work with, with a really cool effect while also seeing how the Roughness and Metallic properties work!