
Having defined why lighting is so important, let's start creating each of the types and talking about what they do. In this recipe, we will see each of the different kinds of lights available in the engine. We will also discuss how they are different and when and why to use each one.
Before we start working within the Unreal Editor, we will need to have a project to work with:
- First, open up the Unreal Editor by clicking on the Launch button from the Unreal Engine Launcher.
- Start a new project from the Project Browser tab by selecting the New Project tab. Select First person and make sure that With Starter Content is selected. Give the project a Name (
Cookbook_Chapter6). Once you have finished, click on Create Project. - You should see a level similar to this:

To get started, let's see how we can go about adding lights to our level:
- Move the camera toward a dark area of our level that we want to light up. Once there, go to Modes | Lights and click on the Point light and drag and drop the light into your level.
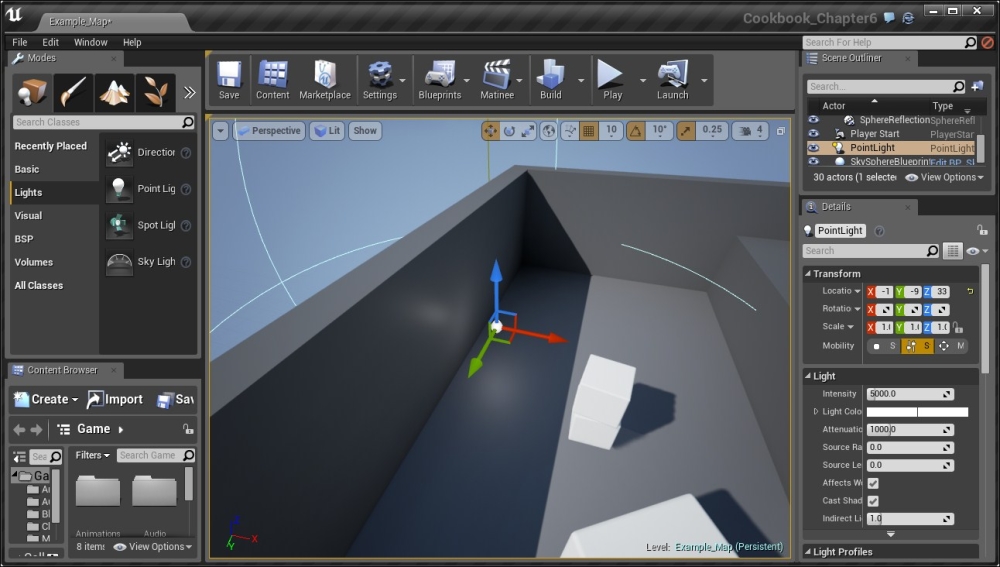
Adding a Point Light to your level
Point Lights act in a similar manner to a light bulb; they will emit light in all the directions from their center for a certain radius, losing power as the light gets further away.
Note
For more information on Point Lights, refer to https://docs.unrealengine.com/latest/INT/Engine/Rendering/LightingAndShadows/LightTypes/Point/index.html.
- We can also create lights from our Level tab. Let's do this by right-clicking anywhere in the level and navigating to Place Actor | Spot Light.

Creating a Spot Light in your level
The object will appear facedown with lights going out in the direction that it is shining. This actually goes much further out, so let's check this out.
- From Translation mode, switch to Rotation mode by pressing down the spacebar (or E) and then rotating the object by
-90degrees along the Y axis to face the dark wall.
The cone shape effect of a Spot light
Spot lights act much like they do in the real world; specifically, they will emit light from a point out in a cone shape. However, just like real spotlights, there is a center section that is fully bright with the outer edge decreasing in power. We can do this in Unreal as well using the Inner Cone Angle and Outer Cone Angle properties.
- From the Light section under the Details panel, set the Inner Cone Angle value to
25and the Outer Cone Angle value to32. After that, increase the Intensity to50000.0.
Managing cone angles and intensity
However, spotlights can also lose power as they move away, as shown in the following example:

Note
For more information about Spot Lights, refer to https://docs.unrealengine.com/latest/INT/Engine/Rendering/LightingAndShadows/LightTypes/Spot/index.html.
- The next light I want to point out is already in the example level by default. Go to the Scene Outliner tab and select the DirectionalLight object by double-clicking on it.

Selecting directional light
Directional lights act much like the sun. Depending on their properties, they affect the entire outer section of the level. You'll notice the arrows pointing in a certain direction which is where the light will be emitting from.
- Rotate the light by
40degrees in the Y direction.Note
For more information on Directional Lights, refer to https://docs.unrealengine.com/latest/INT/Engine/Rendering/LightingAndShadows/LightTypes/Directional/index.html.

Rotating the directional light
- Now the last light is the Sky Light, which is used to create ambient light from the distant areas in the world. It then applies that light to the world so that the level's lighting will match the rest of the level. To add this, use either method mentioned for the Sky Light and put it into the level.

- The Sky Light will only capture the screen when we rebuild the lighting by selecting Recapture Scene or manually going to Build | Update Reflection Captures.
Note
For more information on Sky Lights, refer to https://docs.unrealengine.com/latest/INT/Engine/Rendering/LightingAndShadows/LightTypes/SkyLight/index.html.