
Games will often need the ability to give health to players and/or enemies and players need to have the ability to gain and/or lose the health. In this recipe, it being the first of a two-part recipe, we will create the ability to take and heal damage, whereas later on in Chapter 10, User Interface, we will use the UI tools in Unreal to display this information.
Before we start working on this, we need to have a project created and set up for our character to actually have health and a way to damage it. Follow these steps:
- First, open up the Unreal Editor by clicking on the Launch button from the Unreal Engine Launcher.
- Start a new project from the Project Browser tab by selecting the New Project tab. Select Third person and make sure that With Starter Content is selected. Give the project a Name (
Cookbook_Chapter8). Once you are done, click on Create Project.
Now, once the project is created, the first step here will be to create some action to damage the player. In this instance, I'm going to create a trigger. When the player touches the trigger, it will get damaged. To make it easier to see, I'm going to add a fire particle system. Follow these steps:
- From the Content Browser tab, open up the
StarterContent/Particlesfolder and drag and drop theP_Fireparticles onto the floor of the starting level. - Next, from the Modes tab, go to the Place mode (if you weren't there already) and select the Volumes section. From the options, scroll all the way down until you see Trigger Volume and then drag and drop that into the level so that the fire overlaps it.
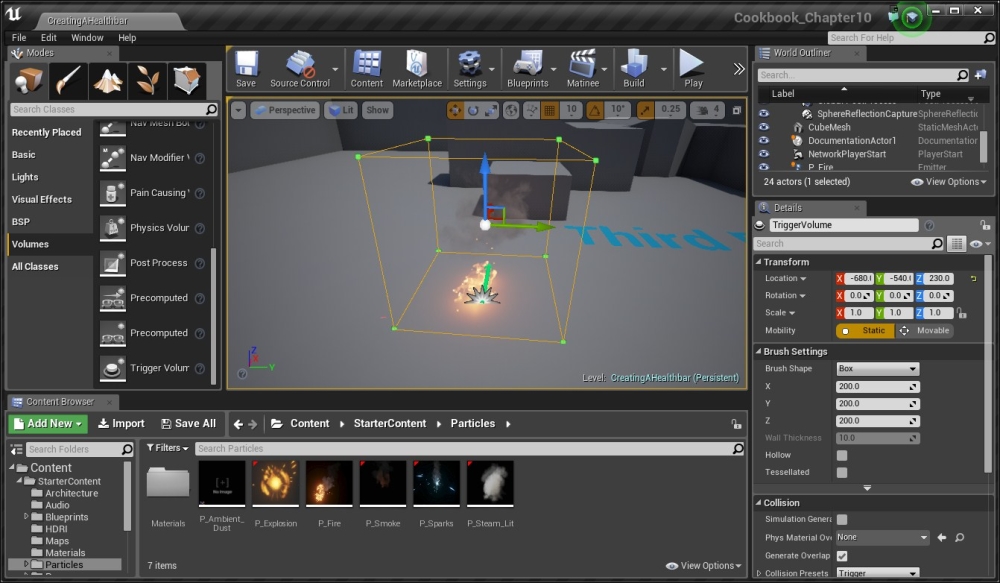
Creating a trigger to damage the player
Now that we have the trigger in place, we need to create a blueprint to do the damage for us.
- With the Trigger Volume object selected, go to Blueprints | Open Level Blueprint.
- From the Event Graph tab, right-click somewhere on the grid and then navigate to Add Event for Trigger Volume 1 | Collision | Add On Actor Begin Overlap.
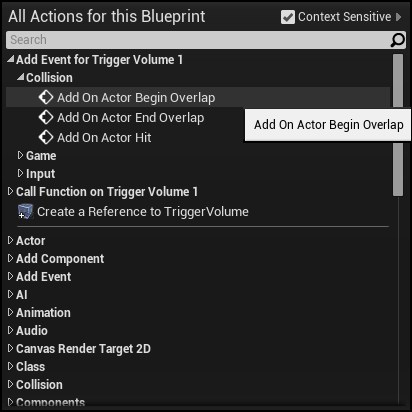
This event will be called whenever any other actor begins to overlap this actor.
Note
For more information on OnActorBeginOverlap and all of the other Collision Responses in UE4, refer to https://docs.unrealengine.com/latest/INT/Engine/Physics/Collision/index.html.
- Next, when we collide with the trigger, we want to damage the player. Thankfully, Unreal comes with an Apply Damage action that we can use. To the right of the OnActorBeginOverlap action, right-click and start typing
Applyand when Apply Damage is selected, press theEnterkey. - Connect the output from the OnActorBeginOverlap action to the input of the Apply Damage action. Then, connect Other Actor of OnActorBeginOverlap (TriggerVolume) to Damaged Actor of Apply Damage. Finally, under Base Damage, type in
10.
Blueprint to cause damage event when an object touches the trigger volume
What this will do is whenever an object touches the trigger volume, it will call a generic damage event on that object with a damage parameter of 10. Note that this will only do something if someone has created an AnyDamage event, which we will learn how to do later on in this recipe.
Now that we have something that can damage the character, we need to actually give our character a way to take damage:
- Exit out of the level blueprint and from the Content Browser tab, open up the
ThirdPersonBP/Blueprintsfolder and double-click on theThirdPerson Characterobject to open it up. - From the MyBlueprint tab, you'll see a section called Variables; extend it out (if it's not already extended) and press the + button to create a new variable. When it's created, give it a name (
CurrentHealth) and then from the Details tab, change Variable Type value toFloat. - After this, create another float variable called
MaxHealth. - Next, click on the Compile button to verify everything is working correctly; then, we can assign a Default Value of
100to each of the two numbers.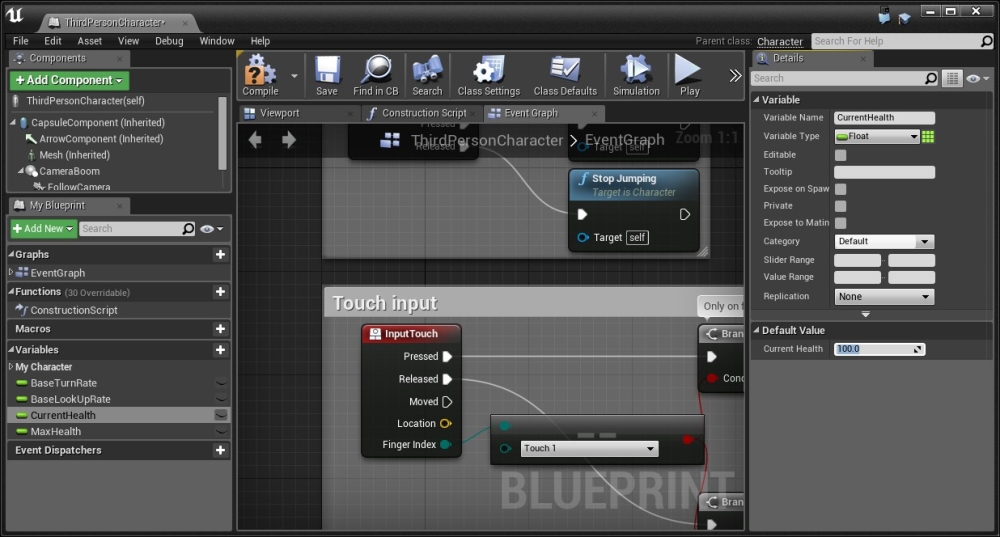
Assigning Default Value to the numbers
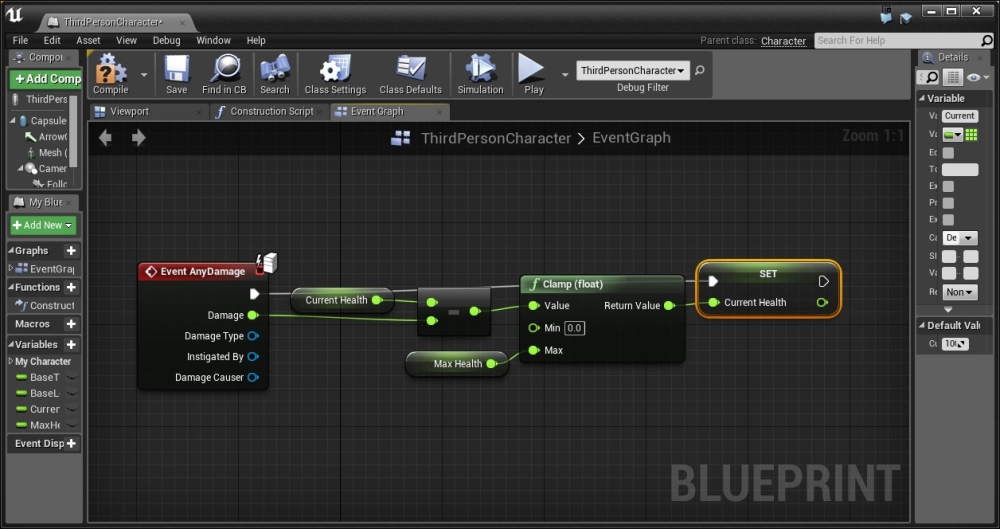
- Now that we have the health variables, we can use them. Move down the Event Graph until you reach some empty space and right-click to create a new Event AnyDamage event (Add Event | Game | Damage).
This event is called if the
ApplyDamagefunction is called on an object. The default character controllers do not have it, so we need to put it in.First, we will subtract the damage from the current player's health and then, set the current health to this new value.
- Drag and drop the
CurrentHealthvariable from the Variables section of the MyBlueprints tab into Event Graph. From the options, select Get. - Next, create a float – float action (which will subtract a float from another float). On the top, connect the Current Health variable. For the bottom, connect the Damage value from the Event AnyDamage action.
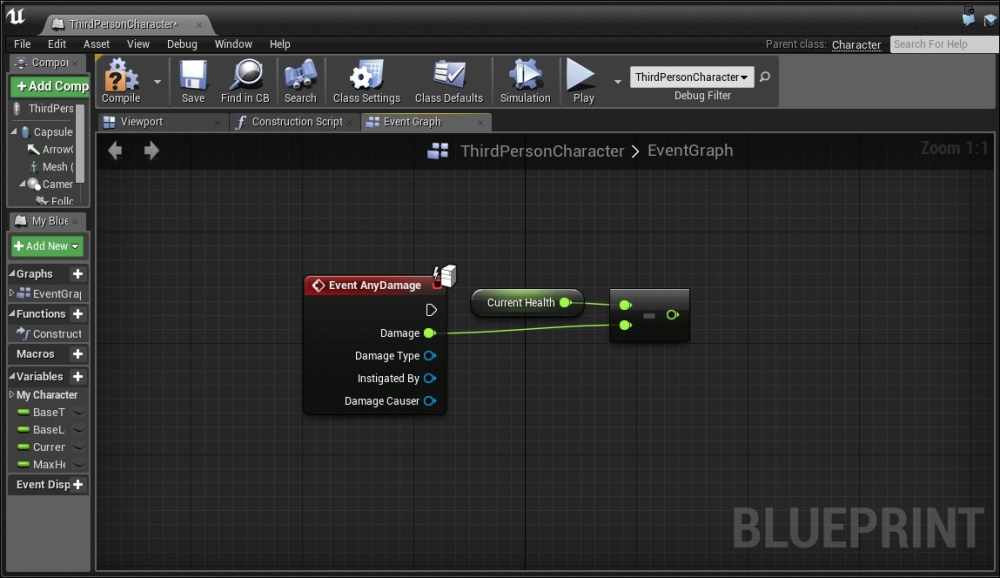
Setting up the final behavior for the damage event
Next, we want to ensure that the value that we get from this, will always be between
0and our Max Health value (we can have someone later on create a trigger with a negative Damage value for Apply Damage, which will then heal our player). To do this, we can use a Clamp action that will make it so that when the number is less than 0, it will set it to 0 or if it is larger than Max Health, it'll come down to Max Health. - Right-click and create a Clamp(float) action. Connect Value to the output of our subtraction action. Leave the Min value at its default of
0, but then for Max, connect our MaxHealth variable (drag and drop and select Get). - Now that we have the valid value, we need to actually set this value. To the right of the Clamp action, drag and drop a Current Health variable, but this time, select the Set action. Connect the Clamp action's Return Value to the Current Health variable of the Set action. Then, connect the output from Event Any Damage to the input of the Set action.
Now we have the ability to take or heal damage to our player. Later on in Chapter 10, User Interface, we have the second part of this recipe in which we use this recipe and then create a healthbar to show the player exactly where their health is!
We've covered quite a lot, but we have only touched the tip of the iceberg, that is, scripting. To give yourself a little exposure to what else can be done with blueprints, take a look at the following tutorials:
- If you're working in teams, having a set of practices will make it much easier for you to work together and perform well. Some recommended best practices for blueprints can be found at https://docs.unrealengine.com/latest/INT/Engine/Blueprints/BestPractices/index.html.
- Scott McCutchen has created a tutorial for having a character swap their mesh and animations during gameplay, making it seem like one character poofs out of existence with another taking its place. Check it out at https://www.youtube.com/watch?v=5R1z3rytu7Y.
- Another more advanced use of blueprints is in the creation of an inventory system. Tom Looman has come up with a tutorial on one that you can check out at http://www.tomlooman.com/tutorial-basic-inventory-system-in-blueprint/.
- This tutorial is a bit dated, but Joel Shapiro's blueprints tutorial does go through the creation of a 2D platformer from scratch, so I think it's worth checking it out at http://www.raywenderlich.com/97058/unreal-engine-tutorial-for-beginners-part-1.
- Finally, we also have a tutorial from Peter Newton where they build an AI, making use of NavMeshes. While it is a long tutorial, it does go into a number of different aspects of building an AI Bot. Check this out at https://wiki.unrealengine.com/AI_Bot:_Blueprint_Scripting_Playlist.