A main menu can serve as an introduction to your game and is a great place for us to discuss some additional things that UMG has, such as texts and buttons. We'll also learn how we can make buttons do things. Let's spend some time to see just how easy it is to create one!
Note
For more information on the client-server model, refer to https://en.wikipedia.org/wiki/Client%E2%80%93server_model.
To give you an idea of how it works, let's create an empty level to hold our menu:
- Create a new level by going to File | New Level and select Empty Level.
- Next, inside the Content Browser tab, go to our
UIfolder and navigate to Add New | User Interface | Widget Blueprint and give it a name (MainMenu). Double-click on it to open up the editor.In this menu, we are going to have the title of the game, and then a series of buttons the player can press.
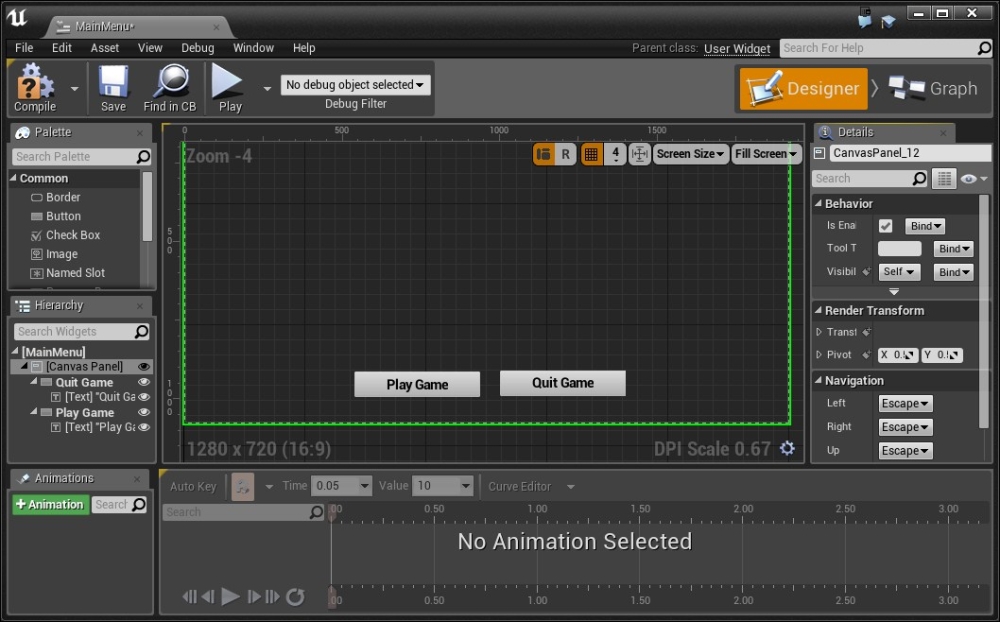
- From the Palette tab, open up the Common section and drag and drop a Button onto the middle of the screen.
- Select the button and change its Size X to
400and Size Y to80. We will also rename the button toPlay Game. - Drag and drop a Text object onto the Play Game button, and you should see it snap onto the button as a child. Under Content, change Text to Play Game. Under Appearance, change the color of the button to black and change the Font size to
32. - From the Hierarchy tab, select the Play Game button and copy and paste it to create a duplicate. Move the button down, rename it to
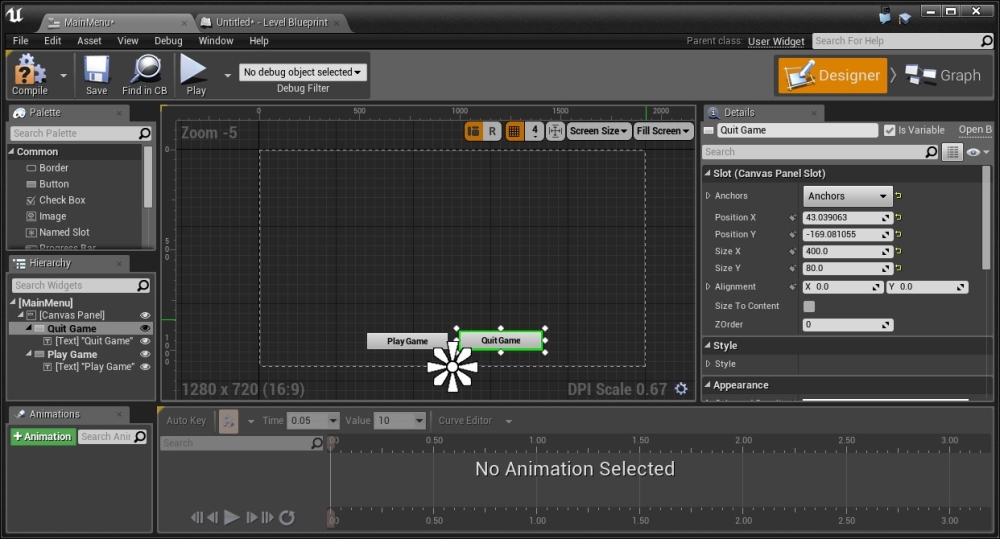
Quit Game, and change the textContentas well. - Move both of the objects so that they're on the bottom part of the HUD, slightly above and side by side, as shown in the following image:
- Lastly, we'll want to set our pivots and anchors accordingly. When you select either the Quit Game or Play Game buttons, you may notice a sun-like widget that displays the Anchors of the object (known as the Anchor Medallion). In our case, open Anchors from the Details panel and click on the bottom center option.
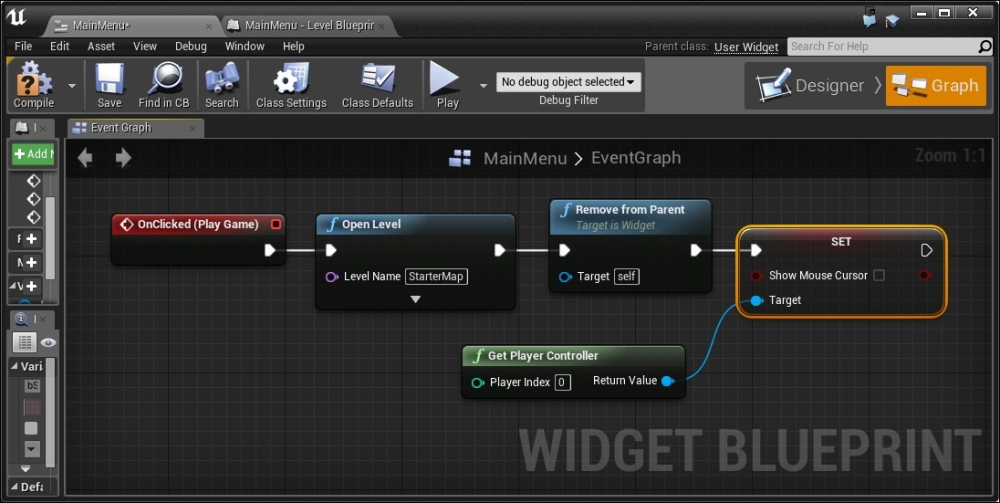
- Now that we have the buttons created, we want them to actually do something when we click on them. Select the Play Game button and from the Details tab, scroll down until you see the Events component. There should be a series of big green + buttons. Click on the green button beside OnClicked.

- Next, it will take us to Event Graph with the appropriate event created for us. To the right of the event, right-click and create an Open Level action. Under Level Name, put in whatever level you like (for example,
StarterMap) and then connect the output of the OnClicked action to the input of the Open Level action. - To the right of that, create a Remove from Parent action to make sure that when we leave it, the menu doesn't stay.
- Finally, create a Get Player Controller action and to the right of it, a Set Show Mouse Cursor action disabled so that the mouse will no longer be visible as we want to see the mouse in the menu (drag from Return Value of the Player Controller to create a new node and search for the mouse cursor action).
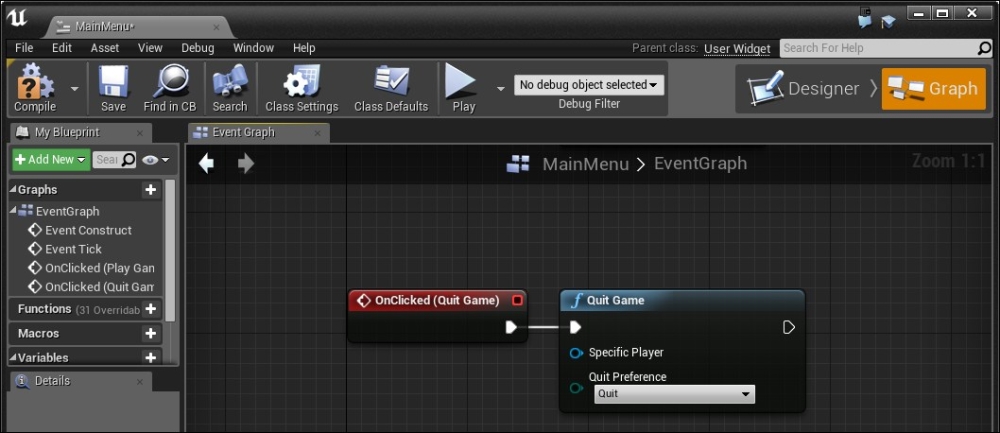
- Now, go back to the Designer button and then select the Quit Game button. Click on the OnClicked button as well and to the right of this one, create a Quit Game action and connect the output of the OnClicked action to the input of the Quit Game action.
- Lastly, as a bit of polish, let's add our game title to the screen. Drag and drop another Text object onto the scene, this time with Anchor at the top of center. From here, change Position X to
0and Position Y to176. - Change the Alignment value of the X axis to
.5and check the Size to Content option for it to automatically resize. - Set the Content component's Text property to the game's name (in my case,
Game Name). - Under the Appearance component, set the Font size to
93and set the Justification property to Center.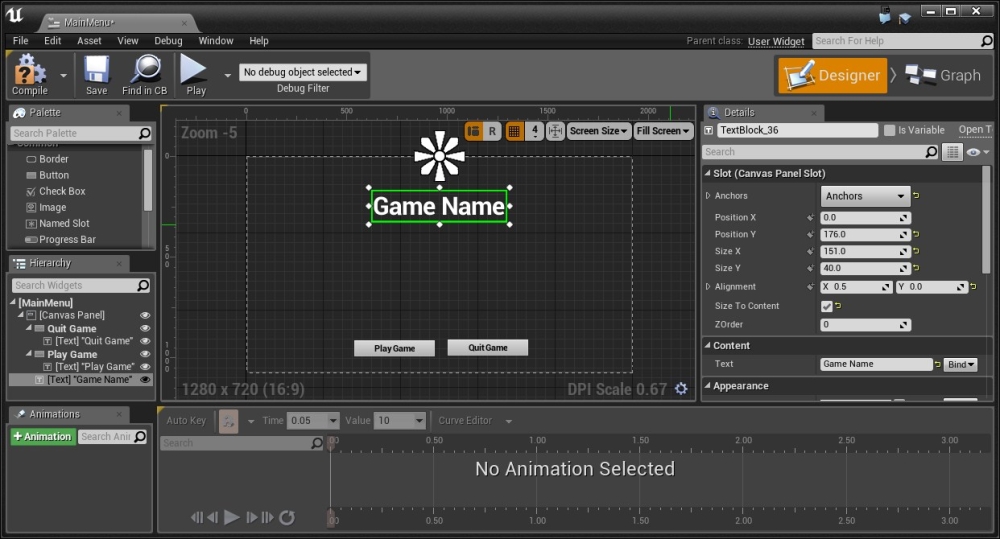
Note
There are a number of other styling options that you may wish to use when developing your HUDs. For more information on that, refer to https://docs.unrealengine.com/latest/INT/Engine/UMG/UserGuide/Styling/index.html.
- Compile the menu, and save it, and now we need to actually have the widget show up. To do so, we need to take the same steps as we did previously.
- Open up Level Blueprint by going to to Blueprints | Open Level Blueprint and create an EventBeginPlay event.
- Then, to the right of that, right-click and create a Create Widget action. Under Class, from the dropdown, select
MainMenuand connect the arrow from Event Begin Play to the input of Create MainMenu_C Widget. - After this, click and drag from the output arrow and create an Add to Viewport event. Then, connect Return Value of our Create Widget action to Target of the Add to Viewport action.
- Lastly, we also want to display the player's cursor on the screen to show buttons. To do that, right-click and select Get Player Controller. Then, from Return Value of that, create a Set Show Mouse Cursor object. Connect the output of the Add to Viewport action to the input of the Show Mouse Cursor action.
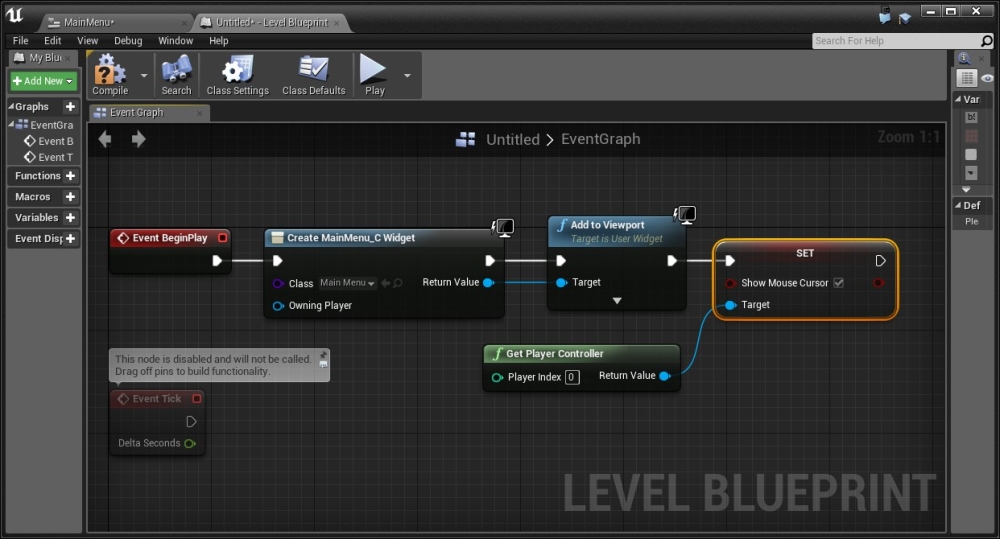
Blueprint to show player's cursor on the screen
- Compile, save, and run the project!
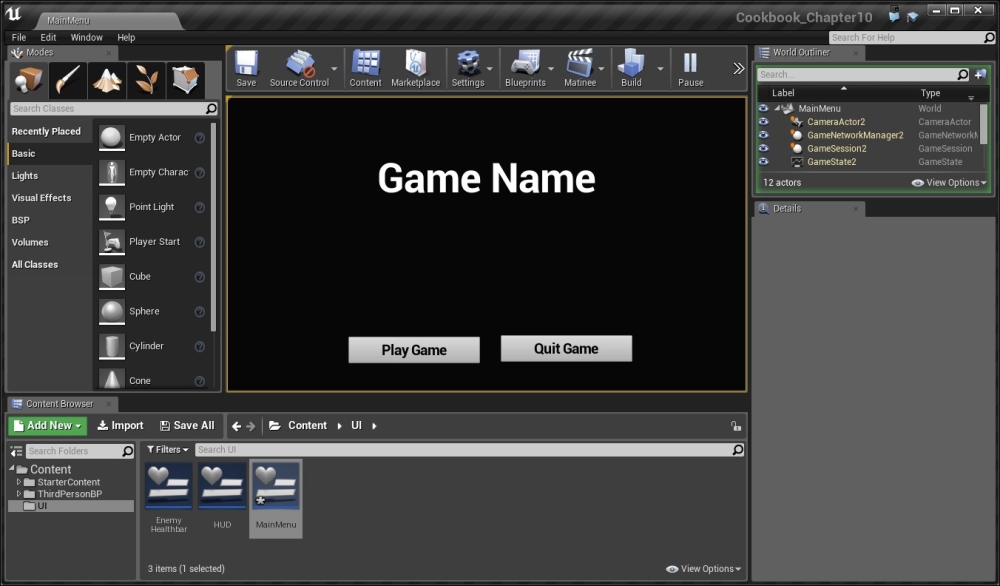
With this our menu is completed! We can quit the game with no problems, and pressing the Play Game button will start our level!