
In this recipe, we will examine how our application can be used to recognize human faces. Thanks to the OpenCV library, it is really easy.
We will be using the OpenCV library, so please refer to the Integrating with OpenCV recipe for information on how to set up your project. We will need a sample image to proceed, so save it in your assets folder as image.png. Put the Haar cascade classifier file for frontal face recognition inside the assets directory. The cascade file can be found inside the downloaded OpenCV package or in the online public repository, located at https://github.com/Itseez/opencv/blob/master/data/haarcascades/haarcascade_frontalface_alt.xml.
We will create an application that demonstrates the usage of cascade classifier from OpenCV with Cinder. Perform the following steps to do so:
- Include necessary headers:
#include "cinder/gl/Texture.h"
#include "cinder/Surface.h"
#include "cinder/ImageIo.h"
- Add the following members to your main class:
Surface8u mImage;
cv::CascadeClassifier  mFaceCC;
std::vector<Rectf>  mFaces;
- Add the following code snippet to the
setupmethod:mImage = loadImage( loadAsset("image.png") ); mFaceCC.load( getAssetPath( "haarcascade_frontalface_alt.xml" ).string() ); - Also add the following code snippet at the end of the
setupmethod:cv::Mat cvImage( toOcv( mImage, CV_8UC1 ) ); std::vector<cv::Rect> faces; mFaceCC.detectMultiScale( cvImage, faces ); std::vector<cv::Rect>::const_iterator faceIter; for(faceIter = faces.begin(); faceIter != faces.end(); ++faceIter ) { Rectf faceRect( fromOcv( *faceIter ) ); mFaces.push_back( faceRect ); } - At the end of the
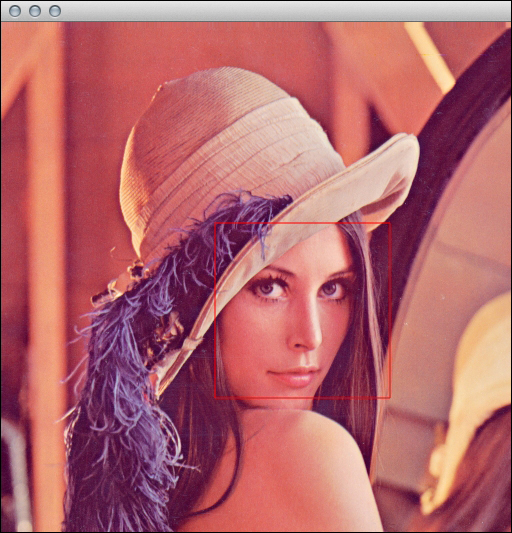
drawmethod add the following code snippet:gl::color( Color::white() ); gl::draw(mImage); gl::color( ColorA( 1.f, 0.f, 0.f, 0.45f ) ); std::vector<Rectf>::const_iterator faceIter; for(faceIter = mFaces.begin(); faceIter != mFaces.end(); ++faceIter ) { gl::drawStrokedRect( *faceIter ); }
In step 3 we loaded an image file for processing and an XML classifier file, which has description of the object features to be recognized. In step 4 we performed an image detection by invoking the
detectMultiScale function on the mFaceCC object, where we pointed to cvImage as an input and stored the result in a vector structure, cvImage is converted from mImage as an 8-bit, single channel image (CV_8UC1). What we did next was iterating through all the detected faces and storing Rectf variable, which describes a bounding box around the detected face. Finally, in step 5 we drew our original image and all the recognized faces as stroked rectangles.
We are using cascade classifier implemented in OpenCV, which can be trained to detect a specific object in the image. More on training and using cascade classifier for object detection can be found in the OpenCV documentation, located at http://docs.opencv.org/modules/objdetect/doc/cascade_classification.html.
You can use a video stream from your camera and process each frame to track faces of people in real time. Please refer to the Capturing from the camera recipe in Chapter 11, Sensing and Tracking Input from the Camera.