
In this recipe, we are going to learn how we can build a basic particle system in two dimensions using the Verlet algorithm.
We will need to create two classes, a Particle class representing a single particle, and a ParticleSystem class to manage our particles.
Using your IDE of choice, create the following files:
Particle.hParticle.cppParticleSystem.hParticleSystem.cpp
We will learn how we can create a basic particle system. Perform the following steps to do so:
- First, let's declare our
Particleclass in theParticle.hfile and include the necessary Cinder files:#pragma once #include "cinder/gl/gl.h" #include "cinder/Vector.h" class Particle{ }; - Let's add, to the class declaration, the necessary member variables –
ci::Vec2fto store the position, previous position, and applied forces; andfloatto store particle radius, mass, and drag.ci::Vec2f position, prevPosition; ci::Vec2f forces; float radius; float mass; float drag;
- The last thing needed to finalize the
Particledeclaration is to add a constructor that takes the particle's initial position, radius, mass, and drag, and methods to update and draw the particle.The following is the final
Particleclass declaration:class Particle{ public: Particle( const ci::Vec2f& position, float radius, float mass, float drag ); void update(); void draw(); ci::Vec2f position, prevPosition; ci::Vec2f forces; float radius; float mass; float drag; }; - Let's move on to the
Particle.cppfile and implement theParticleclass.The first necessary step is to include the
Particle.hfile, as follows:#include "Particle.h"
- We initialize the member variables to the values passed in the constructor. We also initialize
forcestozeroandprevPositionto the initial position.Particle::Particle( const ci::Vec2f& position, float radius, float mass, float drag ){ this->position = position; this->radius = radius; this->mass = mass; this->drag = drag; prevPosition = position; forces = ci::Vec2f::zero(); } - In the
updatemethod, we need to create a temporaryci::Vec2fvariable to store the particle's position before it is updated.ci::Vec2f temp = position;
- We calculate the velocity of the particle by finding the difference between current and previous positions and multiplying it by
drag. We store this value inci::Vec2ftemporarily for clarity.ci::Vec2f vel = ( position – prevPosition ) * drag;
- To update the particle's position, we add the previously calculated velocity and add
forcesdivided bymass.position += vel + forces / mass;
- The final steps in the
updatemethod are to copy the previously stored position toprevPositionand resetforcesto azerovector.The following is the complete
updatemethod implementation:void Particle::update(){ ci::Vec2f temp = position; ci::Vec2f vel = ( position - prevPosition ) * drag; position += vel + forces / mass; prevPosition = temp; forces = ci::Vec2f::zero(); } - In the
drawimplementation, we simply draw a circle at the particle's position using its radius.void Particle::draw(){ ci::gl::drawSolidCircle( position, radius ); } - Now with the
Particleclass complete, we need to begin working on theParticleSystemclass. Move to theParticleSystem.hfile, include the necessary files, and create theParticleSystemclass declaration.#pragma once #include "Particle.h" #include <vector> classParticleSystem{ public: }; - Let's add a destructor and methods to update and draw our particles. We'll also need to create methods to add and destroy particles and finally a
std::vectorvariable to store the particles in this system. The following is the final class declaration:Class ParticleSystem{ public: ~ParticleSystem(); void update(); void draw(); void addParticle( Particle *particle ); void destroyParticle( Particle *particle ); std::vector<Particle*> particles; }; - Moving to the
ParticleSystem.cppfile, let's begin working on the implementation. The first thing we need to do is include the file with the class declaration.#include "ParticleSystem.h"
- Now let's implement the methods one by one. In the destructor, we iterate through all the particles and delete them.
ParticleSystem::~ParticleSystem(){ for( std::vector<Particle*>::iterator it = particles.begin(); it!= particles.end(); ++it ){ delete *it; } particles.clear(); } - The
updatemethod will be used to iterate all the particles and callupdateon each of them.void ParticleSystem::update(){ for( std::vector<Particle*>::iterator it = particles.begin(); it != particles.end(); ++it ){ (*it)->update(); } } - The
drawmethod will iterate all the particles and calldrawon each of them.void ParticleSystem::draw(){ for( std::vector<Particle*>::iterator it = particles.begin(); it != particles.end(); ++it ){ (*it)->draw(); } } - The
addParticlemethod will insert the particle on theparticlescontainer.void ParticleSystem::addParticle( Particle *particle ){ particles.push_back( particle ); } - Finally,
destroyParticlewill delete the particle and remove it from the particles' list.We'll find the particles' iterator and use it to delete and later remove the object from the container.
void ParticleSystem::destroyParticle( Particle *particle ){ std::vector<Particle*>::iterator it = std::find( particles.begin(), particles.end(), particle ); delete *it; particles.erase( it ); } - With our classes ready, let's go to our application's class and create some particles.
In our application's class, we need to include the
ParticleSystemheader file and the necessary header to use random numbers at the top of the source file:#include "ParticleSystem.h" #include "cinder/Rand.h"
- Declare a
ParticleSystemobject on our class declaration.ParticleSystem mParticleSystem;
- In the
setupmethod we can create 100 particles with random positions on our window and random radius. We'll define the mass to be the same as the radius as a way to have a relation between size and mass.dragwill be set to 9.5.Add the following code snippet inside the setup method:
int numParticle = 100; for( int i=0; i<numParticle; i++ ){ float x = ci::randFloat( 0.0f, getWindowWidth() ); float y = ci::randFloat( 0.0f, getWindowHeight() ); float radius = ci::randFloat( 5.0f, 15.0f ); float mass = radius;radius; float drag = 0.95f; Particle *particle = new Particle ( Vec2f( x, y ), radius, mass, drag ); mParticleSystem.addParticle( particle ); } - In the
updatemethod, we need to update the particles by calling theupdatemethod onmParticleSystem.void MyApp::update(){ mParticleSystem.update(); } - In the
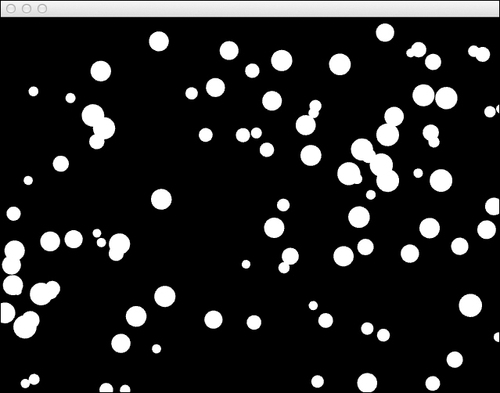
drawmethod we need to clear the screen, set up the window's matrices, and call thedrawmethod onmParticleSystem.void ParticlesApp::draw() { gl::clear( Color( 0, 0, 0 ) ); gl::setMatricesWindow( getWindowWidth(), getWindowHeight() ); mParticleSystem.draw(); } - Build and run the application and you will see 100 random circles on screen, as shown in the following screenshot:
In the next recipes we will learn how to animate the particles in organic and appealing ways.
The method described previously uses a popular and versatile Verlet integrator. One of its main characteristics is an implicit approximation of velocity. This is accomplished by calculating, on each update of the simulation, the distance traveled since the last update of the simulation. This allows for greater stability as velocity is implicit to position and there is less chance these will ever get out of sync.
The drag member variable represents resistance to movement and should be a number between 0.0 and 1.0. A value of 0.0 represents such a great resistance that the particle will not be able to move. A value of 1.0 represents absence of resistance and will make the particle move indefinitely. We applied drag in step 7, where we multiplied drag by the velocity:
ci::Vec2f vel = ( position – prevPosition ) * drag;
To create a particle system in 3D it is necessary to use a 3D vector instead of a 2D one.
Since Cinder's vector 2D and 3D vector classes have a very similar class structure, we simply need to change position, prevPosition, and forces to be ci::Vec3f objects.
The constructor will also need to take a ci::Vec3f object as an argument instead.
The following is the class declaration with these changes:
class Particle{
public:

    Particle( const ci::Vec3f& position,
    float radius, float mass, float drag );

    void update();
    void draw();

    ci::Vec3f position, prevPosition;
    ci::Vec3f forces;
    float radius;
    float mass;
    float drag;
};
The draw method should also be changed to allow for 3D drawing; we could, for example, draw a sphere instead of a circle:
void Particle::draw(){
  ci::gl::drawSphere( position, radius );
} - For more information on the implementation of the Verlet algorithm, please refer to the paper by Thomas Jakobsen, located at http://www.pagines.ma1.upc.edu/~susin/contingut/AdvancedCharacterPhysics.pdf
- For more information on the Verlet integration, please read the wiki at http://en.wikipedia.org/wiki/Verlet_integration