In this chapter, we will learn how to work and draw with 2D graphics and built-in Cinder tools.
The recipes in this chapter will cover the following:
- Drawing 2D geometric primitives
- Drawing arbitrary shapes with the mouse
- Implementing a scribbler algorithm
- Implementing 2D metaballs
- Animating text around curves
- Adding a blur effect
- Implementing a force-directed graph
In this recipe, we will learn how to draw the following 2D geometric shapes, as filled and stroked shapes:
- Circle
- Ellipse
- Line
- Rectangle
Include the necessary header to draw in OpenGL using Cinder commands.
Add the following line of code at the top of your source file:
#include "cinder/gl/gl.h"
We will create several geometric primitives using Cinder's methods for drawing in 2D. Perform the following steps to do so:
- Let's begin by declaring member variables to keep information about the shapes we will be drawing.
Create two
ci::Vec2fobjects to store the beginning and end of a line, aci::Rectfobject to draw a rectangle, aci::Vec2fobject to define the center of the circle, and afloatobject to define its radius. Finally, we will createaci::Vec2fto define the ellipse's radius and twofloatobjects to define its width and height.Let's also declare two
ci::Colorobjects to define the stroke and fill colors.Vec2f mLineBegin,mLineEnd; Rect fmRect; Vec2f mCircleCenter; float mCircleRadius; Vec2f mEllipseCenter; float mElipseWidth, mEllipseHeight; Color mFillColor, mStrokeColor;
- In the
setupmethod, let's initialize the preceding members:mLineBegin = Vec2f( 10, 10 ); mLineEnd = Vec2f( 400, 400 ); mCircleCenter = Vec2f( 500, 200 ); mCircleRadius = 100.0f; mEllipseCenter = Vec2f( 200, 300 ); mEllipseWidth = 200.0f; ellipseHeight = 100.0f; mRect = Rectf( Vec2f( 40, 20 ), Vec2f( 300, 100 ) ); mFillColor = Color( 1.0f, 1.0f, 1.0f ); mStrokeColor = Color( 1.0f, 0.0f, 0.0f );
- In the
drawmethod, let's start by drawing filled shapes.Let's clear the background and set
mFillColorto be the drawing color.gl::clear( Color( 0, 0, 0 ) ); gl::color( mFillColor );
- Draw the filled shapes by calling the
ci::gl::drawSolidRect,ci::gl::drawSolidCircle, andci::gl::drawSolidEllipsemethods.Add the following code snippet inside the
drawmethod:gl::drawSolidRect( mRect ); gl::drawSolidCircle( mCircleCenter, mCircleRadius ); gl::drawSolidEllipse( mEllipseCenter, mEllipseWidth, ellipseHeight );
- To draw our shapes as stroked graphics, let's first set
mStrokeColoras the drawing color.gl::color( mStrokeColor );
- Let's draw our shapes again, this time using only strokes by calling the
ci::gl::drawLine,ci::gl::drawStrokeRect,ci::gl::drawStrokeCircle, andci::gl::drawStrokedEllipsemethods.Add the following code snippet inside the
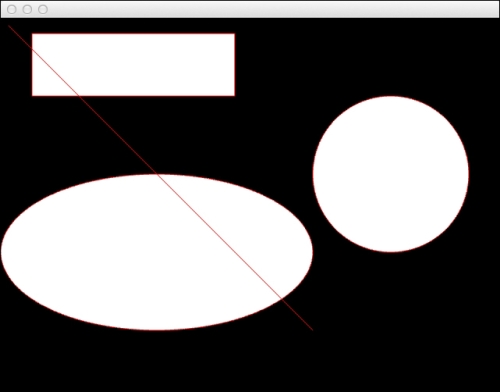
drawmethod:gl::drawLine( mLineBegin, mLineEnd ); gl::drawStrokedRect( mRect ); gl::drawStrokedCircle( mCircleCenter, mCircleRadius ); gl::drawStrokedEllipse( mEllipseCenter, mEllipseWidth, ellipseHeight );
This results in the following: