
In this recipe, we will learn how to construct a surface in 3D using Perlin noise to create organic deformations that resemble a piece of terrain.
Include the necessary files to draw using OpenGL, Perlin noise, a Maya camera for navigation, and Cinder's math utilities. Add the following code to the top of the source file:
#include "cinder/gl/gl.h"
#include "cinder/Perlin.h"
#include "cinder/MayaCamUI.h"
#include "cinder/CinderMath.h"
Also, add the following using statements:
using namespace ci;
using namespace ci::app;
using namespace std;
We will create a grid of 3D points and use Perlin noise to calculate a smooth surface.
- Declare
structto store the vertices of the terrain by adding the following code before the applications class declaration:struct Vertice{ Vec3f position; Color color; }; - Add the following members to the applications class declaration:
vector< vector<Vertice> > mTerrain;
int mNumRows, mNumLines;
MayaCamUI mCam;
Perlin mPerlin;
- In the
setupmethod, define the number of rows and lines that will make up the terrain's grid. Also, define the gap distance between each point.mNumRows = 50; mNumLines = 50; float gap = 5.0f;
- Add the vertices to
mTerrainby creating a grid of points laid on thexandzaxis. We will use the values generated byci::Perlinto calculate each points height. We will also use the height of the points to define their color:mTerrain.resize( mNumRows ); for( int i=0; i<mNumRows; i++ ){ mTerrain[i].resize( mNumLines ); for( int j=0; j<mNumLines; j++ ){ float x = (float)i * gap; float z = (float)j * gap; float y = mPerlin.noise( x*0.01f, z*0.01 ) * 100.0f; mTerrain[i][j].position = Vec3f( x, y, z ); float colorVal = lmap( y, -100.0f, 100.0f, 0.0f, 1.0f ); mTerrain[i][j].color = Color( colorVal, colorVal, colorVal ); } } - Now let's define our camera so that it points to the center of the terrain.
float width = mNumRows * gap;
float height = mNumLines * gap;
Vec3f center( width/2.0f, height/2.0f, 0.0f );
Vec3f eye( center.x, center.y, 300.0f );
CameraPersp camera( getWindowWidth(), getWindowHeight(), 60.0f );
camera.setEyePoint( eye );
camera.setCenterOfInterestPoint( center );
mCam.setCurrentCam( camera );
- Declare the mouse event handlers to use
mCam.Void mouseDown( MouseEvent event ); void mouseDrag( MouseEvent event ); } - Now let's implement the mouse handlers.
void MyApp::mouseDown( MouseEvent event ){ mCam.mouseDown( event.getPos() ); } void MyApp::mouseDrag( MouseEvent event ){ mCam.mouseDrag( event.getPos(), event.isLeft(), event.isMiddle(), event.isRight() ); } - In the
drawmethod, let's start by clearing the background, setting the matrices usingmCam, and enabling reading and writing of the depth buffer.gl::clear( Color( 0, 0, 0 ) ); gl::setMatrices( mCam.getCamera() ); gl::enableDepthRead(); gl::enableDepthWrite();
- Now enable OpenGL to use the
VERTEXandCOLORarrays:glEnableClientState( GL_VERTEX_ARRAY ); glEnableClientState( GL_COLOR_ARRAY );
- We will use a nested
forloop to iterate over the terrain and draw each strip of terrain asGL_TRIANGLE_STRIP.for( int i=0; i<mNumRows-1; i++ ){ vector<Vec3f> vertices; vector<ColorA> colors; for( int j=0; j<mNumLines; j++ ){ vertices.push_back( mTerrain[i][j].position ); vertices.push_back( mTerrain[i+1][j].position ); colors.push_back( mTerrain[i][j].color ); colors.push_back( mTerrain[i+1][j].color ); } glColor3f( 1.0f, 1.0f, 1.0f ); glVertexPointer( 3, GL_FLOAT, 0, &vertices[0] ); glColorPointer( 4, GL_FLOAT, 0, &colors[0] ); glDrawArrays( GL_TRIANGLE_STRIP, 0, vertices.size() ); }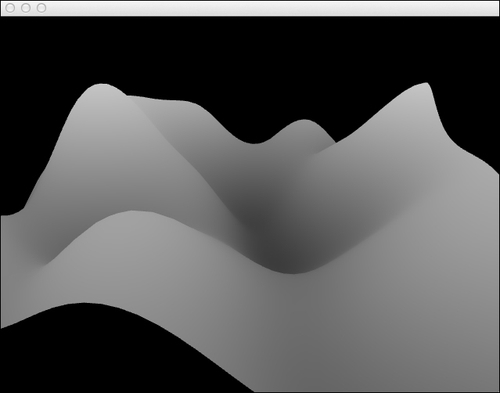
Perlin noise is a coherent random number generator capable of creating organic textures and transitions.
We used the values created by the ci::Perlin object to calculate the height of the vertices that make up the terrain and create smooth transitions between vertices.
We can also animate our terrain by adding an increasing offset to the coordinates used to calculate the Perlin noise. Declare the following member variables in your class declaration:
float offsetX, offsetZ;
In the setup method, initialize them.
offsetX = 0.0f;
offsetZ = 0.0f;
In the update method animate each offset value by adding 0.01.
offsetX += 0.01f;
offsetZ += 0.01f;
Also in the update
method, we will iterate over all the vertices of mTerrain. For each vertex we will use its x and z coordinates to calculate the Y coordinate with mPerlin noise, but we will offset the coordinates.
  for( int i=0; i<mNumRows; i++ ){
  for( int j=0; j<mNumLines; j++ ){
  Vertice& vertice = mTerrain[i][j];
  float x = vertice.position.x;
  float z = vertice.position.z;
  float y = mPerlin.noise( x*0.01f + offsetX, z*0.01f + offsetZ ) * 100.0f;
            vertice.position.y = y;
        }
    }