
Now that we have a racetrack, the next important thing to create is a race kart. Again, we will use images from the original Mario Kart game.
Go online and find a Mario Kart sprite sheet depicting Mario in his race kart. A sprite sheet is a special type of image that's often used in professional 2D games. It collects all of the costumes that belong together into a single image. That way, an image only has to be loaded once. The game program only shows a small part of the sprite sheet at any given time. With scripts, the window through which you view the sprite sheet can be moved. This has an effect similar to changing costumes in Scratch; it creates animation.
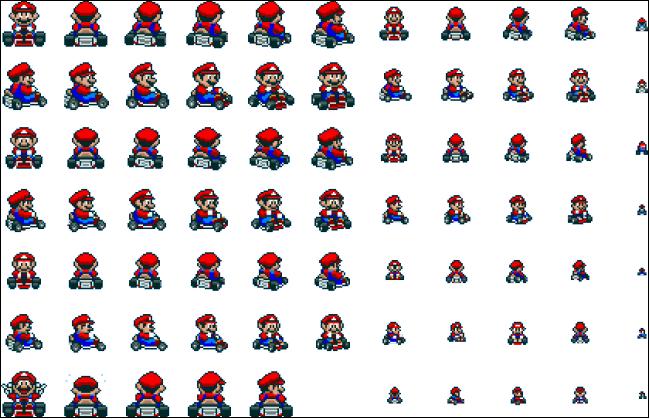
We will assemble a row of costumes that shows the character in his kart from all angles. By moving through the costumes, the sprite will appear to rotate by a full circle. We will use these costumes later to indicate the direction the character is facing in the game.
For this stage, an external image editor will be very useful because we want to load all the different images as separate costumes. You can do it in Scratch, but you'll be doing a lot of erasing to only leave one image per costume. You'll also see that most sprite sheets only show images facing in one direction. We want to have separate images for both directions, so we will need to mirror most of them to face the other side as well.
Let's first look at the method that uses an external editor:
- Start your preferred editor and load the sprite sheet.
- Cut out each sprite that you want to use and save it separately. Make sure that the area around the sprite is transparent, so you don't end up with a colored box surrounding your character sprite.
- If needed, make mirrored copies of all the images facing in the other direction. This will be necessary for all of the images that aren't facing straight up or down.
- Double-check to make sure that your collection of separated sprites describe a full circle in approximately equal steps.
With the images ready to be loaded, we can start adding them to Scratch by using the following steps:
- In Scratch, create a new sprite and name it
kart1. - Click on the New costume link to open the drop-down menu.
- Select the Import option.
- Select and import the first sprite costume.
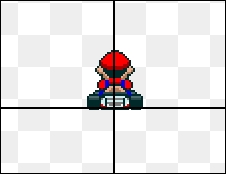
- Click on the Set Costume Center icon and place the center point at the bottom of the image between the wheels; see the following screenshot:
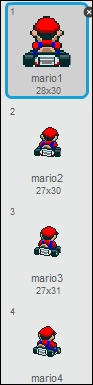
- Repeat the process for all the other costumes.
- If your costumes aren't sorted properly, fix them by dragging them around.
That's one method to get your images into Scratch. Now for the other method:
- Create a new sprite and name it
kart1. - Click on the New Costume link and choose Import from the drop-down menu.
- Select the entire sprite sheet to load it as a new costume.
- Duplicate the sprite sheet costume as many times as there are costumes in a full circle (our example uses 22 costumes).
- Now, start editing the first costume. Pick one image from the sprite sheet that you want to save and erase all of the rest. Use the Fill tool with the transparent color to remove any background color surrounding the selected image.

- Place the center point at the bottom of the image, between the wheels.
- Repeat this process for all of the images that you need to create a full-circle animation.
As I mentioned, the second method does take some endurance, but it works.
We now have a kart sprite with a series of costumes that allow the sprite to rotate in all of the directions. We will script these costumes in the next project.
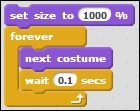
You might want to test whether your rotating animation looks nice. That's easy to do and just requires adding the following small script to the sprite:
- Start with a set size to () % block and fill in
1000. We will overscale the image so that you can clearly see all the details. - Attach a forever loop.
- Inside the loop, place a next costume loop to endlessly cycle through all of the costumes that we added.
- Also add a wait () secs block to slow the animation down a bit; fill in the value
0.1.
The following screenshot shows the final script:
Move your sprite to the center of the stage and click on the script we just made to activate it. The sprite will scale up and start animating. Does the sprite move in a fluid circle? If the rotation is jumpy or seems to move against direction, you might need to switch a few costumes around. Does the image seem to wiggle or hop up and down? Then you probably didn't place the center point correctly. You can tweak and test your animation cycle until it looks just right.