
Now we will create the first function that will compose our application.
- Still in the
mapnik_experimentsfolder, create a new file:map_functions.py. - Insert the code as follows into that file:
# coding=utf-8

import mapnik


def create_map(style_file, output_image, size=(800, 600)):
    """Creates a map from a XML file and writes it to an image.

    :param style_file: Mapnik XML file.
    :param output_image: Name of the output image file.
    :param size: Size of the map in pixels.
    """
    map = mapnik.Map(*size)
    mapnik.load_map(map, style_file)
    map.zoom_all()
    mapnik.render_to_file(map, output_image)


if __name__ == '__main__':
    create_map('map_style.xml', '../output/world3.png',
               size=(400, 400))
What we did here is pack the map generation code into a function that we can reuse in the future. It takes two required arguments: the XML style file and the name of the image file that Mapnik will write the results to.
The third optional parameter is the size of the map that will be created; you can pass a list or a tuple with the width and height of the map in pixels. This tuple or list is then unpacked with the * symbol into mapnik.Map arguments.
Finally, again we used the if __name__ == '__main__': technique to test the code. Remember that everything that is inside this if block is run only if the file is called directly. On the other hand, if this file is imported as a module, this code will be ignored. Look at the Creating the application entry point section in Chapter 2, The Geocaching App, if you need more information on that technique.
This is a useful function; now we can create maps from XML files with a single line of code. But there is a flaw: the data source (the shapefile that will be used) is hardcoded inside the XML. Suppose that we want to generate maps for a bunch of shapefiles; for every file we would need to change the XML, impeding the execution of batch operations.
Fortunately, there are two ways that we can change the data source file that Mapnik will use without manually changing the XML. We can make code to edit the XML for us, or we can mix XML and Python in the map definition.
Mapnik's Map object has a couple of properties that can be accessed. At the moment, we are interested in accessing the layer, because the layer contains the data source that we want to define or change.
Every Map instance contains a layers property that returns a Layers object containing all the layers defined in the map. This object behaves like a list of Layer objects in which its items could be iterated or retrieved by an index. In turn, the Layer object contains the name and the data source properties. Let's take a look how this works:
Note
Check the Mapnik API documentation at: http://mapnik.org/docs/v2.2.0/api/python/. There you can find all the classes, methods, and properties that are available.
- Change your function so we can inspect the properties of the
mapobject:def create_map(style_file, output_image, size=(800, 600)): """Creates a map from a XML file and writes it to an image. :param style_file: Mapnik XML file. :param output_image: Name of the output image file. :param size: Size of the map in pixels. """ map = mapnik.Map(*size) mapnik.load_map(map, style_file) layers = map.layers layer = layers[0] print(layer) print(layer.name) print(layer.datasource) map.zoom_all() mapnik.render_to_file(map, output_image)The highlighted code gets the
layersobject and the first layer in it (at index0), then prints it, its name, and the data source properties. - Just rerun the code and you should get this output:
<mapnik._mapnik.Layer object at 0x01E579F0>
world
<mapnik.Datasource object at 0x01F3E9F0>

Process finished with exit code 0
As you see in the output, the first layer is the
worldlayer defined in the XML and it has a data source. This data source is what we want to set or modify during code execution. - Make another test. Open the
map_style.xmlfile and remove the data source from the definition, like this:<Map background-color="white"> <Style name="My Style"> <Rule> <PolygonSymbolizer fill="#f2eff9" /> <LineSymbolizer stroke="rgb(50%,50%,50%)" stroke-width="0.1" /> </Rule> </Style> <Layer name="world"> <StyleName>My Style</StyleName> </Layer> </Map> - Run the code again and see the output:
<mapnik._mapnik.Layer object at 0x01DD79F0>
world
None

Process finished with exit code 0
Now, when we print the
data sourceproperty, it showsNonebecause we removed it from the definition; also the image (world3.png) is empty because there is no data to display. Now we are going to define it in the Python code. - Edit the
map_functions.pyfile:# coding=utf-8 import mapnik def create_map(shapefile, style_file, output_image, size=(800, 600)): """Creates a map from a XML file and writes it to an image. :param shapefile: Shapefile containing the data for the map. :param style_file: Mapnik XML file. :param output_image: Name of the output image file. :param size: Size of the map in pixels. """ map = mapnik.Map(*size) mapnik.load_map(map, style_file) data source = mapnik.Shapefile(file=shapefile) layers = map.layers layer = layers[0] layer.datasource = data source map.zoom_all() mapnik.render_to_file(map, output_image) if __name__ == '__main__': create_map('../../data/world_borders_simple.shp', 'map_style.xml', '../output/world3.png', size=(400, 400))
The new required argument in the function is the name of the shapefile containing the data. In the code we create a Mapnik data source from this file, get the first layer, and set its data source to the one that was created. Run the code and look at the output, you should see the rendered world map. Besides setting the data source, it is possible to combine XML and Python to change the map definition any way you want.
As we start to play with the map style, it could get a little boring to manually open the image every time we want to see the results. So we will write a function that will automatically open and display the image for us when we run the code. To do that we will use the Open Computer Vision (OpenCV) package.
- Import the package at the beginning of the
map_functions.pyfile:import mapnik import cv2
- Create this new function before the
create_mapfunction:def display_map(image_file): """Opens and displays a map image file. :param image_file: Path to the image. """ image = cv2.imread(image_file) cv2.imshow('image', image) cv2.waitKey(0) cv2.destroyAllWindows() - Now change our tests to call the function; to do that, edit the
if __name__ == '__main__':block:if __name__ == '__main__': map_image = '../output/world3.png' create_map('../../data/world_borders_simple.shp', 'map_style.xml',map_image, size=(400, 400)) display_map(map_image) - Run the code. Now you should see a window pop up with the map image:
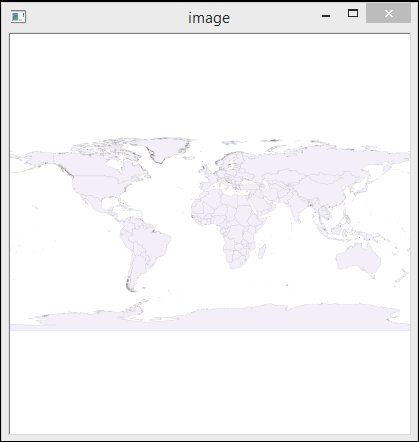
We won't explore OpenCV functionality in depth now; just note that cv2.waitKey(0) halts code execution until any key is pressed or the window is closed.