TYPOGRAPHY BEGINS WITH A SINGLE CHARACTER, and putting type on your page is about as fundamental as InDesign skills get. There are several different approaches to placing type on the page and you’ll probably end up using all of them at one time or another. Let’s begin with the most elemental.
Before you type on your page you need a container or text frame to hold your text. The good news is that with InDesign, unlike QuarkXPress, you don’t have to first draw a text frame. Instead, you can create a text frame on the fly with your Type Tool, which really speeds things up. Using your Type Tool, click and drag to define the width and depth of your text frame (or, if you have a text frame already on the page, just click that) and type away.
Tip: Scaling Type
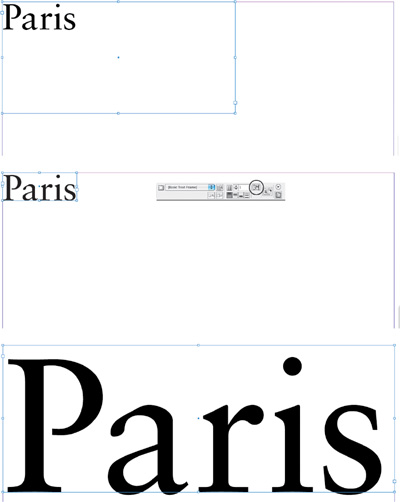
Here is one of my favorite tips—and so simple. Drag out a text frame with your Type Tool, then type your text. You may find that your text frame is much bigger than necessary to accommodate your text. No worries, all you do is click on the Fit Frame to Content icon in the Control palette, or press Cmd+Option+C (Ctrl+Alt+C) to fit your frame nice and snug around your text. Clean, elegant, uncluttered—and fantastic if you then want to scale the text by eye. Hold down Command+Shift (Ctrl+Shift) and drag from one of the four corners of the text frame to size the type while maintaining its proportions.
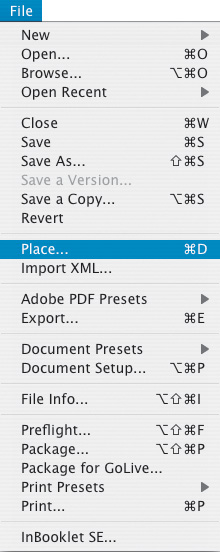
Before using any of the text-flow methods, first “load” your cursor. To do that choose File>Place, navigate to the text file you wish to import, and then click Open.
For those of you who remember PageMaker, InDesign’s text-flow methods will feel comfortably familiar. Those more familiar with QuarkXPress may be tempted to say something like, “You mean I don’t have to draw a text box?”—because InDesign’s text-flow methods are fast and fluid.
Once you have a loaded type cursor, the size of your text frame is determined by the document’s column and margin settings. Simply click at the top of the column to flow a single column of text. Note that the arrow in the loaded cursor icon will change from black to white when the cursor is over a guide. If there’s more text to come—overset text—you’ll need to click on the red arrow at the bottom left of the text frame to “reload” your cursor. Then move to where you want the over matter to go—either a new column or a new page—and click at the top of the column or page to flow another text frame.
Alternatively, if you don’t want the width and depth of a text frame determined by your document’s columns, click and drag the loaded type cursor to the size you want. When you release the mouse button, text will flow into the area you have defined. If there is more text to be placed, click the out port to reload your cursor, then click in the next text frame to continue the text flow.
Each text frame contains an in port and an out port, which are used to make connections to other text frames. An empty in port or out port indicates the beginning or end of a story, respectively. An arrow in a port indicates that the frame is linked to another frame. A red plus sign (+) in an out port indicates that there is overset text—more text than will fit in the current text frame(s). To flow the overset text, select the frame with the Selection Tool, click the out port, and then flow another text frame.


Continuing the text flow from one frame to another is called Threading. Here are some typical Threading techniques:
Adding a frame to the thread: Select the text frame with the Selection Tool, then click its out port to load your text cursor. Move to the next column or page and then click or drag to create another frame. The text flows from the frame you clicked into the new frame.
Delete a frame from the text thread: Select it with the Selection Tool and press the Delete key. Don’t worry about losing text—you are only deleting the container, not the content.
Tip
When creating a series of threaded text frames you can speed things up, by holding Option/Alt as you drag out a new text frame. The new text frame will be automatically threaded to the previous frame.
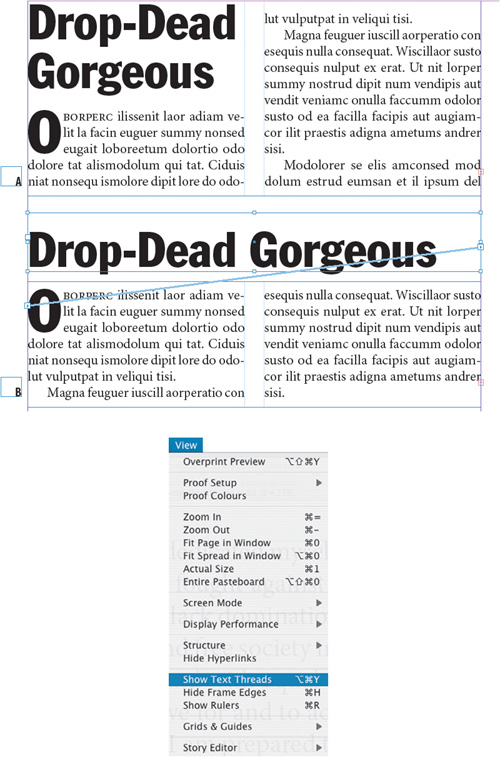
Making a headline span multiple columns: In addition to the out port at the bottom right of a text frame, there is another port at the top left, which can be used to load text from the beginning of the story. This is useful when you have a multicolumn layout and you want the headline to stretch across the columns rather than being squashed into a single column. Some people just cut and paste the headline into a separate story, which works, but threading the text is more efficient because it maintains the headline as part of the story, meaning that it can be text selected, spell checked, and viewed in the Story Editor as one story, rather than as two distinct pieces.
Pull down a horizontal guide from the Horizontal Ruler to approximately where the first paragraph will begin.
Resize the text frame so that it begins at this guide.
Load your Type Tool from the out port at the top left of the text frame.
Click and drag to create a text frame that spans the depth of the headline and across the width of the two columns.
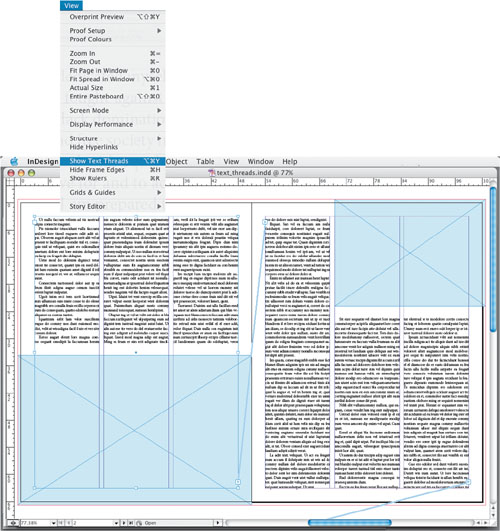
Showing Text Threads: Choose Show Text Threads from the View menu, and linking arrows will indicate the flow of the text for a selected text frame.
Some people prefer to map out their layouts, drawing and linking text frames before they have the real text. To create a series of linked text frames, draw your frames with the Rectangle Frame Tool, then click the first frame with your Type Tool to designate it as a text frame. Click the text frame’s out port to link it to the next frame in the thread and continue to link the frames as necessary. Optionally, you can fill these text frames with placeholder text.
Using placeholder or dummy text when mocking up a page or spread is a time-honored tradition in the world of page layout. Back in the day, folks used a text file called Lorem Ipsum, which looked like Latin but actually was mumbo jumbo with word and sentence lengths approximating those of an “average” article. Today this feature is built into InDesign: Just place the Type Tool in a text frame, or click and drag with the Type Tool to create one, then select Type>Fill with Placeholder Text and that frame (or frames if you have a series of linked text frames) is filled with dummy text.
Tip: Create your Own “Dummy” Text
Tired of using pigeon Latin for your placeholder text? You can create custom placeholder text by making a text file with the text you want to use and naming it ‘placeholder.txt.’ Save the file in the InDesign CS2 application folder and thereafter this is what you’ll get when you choose Fill with Placeholder Text.
Another method for getting text into an InDesign document is to copy and paste it from another application. Before you do this you might want to check out a related preference in the Type Preferences dialog box: Preserve Text Attributes When Pasting. Depending on the result you want, this can either be a blessing or a curse, so it’s good to know you have the option. Note that when you paste text from another application, “dumb” or straight quotes will not be automatically converted to Typographer’s quotes, nor will double hyphens be converted to em dashes—both standard niceties that come with importing a text file using the Place command.
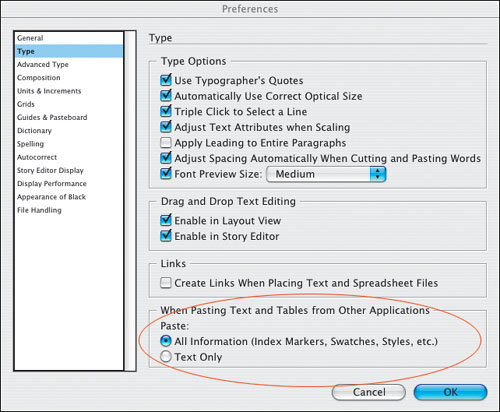
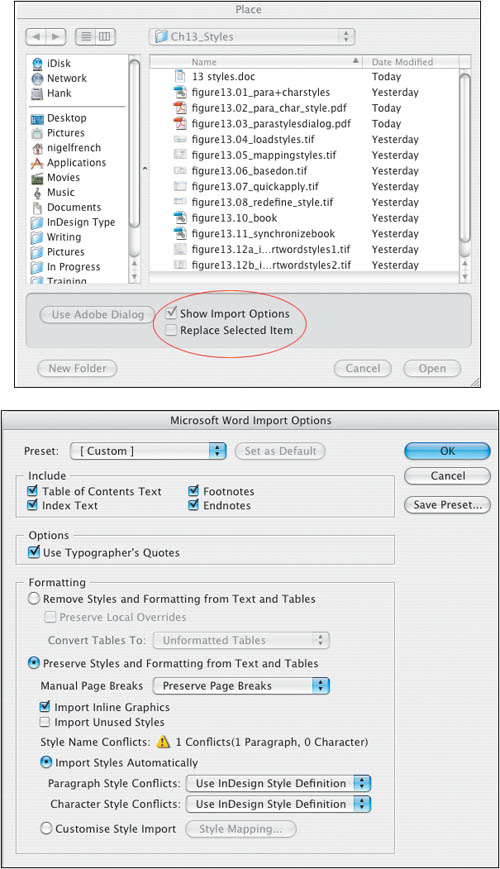
When placing a Microsoft Word file, if you check Show Import Options, you are taken to the Microsoft Word Import Options dialog. This is a much-enhanced feature in CS2 and allows for complex mapping of Word paragraph and character styles to InDesign styles. We’ll look at Customize Style Import in Chapter 13, “ Stylin’ with Paragraph and Character Styles.” For now, notice that you have the option of importing your Word text with or without Styles and Tables formatting, as well as being able to control the import of Word-created footnotes, endnotes, table of contents text, and index text.