
We are now ready to test our Assets class with the rest of the already built game code.
We need to add the following two imports to CanyonBunnyMain:
import com.badlogic.gdx.assets.AssetManager;
import com.packtpub.libgdx.canyonbunny.game.Assets;
After this, we add the calls to load, reload, and unload our assets with the following changes to the code:
@Override
public void create () {
  // Set Libgdx log level to DEBUG
  Gdx.app.setLogLevel(Application.LOG_DEBUG);
  // Load assets
  Assets.instance.init(new AssetManager());
  // Initialize controller and renderer
  worldController = new WorldController();
  worldRenderer = new WorldRenderer(worldController);
}

@Override
public void resume () {
    Assets.instance.init(new AssetManager());
    paused = false;
}

@Override
public void dispose () {
    worldRenderer.dispose();
    Assets.instance.dispose();
}
In create(), we instantiate a new AssetManager object and pass it to the init() method of our Assets class. Note that we initialized AssetManager before WorldController is created so that our assets are loaded and ready to be accessed. Remember, an instance of our class does already exist and can be directly accessed through the instance variable. In resume(), we actually do the exact same that we did in create(); as for Android, the context loss requires all assets to be reloaded when resumed. Finally in dispose(), we call the dispose() method of our Assets class, which in turn delegates this request to its internally stored instance of the asset manager.
The final change will be to replace our test sprites with the ones from the texture atlas. Add the following two imports to WorldController:
import com.badlogic.gdx.graphics.g2d.TextureRegion;
import com.badlogic.gdx.utils.Array;
After this, apply the modifications shown in the following code:
private void initTestObjects () {
    // Create new array for 5 sprites
    testSprites = new Sprite[5];
    // Create a list of texture regions
    Array<TextureRegion> regions = new Array<TextureRegion>();
    regions.add(Assets.instance.bunny.head);
    regions.add(Assets.instance.feather.feather);
    regions.add(Assets.instance.goldCoin.goldCoin);
    // Create new sprites using a random texture region
    for (int i = 0; i < testSprites.length; i++) {
         Sprite spr = new Sprite(regions.random());
         // Define sprite size to be 1m x 1m in game world
         spr.setSize(1, 1);
         // Set origin to sprite's center
         spr.setOrigin(spr.getWidth() / 2.0f, spr.getHeight() / 2.0f);
         // Calculate random position for sprite
         float randomX = MathUtils.random(-2.0f, 2.0f);
         float randomY = MathUtils.random(-2.0f, 2.0f);
         spr.setPosition(randomX, randomY);
         // Put new sprite into array
         testSprites[i] = spr;
    }
    // Set first sprite as selected one
    selectedSprite = 0;
}
We are still creating five sprites in initTestObjects() as before. The difference is that we are now using the bunny head, feather, and gold coin texture regions. To make our test a little bit more interesting, we create a dynamic array called regions that holds all the texture regions we want to use. Then, inside the setup loop, we create a Sprite instance with a randomly picked texture region from the dynamic array. This results in a random number of similar looking objects in the test scene.
You can now run the game to test it out. The following is a screenshot that shows a possible outcome due to the randomness that we built in:
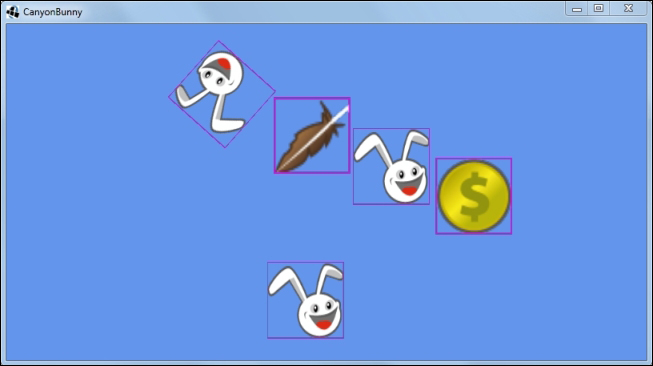
As you can see, we left the debug outlines enabled. You can easily disable them by just flipping the drawDebugOutlines variable from true to false in the Main class of the desktop project. Do not forget to set rebuildAtlas to true for at least one run of the desktop project to refresh the texture atlas.
Note
Sometimes, your changes to the texture atlas might appear to have no effect at all. If this is the case, Eclipse might not have detected a change to the texture atlas file and therefore did not rebuild the project binaries. A second restart of the game does help from time to time. Alternatively, you can always force Eclipse to rebuild the project by navigating to the Clean option in the Project menu to clean the project from all compiled files.
The resulting scene should now look similar to the following screenshot:
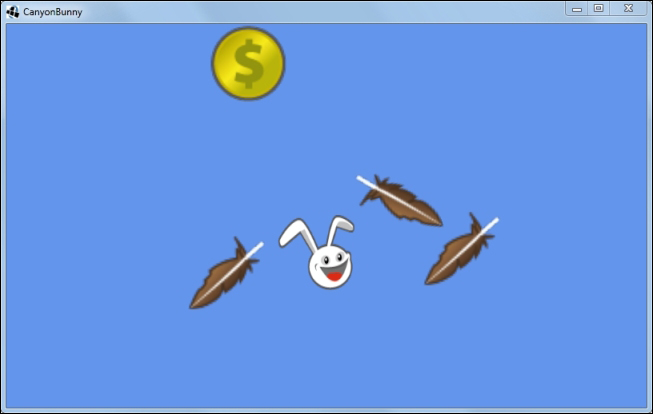
Great! We now have super cool graphics in our game. We can still do all the other things we built earlier, such as moving the camera, selecting an object and moving it, following an object, or zooming in and out.