
In a game, we need an actual model exported from Blender or any other 3D animation software.
Copy these three files to the assets folder of the android project:
car.g3dj: This is the model file to be used in our exampletiretext.jpgandyellowtaxi.jpg: These are the materials for the model
Replacing the ModelBuilder class in our ModelTest.java file, we add the following code:
          assets = new AssetManager();
          assets.load("car.g3dj", Model.class);
          assets.finishLoading();
          model = assets.get("car.g3dj", Model.class);
          instance = new ModelInstance(model);
Additionally, a camera input controller is also added to inspect the model from various angles as follows:
          camController = new CameraInputController(cam);
          Gdx.input.setInputProcessor(camController);

          camController.update();
This camera input controller will be updated on each render() by calling camController.update().
The completed MyModelTest.java is as follows:
public class MyModelTest extends ApplicationAdapter  {
   public Environment environment;
   public PerspectiveCamera cam;
   public CameraInputController camController;
   public ModelBatch modelBatch;
   public Model model;
   public ModelInstance instance;
   public AssetManager assets ;

   @Override
   public void create() {
   environment = new Environment();
   environment.set(new ColorAttribute(ColorAttribute.AmbientLight, 0.4f, 0.4f, 0.4f, 1f));
         environment.add(new DirectionalLight().set(0.8f, 0.8f, 0.8f, -1f, -0.8f, -0.2f));

          modelBatch = new ModelBatch();

          cam = new PerspectiveCamera(67, Gdx.graphics.getWidth(), Gdx.graphics.getHeight());
          cam.position.set(1,1,1);
          cam.lookAt(0, 0, 0);
          cam.near = 1f;
          cam.far = 300f;
          cam.update();

          assets = new AssetManager();
          assets.load("car.g3dj", Model.class);
          assets.finishLoading();
          model = assets.get("car.g3dj", Model.class);
          instance = new ModelInstance(model);

          camController = new CameraInputController(cam);
          Gdx.input.setInputProcessor(camController);

   }

   @Override
   public void render() {
          camController.update();
          Gdx.gl.glViewport(0, 0, Gdx.graphics.getWidth(), Gdx.graphics.getHeight());
          Gdx.gl.glClear(GL20.GL_COLOR_BUFFER_BIT | GL20.GL_DEPTH_BUFFER_BIT);

          modelBatch.begin(cam);
          modelBatch.render(instance, environment);
          modelBatch.end();
   }

   @Override
   public void dispose() {
          modelBatch.dispose();
assets.dispose() ;
   }

}
The new additions are highlighted. The following is a screenshot of the render scene. Use the W, S, A, D keys and mouse to navigate through the scene.

LibGDX supports three model formats, namely Wavefront OBJ, G3DJ, and G3DB. Wavefront OBJ models are intended for testing purposes only because this format does not include enough information for complex models. You can export your 3D model as .obj from any 3D animation or modeling software, however LibGDX does not fully support .obj, hence, if you use your own .obj model, then it might not render correctly. The G3DJ is a JSON textual format supported by LibGDX and can be used for debugging, whereas the G3DB is a binary format and is faster to load.
One of the most popular model formats supported by any modeling software is FBX. LibGDX provides a tool called FBX converter to convert formats such as .obj and .fbx into the LibGDX supported formats .g3dj and .g3db.
To convert car.fbx to a .g3db format, open the command line and call fbx-conv-win32, as shown in the following screenshot:
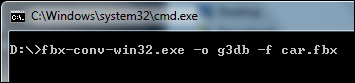
Make sure that the fbx-conv-win32.exe file is in the same folder as car.fbx. Otherwise, you will have to use the full path of the source file to convert.
Note
To find out more about FBX converter visit https://github.com/libgdx/fbx-conv and https://github.com/libgdx/libgdx/wiki/3D-animations-and-skinning. Also, you can download FBX converter from http://libgdx.badlogicgames.com/fbx-conv.