
Here, we will explore the basis of the LibGDX 3D API and will create a basic scene with a sphere model at the center.
Note
You can also check the LibGDX wiki on the 3D API at https://github.com/libgdx/libgdx/wiki/Quick-start.
First of all, let's create a new LibGDX project using gdx-setup-ui.jar as learned in Chapter 1, Introduction to LibGDX and Project Setup. Enter the values as shown here:
- Name:
ModelTest - Package:
com.packtpub.libgdx.modeltest - Game Class:
MyModelTest - Destination:
C:libgdx
You can see the following page after all the details are filled:
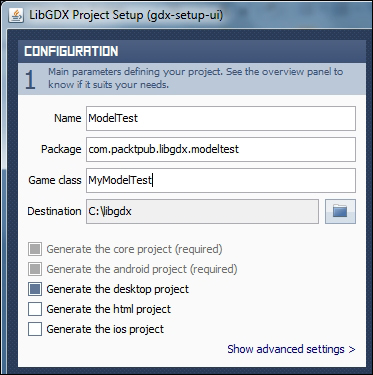
Here, you won't need the HTML or iOS project for testing models; however, if you want to simply check those devices, you can go ahead and enable those projects. Also, set the width and height to 800 x 480 in the project.
Open the MyModelTest.java file and remove all the auto-generated code and add the following code:
package com.packtpub.libgdx.modeltest;
import com.badlogic.gdx.ApplicationAdapter;
import com.badlogic.gdx.Gdx;
import com.badlogic.gdx.graphics.Color;
import com.badlogic.gdx.graphics.GL20;
import com.badlogic.gdx.graphics.PerspectiveCamera;
import com.badlogic.gdx.graphics.VertexAttributes.Usage;
import com.badlogic.gdx.graphics.g3d.Environment;
import com.badlogic.gdx.graphics.g3d.Material;
import com.badlogic.gdx.graphics.g3d.Model;
import com.badlogic.gdx.graphics.g3d.ModelBatch;
import com.badlogic.gdx.graphics.g3d.ModelInstance;
import com.badlogic.gdx.graphics.g3d.attributes.ColorAttribute;
import com.badlogic.gdx.graphics.g3d.environment.DirectionalLight;
import com.badlogic.gdx.graphics.g3d.utils.CameraInputController;
import com.badlogic.gdx.graphics.g3d.utils.ModelBuilder;
public class MyModelTest extends ApplicationAdapter {
public Environment environment;
public PerspectiveCamera cam;
public CameraInputController camController;
public ModelBatch modelBatch;
public Model model;
public ModelInstance instance;
@Override
public void create() {
environment = new Environment();
environment.set(new ColorAttribute(ColorAttribute.AmbientLight, 0.4f, 0.4f, 0.4f, 1f));
environment.add(new DirectionalLight().set(0.8f, 0.8f, 0.8f, -1f, -0.8f, -0.2f));
modelBatch = new ModelBatch();
cam = new PerspectiveCamera(67, Gdx.graphics.getWidth(), Gdx.graphics.getHeight());
cam.position.set(2, 2, 2);
cam.lookAt(0, 0, 0);
cam.near = 1f;
cam.far = 300f;
cam.update();
ModelBuilder modelBuilder = new ModelBuilder();
model = modelBuilder.createSphere(2, 2, 2, 20, 20, new Material(ColorAttribute.createDiffuse(Color.YELLOW)), Usage.Position | Usage.Normal);
instance = new ModelInstance(model);
camController = new CameraInputController(cam);
Gdx.input.setInputProcessor(camController);
}
@Override
public void render() {
camController.update();
Gdx.gl.glViewport(0, 0, Gdx.graphics.getWidth(), Gdx.graphics.getHeight());
Gdx.gl.glClear(GL20.GL_COLOR_BUFFER_BIT | GL20.GL_DEPTH_BUFFER_BIT);
modelBatch.begin(cam);
modelBatch.render(instance, environment);
modelBatch.end();
}
@Override
public void dispose() {
modelBatch.dispose();
model.dispose();
}
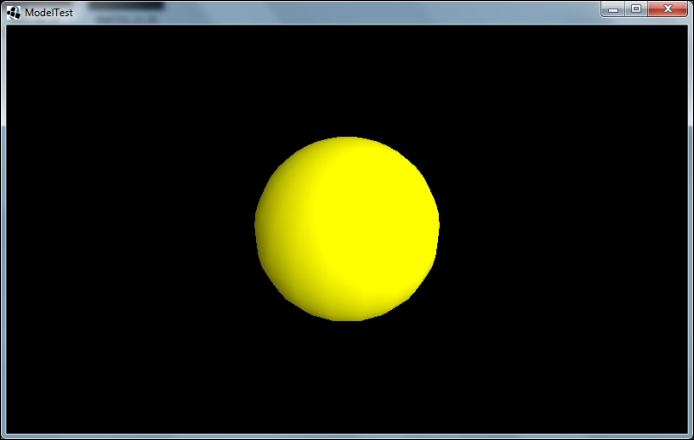
}Here, we made a basic scene and created a sphere model, as shown in the following screenshot:
There are two types of cameras, namely orthographic and perspective. Here, we use the perspective camera to view the scene from a certain perspective, as shown here:
public PerspectiveCamera cam;

cam = new PerspectiveCamera(67, Gdx.graphics.getWidth(),
Gdx.graphics.getHeight());
cam.position.set(2, 2, 2);
cam.lookAt(0, 0, 0);
cam.near = 1f;
cam.far = 300f;
cam.update();
Using the preceding code, we create a perspective camera of field view 67 degrees keeping the current aspect ratio. The position of the camera is set at (x, y, z) coordinates (2, 2, 2) and is set by calling cam.position.set(2, 2, 2). The coordinate system in LibGDX has the z axis aligned towards the viewer as visualized in the following figure:

The camera is made to look at the origin (0, 0, 0) using the call cam.lookAt(0, 0, 0). We set the near and far values to make sure we can always see our object. Finally, we update the camera so all the changes we made are reflected by the camera.
A model represents a 3D asset. It stores a hierarchy of nodes. A node has a transform and optionally a graphical part in the form of a MeshPart and Material. A model can be rendered by creating ModelInstance from it. This instance has an additional transform to position the model in the world, and allows the modification of materials and nodes without destroying the original model. The original model is the owner of any meshes and textures; all instances created from the model share these resources. Disposing of the model will automatically make all instances invalid.
We create a sphere model using LibGDX's ModelBuilder. It can create basic shapes such as box, sphere, cone, capsule, cylinder, and so on, as follows:
public Model model;
public ModelInstance instance;

ModelBuilder modelBuilder = new ModelBuilder();
model = modelBuilder.createSphere(2, 2, 2, 20, 20,
new Material(ColorAttribute.createDiffuse(Color.YELLOW)), Usage.Position | Usage.Normal);

instance = new ModelInstance(model);
In the preceding code, a sphere is created with the width, height, and depth set to 2 units and the horizontal and vertical divisions are set to 20. You have to provide materials and attributes to create any model. Finally, ModelInstance is created from that model. After using the model, we dispose of it by calling model.dispose().
The ModelBatch class is used to render the model instance as follows:
          modelBatch.begin(cam);
          modelBatch.render(instance, environment);
          modelBatch.end();
In the render method, we clear the screen, call modelBatch.begin(), render our ModelInstance, and then call modelBatch.end() to finish rendering. While rendering the model using modelBatch.render(), we provide the environment along with the rendering ModelInstance. The model batch is disposed of by calling modelBatch.dispose().
The environment contains the uniform values specific for a location. For example, the lights are part of the environment. Simple applications might use only one environment, while more complex applications might use multiple environments depending on the location of ModelInstance. A ModelInstance class can only contain one environment though, as shown here:
public Environment environment;
...
environment = new Environment();
environment.set(new ColorAttribute(ColorAttribute.AmbientLight, 0.4f, 0.4f, 0.4f, 1f));
environment.add(new DirectionalLight().set(0.8f, 0.8f, 0.8f, -1f, -0.8f, -0.2f));
...
modelBatch.render(instance, environment);
In the preceding code, a new environment is set and a directional light source is added. This environment is then rendered by calling modelBatch.render().