
Before you can print from Red Hat Linux, you must configure a printer. Red Hat Linux supports local printers attached to your system’s parallel port and remote printers that your system accesses via the network. Before you can configure a remote printer, you must first configure networking, as explained in Chapter 11.
To configure a local printer, launch the printer configuration tool by selecting Main Menu → Programs → Printer Configuration. The Printer Configuration Tool, as shown in Figure 9-17, appears.
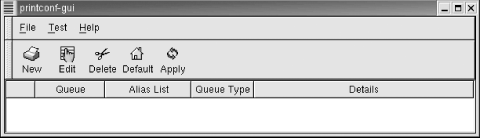
First, create a new printer by clicking the New icon. The Add a New Print Queue wizard appears. Click Next to proceed. The Set the Print Queue Name and Type dialog box, as shown in Figure 9-18, appears.
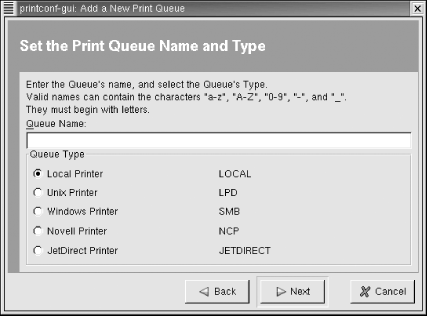
Every print queue has a name. The default print queue has the name lp. Type lp or another print queue name of your choice in the text box labeled Queue Name. Select the Local Printer radio button and click Next. The Configure a Local Printer dialog box, as shown in Figure 9-19, appears.

The dialog box shows the parallel ports associated with your system. Linux numbers parallel ports starting with zero, so the port designated /dev/lp0 corresponds to the device known by Microsoft Windows as LPT1. Select the parallel port to which your printer is attached and click Next.
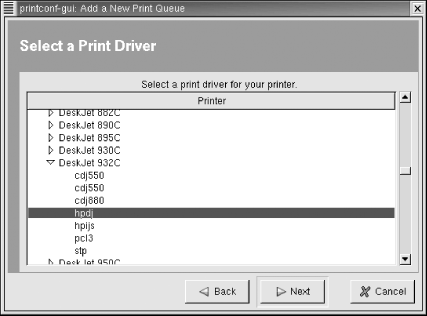
The Select a Print Driver dialog box, as shown in Figure 9-20, appears. Select the make of your printer by clicking the triangle that appears at the left of its name. From the sublist that appears, select the model of your printer and choose a print driver, as shown in Figure 9-21. More than one driver may be available for your printer. Some drivers work better than others, so you’ll eventually want to try each driver in order to locate the one that works best. For now, merely choose a driver arbitrarily. Then click Next.

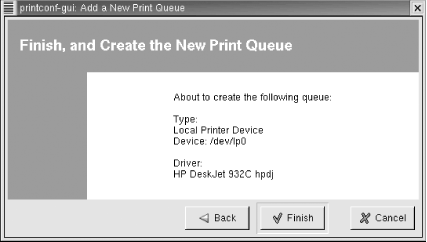
The Finish and Create the New Print Queue dialog box, as shown in Figure 9-22, appears. Check the information and use the Back button to correct any errors. When you’re satisfied with your specifications, click Finish.
The printer configuration tool reappears, with the new printer shown
as in Figure 9-23. To verify the configuration,
click Test and choose ASCII Text Testpage. Doing so sends a sample
page to the printer so that you can verify correct operation. A
dialog box invites you to save your configuration changes; click Yes,
or your new printer configuration will be lost. The system then
restarts the printer system, known as the lpd
daemon, and informs you of the result by presenting a dialog box.
Click OK to continue. Finally, a dialog box confirms that the sample
page has been sent to the printer.

If the sample page doesn’t appear or appears incorrectly, select the printer and click Edit. Use the Edit Queue dialog box that appears, as shown in Figure 9-24, to select a different print driver or revise options associated with the current driver.
