
Installing and configuring the Apache web server is not much more difficult than installing an FTP server. Moreover, web servers tend to be more secure than FTP servers, so a web server may be a better way for you to publish files. Once your web server is up and running, other Internet users can view and download documents within the web-enabled directories on your Linux system. This section explains the installation and configuration of Apache, the most popular web server on the Internet.
To install Apache, use GnoRPM to install the following packages:
apacheapache-manualapache-conf
You’ll find the apache-manual package on
Disc 2 of Red Hat Linux 7.2. You may also need to install the
mm package, which contains a library needed by
Apache.
Strictly speaking, you do not need to install the
apache-manual or
apache-conf packages. However, you may find the
Apache manual useful, and you’ll probably find it easier to
configure Apache using apacheconfthan using a text editor.
Configuring
a web server can be as easy or as difficult as you choose. Like other
web servers, Apache provides seemingly countless options. As
distributed with Red Hat Linux, Apache has a default configuration
that generally requires only a little tweaking before use.
Apache’s configuration files reside in the directory
/etc/httpd/conf. For historical reasons that no
longer apply, Apache has three configuration files:
access.confhttpd.confsrm.conf
However, the only configuration file that’s currently used is
httpd.conf. As mentioned, the easiest way to
perform a basic configuration of Apache is with the X-based tool,
apacheconf. To configure Apache, choose Programs
→ System → Apache Configuration from the GNOME menu or
choose System → Apache Configuration from the KDE menu.
Alternatively, start X and launch
apacheconfby
issuing the following command in a terminal window:
apacheconf &The main configuration screen, shown in Figure 12-1, appears.

The main configuration screen lets you specify the following:
- Server Name
This is the hostname of your system. Often, this will be www.domain.com, where domain.com is the name of your domain.
- Webmaster Email Address
Any messages concerning the web server will be sent to this address.
- Available Addresses
This is the IP address (or addresses) on which the web server listens.
You should specify the Server Name and Webmaster Email Address. Unless your system has multiple network adapters or you want to run the web server on a nonstandard port (that is, a port other than 80), you don’t need to modify the Available Addresses configuration item.
The Virtual Hosts tab, shown in Figure 12-2, lets you specify virtual hosts. Virtual hosting is a feature that lets you host multiple web sites with a single IP address. For example, both www.myfirstsite.com and www.myothersite.com could be hosted on the same system using a single IP address. However, virtual hosting is not compatible with HTTP 1.0 browsers.

The Server tab, shown in Figure 12-3, lets you specify the location of important files and directories and the user account and group used by Apache. You should not generally alter these configuration items.

The Performance Tuning tab, shown in Figure 12-4, provides access to configuration items that let you optimize Apache’s performance. Unless your web server will see very heavy service, you should reduce the maximum number of connections. A value of 15 is more than appropriate for a personal web server.

If you’re interested in exploring the many other configuration
options provided by Apache, see the Apache manual, which resides in
/var/www/html/manual. You can view the file with
Links or another HTML browser. Also, see the Apache web site
(http://www.apache.org), which
includes a tutorial on Apache configuration.
Once you’ve configured your web server, you can start it by issuing the following command:
service httpd startYou can verify that the web server has started by issuing the command:
service httpd statuswhich should report that one or more processes are running, like so:
[root@athlon /root]# service httpd status
httpd (pid 658 657 656 649 648 647 646 645 641) is running...
If you installed the Links browser, you can use it to test your web server by issuing the following command:
links http://localhostYou should see a screen that resembles Figure 12-5.

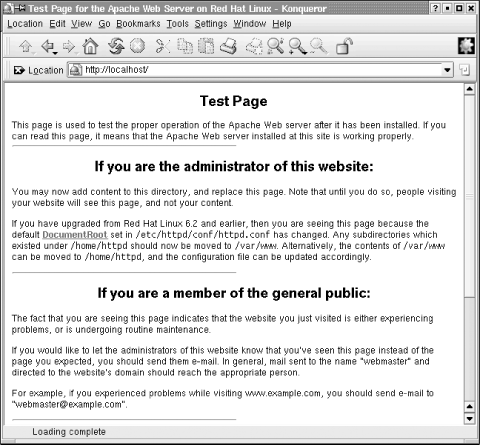
If you prefer, you can view the start page with Netscape Navigator or Konqueror, both of which support the graphics embedded in the page. The result should resemble Figure 12-6.
Once you can access your web server locally, try accessing it from a remote computer. This should be as simple as forming a URL that includes the fully qualified hostname or IP address of your system (that is, the host and domain names), for example, http://mysystem.mydomain.
To stop Apache, issue the command:
service httpd stopIf you change Apache’s configuration, you can restart the server with the command:
service httpd restartIf you want to start Apache automatically when you boot the system, issue the command:
chkconfig --level 345 httpd on
You can
create HTML pages in /var/www/html, owned by the
root user account. These pages are accessible
via the URL http://www.domain.com, where domain.com is the name of the host.
Alternatively, users can create a public_html
subdirectory within their home directory, for example,
/home/joepublic/public_html. There, they can
publish files that are web-accessible. To access such files, use a
special URL that consists of a tilde (~) followed
by the name of the user account. For example,
http://www.domain.com/~joepublic refers to the
user joepublic’s web directory.
Tip
By default, a user’s home directory and its
subdirectories—including the public_html
subdirectory—are not web-accessible. For the user
joepublic’s web pages to be
web-accessible, the apache user account or group
must have execute access to the directories
/home, /home/joepublic, and
/home/joepublic/public_html. Moreover, if
automatic directory indexes are desired, the
apache user account or group must have read
access to the directory
/home/joepublic/public_html. The files
themselves must be publicly readable.
If you have trouble accessing web
pages on your server, check Apache’s log files, which reside in
the directory /etc/httpd/logs. The log files may
provide valuable clues to help you understand what’s going
wrong.