
This chapter explains how to use Red Hat Linux to connect to the
Internet via a dialup connection. First, it explains how to use
rp3, an X-based program that makes it easy to
connect to the Internet via a Point-to-Point Protocol (PPP)
connection provided by an Internet service provider (ISP). The
chapter also explains how to use wvdial, a
related program that doesn’t require X. Next, the chapter
describes several popular network client applications available under
Linux, including several web browsers and a graphical FTP client.
Finally, the chapter gives some tips on how to configure Linux to
work with your cable or DSL modem.
Most ISPs provide a type of dialup connection known as a PPP connection. ISPs use a variety of dialogs to make a PPP connection. Often the most difficult part of configuring your computer to make a PPP connection is specifying dialog options consistent with those required by your ISP. Technical support representatives of many ISPs may not be especially helpful in explaining the necessary options to customers who use an operating system other than Windows.
The rp3 program simplifies making a PPP
connection. It transparently establishes the connection in much the
same way as Windows Dial-up Networking. It understands a variety of
possible dialogs used by ISPs. In most cases, it will analyze data
sent by your ISP and respond with the proper data in the format
required by the ISP.
If you installed the
GNOME and Dialup Workstation
package groups, you’ve already installed
rp3 and the packages on which it depends. If
not, you
can use GnoRPM to install the
ppp, rp3, and
wvdial packages.
To configure rp3, start your preferred desktop environment, GNOME or KDE. Then, if you’re using GNOME, select Programs → Internet → Dialup Configuration; if you’re using KDE, select Internet → Dialup Configuration.
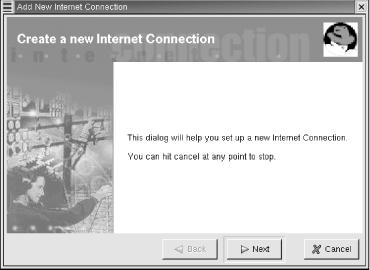
A wizard (Red Hat calls them “druids”), titled “Create a new Internet connection,” as shown in Figure 10-1, appears. You can use the wizard to configure your modem and Internet accounts. To begin, click Next.
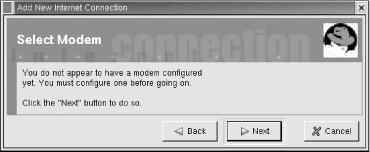
The Select Modem dialog box, shown in Figure 10-2, appears. Again, click Next to proceed.
A dialog box shows progress as rp3 searches your
system’s devices to locate a modem. If the search is not
successful, simply try again; sometimes rp3 is
unable to locate a modem on the first or second attempt. If
rp3 fails repeatedly, you should suspect that
something is wrong with your modem. If it’s an external modem,
check the power and data cables. If it’s an internal modem,
check that any configuration switches or jumpers are properly set.
Tip
If you can’t locate the
problem, it may be with your modem. Some modems, referred to as
WinModems,
require special drivers generally available only for Windows.
Unfortunately, Red Hat’s hardware database does not include
many entries describing modems. As a rule of thumb, most external
modems—except WinModems—are compatible with Linux. To
learn more about your modem and its compatibility with Linux, see
http://www.linmodems.org or Rob
Clark’s WinModems Are Not Modems page,
http://www.idir.net/~gromitkc/winmodem.html.
When the wizard finds your system’s modem, the Modem Found dialog box, shown in Figure 10-3, appears. If you want to customize modem properties, click the radio button labeled “Modify this modem manually, or add a new modem” and click Next. Use the dialog box that appears to customize modem settings, such as baud rate and speaker volume. Then, whether you customized modem settings or not, click Next to proceed.

The Phone Number and Name dialog box, shown in Figure 10-4, appears. Type the name by which you want to refer to this connection and the Internet provider’s phone number. Click Next to proceed.

The User Name and Password dialog box, as shown in Figure 10-5, appears. Type the username and password needed to log in via the connection. To enhance security, the password is echoed as asterisks as you type it. Click Next to proceed.

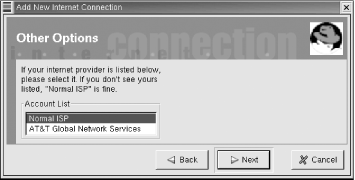
The Other Options dialog box, shown in Figure 10-6, appears. Select your Internet provider from the list, or if your provider is not shown, select Normal ISP. Click Next.
The Create the Account dialog box, shown in Figure 10-7, appears. Click Finish.

Once you’ve created an Internet connection, you’re ready to connect to your ISP. The following section explains how to do so.
If you’re using GNOME, you can connect to your ISP by selecting Main Menu → Applets → Network → RH PPP Dialer; if you’re using KDE, select Internet → RH PPP Dialer. The Choose dialog box, as shown in Figure 10-8, appears and asks you to choose an interface. Select the Internet connection you just created and click OK.

The Change Connection Status? dialog box, as shown in Figure 10-9, appears. Click Yes to initiate the connection.

Within a few seconds, you should hear a dial tone from your modem (if
you have sound enabled), and shortly thereafter the connection should
be established. Once connected, rp3 launches a
dialog box titled with the name of the Internet connection; if
you’re running GNOME, the dialog box may appear as a docked
applet, so you won’t be able to view the dialog box’s
titlebar.
If rp3cannot open the Internet connection,
you’ll see a dialog box announcing the failure. In that case,
you should check the phone number, username, and password you entered
earlier. To do so, launch rp3-configand use the Edit button to view and correct
the entries you made.
Note
If you hear your modem dialing but rp3
doesn’t succeed in establishing a connection, check the most
recent messages in the system log by issuing the command:
tail /var/log/messages
You may find relevant messages that point you to the source of the problem.
Once rp3 establishes the connection, you should
be able to access the Internet. Try to ping an Internet host by
issuing a command such as ping
www.redhat.com in a terminal window.
If the command doesn’t work, perhaps your connection isn’t working. Or perhaps your ISP’s PPP server failed to properly provide DNS information. Try pinging the IP address of a host you know to be available. For example:
ping -n 216.148.219.195
If pinging the IP address works,
simply use Netconfigto revise your
DNS configuration and you’re set. Otherwise, you may have some
difficulty getting the connection to work. Use the
ifconfigand
routecommands
to view your network configuration. If you can figure out the
problem, again you’re set. If not, you may be able to obtain
help from your ISP or from participants in an Internet newsgroup,
such as linux.redhat or
linux.redhat.misc.