In SharePoint, a Content Type for a SharePoint List is very similar to a Schema for a relational database table. So, you can think of an External Content Type as the schema (definition) for an external (outside of SharePoint) list. For example, properties, and data types.
External Content Types use a service application called Business Data Connectivity Services to perform the actual connection to the external data sources. You may see the acronyms BDC for Business Data Connectivity or BCS for Business Connectivity Services further in the chapter, which all mean the same thing from your perspective.
One of my favorite things about SharePoint 2010 is the brilliant simplicity of connecting to an external data source, and then creating an external list. This list looks and behaves exactly like a SharePoint List, including the ability to update data from within SharePoint. The best way to prove the simplicity of the setup and power of this feature is to dive right into a working example!
Ensure that SharePoint Designer 2010 has been opened to the Chapter 6 URL. Carry out the following steps in order to accomplish this:
- From the Navigation section, under Site Objects, choose External Content Types. Be patient while this loads for the first time.
- Click on External Content Type in the ribbon, as shown in the following screenshot:

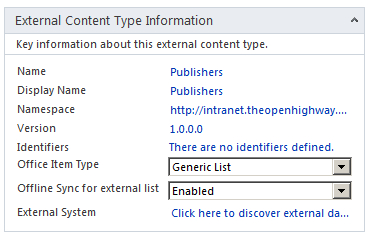
- On the tab that comes up, in the Information section, change the name to Publishers. Next to External System, click on the link Click here to discover external data, as shown in the following screenshot:
- On the tab that opens up, click on Add Connection:

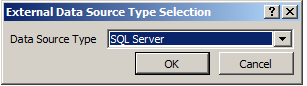
- From the drop-down, choose SQL Server as the Data Source Type and click OK:
- Enter a period (.) for the Database Server (which is shorthand for the local default SQL Server instance), pubs for the Database Name, and give this connection the name of Publishers. Choose to connect with the User's Identity and click OK, as shown in the following screenshot:

- Your database explorer should now look as follows. Expand the tables section and you should see all the available tables from the Publishers database:

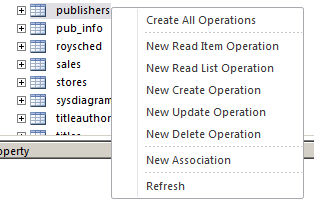
- Now, SharePoint Designer will generate all of the operations to interact with the publishers table, including the ability to Create, Read, Update, and Delete. Right-click on the publishers table and choose Create All Operations, as shown in the following screenshot:
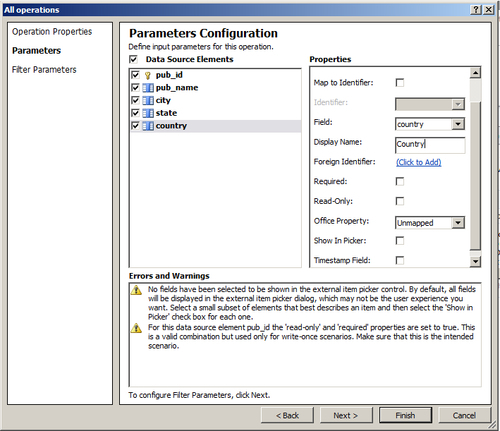
- In the All Operations window that comes up, click on Operations Properties and then click Next. On the Parameters Configuration screen, click on each of the Data Source Elements, provide a friendly display name, and click Next:
- We are now going to set up some filter values for later use. On the Filter Parameters Configuration screen, click on the Add Filter Parameter button. In the Properties pane, click on the link beside Filter that says Click to Add. On the Filter Configuration screen, change the filter name to pub_name, and choose the Filter Type Wildcard. It is very important to check the box for Ignore filter if Value is and ensure that the selection is Null. Click OK when done:

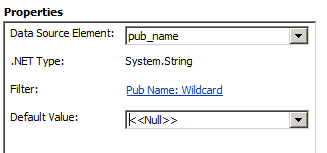
- The Properties pane should now appear as follows. Be sure to change the Data Source Element to match the filter we are creating. Also, it is very important to change the Default Value to <<Null>>, as shown in the following screenshot:
- Repeat steps 10 and 11 to add a Wildcard criteria for City, State, and Country fields. The result should appear as follows:

- Click on the Finish button. Ensure that you save your work at this point.
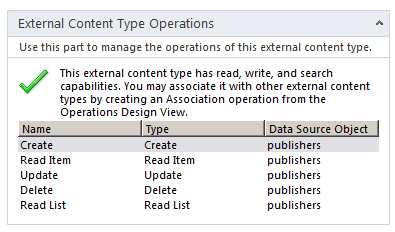
- On the External Content Types ribbon, click on the Summary View icon. Once you do this, your External Content Type Operations section should now appear as follows:
So far, we have only defined an actual connection to the database. Now we will get a user interface generated by SharePoint for us. Carry out the following steps to accomplish this:
- From the Navigation section, under Site Objects, choose External Content Types. Click on Publishers to open it.
- On the External Content Types ribbon, click on Create Lists and Forms, as shown in the following screenshot. If you had not previously saved it, you will get a warning about this (and you can click Yes):

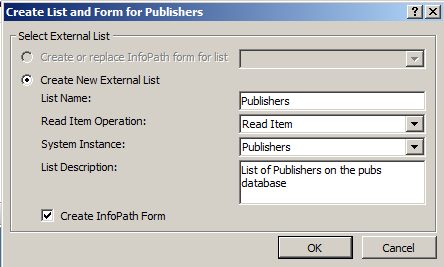
- On the Create List and Form for Publishers window, provide the List Name Publishers and a description. Be sure to check the Create InfoPath Form checkbox, as shown in the following screenshot. Click OK and you are done! Ensure that you save your work:
- In Internet Explorer, navigate to the Chapter 6 URL, and click on the Publishers link that now appears under lists. Oh no..! What?!? You get access denied, as shown in the following screenshot:
Believe it or not, you could interact with the database in SharePoint Designer to create the External Content Type and List, but you will still get an access denied message even though you are the Server Administrator, Farm Administrator, and SQL Administrator! Access to data through Business Connectivity Services is secure, by default, and it requires the Farm Administrator to set these permissions. That is, there is nothing the SharePoint Designer or the Site Collection Administrator can do about this. So let's fix our permission problem!
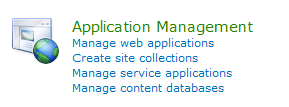
- Open SharePoint Central Administration. In the Application Management section, click on Manage service applications, as shown in the following screenshot:
- Highlight Business Data Connectivity Services. In the ribbon, click on the Manage icon, as shown in the following screenshot:

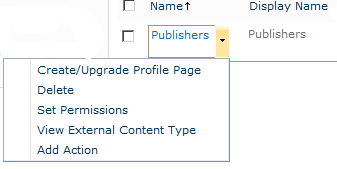
- You will see the Publishers External Content Type that you had created in SharePoint Designer 2010. From the drop-down on Publishers, choose Set Permissions:

- In the first textbox, type the name of the Administrator account and click on Add. Then, check all the checkboxes under permissions. Your screen should look similar to the following screenshot. Finally, click on OK, as shown in the following screenshot:

- Unfortunately, these permissions will NOT take effect until you reset the web server. Open a command prompt and type iisreset, as shown in the following screenshot:

- When the reset completes, you can close the command prompt window. Open Internet Explorer and navigate once again to the Chapter 6 URL. After this reset, it may take 30 seconds or so for your site to appear again.
Ok, now we can (finally) test our new External list! Carry out the following steps to do so:
- From the Chapter 6 URL in Internet Explorer, click on the Publishers link under Lists.
- Using the drop-down for the item, select Edit Item. Change the New Moon Books publisher name to Old Moon Books, as shown in the following screenshot:

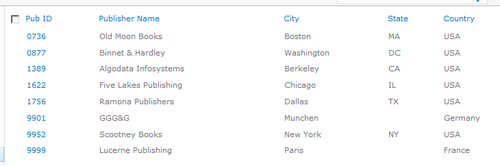
- The resulting list should appear as follows:
Congratulations! You have used a very important and powerful new SharePoint 2010 feature to create an External Content Type and External list with SharePoint Designer 2010.
The External Content Type created with SharePoint Designer 2010 is actually published to the SharePoint Farm. One key benefit is that Publishers information will be available across site collections and web applications. In other words, your work is highly reusable! You should take a moment to explore the view of the External Content Type as it appears in the Central Administration:
- Open SharePoint Central Administration. In the Application Management section, click on Manage service applications:

- Highlight the Business Data Connectivity Services. In the ribbon, click on the Manage icon.
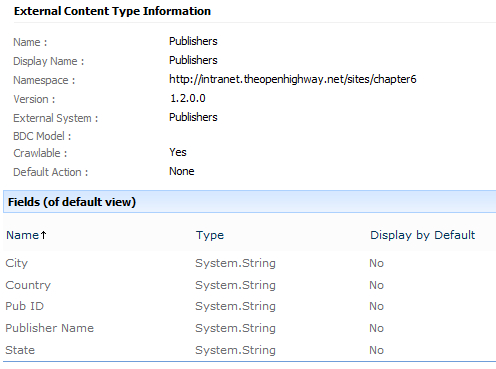
- You will see the Publishers External Content Type that you had created in SharePoint Designer 2010. From the drop-down on Publishers, choose View External Content Type, as shown in the following screenshot:
- View the details for Publishers. Scroll down further on the screen to see the defined filters, as shown in the following screenshot: