
When you created the Q1 Results page in the Press Releases site, you filled in the Title and Page Content on what is known as a Publishing Page Layout called the Article Page. This is the most generic type of page layout for SharePoint 2010 WCM.
However, just like a web form, you can extend the Article Page Layout by adding additional fields! This task is accomplished by using SharePoint Designer 2010.
In this recipe, we want to add a Proposals section to our website, where we can provide a web page that gives an overview and more information about a particular proposal, and then a link to the proposal itself. When filling out the web page, similar metadata should be specified, such as the proposal type, client, and amount. In order to accomplish this, we will be creating a custom Publishing Page Layout for our proposals.
Since everything in SharePoint is based on a content type, you should perhaps not be surprised that, when we go to create our own custom page layout, we will start by defining a content type! It will inherit from the Article Publishing Layout. Then we use SharePoint designer to lay out the fields on the web page, very much like dragging controls from the tool box onto the design surface of an ASPX page.
When you examined the Document Libraries available on the publishing site, you may have noticed that our Proposals document library was not there. The feature staple we had in place was only for the team site definition, and therefore did not activate the features automatically for the publishing site definition.
We are going to get ready by activating the site collection features, creating a Proposals sub site, and then activating the Proposal Library feature on the new sub site.
- Navigate to the home page, that is, the Chapter 8 URL. Go to Site Actions | Site Settings. From the Site Collection Administration section select Site Collection Features.
- Activate the feature Proposal Library Schema.
Activating this feature assumes you have completed Chapter 2, SharePoint Development with Visual Studio SharePoint Development with Visual Studio . If you have not, then skip this step.
- From the Site Actions menu, select New Site. From the Create screen, leave the default of Publishing Site with Workflow. Enter the title as Proposals and the URL name as proposals.
- You will be taken to the home page of the Proposals site, and note that Proposals has appeared on the left-hand side navigation.
- From Site Actions | Site Settings, choose Navigation from under the Look and Feel section.
- In the Current Navigation section, choose Display the same navigation items as the parent site and select the Show pages checkbox.
- From Site Actions | Site Settings, choose Manage Site Features from the Site Actions section.
- Activate the Proposal Library feature.
- If you have not completed Chapter 2, then this feature will not exist. Instead, you can create a new document library called Proposal Library.
- From Site Actions | View all site content, go to the Proposals document library. Create and/or upload a selection of proposal documents.
Excellent! We are now ready to create our own custom page layout for a proposal.
By activating the Proposal Library Schema, we already have the required site columns. We will now create a Proposals Content Type appropriate for use as a page layout:
- Navigate to the home page, that is, the Chapter 8 URL.
- From Site Actions | Site Settings, choose Site Content Types under Galleries.
- Click the Create link and enter the name Proposal Page Layout. In the Select parent content type from drop-down, choose Page Layout Content Types. In the Parent Content Type drop-down, choose Article Page.
- In the Group section, select New Group, enter Packt Content Types, and click OK.
- On the Site Content Type Information screen, scroll down towards the bottom and select Add from existing site columns.
- On the Select Columns screen, select Packt Publishing Columns, then select Proposal Amount, Proposal Client, and Proposal Type, and click OK.
- We are now ready to create our page layout using SharePoint Designer. Open the Chapter 8 URL in SharePoint Designer 2010. In the Navigation section, click on Page Layouts.
- From the Page Layouts ribbon, select New Page Layout. From the New dialog, select content type group as Packt Content Types, content type name as Proposal Page Layout, URL name as ProposalPageLayout, and Title as Proposal Page Layout and click OK.
- The ProposalPageLayout.aspx page will automatically open for editing. Notice the Toolbox pane on the left. If the Toolbox is not visible, go to the View tab of the ribbon, click on the Task Panes drop-down, and select Toolbox. Scroll to the bottom to see the Page Fields and the Content Fields sections, as shown in the following screenshot:

- With the cursor on the PlaceHolderMain, press Enter to create a blank line. From the toolbox, you can drag-and-drop the content field Page Content to the bottom of the PlaceHolderMain.
- Place your cursor at the top of the PlaceHolderMain. From the Insert tab of the ribbon, insert a 2x6 table. In the first column of the table, type Title:, Byline:, Article Date:, Proposal Type:, Proposal Client:, and Proposal Amount:.
- From the Page Fields section on the toolbox, drag the Title field to column 2, row 1 of the table.
- From the Content Fields section on the toolbox, drag the appropriate fields to column 2 of the table. The PlaceHolderMain section of your page layout should now look similar to the following screenshot:

- Save the file.
- On the left-hand side of SharePoint Designer, click on Page Layouts. Highlight ProposalPageLayout.aspx. From the ribbon, select Check In. On the Check In screen, select Publish a major version and click OK.
- You will be prompted with The document requires approval. Do you want to view or modify its approval status?. Just click on Yes.
- A browser window will open. In the Approval Status: Pending section, use the drop-down menu on ProposalPageLayout and select Approve/Reject, as shown in the following screenshot:

- On the Approve/Reject screen dialog, select Approved and click OK.
We are now ready to put our new page layout to use! Carry out the following steps to do so:
- Navigate to the Proposals site. Select Site Actions | New Page. On the New Page dialog, enter the name Acme Proposal and click Create. You will notice that the Page Layout is still the default Article Page, but you can change the page layout on demand to any of the many out-of-the-box page layouts or (of course) to our newly created one.
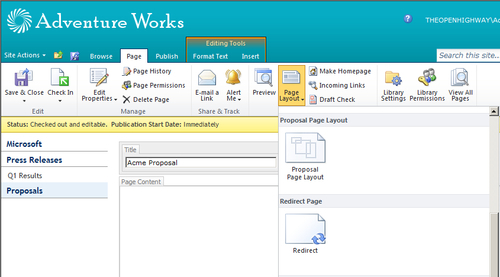
- From the Page tab in the ribbon, click on the Page Layouts drop-down. You can explore the many available out-of-the-box layouts and scroll down to see Proposal Page Layout. Select Proposal Page Layout:
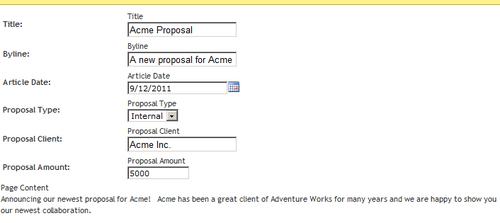
- You will now see the page layout in Edit mode—where all of the fields appear for editing, based on their type; for example, calendar selection for dates and a drop-down selection for Proposal Type, as shown in the following screenshot. Enter some information for your proposal:
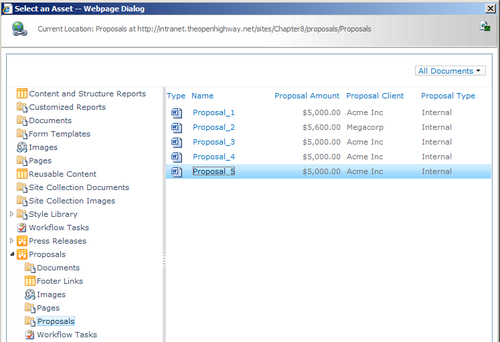
- Place your cursor in the Page Content area, below the text you have already entered. We are going to insert a link to a proposal in the document library. From the Editing Tools Insert tab, select the Link drop-down from the menu and insert the link From SharePoint. The Select an Asset dialog will come up. Navigate to the Proposals library and select an appropriate Proposal:
- You can modify the text of the link (I changed it from the document name to the word here). You can also use the Link Tools Format tab in the ribbon to change the properties of the link as desired.
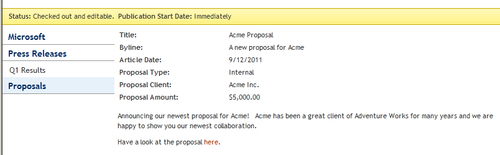
- On the Page tab of the ribbon, click on Save and Close. Note that you will now see the view as if it were from the public site. Clicking on the here link will open the proposal document, as shown in the following screenshot:
- Notice that a link in the left-hand side navigation of your proposal is missing. Note that the link will not appear until the page is fully published.
- Publish the page following the same procedure that we used for our sample Article Page—Q1 Results in Press Releases. Check in the page and submit for approval. Approve the page. Note that the left-hand side navigation now shows the link to your new page, as shown in the following screenshot:
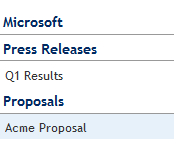
Congratulations for creating a new Proposals section for your Publishing site, along with creating and using a custom page layout for Proposals!