Why would a development book cover using out-of-the-box workflows?!? Well, at times I do see people often turning to creating a custom workflow without first understanding in depth the capabilities of the workflows that are already available. Secondly, this topic will help illustrate the terminology behind the key "phases" of a SharePoint workflow being Association, Initiation, Modification, and Task Edit and the forms that can be associated with each of these phases. This, in turn, prepares us for the other recipes in this chapter as we move on to customize the out-of-the-box workflows
In this recipe, we will utilize an out-of-the-box approval workflow against our Proposal library.
First, we need to create a site collection for this chapter.
- Go to Central Administration and click on the link for Create Site Collections.
- Ensure the correct web application is selected. Enter Chapter 7 for the title and Chapter7 in the textbox for the URL.
- Leave the Template Selection defaulted to Team Site, and enter administrator for the Primary Site Collection Administrator.
- Leave all other options with their default values. Scroll to the bottom and click on Ok.
- When the Top Level Site Successfully Created screen appears, click on the link provided. Bookmark the site to your favorites.
- Note that the Feature Stapling from Chapter 2, SharePoint Development with Visual Studio, has resulted in automatic creation of the Proposal library we will be working with. Create six or more Proposals called "Proposal1", "Proposal2", and so on. Ensure the amounts are different as we will create a workflow based on the Proposal Amount.
In this recipe, we will configure an out-of-the-box approval workflow for the Proposals library. Remember the main purpose of this exercise is to highlight specific terminology involved with SharePoint workflows:
- Go to the Proposals document library in the Chapter 7 URL.
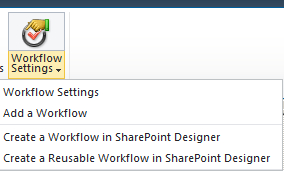
- On the Library tab, in the Library Tools section of the ribbon, in the Workflow Settings drop-down choose Add a Workflow:
- The following screen appears for every workflow (out-of-the-box or custom). It is important to understand that you are taking a workflow template and associating it with the list or library. You must specify to the workflow a Task List and a workflow History List, and how the workflow will start. Here we choose to run this Approval SharePoint 2010 workflow against the Proposal - Content Type and call it OOTBApproval. Click on Next:

Note
You will want to put some thought out in the real world, as to whether you should have all your workflows running from one Task / History List or whether you may in fact want unique lists for this workflow. One factor will be the growing size of the actual lists, and another is how you expect people to work with the Task List(s) to perform the approvals themselves.
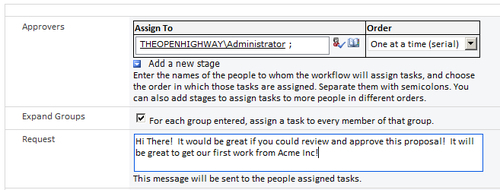
- The following screen is the Association Form for the workflow. It is optional for any workflow and provides the ability to specify default data to workflows as they are started. Choose Administrator and fill in the Request field with a message. Click on Save:

- Go back to the Proposals library. Select a proposal you wish to approve. On the Documents tab of the ribbon in the Library Tools section, click on Workflows:

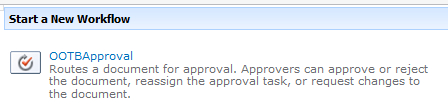
- Under Start a New Workflow, click on OOTBApproval:
- The form that comes up now is called the Initiation Form. Very often this form is the very same one as the Association Form, but it does not necessarily have to be. Note that the "default data" we set up at workflow association time appears on the form. Feel free to modify it (such as the Request text) and click on the Start button:
- Note the new column that appears in the Proposals library with the title of the workflow and a note for your selected proposal that the workflow is In Progress:

- Click on In progress, which is a link that takes you to the Workflow Status page. Note the very cool "Workflow Visualization" courtesy of Visio Services! Just below this visualization, you will see a link that says Add or update approvers of this Approval. Click on the link to see an example of a workflow Modification Form. The form is optional, and if present is often different to either the Association or Initiation Form. Note that it brings up the current data for this workflow. Click on Cancel when you are finished examining this form:

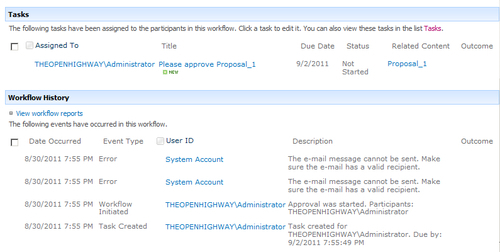
- On the workflow status page scroll down and view the information coming from the Tasks and workflow History List for this approval. For your future reference in custom workflow development, it is best practice to ensure you write out an entry to the workflow History List every time something happens or changes, as somewhat of an audit trail of who did what when, or tracking outcomes. Put another way, workflow history entries do not happen automatically! They are a deliberate action you take in the workflows you develop. Do not be concerned about the errors generated, as we do not have e-mail capabilities set up in this development virtual machine.
- In the Task section, use the drop-down under Title and select Edit Item:

- The final workflow form of note is the Task Edit Form. A custom Task Edit form is optional. If one is not provided, you will get the out-of-the-box Task Edit form (the one with priority and percentage complete and such). Update the comments and click on Approve.

- Examine the updates to the workflow status page (for example, workflow history). Go back to the Proposals list and note the text under OOTBApproval column has changed to Approved.
By reviewing the out-of-the-box approval workflow, we have noted it has all of the possible workflow "form" types including Association, Initiation, Task Edit, and Modification. All workflow forms are optional, and only required if you need to collect information from the user. Workflows can often have no forms associated with them whatsoever.
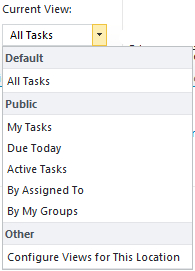
The workflow status page is more for the administrator's benefit than the actual person doing the approval. In the real world, I would suggest directing the person to the Task list where they can see the status of all of the workflow tasks:

However, the All Tasks view is probably useless for a large number of items. The task list itself has many interesting and useful views that actually will help a person get their work done! Such as My Tasks, Due Today, or Active Tasks. You should change the default view in this case.